
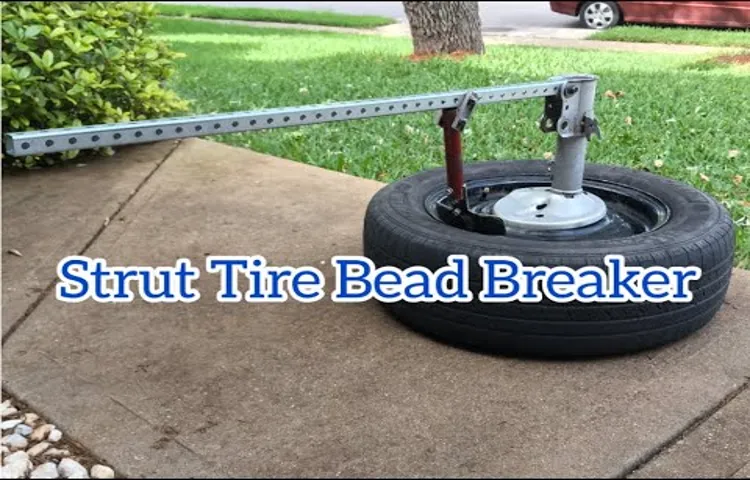
Are you tired of struggling to break the bead on your tires? A tire bead breaker is a handy tool that makes changing tires so much easier. With a little bit of work, you can make your own tire bead breaker at home using simple materials. In this blog, we’ll show you how to DIY a tire bead breaker, step-by-step.
You’ll never have to pay for an expensive tool again! Think of a tire bead breaker like a can opener – it’s a simple tool that does a specific job really well. It’s essentially a clamp that grips the tire and squeezes it until the bead pops off the rim. A good bead breaker is essential for changing tires, especially on larger vehicles such as trucks or tractors.
Making a bead breaker requires a bit of creativity and some basic tools, but it’s a fun and satisfying project for anyone who likes to DIY. Plus, once you’ve made your own tire bead breaker, you’ll feel like a tire-changing pro. So roll up your sleeves and get ready to build your own DIY tire bead breaker!
Table of Contents
Introduction
If you’re a DIY enthusiast or just someone who wants to save a few bucks, you might find it useful to build your own tire bead breaker instead of buying one. A tire bead breaker is a tool that helps you remove the tire from the rim without damaging them. Building a tire bead breaker is relatively simple, especially if you have access to some basic tools and materials such as metal rods, angle iron, and bolts.
The first step is to cut the angle iron and the metal rods to the required length, and then drill some holes for the bolts. Next, you need to weld the rods to the angle iron and attach the bolts to the holes. Finally, you can attach the completed tool to your bench or worktable and start using it.
By building your own tire bead breaker, you can save money and have the satisfaction of creating something useful with your own hands.
Why build your own bead breaker?
Building your own bead breaker can be a challenging but rewarding project. While there are many bead breakers available on the market, building your own can give you a sense of accomplishment and offer a tool that is tailored to your specific needs. Plus, it can be a fun and practical way to exercise your DIY skills and creativity.
In this blog section, we’ll explore some of the reasons why you might want to build your own bead breaker and the benefits of doing so. So, let’s dive in and explore the possibilities!
Safety tips to keep in mind
“Stay Safe: Essential Tips to Keep in Mind” When it comes to staying safe, there are many habits and actions that we should consider. Whether you’re at home, work, or out and about, safety should always be a primary concern. One of the first safety tips to keep in mind is to always be aware of your surroundings.
This means paying attention to who is around you, what is happening in your environment, and the potential risks that may arise. Additionally, always trust your instincts, especially if you feel uncomfortable or uneasy. Trust your body’s natural response to danger and remove yourself from any potentially risky situations.
It’s also important to keep your phone charged, avoid walking alone in dark or isolated places, and never accept rides or help from strangers. By following these essential safety tips, you can ensure your well-being and decrease the risk of harm.
Materials Needed
If you’re looking to break tire beads and don’t want to shell out on expensive tools, there’s a simple solution. Building a tire bead breaker is a relatively straightforward process, and only requires a few materials. The first essential item is a 2×4 piece of wood, which will act as the base.
You’ll also need a car jack, a flathead screwdriver, a hammer, and a vise grip. Once you have all the necessary materials, you can start the assembly process. Begin by drilling a hole in the top of the 2×4, which will be used to hold the screwdriver.
Then, clamp the vise grips onto the rim and secure it to the 2x From there, use the jack to apply pressure and slowly break the bead. Using this DIY solution to break tire beads won’t break the bank, and is a great way to save some money.
List of necessary materials
To start with a project, it’s vital to have the right materials. When it comes to crafting, there are a few essential materials that you’ll need. Firstly, you’ll require a good glue, especially if you’re working with heavy or multiple materials.
Consider the project’s requirements and choose a glue that will work well with the materials you’re using. Secondly, you’ll need scissors that are sharp and comfortable to use. Look for a pair of scissors that will enable you to cut through various materials efficiently.
A dependable ruler is also essential, ensuring that your cuts are precise and straight, while a cutting mat protects your work surface and blades. Additionally, you’ll need a variety of tapes, including masking tape, double-sided tape, and washi tape, depending on the projects you will undertake. Finally, invest in quality markers, pencils, and paints to add color and detail to your projects, and don’t forget to have some fun with your materials.
So, get started with these must-have supplies, and let your creativity flow.
Step-by-Step Guide
Building a tire bead breaker at home may seem like a daunting task, but with the right tools and materials, it is actually quite achievable. The first step is to gather a few pieces of steel, such as a 1-inch square tubing, a 1/4-inch thick plate, and a 3/4-inch solid steel rod. Then, you will need to cut and weld these pieces together, following a basic design for the frame and lever arm.
Be sure to reinforce any weak points, such as where the rod meets the frame, with extra welding. Once you have constructed the main body of the bead breaker, you can attach a hydraulic cylinder and pump to power the operation. Finally, add a pair of metal plates to the end of the lever arm to actually break the bead on the tire.
With a little bit of patience and elbow grease, you can create a functional and effective tire bead breaker right in your own garage.
Step 1: Cutting and Drilling the Steel
When it comes to working with steel, safety should always come first. Before starting any project, make sure to wear protective gear such as gloves, safety goggles, and a face mask. Begin by cutting the steel using a metal saw or angle grinder.
Measure and mark the steel before cutting to ensure accurate cuts. Once the steel is cut to size, use a drill to make holes for any necessary screws or bolts. Before drilling, use a center punch to mark the drilling spot and prevent the drill bit from slipping.
When drilling, use a lubricant to reduce heat and prevent the drill bit from breaking. By properly cutting and drilling the steel, you’ll have a solid foundation for your project.
Step 2: Welding the Bead Breaker Frame
To begin welding the bead breaker frame, you’ll need to have your materials and tools ready. If you followed our first step, you should have a set of pre-cut steel pieces that make up the frame. You’ll also need a welder, welding helmet, gloves, safety glasses, and a clamp or vice to hold your pieces in place.
Position your steel pieces according to your design and clamp them together to secure them. Then, begin welding the joints where the pieces meet. Use a consistent and steady motion as you weld to ensure a strong bond.
Remember to take breaks as needed to avoid overheating your welder or materials. As you work, check your progress frequently to ensure that everything is coming together as intended. Once you’ve completed the first frame, move on to the next one and repeat the process until you’ve finished all of your frames.
With some practice and focus, you’ll be able to create beautiful, durable bead breaker frames that you can rely on for years to come.
Step 3: Adding the Breaker Arm
Now that we have attached the connecting rod to the crankshaft, it’s time to add the breaker arm to the engine. This arm plays a crucial role in converting the rotary motion of the crankshaft into the reciprocating motion of the piston. To start with, attach the breaker arm to the opposite end of the connecting rod using a retaining clip.
Now, take the piston and insert the wrist pin into the small end of the connecting rod. Once the wrist pin is secure, slide the piston onto the top of the connecting rod. Make sure the piston is facing the right direction and align the wrist pin with the groove in the piston.
Now, attach the connecting rod to the breaker arm and install the arm into the engine block. Tighten the bolts and washers to secure the arm in place. Congratulations, you have successfully installed the breaker arm and are one step closer to completing your engine!
Step 4: Mounting the Bead Breaker
When it comes to mounting the bead breaker, there are a few steps you need to follow to ensure it is done correctly. Firstly, you will need to place the bead breaker onto the wheel and ensure it is positioned correctly. You can then begin to tighten the bolts and adjust the height of the tool.
It is important to ensure the tool is level and aligned with the wheel, as this will make the process of breaking the bead easier. Once you have adjusted the height and leveled the tool, you can start to tighten the bolts fully. It is essential to use the right bolts and tools when mounting the bead breaker to prevent any accidents or injuries.
By following these simple steps, you can mount your bead breaker safely and easily, ready to use when you need it.
Using Your Homemade Bead Breaker
If you’re wondering how to build a tire bead breaker, you’re in luck! With just a few simple tools and materials, you can create your own homemade bead breaker. One of the easiest and most effective methods is to use a metal pipe, a few washers, and a bolt. Start by selecting a pipe that is sturdy enough to withstand the pressure of breaking the bead.
Place a washer on each side of the pipe and then insert a bolt through the center. Use a wrench to tighten the bolt, making sure that the washers are securely in place. To use the bead breaker, position it on the tire bead and apply pressure to the pipe.
You should be able to easily break the bead with just a few rotations. Remember to always wear protective gear and use caution when working with tires, but with this DIY bead breaker, you’ll be able to save money and time by doing the job yourself.
Safety Precautions Before Use
Before you use your homemade bead breaker, there are a few important safety precautions that you need to take. First and foremost, make sure that you wear the proper protective gear, such as safety glasses and work gloves. You should also be working in a well-ventilated area, as the process of breaking beads can kick up dust and debris that you don’t want to breathe in.
Additionally, it’s important to make sure that the tire is properly supported and secured before you begin working on it. Finally, take your time and use caution when using your homemade bead breaker. Rushing or being careless can lead to accidents and injuries that you’ll want to avoid.
By following these safety precautions, you can ensure that using your homemade bead breaker is both safe and effective.
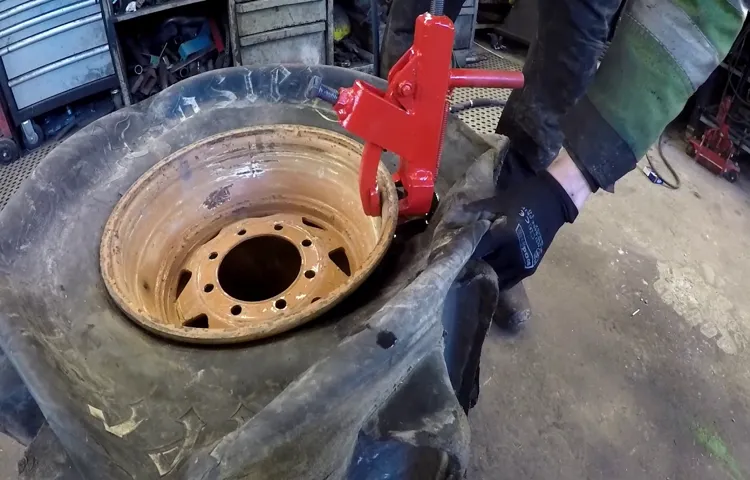
Guide to Breaking a Tire Bead
Breaking a tire bead can be a daunting task, especially if you don’t have the right tools. However, you can still get the job done using your homemade bead breaker. This tool is easy to make, and it won’t cost you much.
To create your bead breaker, you’ll need a few items, including a steel pipe, a metal plate, and a bolt. First, take the steel pipe and cut it to a length of about 18 inches. Then, weld one end of the steel pipe to the metal plate.
Once you have your fixture created, you can now use it to break the bead of your tire. Insert the tire onto the fixture, ensuring the rim is secure in the plate. Tighten the bolt onto the tire’s bottom side until it pops the bead.
This simple method is an excellent solution for anyone who wants to change a tire without having to worry about professional tire services or expensive equipment. With your homemade bead breaker, you’ll be able to change your tires with ease, even in the heart of the wilderness!
Conclusion
In conclusion, building a tire bead breaker doesn’t have to be rocket science. All you need are some basic materials, a little bit of elbow grease, and a willingness to get down and dirty with your tires. With a little ingenuity, you can build a tool that will help you remove stubborn tires and get back to the fun of driving.
So, put on your thinking cap and get to work – and who knows, you may even impress your friends with your DIY skills. Happy breaking!”
Advantages of building your own tool
Building your own tool can offer a lot of advantages, including the ability to customize it to your specific needs. One such tool that can be easily made at home is a bead breaker, which is used to remove tires from rims. Using your homemade bead breaker can save you money that you would otherwise spend on a brand-name tool, and it also gives you the satisfaction of creating something yourself.
Plus, since you built it, you know exactly how it works and how to use it effectively. By building your own tool, you can also experiment with different materials and designs to find what works best for you. So, whether you’re a seasoned mechanic or just someone who likes to tinker, consider building your own bead breaker and take advantage of the benefits it brings.
Final thoughts
Using your homemade bead breaker can be a real game-changer when it comes to changing your tires at home. However, it is important to keep some things in mind to make sure you are getting the most out of your DIY tool. First and foremost, always ensure your safety while using the bead breaker.
Keep your hands and fingers away from the moving parts and wear gloves and eye protection. Secondly, make sure your bead breaker is properly secured to a stable surface before using it. This will prevent any accidents from happening due to the tool moving or shifting during use.
Lastly, take your time when using your homemade bead breaker. Rushing through the process can lead to mistakes and potentially damaging your tire or rim. With these tips in mind, you can confidently use your homemade bead breaker to change your tires at home and save some money in the process!
FAQs
What materials do I need to build a tire bead breaker?
The necessary materials to build a tire bead breaker include a metal pipe, a metal plate, bolts, nuts, and a striking tool like a sledgehammer.
How long does it take to build a tire bead breaker?
The build time for a tire bead breaker will vary depending on skill level and available tools, but it can typically be completed in a few hours.
Can I use a tire bead breaker on all types of tires?
Yes, a tire bead breaker can be used on various types of tires, including car, truck, and ATV tires.
What is the purpose of a tire bead breaker?
The primary purpose of a tire bead breaker is to separate the tire bead from the wheel rim, making it easier to remove and replace a tire.
Is it better to buy or build a tire bead breaker?
This depends on individual preference and available resources. Building a tire bead breaker can be cheaper, but buying one may save time and effort.
How do I use a tire bead breaker?
To use a tire bead breaker, position the tool on the tire and wheel and strike it with a hammer or mallet to break the bead. Then, use a tire changer to remove and replace the tire.
Can I modify a tire bead breaker for personal use?
It is possible to modify a tire bead breaker for personal use, but it is important to consult with a professional or follow safety guidelines to ensure it is done correctly.