Hey there! Have you ever wondered what a power inverter is and why it’s worth building your own? Well, let me break it down for you. A power inverter is a device that converts direct current (DC) power into alternating current (AC) power. It’s like having a magic box that allows you to power up your electronic devices, even when you’re off the grid or experiencing a power outage.
Simply put, it’s an essential tool for anyone who wants to stay connected and have access to electricity wherever they go. But why bother building your own power inverter when you can easily buy one from the store? Well, there are a few reasons why you might want to take matters into your own hands. Firstly, building your own power inverter gives you the freedom to customize it according to your specific needs.
You can choose the size, capacity, and features that fit your requirements perfectly. Secondly, building your own power inverter can be a fun and rewarding DIY project. It allows you to harness your creativity and technical skills while learning about electronics and power systems.
Plus, it’s a great way to save some money since building your own inverter can be more cost-effective than buying one. Lastly, building your own power inverter gives you a sense of empowerment and self-sufficiency. It’s like being able to generate your own electricity and not having to rely on external sources.
It’s a small step towards living off the grid and being more environmentally conscious. So, whether you’re an avid camper, a passionate DIY enthusiast, or simply someone who likes to have control over their own power supply, building your own power inverter can be a rewarding and practical endeavor. Stay tuned as we dive deeper into the world of power inverters and explore the ins and outs of creating your own.
Table of Contents
Understanding power inverters
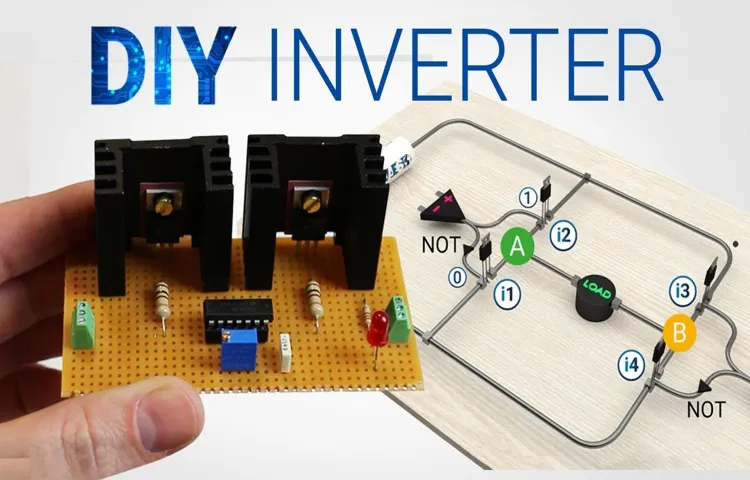
Have you ever wondered how to build your own power inverter? Power inverters are devices that convert DC power from sources such as batteries or solar panels into AC power that can be used to run household appliances and electronics. Building your own power inverter can be a rewarding project that allows you to customize the specifications and save money. To build a power inverter, you will need a few key components including a high-frequency transformer, power transistors, capacitors, and diodes.
The transformer is responsible for stepping up the DC voltage to the desired level, while the transistors, capacitors, and diodes help to convert the DC power into AC power. It’s important to note that building a power inverter requires knowledge of electrical circuits and safety precautions should be taken when working with high voltage. So if you’re up for the challenge, why not give it a try and build your own power inverter?
Definition of a power inverter
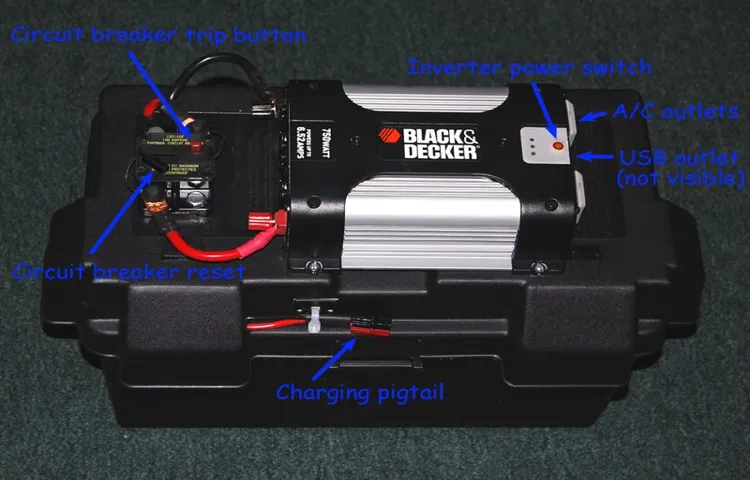
power inverter Have you ever wondered how you could power your electronic devices when you’re on the go? That’s where a power inverter comes in handy. A power inverter is a device that converts DC (direct current) power from a battery source into AC (alternating current) power that can be used to run appliances, electronics, and other devices that require AC power. It’s like having a portable electrical outlet that you can take with you wherever you go.
Whether you’re camping, traveling in an RV, or just need to charge your laptop in your car, a power inverter can provide the electricity you need. It’s a versatile and essential tool for anyone who needs to convert DC power into AC power on the go.

Benefits of building your own power inverter
power inverters, build your own power inverter, benefits of building power inverters
Potential cost savings
Understanding power inverters can lead to potential cost savings for homeowners and businesses. A power inverter is an essential component in converting DC power from a battery or solar panel into AC power that can be used to power household appliances and electrical equipment. By using a power inverter, users can tap into renewable energy sources and reduce their reliance on expensive utility electricity.
This can result in significant savings on monthly electricity bills, especially for those who have invested in solar panels. Additionally, power inverters enable users to have a backup power source during outages, eliminating the need for costly generators. Understanding the capabilities and limitations of different types of power inverters can help users make informed decisions and maximize their potential for cost savings.
Requirements and materials
If you’re interested in building your own power inverter, there are a few requirements and materials you’ll need to get started. First, you’ll need a circuit diagram for the inverter. This will serve as your blueprint and guide throughout the construction process.
You can easily find circuit diagrams online or in electronics books. Next, you’ll need basic knowledge of electronics and soldering skills. This is important as you’ll be working with electronic components and will need to solder them together to create the circuit.
Additionally, you’ll need a variety of electronic components, including transistors, capacitors, resistors, and diodes. These components can be purchased from electronics stores or online suppliers. You’ll also need a DC power source, such as a battery, to provide the input power for the inverter.
Lastly, you’ll need some basic tools, such as a soldering iron, wire cutters, and pliers, to help you assemble the circuit. Building your own power inverter can be a rewarding project that allows you to understand and control the power conversion process.
List of necessary components
To create a successful project or product, there are several necessary components that you will need. These components can vary depending on what you are trying to create, but there are some general requirements and materials that are commonly needed. First and foremost, you will need a clear and well-defined idea or concept.
This is the foundation of your project and will guide all of your decisions moving forward. Once you have your idea, you will need a team of individuals with the necessary skills and expertise to bring your project to life. This could include designers, engineers, marketers, and more.
Additionally, you will need the right tools and equipment to complete your project. This could include software, machinery, or any other resources that are specific to your project. Finally, you will need a budget and timeline to keep your project on track.
This will help you manage your resources and ensure that everything is completed on time. By having these components in place, you will be setting yourself up for success and increasing your chances of creating a successful and impactful project.
Choosing the right power capacity
power capacity, requirements, materials
Safety precautions
safety precautions, requirements, materials
Step-by-step guide to building a power inverter
Have you ever wanted to build your own power inverter? It may seem like a complex task, but with the right tools and instructions, you’ll be able to create your very own power inverter in no time. Building a power inverter allows you to convert DC power from a battery into AC power, which is essential for running household appliances and electronics. To get started, you’ll need a few key components, including a DC to AC converter, a battery, and an inverter circuit.
Once you gather these materials, you’ll need to connect them properly and test your inverter to ensure it’s working correctly. It’s important to follow safety precautions and take your time during the building process. So if you’re up for a challenge and want to learn more about how to build your own power inverter, keep reading!
Step 1: Gather all the required materials
power inverter, step-by-step guide, gather materials, building a power inverter
Step 2: Prepare the power inverter circuit board
power inverter circuit board. Now that you have gathered all the necessary components, it is time to start building your power inverter circuit board. This step-by-step guide will walk you through the process and help you create a high-quality power inverter.
First, start by preparing the circuit board. Make sure to clean it thoroughly to remove any dust or particles that may interfere with the circuitry. Once cleaned, mark the positions for various components like the capacitors, resistors, transistors, and integrated circuits.
This will help you place them accurately on the circuit board later. Now, solder the components onto the circuit board. Start with the low-profile components like resistors and capacitors, and then move on to larger components like transistors and integrated circuits.
Make sure to solder them securely, ensuring that there are no loose connections. It is important to follow the schematic diagram provided with your power inverter circuit to ensure proper placement and connection of components. Next, connect the necessary wires to the circuit board.
These wires will be used to connect the circuit board to the power source and the output inverter. Make sure to use appropriate gauge wires for the desired current and voltage ratings. It is important to route the wires in a neat and organized manner to avoid any short circuits or interference with other components.
Once all the components are soldered and wired, it is time to test the circuit. Connect the power source and the load to the input and output terminals respectively. Switch on the power and observe the output.
Step 3: Solder the components onto the circuit board
In the previous steps of our power inverter-building journey, we discussed the importance of choosing the right components and designing the circuit board. Now, it’s time to bring everything together and start soldering the components onto the circuit board. But before we dive into the nitty-gritty, let’s take a moment to understand what soldering is and why it’s crucial for the success of our project.
Soldering is a process of joining two or more metal components together using a filler material called solder. In our case, we will be soldering various electronic components onto the circuit board to create a functioning power inverter. This process ensures a secure and reliable connection between the components, allowing electricity to flow smoothly.
To start soldering, you will need a soldering iron and some solder. Make sure you choose a soldering iron with enough power and temperature control to handle the job. High-quality soldering irons can provide precise heat control, allowing you to solder delicate components without damaging them.
Before you begin soldering, take a close look at your circuit board and identify the locations where each component needs to be soldered. It’s recommended to start with the smaller and less heat-sensitive components first, gradually moving on to the larger ones. This way, you can master your soldering skills and avoid any potential damage to sensitive parts.
When soldering, it’s important to create a secure and durable connection. First, heat the component lead or the pad on the circuit board where it will be soldered. Then, apply the solder to the heated area, allowing it to melt and flow evenly.
Be careful not to use too much solder, as it can create bridges between components or lead to a weak connection. As you move along, double-check each solder joint to ensure it has a shiny, smooth appearance. This indicates a successful soldering connection.
Step 4: Connect the input and output terminals
power inverter, connect input and output terminals. Once you have assembled all the necessary components and successfully wired your power inverter, it’s time to connect the input and output terminals. This is a crucial step that will determine the functionality and efficiency of your power inverter.
To connect the input terminals, start by identifying the positive (+) and negative (-) terminals on your power inverter. These are usually labeled or color-coded for easy identification. Next, locate the corresponding terminals on your power source, such as a battery or solar panel system.
It is essential to ensure that you match the positive and negative terminals correctly to avoid any potential damage or short-circuiting. Once you have correctly identified the terminals, connect the positive terminal of your power source to the positive terminal of the power inverter. Similarly, connect the negative terminal of your power source to the negative terminal of the power inverter.
This establishes the input connection and allows the power inverter to draw electricity from the power source. Moving on to the output terminals, you will again need to identify the positive (+) and negative (-) terminals on your power inverter. These terminals are where the AC power will be generated and distributed to your desired devices.
Next, locate the appliances or devices that you want to power with your inverter. These devices typically have their own unique power requirements and input terminals. Consult the manufacturer’s instructions or labels to identify the positive and negative terminals on these devices.
Once you have identified the terminals on your devices, connect the positive terminal of the power inverter to the positive terminal of the device. Similarly, connect the negative terminal of the power inverter to the negative terminal of the device. Make sure the connections are secure and tight to ensure proper power transmission.
Step 5: Test the power inverter
power inverter, building a power inverter, test the power inverter, step-by-step guide
Troubleshooting common issues
Building your own power inverter may seem like a daunting task, but with the right knowledge and steps, it can be a rewarding project. One common issue that beginners may encounter is choosing the right components for their inverter. It is important to select quality components that can handle the power requirements of your desired applications.
Another issue that can arise is insufficient cooling for the inverter. As power inverters generate heat, it is crucial to incorporate proper cooling mechanisms such as fans or heat sinks to prevent overheating. Additionally, improper wiring and connections can cause problems such as voltage drops or shorts.
It is important to carefully follow wiring diagrams and ensure all connections are secure and properly insulated. By troubleshooting these common issues and seeking guidance when needed, you can successfully build your own power inverter.
No power output
power output, troubleshooting
Overheating
One common issue that many people encounter with their electronic devices, such as computers and gaming consoles, is overheating. When a device overheats, it can cause performance issues, slow down processing speeds, and even potentially damage the internal components. But don’t worry, troubleshooting this problem doesn’t have to be a complicated task! There are a few common culprits that often contribute to overheating.
One of them is dust and debris buildup inside the device. Over time, dust can accumulate in the vents and fans, restricting airflow and causing the device to heat up. To solve this issue, you can try using compressed air to clean out the vents and fans, ensuring proper ventilation and cooling.
Another common cause of overheating is running demanding applications or games for an extended period. These power-hungry programs push your device to its limits, generating a lot of heat in the process. To prevent overheating in this scenario, you can try closing any unnecessary programs and taking regular breaks to give your device a chance to cool down.
Lastly, your device may be overheating due to its location. Placing your device on surfaces that trap heat, such as blankets or pillows, can prevent proper ventilation and lead to overheating. It’s important to ensure that your device is placed on a flat, hard surface that allows for adequate airflow.
Overall, troubleshooting overheating issues can involve cleaning out dust, managing demanding applications, and ensuring proper placement of your device. By following these tips, you can help prevent overheating and keep your electronic devices performing at their best.
Incorrect voltage output
If you’re experiencing issues with your electronic device not delivering the correct voltage output, there are a few troubleshooting steps you can take to identify and potentially fix the problem. A common cause of incorrect voltage output is a faulty power supply. If the power supply is not providing the appropriate amount of power to the device, it can result in voltage fluctuations and inconsistencies.
To check if the power supply is the culprit, you can try using a different power source or replacing the power supply altogether. Another potential cause of incorrect voltage output is a damaged or faulty component within the device itself. This could be a capacitor, resistor, or other electrical component.
In this case, it may be necessary to open up the device and visually inspect the components for any signs of damage or wear. If any components appear to be damaged, they may need to be replaced. It’s also worth checking the device’s settings or firmware to ensure that the correct voltage output is selected.
Sometimes, a simple configuration error can result in the device not outputting the correct voltage. By following these troubleshooting steps, you can hopefully identify and resolve the issue of incorrect voltage output in your electronic device.
Conclusion: Enjoy the benefits of your homemade power inverter
In conclusion, building your own power inverter is like being a modern-day superhero. You have the power to turn the ordinary into the extraordinary, harnessing the invisible energy all around us. With a bit of electrical prowess, a touch of creativity, and a sprinkle of nerdy enthusiasm, you can bring light to the darkest corners, charge your gadgets with the flick of a switch, and even power up your own personal Batcave.
So, don your cape, grab your trusty soldering iron, and get ready to become the master of your own electrifying destiny. With your homemade power inverter, no power outage or energy crisis will be able to dim your superpowered ambitions. Remember, with great electrical knowledge comes great responsibility – so use your newfound power wisely and always be the hero your gadgets deserve!”
Summary of the benefits of building your own power inverter
Benefits of building your own power inverter include cost savings, customization options, and the ability to troubleshoot common issues. When you build your own power inverter, you have the opportunity to save money compared to purchasing a pre-made one. By sourcing the components yourself and assembling them, you can often find more affordable options and avoid paying for unnecessary features.
Additionally, building your own power inverter allows you to customize it to fit your specific needs. You can choose the input and output voltages, as well as the power capacity, based on your requirements. This level of customization ensures that you have the right inverter for your unique situation.
Furthermore, if any issues arise with your power inverter, you have the knowledge and skills to troubleshoot and fix them yourself. This can save you time and money, as you won’t have to rely on external support or wait for repairs. Overall, building your own power inverter gives you control, cost savings, and the ability to handle any problems that may arise.
Final thoughts and encouragement to start building
Are you feeling a bit discouraged or overwhelmed about starting your building project? Don’t worry, you’re not alone! It’s common to encounter some challenges along the way. However, with the right mindset and a little troubleshooting, you can overcome these obstacles and continue on your path to success. One of the most common issues that arise when building is encountering unexpected setbacks.
Whether it’s a delay in materials, a mistake in the plans, or unforeseen weather conditions, these setbacks can be frustrating. The key is to stay calm and focused. Take a step back, assess the situation, and come up with a plan to address the issue.
Remember, building is a process, and setbacks are just a part of that process. Don’t let them deter you from reaching your goal. Another common issue that many builders face is a lack of expertise or knowledge in certain areas.
Building is a complex and multifaceted task that requires various skills and understanding. It’s important to remember that you don’t have to know everything. If you come across a challenge that you’re not sure how to solve, don’t be afraid to ask for help.
Seek out experts or experienced builders who can offer guidance and advice. Remember, it’s better to ask for help and learn from others than to struggle alone. Lastly, it’s important to stay motivated and positive throughout the building process.
Building can be physically and mentally demanding, and it’s easy to get discouraged when things don’t go as planned. However, it’s crucial to remember why you started in the first place. Visualize the finished project and all the hard work and dedication that you’ve put into it.
FAQs
What is a power inverter?
A power inverter is a device that converts DC (direct current) power from a battery or other power source into AC (alternating current) power, which is the type of power used in most household appliances and electronic devices.
Why would I want to build my own power inverter?
Building your own power inverter allows you to customize it to your specific needs and requirements. It can also be a cost-effective option compared to purchasing a ready-made inverter.
What are the basic components needed to build a power inverter?
The basic components needed to build a power inverter include a DC power source, such as a battery or solar panel, an inverter circuit, switching devices (transistors or MOSFETs), transformer, and output filter.
Can I build a power inverter without any prior electronics knowledge?
While having prior electronics knowledge is beneficial, it is not absolutely necessary. There are many online resources and tutorials available that can guide you through the process of building a power inverter, even for beginners.
Are there any safety precautions I need to consider while building a power inverter?
Yes, it is important to take safety precautions when building a power inverter. This includes wearing appropriate protective gear, working in a well-ventilated area, and following proper wiring and circuitry practices to avoid electric shock or other accidents.
What are the different types of power inverters that can be built?
There are several types of power inverters that can be built, including square wave inverters, modified sine wave inverters, and pure sine wave inverters. Each type has its own advantages and applications.
Can a DIY power inverter be used to power all appliances and devices?
It depends on the type and capacity of the DIY power inverter. Some DIY inverters may be suitable for powering smaller devices or appliances, while others may be capable of powering larger appliances or even an entire house, depending on their design and power output.


