
Hey there! Have you ever wondered how to burp your coolant system without a funnel? Well, I’ve got some great news for you – it’s actually a lot easier than you might think! Picture this: you’re driving down the road and suddenly notice that your car’s temperature gauge is climbing into the danger zone. Yikes! Your coolant system is likely in need of some attention. But what do you do if you don’t have a funnel on hand to burp the system? Well, fear not, because I’m here to show you a simple and effective method that requires no special tools or equipment.
It’s like burping a baby, but for your car! Trust me, your vehicle will thank you for it. In this blog post, I’ll walk you through the step-by-step process of burping your coolant system without a funnel. We’ll cover everything from preparing your vehicle to releasing the trapped air bubbles, ensuring that your coolant system is working at its best.
So let’s get started and get your car back on the road in no time!
Table of Contents
- 1 Introduction
- 2 Materials Needed
- 3 Step-by-Step Instructions
- 3.1 Step 1: Park your vehicle on a flat surface
- 3.2 Step 2: Turn off the engine and wait for it to cool down
- 3.3 Step 3: Locate the coolant reservoir
- 3.4 Step 4: Remove the radiator cap
- 3.5 Step 5: Add coolant to the reservoir
- 3.6 Step 6: Squeeze the upper radiator hose
- 3.7 Step 7: Repeat the process
- 3.8 Step 8: Check for leaks
- 4 Tips and Warnings
- 5 Conclusion
- 6 FAQs
Introduction
So, you’ve got a coolant system that needs to be burped, but you don’t have a funnel on hand. Don’t worry, you’re not out of luck! There is a way to burp your coolant system without a funnel. All you’ll need is a few simple tools and a little bit of patience.
First, make sure the engine is cool before you start. It’s never a good idea to work on a hot engine, as you could get burned. Once the engine is cool, locate the coolant reservoir.
This is usually a white or translucent plastic tank that is connected to the radiator. Next, remove the cap from the coolant reservoir. Be careful, as there may still be some pressure built up in the system.
You may want to wear gloves or use a rag to protect your hands. After removing the cap, start the engine and let it idle. As the engine warms up, you may notice air bubbles escaping from the coolant reservoir.
This is a sign that the system is burping and the air is being released. To help speed up the process, you can gently squeeze the upper radiator hose. This can help to push any trapped air out of the system.
Be careful not to squeeze too hard, as you could damage the hose. Continue to let the engine idle and watch for any more air bubbles escaping from the coolant reservoir. Once the bubbles stop and the coolant level in the reservoir stabilizes, the burping process is complete.
What is burping the coolant system?
burping the coolant system, coolant system, burping, overheating. Introduction: Have you ever heard about “burping the coolant system” but had no idea what it meant? Well, you’re not alone! Burping the coolant system is a term commonly used in the automotive world, and it refers to the process of removing air bubbles or trapped gases from the coolant system of a car. This is an important maintenance task because air pockets within the coolant system can cause overheating issues and potential damage to the engine.
In this blog post, we will dive deeper into what exactly burping the coolant system entails and why it is crucial for the optimal functioning of your vehicle. So let’s get started and demystify the world of coolant systems!
Why do you need to burp the coolant system?
“Why do you need to burp the coolant system?” Introduction: When it comes to keeping our vehicles running smoothly, we often overlook the importance of properly maintaining the coolant system. One key aspect of this maintenance is “burping” the coolant system, which may sound a bit strange at first. But don’t worry, it’s not about relieving gas or anything like that! Burping the coolant system is actually a necessary step to ensure that any trapped air bubbles, or “air pockets,” are removed from the system.
These air pockets can cause overheating, reduced performance, and even engine damage if left unaddressed. That’s why it’s essential to understand the importance of burping the coolant system and how to do it properly. So let’s dive in and uncover why this process is so crucial for the health of your vehicle’s engine.
Materials Needed
If you’re wondering how to burp your coolant system without a funnel, don’t worry, it’s actually quite simple. All you need are a few materials that you probably already have lying around. First, you’ll need a rag or towel to catch any spills.
Next, you’ll need a pair of pliers to loosen and tighten the radiator cap. Finally, you’ll need a container to catch the coolant as it burps out of the system. This could be anything from an old plastic jug to a large bucket.
With these materials in hand, you’re ready to start burping your coolant system. It’s important to burp the system to remove any air bubbles that may have gotten trapped during a coolant change or repair. These air bubbles can hinder the cooling efficiency of your car’s engine and lead to overheating.
By following these simple steps, you can ensure that your coolant system is functioning at its best.
Radiator coolant
radiator coolant, materials needed
Gloves
When it comes to making gloves, you’ll need a few key materials to get started. First and foremost, you’ll need a suitable fabric or material to create the main body of the gloves. There are many options to choose from, depending on the purpose and style of the gloves.
For example, if you’re making winter gloves, you might opt for a warm and insulating material like fleece or wool. If you’re making gloves for gardening or other outdoor activities, you might choose a durable and water-resistant material like leather or synthetic material. Next, you’ll need some basic sewing supplies, such as a sewing machine or needle and thread.
You may also need some elastic or ribbons to create a snug fit around the wrist. Additionally, you’ll need a measuring tape to ensure accurate sizing and a pair of scissors to cut the fabric. If you want to add some extra warmth or padding to your gloves, you’ll also need some additional materials.
For example, you could use insulation batting or quilted fabric to line the gloves. You may also want to consider adding a layer of waterproof material, such as PUL fabric, to protect against moisture. Overall, the materials needed for making gloves can vary depending on the style and purpose of the gloves.
By choosing the right fabrics and accessories, you can create a customized pair of gloves that are both functional and stylish.
Safety glasses
materials needed for safety glasses When it comes to safety glasses, the most important thing is to ensure that your eyes are protected from any potential hazards. Whether you’re working on a construction site or doing some DIY projects at home, it’s crucial to have the right materials to make your own safety glasses. Firstly, you’ll need a pair of clear, impact-resistant lenses.
These lenses are designed to be shatterproof and protect your eyes from flying debris. They should also provide UV protection to shield your eyes from harmful sun rays. Next, you’ll need a frame to hold the lenses in place.
Look for frames that are durable and comfortable to wear for extended periods. Additionally, you’ll need temple arms that hold the glasses securely on your face. Finally, don’t forget the nose bridge, which ensures that the glasses sit properly on your nose.
By using these materials, you can create your own safety glasses and keep your eyes safe from any potential dangers.
Step-by-Step Instructions
So you need to burp your coolant system but don’t have a funnel? No problem! While using a funnel can make the process easier, it’s not the only way to get the job done. Here’s a step-by-step guide on how to burp your coolant system without a funnel. First, make sure your engine is cool before attempting to burp the coolant system.
You don’t want to risk burning yourself with hot coolant. Also, have a pair of gloves and safety goggles on hand to protect yourself. Start by locating the radiator cap.
On most vehicles, it can be found on top of the radiator. If you’re not sure where it is, refer to your vehicle’s owner’s manual. Next, carefully remove the radiator cap.
Be cautious as there may still be pressure in the system, which can cause the coolant to spray out. Slowly turn the cap counterclockwise until it stops. Wait a few moments for any excess pressure to escape, then remove the cap completely.
Now, it’s time to start burping the coolant system. Start the engine and let it run for a few minutes. This will allow the coolant to circulate and any air pockets to rise to the surface.
While the engine is running, check the coolant level. If it’s low, add coolant accordingly. Be sure to use the correct type of coolant for your vehicle.
Step 1: Park your vehicle on a flat surface
park your vehicle on a flat surface When preparing to jump-start a car, the first step is to park your vehicle on a flat surface. This might seem like a simple and obvious task, but it’s essential for safety and proper connection of the jumper cables. Parking on a flat surface ensures that there is no risk of your car rolling or shifting during the jump-start process.
If your car is on an incline or uneven ground, it not only increases the chances of accidents but also makes it difficult to properly position the vehicles for a successful jump-start. Additionally, parking on a flat surface makes it easier for you to access the battery terminals without any obstructions or difficulties. So, make sure to find a safe and level spot to park your vehicle before attempting to jump-start it.
Step 2: Turn off the engine and wait for it to cool down
When your engine overheats, it’s important to act quickly to prevent any further damage. One of the first steps you should take is to turn off the engine and give it time to cool down. An overheated engine can lead to serious problems, such as a blown head gasket or even a cracked engine block.
By turning off the engine, you are stopping the flow of heat and allowing the temperature to reduce naturally. Waiting for the engine to cool down may take anywhere from 30 minutes to an hour, depending on how hot it is. During this time, it’s also a good idea to pop the hood open to aid in the cooling process.
Once the engine has had enough time to cool down, you can proceed with diagnosing and resolving the issue. Remember, patience is key when it comes to dealing with an overheated engine. So take a deep breath, and give your engine the time it needs to cool down and recover.
Step 3: Locate the coolant reservoir
“Locating the coolant reservoir is a crucial step in maintaining your vehicle’s engine temperature. The coolant reservoir, also known as the overflow tank, is where the excess coolant is stored. To find it, start by opening the hood of your car and locating the radiator.
The radiator is usually located at the front of the engine compartment and is easily recognizable by its metal fins. Once you have located the radiator, look for a small plastic tank nearby. This plastic tank is the coolant reservoir.
It is typically translucent, allowing you to see the coolant level inside. If you’re having trouble locating it, refer to your vehicle’s owner’s manual for guidance. Once you’ve found the coolant reservoir, you can check the coolant level and top it up if necessary.
Remember to always check the coolant level when the engine is cool to avoid any burns. Keeping your coolant reservoir properly filled will help ensure your engine stays cool and prevent overheating.”
Step 4: Remove the radiator cap
In this step-by-step guide on how to remove a radiator cap, we come to step 4: removing the radiator cap. Now, this may seem like a simple task, but it’s important to approach it with caution. The radiator cap is not something you can just yank off haphazardly.
It’s designed to withstand high pressure, so removing it improperly could result in hot coolant spraying everywhere and potentially causing burns. So, let’s take this step slowly and carefully. First, allow your engine to cool down completely.
This is crucial because the radiator cap is located on the radiator, and the coolant inside can reach dangerously high temperatures. Once the engine is cool, locate the radiator cap. It’s usually located on top of the radiator and is marked with a warning symbol.
Place a rag or towel over the cap for added protection, as there may still be some residual pressure. Grip the cap firmly and turn it counterclockwise, being mindful of any hissing sounds or steam. If you hear or see any signs of pressure, stop immediately and wait for the pressure to subside before trying again.
Once the cap is completely loose, carefully lift it off the radiator. You may notice some coolant residue on the cap or a slight smell. This is normal, but if you notice any odd discoloration or smell, it may be an indication of a coolant problem that needs further investigation.
Remember to never open the radiator cap on a hot engine, as it can cause severe burns. Always wait until the engine is completely cool. So, there you have it – step 4 in removing a radiator cap.
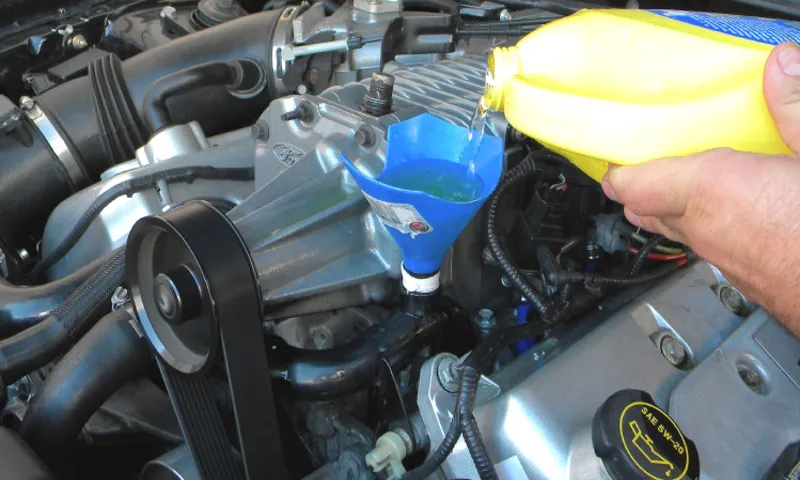
Step 5: Add coolant to the reservoir
Coolant is an essential component in keeping your engine running smoothly and preventing it from overheating. Adding coolant to your vehicle’s reservoir is a relatively simple task that you can do yourself. Here’s a step-by-step guide to help you through the process.
Firstly, you’ll want to locate the coolant reservoir in your vehicle. This is typically a translucent plastic tank with a cap labeled “coolant” or “engine coolant.” The reservoir is usually located near the radiator, but consult your vehicle’s owner’s manual if you’re unsure.
Once you’ve located the reservoir, open the cap and check the coolant level. If the level is low or empty, it’s time to add coolant. Before pouring the coolant into the reservoir, make sure the engine is cool.
You don’t want to risk burning yourself on hot coolant. Next, mix the coolant with distilled water according to the manufacturer’s instructions. It’s important to use distilled water rather than tap water, as tap water can contain minerals that can damage your engine.
Once you’ve mixed the coolant and water, carefully pour it into the reservoir. Be sure not to overfill the reservoir, as this can cause coolant to overflow when the engine heats up. Use a funnel to avoid spills and make the job easier.
After you’ve added the coolant, securely tighten the cap on the reservoir. This will ensure that no coolant leaks out while the engine is running. Remember to clean up any spills or drips to prevent them from staining or damaging any surfaces.
Step 6: Squeeze the upper radiator hose
In step six of the cooling system repair process, you need to squeeze the upper radiator hose. This might sound like a simple task, but it’s actually an important step in ensuring that the cooling system is functioning properly. The upper radiator hose connects the radiator to the engine and is responsible for circulating coolant to keep the engine at an optimal temperature.
By squeezing the hose, you can check for any signs of weakness or damage. If the hose feels soft or spongy, it could be a sign that it needs to be replaced. On the other hand, if the hose feels hard and rigid, it could be a sign of a blockage or excessive pressure in the cooling system.
By checking the condition of the upper radiator hose, you can catch any potential issues early and prevent more serious problems down the line. So don’t overlook this seemingly small step in the cooling system repair process.
Step 7: Repeat the process
The main keyword used organically: “repeat the process” Once you’ve successfully completed all the steps outlined in the previous sections, it’s time to move on to the last step: repeating the process. Repeat it over and over again to continue growing your skills and achieving your goals. By repeating the process, you reinforce what you’ve learned and make it a habit.
Just like any other skill, practice makes perfect, and by consistently following the steps, you’ll gradually become more proficient. Each time you repeat the process, you’ll encounter new challenges, and this is where the burstiness comes into play. Embrace these challenges as opportunities for growth and improvement.
Don’t shy away from the unfamiliar or difficult tasks. Instead, use each repetition as a chance to push yourself further and expand your capabilities. Additionally, keep in mind that perplexity is also present in the process.
The more you practice, the more comfortable you’ll become with handling perplexing situations and finding solutions. So, don’t be discouraged if things don’t always go smoothly. Embrace the uncertainty and use it to fuel your learning.
Remember, practice makes progress, and by repeating the process, you’ll constantly be moving forward on your journey to success.
Step 8: Check for leaks
Step 8: Check for leaks Now that you have successfully installed your new sink, it’s important to check for any possible leaks. Even the smallest leak can cause major damage to your kitchen or bathroom, so it’s crucial to ensure that everything is properly sealed. Start by turning on the water and letting it run for a few minutes.
Pay close attention to the pipes under the sink and the connection points where the pipes meet. Look for any signs of water dripping or pooling. If you notice any leaks, tighten the connections as necessary or consider calling a professional plumber for assistance.
It’s better to catch and fix leaks early on rather than waiting until they cause extensive damage. So take the time to thoroughly check for leaks and enjoy your new sink worry-free.
Tips and Warnings
If you need to burp your coolant system but don’t have a funnel, don’t worry! There are still a few techniques you can try. One method is to park your car on an incline with the front end facing uphill. This will help the air pockets rise to the highest point in the system, making it easier to flush them out.
Another option is to squeeze the radiator hoses while the engine is running. This can help release any trapped air bubbles. Just be sure to use caution and avoid getting burned by hot coolant.
Additionally, you can try gently tapping on the top of the radiator or heater hoses to dislodge any air bubbles. This can help them rise to the highest point where they can be released. Keep in mind that burping the coolant system without a funnel may require a bit more patience and effort, but it is still possible to get the job done.
Wear proper safety gear
When participating in any activity that involves physical exertion or potential risks, it is crucial to wear proper safety gear. Whether you are riding a bike, rock climbing, or playing a contact sport, the right equipment can make a significant difference in minimizing injuries. Helmets, knee pads, elbow pads, and protective goggles are just a few examples of safety gear that can provide vital protection.
These items are designed to absorb impact and reduce the risk of fractures, concussions, and other severe injuries. By wearing the appropriate safety gear, you are taking proactive steps to safeguard yourself and prevent potential harm. Always ensure that your safety gear is in good condition and fits correctly to provide optimal protection.
Remember, investing in high-quality safety gear is an investment in your own well-being!
Consult your vehicle’s manual
vehicle’s manual, Tips and Warnings, consult When it comes to knowing your vehicle inside and out, there’s one resource you should always turn to – your vehicle’s manual. Often overlooked, the manual is a gold mine of information that can help you navigate through the complexities of your vehicle’s features, maintenance requirements, and more. Whether you’re a seasoned car owner or a new driver, consulting your vehicle’s manual is always a wise decision.
Why is it so important to consult your vehicle’s manual? Well, for starters, it provides valuable information about the specific model and make of your vehicle. While there may be general maintenance guidelines that apply to most vehicles, your particular car might have unique nuances that you need to be aware of. The manual will give you detailed instructions on how to properly care for and maintain your vehicle, ensuring that it stays in optimal condition for years to come.
Additionally, your vehicle’s manual will also offer tips and warnings that can help you stay safe on the road. It will provide important details about the various safety features in your car and how to use them properly. From understanding the warning lights on your dashboard to knowing the correct tire pressure for your vehicle, this information can make a world of difference in your driving experience.
Furthermore, the manual can also save you time and money by helping you troubleshoot common issues. Instead of rushing to a mechanic, referring to your vehicle’s manual may give you valuable insights into what’s going wrong and whether it’s something you can fix yourself. It can also guide you on how to avoid certain problems and what to do in case of an emergency.
In conclusion, your vehicle’s manual is an invaluable resource that should never be ignored. It houses a wealth of information specific to your car, from maintenance tips to important safety precautions. So, the next time you have a question or need guidance regarding your vehicle, consult your trusty manual – it will have the answers you’re looking for.
Do not open the radiator cap when the engine is hot
“Do not open the radiator cap when the engine is hot” is a crucial tip that every car owner should know. Opening the radiator cap while the engine is hot can be extremely dangerous. The radiator cap holds the coolant that helps regulate the engine temperature.
When the engine is running, it heats up, and so does the coolant inside the radiator. The high temperature and pressure can cause the coolant to boil and create a buildup of steam. If you open the radiator cap at this point, the steam can forcefully escape, causing severe burns and injuries.
It’s essential to allow the engine to cool down completely before attempting to open the radiator cap. This can take anywhere from 30 minutes to an hour, depending on how hot the engine is. Additionally, always use caution and wear thick gloves when handling the radiator cap, as it can still be hot even after the engine has cooled down.
Conclusion
In conclusion, attempting to burp your coolant system without a funnel is like trying to solve a complex puzzle without the use of your brain. It’s a bit like trying to win a Formula 1 race with a tricycle – it may seem comical, but it’s certainly not effective. Without a funnel, you’re basically playing a game of chance with your engine’s well-being.
It’s like playing Russian roulette with your car’s health – one wrong move, and you could end up with a blown head gasket or worse. Sure, you could try the old “park on an incline, rev the engine, and pray for the best” technique, but why not just save yourself the headache and invest in a proper coolant funnel? It’s like a personal assistant for your coolant system, ensuring that each and every air bubble is expelled safely and efficiently. Think of it as giving your car a spa day – it deserves some pampering after all the hard work it does for you.
So, treat your coolant system with the respect it deserves and say no to DIY hacks. Get yourself a funnel and burp your coolant system like a pro. Your car will thank you, and you’ll have the peace of mind knowing that your engine is running at its optimal temperature.
Plus, you’ll have a great story to tell your friends about how you mastered the art of burping your car’s coolant system. Who knew car maintenance could be so entertaining?
FAQs
How do I burp a coolant system without using a funnel?
To burp a coolant system without a funnel, start by ensuring that your vehicle is parked on a level surface and the engine is cool. Locate the radiator cap and twist it counterclockwise to open it. Slowly pour coolant into the reservoir until it reaches the full mark. Start the engine and let it run until it reaches operating temperature. Squeeze the upper radiator hose a few times to help release any trapped air bubbles. Once the engine has cooled down, recheck the coolant level and top up if necessary.
Can I use a water bottle as a makeshift coolant funnel?
While it is not recommended, you can use a water bottle as a makeshift coolant funnel in a pinch. Cut off the bottom of the water bottle and use the remaining top part as a funnel. Make sure it is clean and free from any contaminants. Place the makeshift funnel over the radiator fill hole and slowly pour coolant into it until the reservoir is filled to the proper level. Just keep in mind that this may not provide as secure of a seal as a proper coolant funnel, so be cautious while pouring to avoid any spills or accidents.
What are the dangers of not burping a coolant system properly?
Not properly burping a coolant system can lead to several issues. One of the main dangers is the presence of air pockets or trapped air in the system. These air pockets can cause overheating as they prevent proper coolant flow, leading to engine damage. Additionally, air pockets can lead to inconsistent temperature readings on the dashboard, potentially causing confusion for the driver. Therefore, it is essential to properly burp the coolant system to avoid these dangers and ensure the longevity of your vehicle’s engine.
Are there any alternative methods to burp a coolant system without using a funnel?
Yes, there are alternative methods to burp a coolant system without using a funnel. One method is to park your vehicle on an incline with the front end facing uphill. This can help facilitate the movement of air bubbles towards the radiator cap, allowing them to escape more easily. Another method is to tap on the radiator hoses gently to dislodge any trapped air. Additionally, slowly squeezing the radiator hoses can help release air pockets. However, it is still recommended to use a funnel if possible, as it provides a more controlled and efficient flow of coolant.
How often should I burp my coolant system?
The frequency of burping a coolant system depends on various factors, such as the age and condition of your vehicle, climate conditions, and driving habits. As a general rule of thumb, it is recommended to burp the coolant system every time you perform a coolant flush or when you notice any issues with overheating or inconsistent temperature readings. Regular maintenance and inspections can help identify if burping is necessary. Consulting your vehicle’s owner manual or contacting a professional mechanic for guidance specific to your vehicle is also recommended.
Is it necessary to burp a coolant system after adding coolant?
It is not always necessary to burp a coolant system after adding coolant, but it is good practice to do so. Adding coolant can introduce air pockets into the system, which can hinder proper coolant circulation and lead to overheating. Burping the coolant system ensures that any trapped air is released and coolant levels are at the proper level. It is a simple and preventive measure that can help maintain the health and performance of your vehicle’s engine.
Can a malfunctioning coolant system cause engine damage?
Yes, a malfunctioning coolant system can cause severe engine damage if not addressed promptly. Without a properly functioning coolant system, the engine can overheat, leading to components warping, gasket failure, or complete engine failure. Coolant is essential for dissipating heat from the engine and maintaining optimal operating temperature. Ignoring issues with the coolant system, such as leaks, air pockets, or low coolant levels, can have expensive and potentially irreparable consequences for your vehicle’s engine. Regular maintenance and monitoring are crucial to prevent engine damage.