
Changing a bike tire can be a daunting task, especially if you have disc brakes. Whether you’re an experienced cyclist or just got into the sport, knowing how to change your bike’s tire is a fundamental skill that every rider should have. Having a flat tire while on a ride can be frustrating, but it doesn’t have to be overwhelming.
With the right tools, a bit of practice, and a little patience, you can easily learn how to change your bike’s tire with disc brakes. In this article, we’ll walk you through the step-by-step process of changing a bike tire with disc brakes, so you can get back on the road quickly and safely. So grab your wrenches and let’s get started!
Table of Contents
Gather Necessary Tools
If you need to change a bike tire with disc brakes, the first thing you will need to do is to gather the necessary tools. You will need a tire lever, an air pump, and a replacement tire. You might also need a flathead screwdriver, depending on the type of disc brake system you have.
Once you have all of these tools at hand, you can begin the process of changing your tire. It can be a bit intimidating at first, but with the right tools and a bit of patience, it’s a task that can easily be accomplished. First, remove the wheel from the bike frame and take the tire off the rim using the tire lever.
Then, install the replacement tire onto the rim and inflate it to the recommended pressure. Finally, reattach the wheel to the bike frame and adjust the disc brakes as necessary. With these steps completed, you’ll be ready to ride your bike again with confidence and safety.
List of Tools Needed
Before beginning any project, it’s important to gather all the necessary tools to ensure a smooth and successful process. When it comes to DIY projects, having the right tools can make a world of difference. Not having them can lead to frustration, wasted time, and even potential safety hazards.
Depending on the project, the tools needed may vary. Some basics, however, remain constant. A hammer, screwdriver set, tape measure, level, and pliers are some common tools that you should have on hand.
Other tools that may be needed include a power drill, saw, paint brushes, safety equipment, and more. It’s essential to assess the project beforehand and make a list of all the tools you will need to complete it. By having all the tools ready before starting the project, you will save time and effort and get the job done correctly and efficiently.
Make Sure You Have the Right Replacement Tire
When it comes to replacing a tire, it’s important to ensure that you have the right replacement tire for your vehicle. This means that you need to take note of the tire’s size, type, load capacity, and speed rating. Before you start, it’s also crucial to gather the necessary tools.
This includes a spare tire, a lug wrench, a jack, and a tire pressure gauge. These tools will allow you to safely and efficiently replace your tire on the side of the road if you have a flat or blowout. Keep these tools stored in your car at all times so you’re always prepared if an emergency arises.
Don’t forget to check the condition of your spare tire regularly to make sure it’s in good shape in case you need to use it. By being proactive and prepared, you’ll be able to confidently handle any tire situation that comes your way.
Remove the Wheel
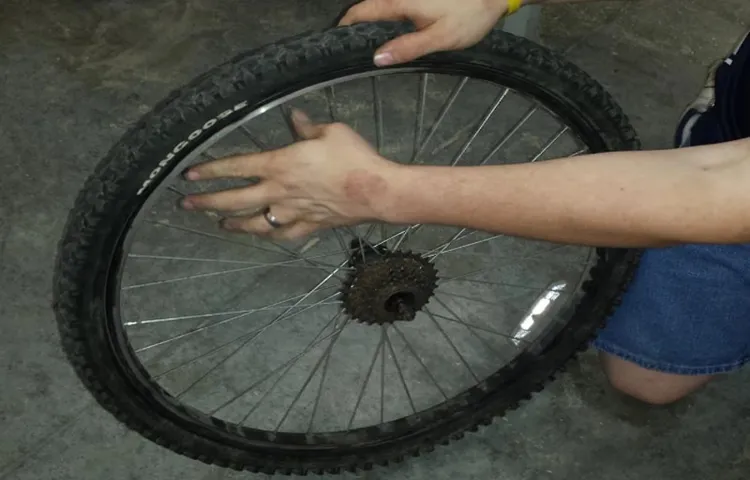
If you have a bike with disc brakes, changing a tire can seem daunting. However, the process is not much different from changing a tire on a bike with traditional brakes. The first step is to remove the wheel, just as you would with any other bike.
To do this, release the quick release lever or loosen the bolts on the axle. Then, slide the wheel out of the dropouts and remove it from the bike. The disc brake rotor will remain attached to the wheel and can be left as is.
With the wheel removed, you can easily change the tire and tube as needed. When reinstalling the wheel, be sure to align the rotor with the caliper and properly tighten the bolts or close the quick release lever. And there you have it – a successfully changed tire on a bike with disc brakes!
Release the Brake Caliper
When it comes to performing brake maintenance or repairs, removing the wheel is a crucial first step in accessing the brake components. To do this, start by loosening the lug nuts with a lug wrench while the car is still on the ground. Then, using a jack stand, lift the car and place it on the stand for safety.
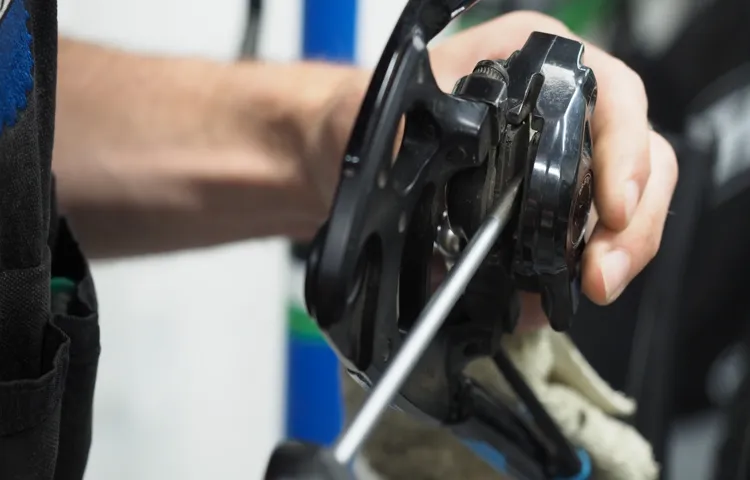
Once the wheel is off, it’s time to tackle the brake caliper. This component is responsible for applying pressure to the brake pads, which in turn contact the rotor and slow the vehicle. To remove the caliper, locate the bolts or pins that secure it to the mounting bracket and use a wrench or socket to loosen them.
Once free, the caliper will simply slide off the rotor. It’s important to note that the caliper should never be left hanging by the brake line, as this could cause damage. Instead, use a bungee cord or wire to secure it out of the way.
With the caliper removed, the brake pads and other components can be accessed and serviced as needed. Overall, releasing the brake caliper is an important step in keeping your brakes in top condition and ensuring the safety of your vehicle.
Remove the Quick Release Pin
Removing the wheel from your bike can often seem like a daunting task, especially if you’re unfamiliar with the process. However, it’s a necessary step if you’re looking to repair or replace the tire, inner tube, or rim. First things first, locate the quick release lever that holds the wheel in place.
It’s usually located near the axle on the rear wheel or near the hub of the front wheel. Once you’ve located it, flip it open, and the quick-release pin should then slide out easily. With the quick-release pin removed, the wheel should slide right out of the frame.
It might take a bit of wiggling to get it loose if it’s a tight fit, but it should come out without too much trouble. And voila! You’ve succeeded in removing your bike wheel. Remember to keep track of any washers or spacers that may have fallen out during the process and to put them back in their proper place.
Removing the wheel is a crucial first step when it comes to any type of bike maintenance, so don’t be afraid to give it a try yourself.
Carefully Remove the Wheel from the Fork
Removing the wheel from the fork of a bicycle requires precision and careful handling to avoid any damage or mishap. Start by flipping the bike upside down and supporting it with a steady stand. Locate the quick-release lever and flip it open to loosen the wheel.
If the bike has nutted axles, loosen the nuts with a wrench and slide the wheel out of the dropouts. Carefully lift the wheel out from the fork and avoid pulling the brake pads with it. If the wheel is tight and won’t come off, wiggle it gently while applying some pressure until it loosens up.
Once you remove the wheel, inspect the tire and the rim for any damages or signs of wear and tear. Reinstalling the wheel is just as important and requires following the same steps in reverse. Ensure that the wheel sits evenly in the dropouts and tighten the quick-release lever or nuts firmly.
Removing and reinstalling the wheel is a straightforward process that is essential to maintain your bike’s functionality and ensure a smooth and safe ride.
Remove the Tire
Now that you’ve gathered your tools, it’s time to remove the tire. If you have a quick-release skewer, loosen and remove it to release the wheel from the frame. If you have thru-axles, you’ll need to unscrew them from the frame and wheel.
Be sure to keep any small pieces or washers in a safe place. Once the wheel is free, carefully pry the tire off of the rim with a tire lever. Work your way around the circumference, prying up a small section of the tire each time.
Once one side of the tire is off, remove the inner tube by pulling it out from under the tire. Inspect the tire for any cuts or debris, and check the rim tape for any signs of wear or punctures. With the tire removed, you’re ready to move onto the next step in changing your bike tire with disc brakes.
Depress the Bead of the Tire to Remove It
When it comes to removing a tire, one crucial step is depressing the tire bead. This can seem daunting, but with the right tools and techniques, it is a relatively simple process. Essentially, depressing the tire bead involves pushing the edge of the tire down into the well of the rim so that it can be easily removed.
One method for doing this is to use a tire lever or pry bar to gently push down on the tire bead at several points around the circumference of the tire. Once the bead is fully depressed, you can easily slide the tire off of the rim and onto the ground. It is important to exercise caution when using a tire lever or pry bar, as these tools can damage the tire or rim if not used properly.
Overall, by properly depressing the tire bead, you can make the process of removing a tire much easier and more efficient.
Remove the Tube
Removing the tire can be daunting, but it’s essential to fix the inner tube and prevent further damages. The first step is to release the air pressure by unscrewing the valve cap. Next, use a tire lever to pry the tire off the rim.
Place the lever under the bead of the tire and pull it upward. Do this on both sides of the tire until it’s loose enough to remove by hand. With both hands and a bit of strength, slide the tire off the rim, starting from the valve end.
But before doing so, make sure to remove any obstructions like the brake pads or zip ties that may snag the tire. Once the tire is off, inspect the wheel for any damage or dents that could have caused the flat tire. And voila! The tire is off, ready for inspection, and fixing.
Install the New Tire
Now that you’ve removed the old tire, it’s time to install the new one. First, make sure the new tire is properly aligned with the wheel. Begin by placing one side of the tire into the rim, and then use your thumbs to work the rest of the tire onto the rim.
Once the tire is on, make sure it’s properly seated in the rim. Then, using your hands, push the tire bead to the center of the rim. Be sure to check the alignment of the disc brakes and make any necessary adjustments.
Finally, inflate the tire to the recommended pressure and give it a spin to make sure it’s running straight and true. With your new tire installed, you can ride confidently knowing you can handle any terrain your bike will encounter. Remember to keep your bike in good condition with regular maintenance, and it will provide you with years of reliable service.
Insert the New Tube into the Tire
When it comes to installing a new tire, the next step after placing the tube inside is to insert the new tube into the tire. Make sure the valve stem is facing the correct direction before inserting the tube into the tire. Carefully tuck the tube inside the tire, but be cautious not to twist or pinch it in the process.
Start at the valve stem and work your way around the tire, making sure the tube is placed evenly around the rim. Use your hands to push the tire into the rim until it is fully seated. Once the tire is in place, ensure the valve stem is correctly aligned with the valve hole in the rim.
Tighten the valve nut to lock the valve in place and avoid leaks. By proceeding slowly and delicately, you’ll be able to install the new tire without any issues.
Carefully Work the Tire onto the Rim
Installing a new tire can be a daunting task, especially if you’re attempting it for the first time. One of the most critical steps of the process is carefully working the tire onto the rim. It’s essential to ensure that the tire is seated correctly to avoid future mishaps while driving.
To do this, start by placing one side of the tire onto the rim, then use tire irons to push the other side onto the rim and work your way around. Take your time, and don’t force it, as that can cause damage to both the tire and the rim. If you encounter a stubborn area, use a lubricant on the rim to ease the tire installation.
Once the tire is installed, inflate it to the recommended pressure level and check for any leaks or bulges before hitting the road. Remember, correctly installing a new tire is crucial for safe driving.
Re-attach the Wheel and Brake
When it comes to changing a bike tire with disc brakes, it’s important to know how to re-attach the wheel and brake correctly. After inserting the new tire into the wheel rim and inflating it, place the wheel back into the bike frame. Make sure the rotor is aligned with the brake pads and insert the axel back into the dropouts, tightening the quick release lever or nut.
It’s important to check that the wheel spins freely and doesn’t rub against the brake pads. Once the wheel is secured, it’s time to reconnect the brake. Squeeze the brake lever a few times, allowing the caliper to adjust to the rotor.
Check for proper alignment by spinning the wheel and looking for any rubbing or noise. If it’s not aligned, loosen the caliper bolts, adjust the position, and tighten them again. With the wheel and brake properly re-attached, your bike is ready to hit the road again!
Insert the Wheel Back Onto the Fork
After you have finished fixing or replacing your bike’s tire, your next task is to reattach the wheel onto the fork. However, before you do that, it is important to reinsert the brake back into place. If your bike’s brake has quick-release levers, you may open them first before reinserting the brake pads between the rims of your tire’s new tube.
Next, hold the wheel and place the fork dropouts onto the hub’s axle. You can continue by clamping down the quick-release lever to secure the wheel onto the fork. Alternatively, if your bike uses nuts to secure the wheel, utilize the appropriate wrench to tighten them securely.
Then position the wheel between the fork blades. Ensure the brake pads are placed correctly and firmly on the rim before tightening the brake pads from the back of the fork. After that, close the quick-release lever or the nut tightly while checking the wheel’s stability.
Your bike is now ready for the road once again!
Secure the Quick Release Pin
One crucial step in re-attaching a wheel and brake is to secure the quick release pin. This small, yet critical component plays a vital role in keeping the wheel securely fastened to the bike frame. Failing to attach it properly can result in a severe accident while cycling.
Therefore, it’s essential to ensure that the quick release pin is correctly positioned and tightly fastened to the bike. To do so, hold the wheel firmly in place and turn the quick release lever to tighten it until it can no longer be rotated. Make sure the lever is on the non-drive side of the bike and that it’s pointing towards the back of the bike.
Always double-check that the quick release pin is securely tightened before hitting the road. Remember, a small error in properly attaching the quick release pin can have severe consequences. So, take your time and ensure that nothing is left to chance.
Re-attach the Brake Caliper
To re-attach the brake caliper and wheel, you’ll want to first slide the rotor back into place between the brake pads. Place the caliper over the rotor and line up the bolt holes on the caliper with the bolt holes on the steering knuckle. Screw in the bolts by hand until they’re snug.
Then, use your torque wrench to tighten the bolts to the manufacturer’s specifications. Be careful not to overtighten them, as this can damage the threads on the bolts or the caliper itself. Finally, reattach the wheel by aligning the holes with the studs and screwing on the lug nuts by hand to hold the wheel in place.
Use the lug wrench to tighten the nuts further, alternating sides and tightening gradually until they’re fully tightened. Give the wheel a spin to make sure everything is aligned and the brakes are working properly before hitting the road. And there you have it, you’re ready to roll!
Inflate the New Tire
After you’ve successfully made sure the new tire is in place, the next step in changing a bike tire with disc brakes is to inflate it. Before pumping the tire, make sure to check the recommended pressure range on the tire sidewall, as going over or under this range can negatively impact your riding experience. Once you have this information, attach the pump to the valve and begin pumping in short bursts, rather than continuously.
This helps to avoid putting too much pressure on the tire in one go, which could result in it bursting. Keep inflating the tire until it’s within the recommended range, and make sure to check its pressure periodically throughout the ride. By taking the time to properly inflate your new tire, you’ll ensure a comfortable and safe riding experience.
Check the Recommended Tire Pressure
When it comes to getting new tires for your vehicle, it’s important to know the recommended tire pressure so that you can inflate them properly. The recommended tire pressure is typically found in your vehicle’s owner’s manual or on a sticker located on the driver’s side door jamb. It’s important to follow this recommendation because overinflating or underinflating your tires can lead to a variety of problems, including reduced fuel efficiency, uneven tire wear, and decreased handling ability.
Inflating your new tires to the proper pressure can help ensure that they last longer and perform optimally. So, take a few extra moments to check the recommended tire pressure and inflate your new tires to the proper level – your vehicle (and your wallet) will thank you in the long run!
Use a Bike Pump to Inflate the Tire
When it comes to inflating a new bike tire, the most important tool you’ll need is a good bike pump. A proper bike pump is an essential accessory for all riders, whether you’re a pro or just a casual cyclist. It’s important to make sure that the pressure is right in your tires before each ride to avoid any accidents or damage to your bike.
With a bike pump, you can easily inflate your tire to the correct pressure and ensure a smooth ride on the road or trail. Whether you’re using a hand-held pump or a floor pump, make sure to follow the manufacturer’s instructions for proper use. It’s also important to check the recommended air pressure for your specific tire to make sure you’re inflating it to the correct level.
A good rule of thumb is to inflate your tire to the maximum recommended air pressure printed on the tire sidewall. By using a bike pump to inflate your tire properly, you’ll be able to enjoy a comfortable and safe ride no matter where your bike takes you.
Test the Tire and Brake
If you’re wondering how to change a bike tire with disc brakes, one important step is to test the tire and brake before hitting the road. A flat tire can cause safety issues, while worn-out brakes can lead to accidents. First, check your tire pressure and make sure it’s at the recommended level.
Then, inspect the tire for any cuts or punctures. If you need to replace the tire, make sure it’s compatible with your disc brakes. Once the tire is on, spin it around to make sure it’s centered and doesn’t wobble.
Next, test your brakes by gently squeezing the levers. Make sure the brake pads engage with the rotor and that there are no squeaks or grinding noises. Finally, take your bike for a test ride in a safe area to make sure everything feels secure and performs well.
Remember, safety always comes first when it comes to bike maintenance and repairs!
Spin the Wheel and Check for Any Issues
When it comes to keeping your car safe on the road, checking your tires and brakes is essential. One common way to check your tires is by giving them a spin and keeping an eye out for any issues. A well-maintained tire should spin smoothly without any wobbling or unusual sounds.
If you notice any shaking or vibrations, your tire may need to be balanced or repaired. Additionally, you’ll want to inspect the tread depth and look for any cracks or bulges in the rubber. As for your brakes, a simple way to test them is by applying the brakes at a slow speed and listening for any unusual noises or vibrations.
If you hear a grinding or squeaking sound, it may be time to have your brake pads replaced. Checking your tires and brakes regularly can help ensure your car performs at its best and prevent potential accidents on the road. Be proactive and take the time to spin the wheel and check for any issues.
Test the Brake to Ensure Proper Functioning
When driving, it’s important to ensure that you and your passengers are safe. One of the most crucial components of your vehicle that can impact your safety is the tire and brake. Therefore, testing these parts should be a regular part of your maintenance routine.
To test your brake, start by finding an empty and safe space. Then, slowly drive your vehicle and apply the brake. If you notice any squeaking, grinding, or shaking, it’s likely that your brake needs attention from a mechanic.
This is especially crucial if you’ve been experiencing any strange sounds or sensations while driving, as a faulty brake can put you and others in danger. Don’t wait until it’s too late – prioritize the safety of yourself and others by regularly testing your tire and brake.
Conclusion
Well, there you have it folks! Changing a bike tire with disc brakes may seem like a daunting task, but with the right tools and a little bit of know-how, you can be back on the road in no time. Remember to always check your tire pressure and inspect your tires regularly to prevent any unexpected blowouts. And who knows, maybe one day you’ll be changing tires with such ease that you’ll have people wondering if you were born with a wrench in your hand.
“
FAQs
1. How do I know if my bike tire has disc brakes? A: Look for a circular metal disc mounted on the wheel hub that rotates with the wheel. 2. What tools do I need to change a bike tire with disc brakes? A: You will need a tire lever, a set of Allen wrenches, a flathead screwdriver, and a replacement tire. 3. Can I change a bike tire with disc brakes myself? A: Yes, with the right tools and some basic knowledge, changing a bike tire with disc brakes is a manageable DIY task. 4. How do I remove the wheel with disc brakes to change a tire? A: Loosen the quick-release skewer or axle nuts, then gently pull the wheel out of the frame. Be sure to disengage the brake caliper before removing the wheel. 5. How do I reinstall the wheel with disc brakes after changing a tire? A: Slide the wheel back into the frame and tighten the quick-release skewer or axle nuts. Reengage the brake caliper and check that the rotor is centered between the brake pads. 6. What should I do if the rotor of my disc brakes is bent or damaged? A: Take your bike to a qualified mechanic for repairs or replacement of the damaged disc brake rotor. 7. Can I replace my current disc brake rotors with larger ones for better braking performance? A: Yes, but you should also consider upgrading your brake calipers and brake pads to match the larger rotors. Consult a bike mechanic or manufacturer for recommendations on compatible parts.