
Have you ever noticed your engine temperature gauge rising higher than normal? Or perhaps your car is overheating or running rough? These could be signs of a faulty coolant temperature sensor. A coolant temperature sensor is a small but important component of your car’s engine that measures the temperature of the coolant and sends it to the engine control module. When this sensor fails, it can cause a number of problems that can be costly to repair if not addressed promptly.
In this blog, we’ll walk you through a step-by-step guide on how to change a coolant temperature sensor so you can get your car back on the road in no time.
Introduction
Changing a coolant temperature sensor may seem like a daunting task, but with the right tools and steps, anyone can do it. The coolant temperature sensor is an essential component in your car’s cooling system that controls the engine’s temperature by sending signals to your car’s computer. It can also affect other systems, such as transmission shifting and fuel delivery.
Therefore, if your car is experiencing problems with overheating or erratic temperature readings, it is often necessary to replace the sensor. To do so, first, locate the sensor’s position in your car’s engine bay, then disconnect the electrical connector and remove the old sensor with a wrench. Before installing the new sensor, clean the threads and apply anti-seize compound to ensure a tight seal without over-tightening.
Finally, reconnect the electrical connector, refill the coolant, and start the engine to test for any leaks or issues. By following these simple steps, you can change a coolant temperature sensor easily and avoid costly repairs down the road.
What is a Coolant Temperature Sensor?
A coolant temperature sensor is an essential component of a car’s engine cooling system. It’s responsible for monitoring the temperature of the coolant and sending that information to the car’s computer. This enables the system to make adjustments to the cooling system, like turning on the radiator fan or opening/closing the thermostat, to keep the engine operating at an optimal temperature.
The coolant temperature sensor is typically located near the engine block or thermostat housing and uses a thermistor to measure the coolant temperature. A malfunctioning coolant temperature sensor can result in poor engine performance, decreased fuel efficiency, and engine damage. If you suspect your coolant temperature sensor is malfunctioning, it’s important to have it checked by a professional mechanic.
Why Change a Coolant Temperature Sensor?
If you’ve ever had difficulty starting your car or noticed your engine running a bit hotter than usual, it might be time to replace your coolant temperature sensor. This vital component ensures your engine stays within its optimal temperature range, and if it’s not functioning correctly, it can cause a host of issues, including reduced fuel efficiency and potentially severe engine damage. So why change a coolant temperature sensor? Well, it’s a relatively inexpensive fix that can prevent much more costly repairs down the line.
By taking care of it sooner rather than later, you can avoid more significant expenses and keep your engine running smoothly. So if you suspect your coolant temperature sensor is faulty, it’s best to get it checked out by a professional and replace it if necessary. Trust us, your engine will thank you for it.
Step-by-Step Guide
If you’re experiencing problems with your engine’s temperature gauge or warning light, it could be time to change your coolant temperature sensor. This vital component measures the temperature of your engine’s coolant and sends that information to your car’s computer, which then adjusts the engine’s performance accordingly. Luckily, changing this sensor isn’t too difficult, even for novice mechanics.
First, locate the sensor on your engine block, usually near the thermostat housing or on the cylinder head. Next, disconnect the electrical connector and remove the sensor by twisting it counterclockwise with pliers or a wrench. Be sure to have a drain pan underneath, as some coolant will spill out.
Then, replace with a new sensor, making sure to tighten it firmly. Finally, reconnect the electrical connector and top off the coolant as needed. With these easy steps, you can replace your coolant temperature sensor and get your engine running smoothly again.
Step 1: Prepare the Tools and Materials
When beginning any DIY project, it’s important to have all the necessary tools and materials ready before diving in. For this specific project, you’ll need a power drill, drill bits, screws, a saw, measuring tape, and a pencil. Additionally, you’ll need 1×4 wood boards, wood glue, wood screws, and a piece of plywood.
Don’t forget to have safety goggles and gloves on hand for protection. Once all your supplies are gathered, it’s time to get started on building your DIY bookshelf. Remember, taking the time to properly prepare your tools and materials will make the construction process smoother and safer.
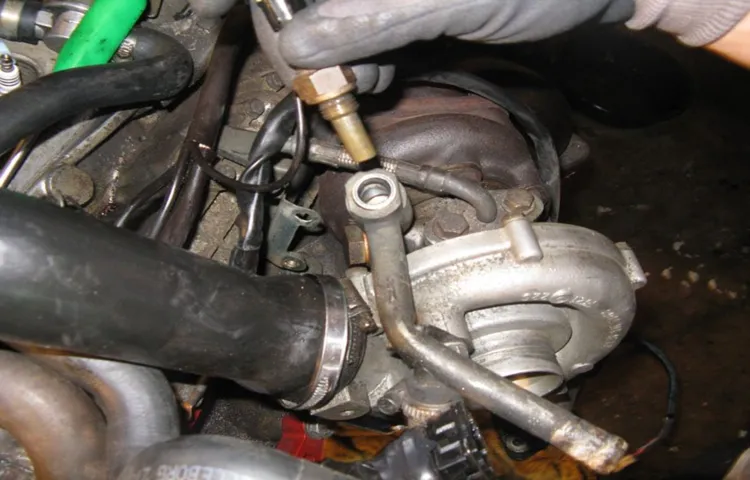
Step 2: Locate the Coolant Temperature Sensor
Once you’ve gathered all the necessary tools, the next step in replacing your coolant temperature sensor is locating it. It’s generally located near the engine’s thermostat, usually on the engine block or the intake manifold. If you’re having trouble finding it, check your vehicle’s manual or do some quick online research.
Keep in mind that some vehicles have multiple coolant temperature sensors, so be sure you’re working with the correct one before proceeding. Once you’ve located the sensor, identify the wiring harness and gently remove it from the sensor. Don’t force it, as you could damage the wiring or the sensor.
With the wiring harness removed, you’re ready to move on to the next step in replacing your coolant temperature sensor. Remember, if you’re ever unsure about any step in the process, don’t hesitate to consult a professional or do further research on the matter.
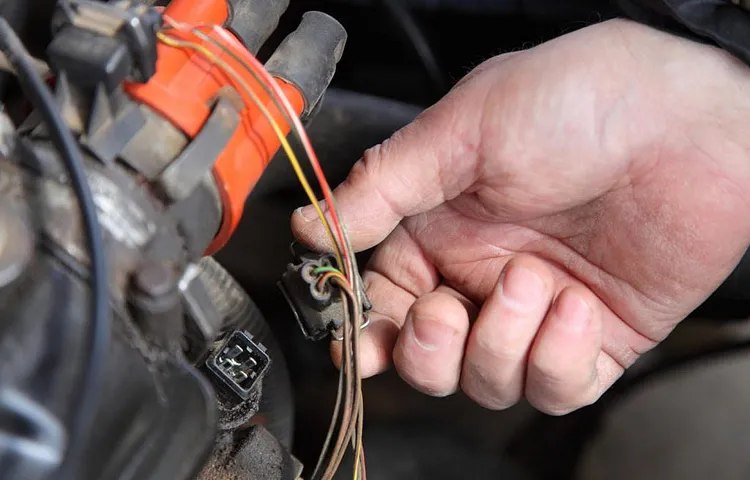
Step 3: Disconnect the Electrical Connector
Disconnecting the electrical connector is an essential step when dealing with electrical components. It is crucial to ensure the safety of both the person performing the task and the equipment they are working on. Before proceeding, make sure the electrical system is turned off.
Once that’s done, locate the connector and, depending on the type of connector, either press the tab or pull the clip to release the connection. It is essential to handle the connector carefully and not force it as it can damage the connector or its pins. Always wear gloves as a safety measure to avoid injury, and if the connector is hard to remove, try using a non-metallic tool like a plastic tool or a flathead screwdriver.
As a result, disconnecting the electrical connector requires a steady hand and some patience.
Step 4: Remove the Old Sensor
Once you have located the old sensor, it’s time to remove it. This step may require a bit of force, so make sure to use caution. Begin by disconnecting the sensor from any wires or connectors that are keeping it in place.
Often, you will need to use pliers or a wrench to loosen and remove bolts or screws securing the sensor. Be gentle as you dislodge it from its mount and pull it out of the vehicle. Make sure to keep the old sensor in a safe place, as you may need it for reference later.
Once it has been removed, clean the area around where it was installed to ensure a smooth installation process for the new sensor. With the old sensor securely removed, it’s time to move on to the exciting part of installing the new sensor and bringing your vehicle back to peak performance.
Step 5: Install the New Sensor
Now, it’s time to install your new sensor in your vehicle, making sure that it’s snug and secure. Start by carefully lining up the sensor with the designated spot, and then press it firmly in place. You may need to use a wrench or pliers to tighten the nut that comes with the sensor to ensure that it’s fastened securely.
Once you’ve tightened the nut, reconnect the electrical connector and attach any retaining clips or bolts that were removed during the disassembly process. And that’s it! Your new sensor is now installed and ready to go. Remember to double-check that everything has been hooked up correctly so that your car can run smoothly without any issue.
By following these simple steps, you can easily change out a sensor in your car and keep it running smoothly for many years to come.
Step 6: Reconnect the Electrical Connector
Now that you’ve replaced the faulty part, it’s time to reconnect the electrical connector. This is a crucial step in the process, as failing to do so properly can result in an array of electrical issues. First and foremost, locate the electrical connector and remove the protective cap.
Once you’ve done so, line up the connector’s prongs and firmly push it into place until it clicks. It’s essential to ensure that the connection is secure, so make sure to test it by giving it a gentle tug. If it doesn’t budge, you’re all set.
This step may seem simple, but it’s critical to the functionality of the part you’ve just replaced. Always take your time with this step to avoid any future problems.
Tips and Warnings
Changing a coolant temperature sensor is a straightforward process, but there are a few tips and warnings you should keep in mind. First and foremost, make sure you have the right type of coolant temperature sensor for your vehicle. If you’re unsure, check your owner’s manual or consult a mechanic.
It’s also important to let your engine cool down before starting any work, as the coolant can be hot and cause burns. Once you’ve located the sensor, be careful not to damage any surrounding components. Finally, take note of the orientation of the old sensor so you can position the new one correctly.
By following these tips and taking the necessary precautions, you can successfully change your coolant temperature sensor and ensure your engine is running smoothly.
Use Caution When Working with Hot Coolant
Working with hot coolant can be a dangerous task, and it is essential to take the necessary precautions to avoid potential injuries. When working with hot coolant, always make sure the engine has cooled down completely before removing the radiator cap to prevent any burns, and wear protective gear such as gloves and goggles. Also, use a coolant tester to check the condition of the coolant and make sure it is at the correct level before adding any more.
It is crucial to avoid direct contact with hot coolant as it can cause severe burns and injury. Remember, prevention is better than cure, so take your time and prioritize safety when working with hot coolant. By taking these precautionary measures, you can ensure a safe and successful job every time.
Seek Professional Help If Not Confident to Proceed
If you’re not confident in your ability to proceed with a task, don’t be afraid to seek professional help. It’s okay to admit when you need assistance, especially if the job at hand is complex or time-sensitive. Turning to a professional can not only alleviate stress and save time, but it can also prevent mistakes that could be costly in the long run.
When seeking professional help, be sure to do your research and find someone with a strong reputation and experience in the specific area you need assistance with. Don’t be afraid to ask questions and clarify expectations before agreeing to any services. It’s important to remember that seeking professional help is a sign of strength, not weakness.
So, if you’re feeling overwhelmed or unsure, reach out and get the help you need.
Conclusion
Congratulations, you now know how to change a coolant temperature sensor! With just a few simple steps, you can keep your engine running smoothly and avoid any overheating issues. Remember to always take safety precautions and consult your vehicle’s manual. And who knows, maybe one day you’ll impress your friends with your new-found mechanical skills.
Just remember to remind them that you’re not a mechanic, you’re just clever with the internet!”
FAQs
What is a coolant temperature sensor?
A coolant temperature sensor is a device that monitors the engine’s coolant temperature and sends the information to the engine management system.
Why would I need to change my coolant temperature sensor?
You may need to change your coolant temperature sensor if it is not functioning properly, causing issues with the engine’s performance or fuel efficiency.
What are the signs that my coolant temperature sensor needs to be replaced?
Signs that your coolant temperature sensor needs to be replaced include erratic or incorrect temperature readings, poor fuel efficiency, and engine overheating.
Can I change my coolant temperature sensor myself?
Depending on your experience with car repairs, you may be able to change your coolant temperature sensor yourself. However, it is recommended to have a professional mechanic do the job.
How long does it take to change a coolant temperature sensor?
It typically takes anywhere from 30 minutes to an hour to change a coolant temperature sensor.
How much does it cost to replace a coolant temperature sensor?
The cost of replacing a coolant temperature sensor varies depending on the make and model of your car and the mechanic you choose. On average, it can cost anywhere from $100 to $300.
What happens if I don’t replace my coolant temperature sensor?
If you don’t replace your coolant temperature sensor, you risk damaging your engine or experiencing reduced fuel efficiency. Over time, this can lead to more expensive repairs.