
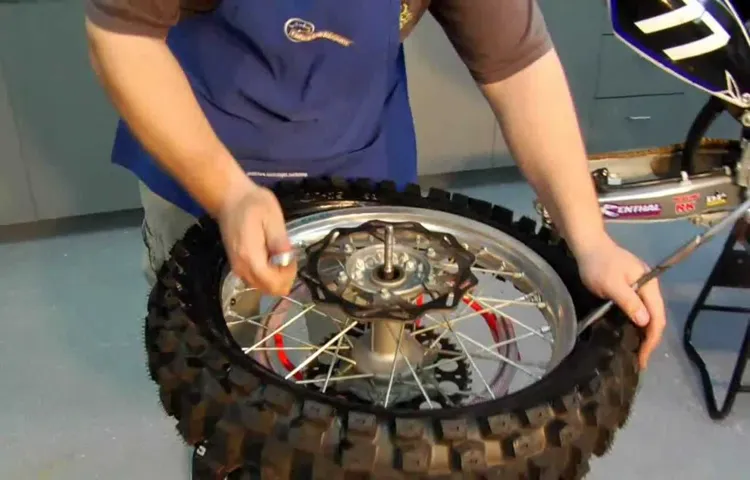
Changing a tire on a car can be pretty daunting, but changing a rear bike tire is a breeze. If you are new to cycling, you might be wondering how to go about this task with minimal effort. Well, you’ve come to the right place! In this guide, we’ll take you through all the steps you need to take to change the rear tire on your bike.
Imagine cruising down your favorite bike trail, with the wind in your hair and the sun on your face, only to hear a loud hissing noise. Next thing you know, you have a flat rear bike tire, and there’s no bike shop in sight. Don’t panic! Changing a rear bike tire is a straightforward process that you can do in a matter of minutes, whether you’re at home or on the side of the road.
In this blog, we’ll explain everything you need to know about changing a rear bike tire. Whether you are a seasoned cyclist or a beginner, our guide will break down all the steps into easy-to-follow instructions, making it a smooth and straightforward endeavor. So grab your tools, and let’s get started on this adventure together.
Table of Contents
What You’ll Need
Changing a rear bike tire may seem intimidating at first, but it’s actually a simple process that requires just a few tools. First, you’ll need a replacement tire that matches the tire currently on your bike. You’ll also need a pair of tire levers to help remove the old tire, and a bike pump to inflate the new tire.
If you’re unsure of what size tire you need, you can check the sidewall of your current tire – it should display a series of numbers and letters indicating the tire size. Once you have all of your tools and parts, it’s time to get started with the tire change!
Tire Levers
If you’re planning to change a tire, the first thing you’ll need is a set of tire levers. These small hand tools are designed to help you remove the tire from the rim of the wheel. There are many different types of tire levers available, and they all work in slightly different ways.
Some tire levers are made from hard plastic, while others are metal or composite. The key is to find a set of levers that feels comfortable in your hand and that you’re confident using. When choosing a set of tire levers, consider the size of your tire and the type of bike you’ll be working on.
For smaller tires, a set of plastic levers may suffice, but for larger tires, you may want to invest in a sturdier set of metal levers. With the right tools in hand, you’ll be ready to change a tire in no time.
New Inner Tube
If you’re planning on replacing your inner tube, there are a few things you’ll need to get started. Firstly, you’ll need a new inner tube that’s compatible with your tire size. It’s important to check the sizing before purchasing to ensure a perfect fit.
Moreover, you’ll need a few tools to make the installation process smoother, such as a tire lever, a wrench, and a pump. With these tools, you can remove the old tube, insert the new one, and inflate it to the recommended pressure level. Additionally, you might want to have some talcum powder on hand, which can help the tube move more easily inside the tire.
By gathering all these necessary items beforehand, you’ll save yourself time and effort in the long run. It’s always better to be prepared and have everything you need before diving into a project like this. With the right tools and a little bit of know-how, you’ll have your new inner tube installed in no time.
Pump
When it comes to pumping, there are a few essential items you’ll need to get started. Firstly, you’ll need a pump. There are several types of pumps to choose from, including manual pumps, electric pumps, and battery-operated pumps.
The type of pump you choose will depend on your needs and preferences. For example, manual pumps are great for occasional pumping, while electric pumps are more efficient for frequent pumping. Secondly, you’ll need breast milk storage bags or containers.
These are essential for storing your milk correctly and safely. Be sure to choose containers that are BPA-free and designed specifically for breast milk storage. Finally, you’ll need a comfortable place to sit and pump.
Some moms prefer to use a nursing chair or stool, while others find a comfortable sofa or bed to be just as effective. By having these essential items, you’ll be ready to start pumping and building up your milk supply.
Wrench (if needed)
When it comes to fixing things around the house, it’s important to have the right tools on hand. One of the essential tools you may need is a wrench. If you’re not sure what type of wrench you need, there are a few things to consider.
First, think about the size of the bolt or nut you need to turn. You’ll want to choose a wrench that fits snugly but isn’t too loose or too tight. You’ll also want to consider the material the wrench is made of.
A high-quality wrench made of steel or another durable metal will last longer and be less likely to break or slip. Finally, think about the type of wrench that will work best for the job. A standard adjustable wrench may work for some tasks, but a socket wrench or torque wrench may be better suited for others.
By having the right wrench on hand when you need it, you’ll be ready to tackle any home repair project that comes your way!
Prepare for the Change
Changing the rear tire of your bike may seem like a daunting task, but with some preparation, it can be a breeze. First, make sure you have all the necessary tools, including a tire lever, a new tube, and a hand pump. It’s also helpful to have a patch kit in case of any punctures.
Next, find a flat surface to work on and flip your bike upside down so it rests on the handlebars and seat. Use the tire lever to remove the bead of the tire from the rim, and then pull the tube out of the tire. Inspect the tire and rim for any damage or debris.
Insert the new tube by first inflating it slightly and then tucking it into the tire. Reinsert the tire bead into the rim, using the tire lever if necessary, and inflate the tire to the recommended pressure. Make sure to double-check for any bulges or pinches before riding.
With these steps, you’ll be able to easily change your rear bike tire and get back on the road in no time!
Find a Flat, Stable Surface
When it comes to setting up a stable base for your gear, finding a flat surface is crucial. Whether you’re pitching a tent or setting up a camera tripod, a level ground helps prevent accidents and makes your experience more enjoyable. Before you start unpacking, take some time to scout the area and identify the best spot.
Look for places that are even and free of rocks, roots, or debris that could damage your equipment. If you’re camping, try to avoid low-lying areas that could turn into puddles after rain – nobody likes a flooded tent. If you’re filming, think about the angle and composition of your shots and find a position that allows you to capture what you need without struggling with an unstable footing.
Remember, a solid foundation is the first step towards success, so take the time to prepare for the change and enjoy your outdoor adventures with confidence and ease.
Shift Gears to Smallest Chainring
When it comes to cycling, shifting gears is an essential skill that every cyclist must know. One particular gear shift that requires both timing and proper execution is shifting gears to the smallest chainring. This move is usually done when cycling uphill or when facing an incline.
Before shifting to the smallest chainring, it is crucial to prepare by reducing your speed. This shift can cause the chain to jump or derail if not done correctly. You don’t want to be caught off-guard when this happens, and it’s best to ensure that all the components are working correctly.
Shifting to the smallest chainring requires constant pedaling and a gradual change to avoid putting too much stress on the chain. Remember that this gear set-up is perfect for climbing, and the slow pedaling motion can help with better control and balance. Always remember to anticipate the terrain ahead and shift gears accordingly to maximize your cycling experience.
Release Brake
As we prepare to “release the brake” and enter a new phase of life, it’s important to acknowledge the mixture of excitement and uncertainty that comes with change. Just like a car that’s been parked with the brake on, we may feel a sudden burst of energy as we begin to move forward, but we’ll also need to be aware of any unexpected twists and turns along the way. Remember, it’s perfectly normal to feel a little overwhelmed when facing the unknown, but don’t let fear hold you back.
Instead, approach this change with an open mind and a willingness to adapt. Think of yourself as a train, gathering momentum on your journey, all the while staying flexible enough to change course if needed. With determination and a positive attitude, you’ll be able to navigate this transition with ease and grace.
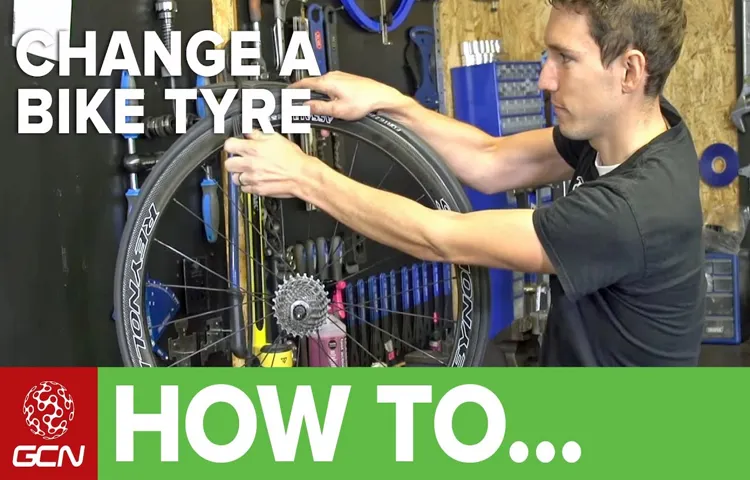
Remove Old Tire
Changing a rear bike tire may seem overwhelming at first, but with the right tools and knowledge, it can be a breeze. Successfully removing the old tire is the first step in the process. Start by loosening the nuts or quick-release lever holding the wheel in place.
Once the wheel is free, carefully remove the tire from the rim by using a tire lever. Gently insert the lever between the tire and rim and pry the tire away from the rim until it pops free. Repeat this process around the entire circumference of the tire until it’s completely removed from the rim.
Make sure to be cautious, as the tire can sometimes be tight and may release with a sudden burst of air pressure. Once the tire is removed, inspect the rim for any signs of damage or wear before proceeding to the next steps. With patience and care, removing an old bike tire can be simple and straightforward.
Release Remaining Air Pressure
When it comes to changing a tire, releasing the remaining air pressure is an important step that ensures the safety of the person replacing the tire. Before you begin to remove the old tire, you should make sure that all the air has been released from it. This is important because if there is any remaining air pressure, the tire could suddenly inflate and cause injury.
To release the air pressure, you can use a tire pressure gauge or a small tool like a screwdriver to press down on the valve stem. It’s important to be careful when doing this, as the release of air can be quite forceful and might even cause the tire to jump. Once all the air pressure has been released, you can safely proceed to remove the old tire and replace it with a new one.
Remember, safety should always come first when changing a tire.
Using Tire Levers, Loosen and Remove Tire from Rim
Tire Levers Removing an old tire from your bike’s rim requires a bit of elbow grease, but with the right tools, it becomes a breeze. First, gather your tire levers. If you don’t have any, be sure to pick some up before you begin.
Tire levers are specifically designed to help lift and loosen the tire from its rim, making it much easier to remove. Start by locating the edge of the tire and wedge your tire lever in between the tire and the rim. Then, gently lift the lever upward, wedging it further until the tire begins to loosen.
Move along the edge of the tire and repeat the process with the second lever. Working slowly and methodically, the tire should eventually begin to loosen from the rim. Once the tire is completely loose, you should be able to slide it off with a little bit of force.
With the old tire removed, you’re now ready to replace it with a brand new tire on your bike!
Remove Old Inner Tube
Removing the old inner tube from a bike tire can seem like a daunting task to some, but it’s actually quite simple if you have the right tools. One key thing to remember is to remove the tire from the rim first, before attempting to remove the inner tube. Once the tire is off, you can start to work on getting the inner tube out.
Begin by locating the valve stem on the inner tube and deflating it completely. Then, use your fingers to loosen the tire and carefully remove the inner tube. It’s important to inspect the inner tube carefully for any punctures or tears that may have caused it to go flat.
If you do find any damage, it’s best to replace the inner tube entirely. Overall, while it may seem tricky at first, removing an old inner tube just takes a bit of patience and the proper technique.
Install New Tire and Inner Tube
Changing a rear bike tire is a task that every cyclist may encounter, and it’s important to understand how to do it properly. The first step is to gather the necessary tools for the task, including a tire lever, a new tire and inner tube, and a pump. Begin by removing the wheel from the bike and deflating the tire completely.
Next, use the tire lever to carefully pry the tire away from the rim, working your way around the circumference until the tire is completely detached from the rim. Remove the old inner tube and inspect the tire for any debris or damage. Then, insert the new inner tube into the tire, ensuring that it is lined up properly before attaching the tire onto the rim with the help of the tire levers.
Finally, inflate the tire to the recommended pressure and check that it is properly seated before reattaching the wheel to the bike. With these steps, you can easily install a new tire and inner tube on your rear bike wheel.
Insert New Inner Tube into Tire
Installing a new tire and inner tube might seem like a daunting task, but with a little bit of know-how and the proper tools, it can be done easily. Before you start, make sure that you have the correct size inner tube for your tire. Begin by removing the wheel from the bike and then removing the old tire and inner tube.
Inspect the inner side of the tire carefully to ensure there are no sharp objects, holes or cuts in the rubber. Next, inflate the new inner tube slightly so that it takes shape, then insert it into the tire, making sure it is evenly distributed. Carefully replace the tire back onto the wheel, being mindful to position the valve stem of the inner tube correctly.
Then, slowly work the tire back onto the rim, making sure not to pinch the inner tube in the process. Once the tire is correctly seated and the inner tube is not pinched, inflate the tube to the recommended pressure level and remount the wheel back onto the bike. With the right technique, you’ll be back on the road confidently with your newly installed tire and inner tube in no time!
Place Tire onto Rim, Starting at Valve Stem
Installing a new tire and inner tube may seem like a daunting task, but with the right knowledge and tools, it can be done easily. One important step in the process is placing the tire onto the rim, starting at the valve stem. This ensures that the tire is centered properly on the rim and prevents any potential damage to the valve stem.
To begin, place one side of the tire onto the rim, starting at the valve stem. Use your hands to carefully push the tire onto the rim, ensuring that the bead is properly seated. Repeat this process on the opposite side of the tire, starting at the valve stem again.
Once both sides of the tire are on the rim, make sure that the tire is evenly seated and centered. By following this simple but crucial step, you’re one step closer to successfully installing your new tire and inner tube.
Using Tire Levers, Push Tire onto Rim
Tire levers are an essential tool when it comes to installing a new tire and inner tube. Once you’ve removed the old tire and inspected the rim, it’s time to put the new tire on. Start by lining up the valve stem on the inner tube with the hole on the rim.
Fit half of the tire onto the rim and then insert the inner tube inside the tire, making sure it’s evenly distributed and not twisted or kinked. Next up, use the tire levers to push the remaining half of the tire onto the rim, working your way around the circumference, while making sure the inner tube doesn’t get pinched between the rim and the tire. Remember not to use too much force, as this can damage the inner tube.
Once the tire is fully seated onto the rim, inflate it to the recommended pressure and give it a quick spin to make sure it’s properly aligned. And voila, you’ve successfully installed a new tire and inner tube, thanks to your trusty tire levers!
Reinflate Tire
Changing a bike tire can seem daunting, but with a little bit of practice, it’s an easy skill to master. The first step in changing a rear bike tire is to remove the wheel from the bike. Flip the bike over so it’s resting on the handlebars and seat, then loosen the nuts that hold the wheel in place using a wrench.
Once the nuts are loose, gently pull the wheel off the bike. Next, use a tire lever to pry the tire off the rim. Once the tire is off, remove the old inner tube.
Take the new inner tube and inflate it slightly before inserting it into the tire. Carefully work the tire back onto the rim, making sure to tuck the inner tube in properly. Finally, use a bike pump to inflate the tire to the recommended pressure.
Tighten the nuts to secure the wheel back onto the bike, and you’re ready to ride again. Remember, always make sure to check your tire pressure regularly to avoid flat tires.
Reattach Brake
If you’ve had to reattach your brake, chances are you’ve had to remove your wheel as well. Before you can fully test out your brakes, you’ll need to reinflate your tire to the appropriate pressure. This can be done with a bike pump or an air compressor.
It’s important to check the recommended tire pressure on the side of your tire before inflating. Overinflating your tire can make it more vulnerable to punctures and can affect the handling of your bike. On the other hand, riding with an underinflated tire can increase the risk of pinch flats and can make it harder to pedal.
Once you’ve filled your tire to the recommended pressure, you’re ready to hit the road and test out your newly reattached brake.
Check Tire Pressure
When it comes to maintaining your car, checking the tire pressure is an essential task that should not be overlooked. Underinflated tires can cause several problems like increased wear and tear, poor fuel efficiency, and the risk of a blowout. To avoid such issues, it is crucial to regularly check your tires and inflate them to the recommended level.
Many gas stations have an air pump available for public use, or you can purchase a handheld tire inflator. Before inflating, it’s important to know what the recommended pressure level for your tires is. You can find this information in your car manual or on a sticker located on the driver’s side doorjamb.
When inflating, it’s better to slightly overinflate and then let out some air to the exact pressure level. With inflated tires, you can enjoy a smoother ride, better fuel economy, and increased safety on the road.
Test Your Work
Changing a rear bike tire may seem like an intimidating task, but with a little practice, it can become second nature. Once you have the necessary tools, the process is straightforward. The first step is to release the brake by opening the quick-release lever or unscrewing the bolts that hold the brake arm to the frame.
Next, shift the chain to the smallest cog to make it easier to remove the wheel. Then, remove the wheel by opening the quick-release lever or unscrewing the axle nuts. Now, take off the tire by inserting two tire levers under the bead of the tire and progressively lifting it away from the rim.
Replace the tube, making sure to find the cause of the puncture and remove any debris from the inside of the tire. Finally, reverse the process of removal to put the wheel back on, ensuring that the chain is placed back on the smallest cog and that the brake is adjusted correctly. With these simple steps, you’ll be back on the road in no time!
Spin Wheel to Check for Proper Alignment and Braking
If you’re wondering whether your bicycle is properly aligned and its brakes are functioning correctly, you may want to try a simple test using a spin wheel. A spin wheel can help you determine if your wheel is true or if you need to make any adjustments to get it in line with the frame. Simply place the wheel in the frame and give it a spin.
If the wheel wobbles or rubs against the brake pads, you may need to adjust the spoke tension or the placement of the brake pads. Once you’ve gotten the wheel aligned, you can check the brakes by applying them to see if they engage smoothly and stop the bike effectively. This quick and easy test can give you peace of mind and ensure your ride is safe and efficient.
Take a Test Ride
Taking a test ride is an essential step to ensure that your work meets your standards. It allows you to test the product’s functionality and performance before releasing it into the market. You get to see first-hand how your creation works and address any issues or bugs that may have been overlooked during development.
Think of it as taking your car for a test drive before deciding to purchase it. You want to make sure that it meets your expectations and that it’s worth the investment. Similarly, by taking a test ride, you’re investing your time and resources into creating a quality product that will satisfy your customers.
It’s always better to catch and fix any issues before going live, as it saves you time, money, and potential reputation damage. So, go ahead, take a test ride, and ensure that your work meets the standards you’ve set for yourself.
Conclusion
In conclusion, changing a rear bike tire is like solving a puzzle- it may seem daunting at first, but with the right tools and techniques, you’ll be able to complete it with ease. So next time you find yourself with a flat tire, don’t despair. With a few simple steps, you’ll be back on the road in no time.
And who knows, maybe you’ll even feel like a pro cyclist by the end of it!”
FAQs
What tools do I need to change a rear bike tire?
To change a rear bike tire, you will need a tire lever, a new inner tube, a bicycle pump, and a wrench.
How do I know if my rear bike tire needs to be replaced?
Signs that your rear bike tire needs to be replaced include cracks in the tire, worn-out tread, or punctures that cannot be repaired.
Can I change a rear bike tire without removing the wheel?
It is possible to change a rear bike tire without removing the wheel, but it is a difficult and time-consuming process. It is best to remove the wheel to make the tire-changing process easier.
How long does it take to change a rear bike tire?
It should take between 20-30 minutes to change a rear bike tire if you have the necessary tools and experience with bike maintenance.
Can I use any type of tire for my rear bike tire?
It is important to match the tire size and type with your bike’s specifications. Check your bike’s manual or consult with a bike technician to ensure you are purchasing the correct tire.
How do I prevent getting a flat rear bike tire?
To prevent getting a flat rear bike tire, regularly check tire pressure, avoid riding on rough surfaces, avoid sharp objects, and replace worn-out tires.
Is it better to patch a rear bike tire or replace it entirely?
It is usually better to replace a rear bike tire entirely if it has a puncture. Patching a tire may not provide a long-term solution and can compromise the tire’s integrity.