Flat tires are a nuisance that no vehicle owner wants to experience, but they can happen to anyone. When it comes to changing a tire on a Chevy Silverado, it’s important to know the proper steps to ensure your safety and the safety of others on the road. In this blog post, we will walk you through the process of changing a tire on your Chevy Silverado, providing you with easy-to-follow instructions and helpful tips.
From locating the spare tire to jacking up the vehicle and tightening the lug nuts, we’ve got you covered. So, sit back, relax, and let’s get started!
Table of Contents
Introduction
Changing a tire on a Chevy Silverado can seem like a daunting task, especially for those who have never done it before. However, with the right tools and a bit of practice, anyone can do it! The first step is to make sure you have all the necessary equipment, including a spare tire, jack, and lug wrench. Once you have these items, locate the flat tire and use the lug wrench to loosen the lug nuts.
Then, use the jack to raise the vehicle off the ground and remove the lug nuts and flat tire. Next, place the spare tire onto the hub and tighten the lug nuts by hand. Finally, lower the vehicle to the ground and use the lug wrench to fully tighten the lug nuts in a star pattern.
With these simple steps, you’ll be back on the road in no time!
Step 1: Prepare your Vehicle
Preparing your vehicle is an essential step in getting ready for any long-distance road trip. Before hitting the road, you want to ensure that your car is in good shape to handle the journey and won’t break down on the way. One of the first things to do when preparing your vehicle for a road trip is to schedule a maintenance check.
This check-up will help you identify any underlying issues that need to be fixed. It’s also crucial to change the oil, top off all the fluids, check your tires’ air pressure and condition, and make sure all the lights are working correctly. These simple tasks may seem insignificant, but they can make all the difference in keeping you and your vehicle safe and comfortable on the open road.
So take the time to prepare your vehicle properly, and you’ll be ready to tackle any adventure that comes your way.

Step 2: Loosen the Lug Nuts
When it comes to changing a tire, the second step is to loosen the lug nuts. This is important because attempting to remove them while the tire is still on the ground can be dangerous and lead to injury or damage to the vehicle. To get started, you’ll need to locate the lug wrench in your car’s trunk or under the hood.
Once you have the wrench in hand, place it on one of the lug nuts and turn it counterclockwise to loosen it. It may take some effort to initially break the nut loose, but once it’s turned a few times, it should spin more easily. This process should be repeated for each of the remaining nuts, but be sure not to remove them completely just yet.
We don’t want the tire to fall off while we’re still working on it!
Step 3: Position the Jack
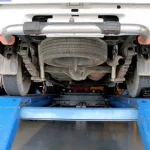
When it comes to lifting a car using a jack, positioning the jack correctly is crucial for safety and efficiency. The first step is to find a flat and stable surface that can withstand the weight of the vehicle. This may require clearing debris or finding an alternative location.
Once you have a suitable spot, place the jack close to the tire that needs to be lifted. It’s important to position the jack under the designated jacking point to avoid damaging the vehicle’s undercarriage. The jacking point can be found in the car manual or marked by a notch on the vehicle’s frame.
Make sure the jack is perpendicular to the ground and centered under the jacking point before proceeding to lift the car. By taking these steps, you can ensure a safe and successful lifting process.
Step 4: Lift the Vehicle
Lifting a vehicle may seem like a daunting task, but with the right knowledge and tools, it can be done safely and efficiently. The fourth step in the process is to lift the vehicle. This is where things can get a bit tricky, as lifting a heavy object can be dangerous if not done correctly.
It’s important to use a jack that is rated for the weight of the vehicle and to make sure the jack is placed on a solid surface. Once the jack is in place, slowly begin pumping it up until the vehicle is lifted off the ground. Remember to place jack stands underneath the vehicle before getting underneath to ensure maximum safety.
Taking these precautions will help prevent accidents and injuries while working on the vehicle.
Step 5: Remove the Lug Nuts and Tire
Removing lug nuts and tires is a crucial step in changing a flat tire or replacing old tires. Once you have lifted your car with the jack, you can start removing the lug nuts using a wrench in a counterclockwise direction. Make sure to keep your face and hands away from the wheel to avoid accidental injury.
Once all of the lug nuts are removed, you can gently pull the tire away from the hub and set it aside. It’s important to remember that the tire and rim are heavy, so be careful when handling them. Finally, inspect the wheel hub and brake components for any signs of damage or wear as long as the tire is off.
This step ensures that your vehicle is safe to drive on the road. With the tire removed, you can now move on to the next step in the process.
Step 6: Put on the Spare Tire
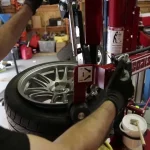
Now that you’ve successfully removed the damaged tire, it’s time to put on the spare tire. Before getting started, make sure that you’re in a safe location away from traffic and that the vehicle is placed on a stable surface. Remove the spare tire from the trunk and place it next to the damaged tire.
Once you have the spare tire in position, begin lifting it onto the hub assembly. Make sure that the tire is lined up correctly with the studs, and hand-tighten the lug nuts to hold the tire in place. Finally, use a lug wrench to tighten the lug nuts as much as possible in a star pattern, alternating between nuts.
Check that the tire is securely attached and then lower the jack, ensuring that the car is level before driving off. With these steps, you’ll be back on the road in no time.
Step 7: Tighten the Lug Nuts
“Tighten the Lug Nuts” After changing a tire, the most crucial step is tightening the lug nuts securely to ensure that the wheel is affixed correctly. Using a lug wrench, turn each nut as far as you can in a star pattern to ensure that the wheel is uniformly seated. Don’t be tempted to over-torque, as this can cause damage to both the wheel and the car itself.
Make sure that you use your body weight to apply pressure as you tighten the nuts, and be sure to double-check that each nut is properly tightened before you hit the road. Properly tightened lug nuts will give you confidence in your vehicle’s stability and give you peace of mind as you head out on your journey.
Step 8: Lower the Vehicle and Remove the Jack
Lower the Vehicle and Remove the Jack Now that you have successfully finished your job under the car, it’s time to lower the vehicle and remove the jack. But make sure that the lug nuts are all tight because they hold the tire in place and prevent accidents while driving. It would be best if you slowly lower the car using the jack handle until you can remove the jack from under the car.
Before removing the jack, double-check that the car is on a level surface and all four tires are in contact with the ground. Doing this will help prevent accidents and may also help avoid any damage to the vehicle. Once you are satisfied that everything is in place, remove the jack, and you’re ready to take your car for a test drive.
Remember, when you’re working under a car, safety is essential. Always keep the area clean of debris, use proper tools, and always wear protective gear, such as gloves and safety glasses. Lowering the vehicle and removing the jack may seem simple, but it’s crucial to follow the proper steps to ensure the safety of yourself and others.
So, make sure you always follow the necessary precautions when working on your car, and you’ll be good to go.
Conclusion
Changing a tire on a Chevy Silverado may seem intimidating at first, but with a few simple steps and a bit of practice, anyone can do it. Just remember to always stay safe by pulling over on a level surface, using a jack stand, and wearing protective gear. And hey, who knows, maybe after mastering the art of tire changing, you’ll feel confident enough to tackle even bigger challenges – like putting together that IKEA bookshelf or installing a new toilet seat.
The sky’s the limit!”
FAQs
What tools do I need to change a tire on a Chevy Silverado?
You will need a Lug wrench, a jack, a spare tire, and wheel chocks.
How long does it take to change a tire on a Chevy Silverado?
The time it takes to change your tire on your Chevy Silverado will depend on your experience, but it generally takes around 20 to 30 minutes.
Can I use the spare tire on my Chevy Silverado for long distances?
No, the spare tire is not designed for long-distance driving and should be replaced with a new tire or a repaired tire as soon as possible.
How do I find the correct tire pressure for my Chevy Silverado?
The recommended tire pressure for your Chevy Silverado can be found in your owner’s manual or on a sticker located on the driver’s side door jamb.
Can I replace just one tire on my Chevy Silverado?
It is recommended to replace all four tires at the same time to ensure they wear evenly, but if only one tire needs replacing, it is possible to do so.
How often should I check my Chevy Silverado tire pressure?
It is recommended to check your tire pressure at least once a month or before going on a long road trip.
Is it safe to change a tire on the side of the road?
Yes, it is safe to change a tire on the side of the road as long as you take proper precautions, such as parking your vehicle away from traffic and using your hazard lights.