Changing a tire can be an intimidating task, but knowing how to do it can save you time and money. If you’re a proud owner of a Ford Explorer, it’s essential to have a working knowledge of changing a tire before you hit the road. A flat tire can happen anytime, anywhere, and it’s better to be prepared ahead of time than be stranded on the side of the road.
The good news is that changing a tire on a Ford Explorer is relatively easy and can be done with some basic tools. With a bit of practice, you can become an expert in changing tires in no time! In this blog, we will walk you through the step-by-step process on how to change a tire on a Ford Explorer. We will cover everything you need to know, from what tools you’ll need to how to properly lift the car and remove the tire.
By the end of this blog, you’ll feel confident in your ability to change a tire on your Ford Explorer. Whether you’re a seasoned driver or a new one, this guide will come in handy in case of an emergency. Don’t let a flat tire ruin your day, follow our guide, and you’ll be back on the road in no time!
Table of Contents
Gather Necessary Tools
Changing a flat tire on your Ford Explorer can be daunting, but with the necessary tools at hand, it can be a straightforward process. Firstly, ensure that you have the correct tools, including a lug wrench, jack, spare tire, and a tire pressure gauge. These should come with your Ford Explorer’s basic toolkit, but if they are missing, be sure to purchase them beforehand.
It’s essential to have these items in your vehicle at all times, particularly when embarking on a long journey. The lug wrench is used to remove the wheel’s lug nuts, while the jack is used to lift the vehicle off the ground and the spare tire to replace the flat one. The tire pressure gauge is essential to ensure that the spare tire is inflated correctly.
Remember, your safety comes first, so never attempt to change a tire in an unsafe location or without proper lighting. Remember, the right tools can make all the difference and save you a lot of time and effort.
Check Spare Tire
If you’re about to embark on a road trip or just need to replace a flat tire, it’s important to check your spare tire before hitting the road. You’ll need a few tools to do so, such as a lug wrench, jack, and tire pressure gauge. First, locate your spare tire, which is typically found in the trunk or underneath the car.
Next, use the lug wrench to loosen the lug nuts on the flat tire, but don’t remove them just yet. Then, use the jack to lift the car until the flat tire is off the ground. Once it’s lifted, you can fully remove the lug nuts and take off the flat tire.
Now it’s time to check the spare tire – use the tire pressure gauge to ensure it’s properly inflated before putting it on. It’s important to have a spare tire ready to go when you need it, so don’t forget to check it regularly and replace it if necessary. With these simple steps, you’ll be ready to hit the road with confidence in your spare tire.
Locate Jack and Lug Wrench
When preparing for a tire change, one of the most important things you need is the jack and lug wrench. Without them, you won’t be able to remove the tire or replace it. It’s crucial to gather these tools before you start the process of changing the tire.
The jack will lift the car so you can easily remove the tire, while the lug wrench will allow you to loosen and tighten the lug nuts which hold the tire in place. Some vehicles come with these tools in the trunk, so it’s important to check there first. If not, you might need to purchase a jack and lug wrench separately or borrow them from someone.
Remember to check the owner’s manual to ensure that you are using the correct tools and follow the instructions carefully. By being prepared with the necessary tools, you can save yourself time and stress when changing a tire on the go.
Prepare Vehicle
Changing a tire on a Ford Explorer might seem daunting, but with the right tools and a little bit of preparation, it can be a smooth and stress-free process. First things first, you need to make sure that you are in a safe and level location away from traffic. Engage the emergency brake and put the car in park, or if you have a manual transmission, put it in first gear.
Gather all the necessary tools, including a lug wrench, a spare tire, and a jack, and make sure they are in good condition and easily accessible. It’s also helpful to have gloves and a flashlight on hand. Finally, before you start, loosen the lug nuts on the tire you need to replace while the car is still on the ground, as it can be difficult to do so once the car is raised on the jack.
By taking the time to prepare properly, you can ensure a safe and efficient tire changing experience.
Park on Level Ground
When you park your car, it’s important to find a level spot to ensure your vehicle stays put and doesn’t roll away. Before parking, survey your surroundings for any inclines or declines that could affect your car’s stability. If you’re parked on an incline, the weight distribution will be uneven, making it easier for your car to roll.
Furthermore, if you park on a steep hill, your car will be more prone to damage, particularly when the weight distribution is not even. So, before you park, find a spot that is flat and level. If there aren’t any choices, turn your wheels towards the curb if you’re parked on an incline, and away from the curb if you’re parked on a decline.
This can help prevent your car from rolling if it does move. Preparing your vehicle before parking can help you avoid any potential damages and ensure a safe and secure parking experience.
Loosen Lug Nuts
Loosening lug nuts is a crucial step in changing a flat tire or performing any maintenance work on your vehicle’s wheels. Before you get started, it’s essential to ensure that your car is in a stable and safe position. To prepare your vehicle, first, find a flat surface where you can park it.
Avoid inclines or uneven terrain, which can cause your car to move when you’re working on it. Next, turn off the engine and engage the parking brake. If you have a manual transmission, leave the car in first gear or reverse, and if it’s an automatic, put it in park.
This will prevent the vehicle from moving while you work on the lug nuts. Once your car is stable, locate the lug nuts on the wheel you need to work on. Most vehicles have four or five lug nuts per wheel, and they are usually located behind the wheel cover or hubcap.
With these steps complete, you’re now ready to start loosening the lug nuts and performing crucial maintenance work on your vehicle’s wheels.
Lift Vehicle
Changing a tire on a Ford Explorer can be a daunting task, but it’s not as difficult as you might think. First, make sure you have all the necessary tools on hand, including a spare tire, a jack, and a lug wrench. Once you have everything you need, locate the lift points on your vehicle and position the jack accordingly.
Begin lifting the vehicle until the tire just clears the ground and remove the lug nuts with the wrench. Then, remove the flat tire and replace it with the spare. Tighten the lug nuts in a crisscross pattern and lower the vehicle.
Finally, use the lug wrench to tighten the lug nuts again and double check that they are secure. With these simple steps, you’ll be on your way in no time!
Position Jack
Positioning a jack correctly is vital when attempting to lift a vehicle safely. First, park the vehicle on a level surface and use safety measures such as chocking the wheels and engaging the emergency brake. Next, locate the recommended jacking points in your vehicle manual for optimal support.
Place the jack in line with the jacking point and slowly lift the vehicle to the desired height. Never place any part of your body under the vehicle when it is lifted. Remember, safety should always come first.
By following these steps and taking caution, you can lift your vehicle safely and confidently.
Raise Vehicle
If you’re looking to raise your vehicle, you’ll need to consider a few things before you start. First, it’s important to determine why you want to lift your vehicle. If you’re planning to take it off-road, you might need a higher clearance to navigate rough terrain.
Alternatively, if you’re hoping to improve the aesthetic of your ride or add larger tires, a lift kit might be the way to go. Whatever your reason, it’s essential to choose the right lift kit for your particular make and model of vehicle. Once you’ve made your selection, you may need to invest in additional components, like new shocks or sway bars, to ensure that your vehicle handles smoothly.
And don’t forget that raising your vehicle can affect its stability and fuel economy, so it’s advisable to do some research and consult with an expert before you begin. By taking the time to plan your lift carefully, you’ll be sure to get the most out of your modified ride.
Remove Flat Tire
Changing a tire on a Ford Explorer is a relatively simple task that can be done with a few basic tools. First, make sure you are in a safe and stable location away from traffic. Then, locate the spare tire and jack, which should be in the trunk or under the vehicle.
Use the jack to lift the car off the ground and remove the lug nuts with a lug wrench. Carefully remove the flat tire and replace it with the spare, making sure it is securely fastened with the lug nuts. Lower the car back to the ground and tighten the lug nuts in a cross pattern to ensure the tire is properly seated.
Don’t forget to check the tire pressure on the spare and have the damaged tire repaired or replaced as soon as possible. It’s always a good idea to practice changing a tire before an emergency occurs, so you can feel confident and prepared if the need arises.
Finish Removing Lug Nuts
To remove a flat tire, the next step after loosening the lug nuts is to finish taking them off. To do this, use a tire iron or wrench to turn each lug nut counterclockwise until it comes off. Some lug nuts may be more difficult to remove than others, so it’s important to use proper leverage and force, being careful not to hurt yourself or damage the vehicle.
Once all of the lug nuts have been removed, carefully lift the flat tire off of the wheel hub and set it to the side. Be sure to keep a firm grip on the tire as it can be heavier than expected. With the flat tire off, you can then proceed to replace it with your spare tire.
Remember to tighten the lug nuts in a star pattern and double check them for proper tightness before driving. By following these steps, you can safely and efficiently remove a flat tire and get back on the road.
Store Flat Tire and Tools
When you encounter a flat tire, the first thing to do is to find a safe spot to park your vehicle. Once you have reached a secure location, switch on your hazard lights and engage your parking brake. Now, it’s time to retrieve your spare tire and tools from your car and begin the process of changing the tire.
Start by removing the hubcap or wheel cover, and then use your lug wrench to loosen the lug nuts before jacking up the car. After the car is elevated off the ground, remove the lug nuts and pull off the flat tire. Remember to handle the tire with care, as it may contain sharp objects.
Once you have taken off the flat tire, place it aside and replace it with the spare tire. Next, fasten the lug nuts back onto the car and tighten them as much as possible. Lower the jack and make sure the lug nuts are fully tightened.
Finally, put the hubcap or wheel cover back on and store the flat tire along with the tools in your trunk or storage area. It’s essential always to have a properly inflated spare tire and functional tools to ensure your safety while driving.
Install Spare Tire
Learning how to change a tire on a Ford Explorer can save you time and money in case of a flat tire. One of the essential steps is to install the spare tire correctly. Before installing the spare tire, make sure to remove the hubcap or wheel cover and loosen the lug nuts with a lug wrench.
Next, lift the car with a jack and remove the flat tire. Once you have the flat tire off, place the spare tire onto the wheel studs and hand-tighten the lug nuts. Lower the car back to the ground and use the lug wrench to tighten the lug nuts as much as possible in a star pattern.
Finally, double-check that all the lug nuts are tight and snap the hubcap or wheel cover back on. Always remember to check the tire pressure of the spare tire before driving on it to ensure the safety of you and your passengers.
Align Holes
When it comes to changing a flat tire, one of the most important steps is to properly align the holes of the wheel and the spare tire. This may seem like a simple task, but it can be tricky if you’re not familiar with the process. First, you need to ensure that the spare tire matches the size of the flat tire and that it is inflated to the recommended pressure.
Then, you should place the spare tire onto the wheel hub and align the holes on the wheel with the ones on the spare tire. Once properly aligned, insert the lug nuts and hand-tighten them before lowering the car back down to the ground. Finally, use a torque wrench to tighten the lug nuts to the recommended torque specification.
By following these steps, you can safely and effectively install your spare tire and continue on your journey without any further issues.
Hand Tighten Lug Nuts
“hand tightening lug nuts” If you find yourself in a situation where you need to install a spare tire, it’s important to know how to properly install it to ensure your safety on the road. One important step in this process is hand tightening the lug nuts. While it may be tempting to use a tool to tighten them as much as possible, it’s actually recommended to hand tighten them first before using a tool to fully tighten them.
This allows for proper alignment and prevents the wheel from wobbling or potentially falling off. To hand tighten the lug nuts, simply place the lug wrench onto the nut and turn it clockwise. Use your other hand to stabilize the wheel to prevent it from moving.
Make sure to tighten the lug nuts in a star pattern to distribute the pressure evenly. Once hand tightened, use a tool to fully tighten the lug nuts, but avoid over tightening to prevent damaging the wheel studs. By following these steps, you can safely install a spare tire on your vehicle.
Lower Vehicle and Tighten Lug Nuts
Changing a tire might seem intimidating, especially if you’re trying to do it on your own. However, if you own a Ford Explorer and find yourself in this situation, don’t worry, it’s a relatively simple process. First, locate your spare tire and the tools that came with your vehicle.
Once you have those, loosen the lug nuts on the flat tire using a lug wrench. It’s a good idea to lower the vehicle first so that it doesn’t move around while you’re loosening the nuts. After they’re loose, place the jack under the jacking point and lift the vehicle until the flat tire is off the ground.
Next, remove the lug nuts from the flat tire and pull it off. Replace it with the spare tire and hand-tighten the lug nuts, making sure they’re lined up with the holes. Finally, lower the vehicle until the tire is resting on the ground and use the lug wrench to tighten the nuts as much as you can.
With these steps, you’ll be well on your way to getting back on the road in no time!
Lower Vehicle
Lower Vehicle, Tighten Lug Nuts If you’re thinking of lowering your vehicle, make sure to do it properly to avoid any potential issues on the road. Lowering your car can greatly affect its performance and handling, so it’s important to make sure everything is adjusted accordingly. One important step in this process is tightening the lug nuts properly.
Lug nuts secure the wheels to the car, so if they’re not tightened enough or are too loose, your wheels can come off while driving, which can lead to a dangerous situation. Make sure to use a torque wrench to tighten them to the manufacturer’s recommended torque specifications. It’s also a good idea to recheck them after driving a short distance to ensure they’re still tight.
By taking the time to properly lower your vehicle and tighten the lug nuts, you can enjoy a sleeker look to your car while also ensuring your safety on the road.
Tighten Lug Nuts
Tighten Lug Nuts Now that you’ve raised your vehicle to change a tire, you must lower it to the ground before proceeding to the final step of tightening your lug nuts. Remember to tighten them in a star pattern, using a lug wrench or socket wrench and applying firm pressure until they are snug. It’s crucial to ensure that the lug nuts are tightened correctly, or you risk the wheel falling off while you’re driving.
To make sure they’re tightened properly, use a torque wrench to tighten them to the manufacturer’s recommended torque specifications. With this tool, you’ll be able to tighten the lug nuts to the exact amount specified, ensuring your safety on the road. Don’t forget, always double-check your lug nuts before hitting the road to avoid any accidents.
By taking the time to tighten your lug nuts correctly, you’ll have peace of mind and enjoy a safe driving experience.
Check Tire Pressure
If you own a Ford Explorer, it’s important to know how to change a tire in case of a flat or blowout. Before attempting to change a tire, make sure you have the necessary tools, including a spare tire, lug wrench, and jack. After loosening the lug nuts, use the jack to lift the vehicle off the ground and fully remove the lug nuts to take the punctured tire off.
While you have the tire off, take the opportunity to check the tire pressure of the spare tire to ensure it’s properly inflated. If it needs more air, use a tire pressure gauge to add air until it’s at the recommended level. Checking tire pressure is crucial for maintaining vehicle safety and prolonging tire life.
Don’t forget to also check the tire pressure of your remaining tires as well, as they can affect handling and fuel economy. By staying vigilant and regularly checking your tires, you can ensure a safe and comfortable driving experience.
Verify Proper Pressure
Checking the tire pressure on your vehicle regularly can help you avoid a plethora of problems while driving. It’s important to verify the proper pressure in all four tires, including the spare, to ensure they are adequately inflated. The recommended tire pressure varies depending on the vehicle, so it’s essential to consult your vehicle owner’s manual to determine the optimal pressure for your particular make and model.
You can also find this information on the inside of the driver’s side door or on the tire itself. Not only does maintaining the proper tire pressure provide a safer driving experience, but it can also help you save on fuel costs as tires that are underinflated can decrease fuel efficiency and even cause tire wear and tear. A simple check of the tire pressure, either manually or with a digital gauge, can prolong the life of your tires, enhance handling, improve braking performance and, ultimately, keep you and your passengers safe on the road.
Therefore, always verify your tire pressure regularly and keep them inflated to the recommended specifications to ensure safety while driving.
Conclusion
Changing a tire on a Ford Explorer may seem like a daunting task, but with a little bit of know-how and determination, anyone can do it. Just remember to always use your trusty spare tire as a backup, keep your tools handy, and don’t be afraid to ask for help if needed. And if all else fails, just remember that changing a tire is a great opportunity to show off your muscles and impress your friends with your automotive skills.
Who knows, you might even develop a new love for car maintenance and become the next auto mechanic superstar!”
FAQs
What safety precautions should I take before changing a tire on my Ford Explorer?
Before changing a tire on your Ford Explorer, make sure to park on a level surface, engage the emergency brake, and place wheel chocks on the opposite side of the tire being changed.
What tools will I need to change a tire on my Ford Explorer?
To change a tire on your Ford Explorer, you will need a lug wrench, a spare tire, a car jack, and possibly a tire pressure gauge.
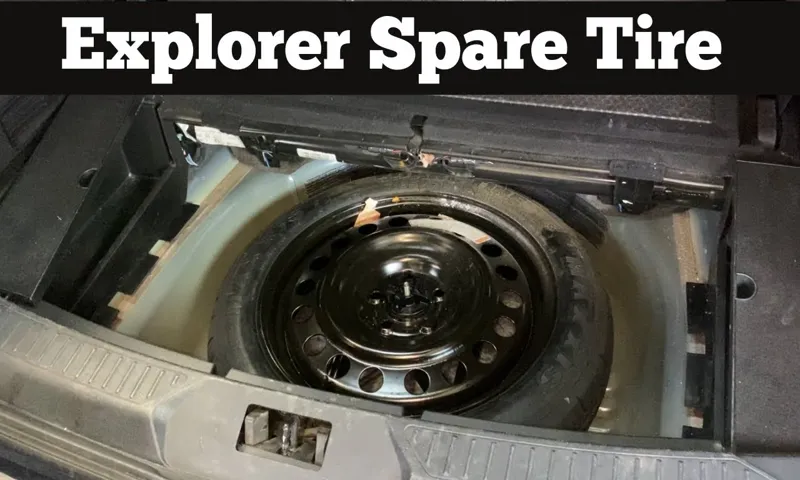
How do I locate the spare tire on my Ford Explorer?
The spare tire on a Ford Explorer is typically located under the vehicle, towards the rear. Check your owner’s manual to locate the specific location for your vehicle.
Can I change a flat tire on my Ford Explorer myself or should I call for assistance?
If you have the necessary tools and knowledge, you can change a flat tire on your Ford Explorer yourself. However, if you do not feel comfortable or safe doing so, it is recommended to call for roadside assistance.
How do I remove a flat tire from my Ford Explorer?
To remove a flat tire from your Ford Explorer, use the lug wrench to loosen the lug nuts, then use the car jack to lift the vehicle and fully remove the lug nuts. The flat tire can then be removed by pulling it straight off of the wheel studs.
How do I install a spare tire on my Ford Explorer?
Once the flat tire has been removed from your Ford Explorer, align the spare tire onto the wheel studs and hand-tighten the lug nuts. Lower the vehicle using the car jack and torque the lug nuts with the lug wrench in a star pattern.
How often should I check the tire pressure on my Ford Explorer?
It is recommended to check the tire pressure on your Ford Explorer at least once a month, as well as before long trips and after any significant changes in temperature.