
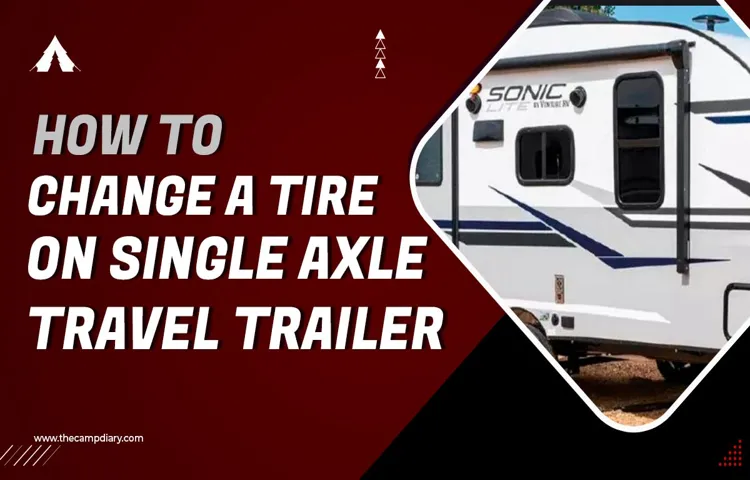
Changing a tire can be a daunting task, but even more so when you’re dealing with a single axle travel trailer. This type of trailer only has one set of wheels, which means that if one tire goes out, you’re left stranded on the side of the road until you can replace it. So, what do you do in this situation? In this blog, we will walk you through the process of changing a tire on your single axle travel trailer, step by step.
We will cover everything from preparing your trailer for the tire change to safely removing and installing the new tire. Don’t worry if you’ve never changed a tire before or if you’re not sure where to start. We’ve got you covered.
By the end of this blog, you’ll feel confident in your ability to change a tire on your single axle travel trailer and get back on the road in no time. So, let’s get started!
Table of Contents
Preparation
Learning how to change a tire on a single axle travel trailer can be a lifesaver during a long road trip. Before starting the process, it’s important to make sure you have all the necessary tools and equipment on hand, including a spare tire, jack, lug wrench, and blocks to ensure the trailer is stable. It’s also a good idea to wear gloves and eye protection for safety.
Begin by positioning the blocks behind the tires on the opposite side of the flat tire to prevent the trailer from rolling. Then, use the lug wrench to loosen the lug nuts on the flat tire, but don’t remove them yet. Next, use the jack to lift the trailer until the flat tire is off the ground.
Finally, remove the lug nuts and old tire, replace it with the spare tire, tighten the lug nuts, lower the trailer, and use the lug wrench to make sure the nuts are tightened properly. With a little preparation and practice, changing a tire on a single axle travel trailer can be an easy task to handle.
Gather Required Tools and Equipment
The first step in any project is preparation, and gathering the necessary tools and equipment is crucial. Depending on the task at hand, you may need power tools, hand tools, safety equipment, or specific tools for your trade. It’s important to do your research and make a list of everything you’ll need before you get started.
Consider renting or borrowing equipment if you don’t have it all on hand, and don’t forget to factor in the cost of any consumables like nails, screws, or adhesives. The last thing you want is to get halfway through a project and discover you’re missing a vital tool. By being prepared and having everything you need in advance, you can save yourself time, money, and stress.
Remember, the key to a successful project is taking the time to get organized and gather everything you need before you begin.
Find a Safe Area to Perform the Task
When it comes to performing a task, safety should always be a top priority. It’s essential to find a safe area to enact the task at hand to prevent any potential accidents or injuries. Whether it’s a simple home project or a complex work-related task, assessing the environment’s safety is crucial.
Before you start working on the task, do a quick scan of the area and determine whether there are any hazards or obstacles that could pose a danger. Are there any sharp objects, uneven surfaces, or loose materials that could cause you to trip or fall? If so, make sure to remove or secure them before proceeding. Safety is paramount, and taking the time to assess the area’s safety can prevent unnecessary accidents and ensure the job is completed efficiently.
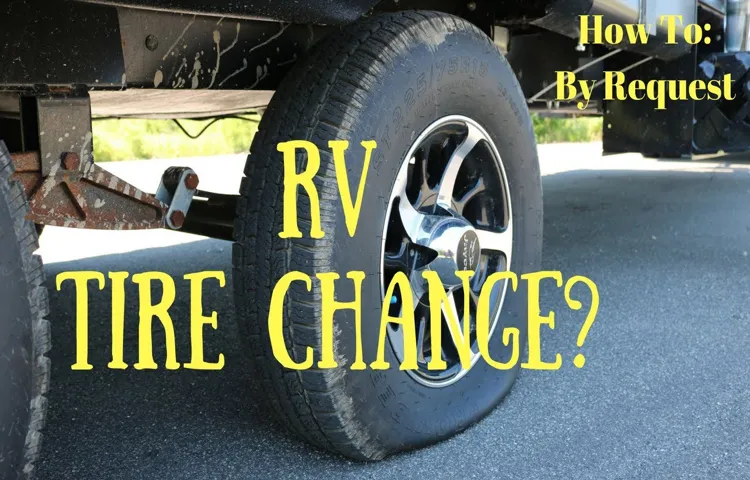
Removing the Flat Tire
Changing a tire is an essential skill for any camper or traveler, especially when it comes to single-axle travel trailers. To remove a flat tire, the first step is to safely park the trailer on level ground and engage all safety measures. Then, using a lug wrench, unscrew the lug nuts on the affected wheel (making sure not to misplace them).
Next, use a jack to lift the trailer until the flat tire is off the ground and can be easily removed. Be sure to place the spare tire back onto the same screws without overtightening the lug nuts. Once everything is securely in place, test the new tire’s inflation level and take it for a short test drive to ensure proper function before setting off on the road.
Remember, tire maintenance is crucial for safe travel, so regular inspections and replacements are necessary to minimize the risk of flat tires and other hazards.
Loosen the Lug Nuts
Loosen lug nuts is a crucial step when removing a flat tire. Before getting started, find a safe place to stop and put on your hazard lights. Then, grab your lug wrench and locate the lug nuts on the flat tire.
You’ll want to use the wrench to turn each lug nut counterclockwise, which will loosen them up. It’s important to note that you don’t need to fully remove the lug nuts at this point, just loosen them enough so that you can easily remove them later on. It’s also important to remember that lug nuts can be quite tight, so you may need to use some force to get them loose.
Once all the lug nuts have been loosened, you’re ready to move on to the next step in the process. Remember, taking your time during this step will ensure you don’t damage the wheel or make the process more difficult than it needs to be.
Lift the Trailer with a Jack
When you find yourself with a flat tire on your trailer, it’s essential to know how to remove it safely and efficiently. First, make sure you have a jack that’s compatible with your trailer’s weight capacity. Position the jack in the designated area on the trailer frame and ensure it’s stable before raising the trailer.
Then, use the jack to lift the trailer off the ground, allowing you to remove the flat tire with ease. Be sure to use lug wrenches to loosen the lug nuts, but don’t take them all the way off until the trailer is securely raised and stabilized. Once the tire is removed, replace it with a spare using the same lug nuts and tighten them with the wrench in a star pattern.
Finally, use the jack to lower the trailer and verify that the spare tire is securely in place before hitting the road again. Don’t forget to inspect your tires regularly to avoid flat tires on the road!
Remove the Lug Nuts and the Flat Tire
To remove the flat tire, the first step is to loosen the lug nuts before jacking up the car. This can be done using a lug wrench or a power wrench. Remember to turn the wrench counter-clockwise to loosen the nuts, but don’t take them off just yet.
Once the lug nuts are loose, use the jack to lift the car off the ground. It is important to remember to properly place the jack under the designated area of the car. Don’t forget to place the emergency brake on to prevent the car from rolling during the change.
Once the car is lifted high enough, the lug nuts can be taken off completely. Carefully remove the flat tire and place it away from the car. This is the perfect time to inspect the tire for any punctures or damage before putting on the spare tire.
Keep in mind that changing a tire is not a difficult task, but it is important to take all necessary safety precautions.
Mounting the Spare Tire
Changing a tire on a single axle travel trailer can be daunting, but with the right tools and knowledge, it can be done quickly and efficiently. One of the essential steps in the process is mounting the spare tire. First, locate the spare tire and ensure it’s properly inflated.
Then, using a lug wrench, remove the hubcap and loosen the lug nuts on the flat tire. Next, use a jack to elevate the trailer until the flat tire is off the ground. Remove the lug nuts and take off the flat tire.
Now it’s time to mount the spare tire. Line up the holes in the spare tire with the wheel studs and place the tire on the hub. Tighten the lug nuts hand-tight, then lower the trailer back down to the ground.
Use the lug wrench to tighten the lug nuts in a star pattern, ensuring they’re snug and secure. Remember to check the tire pressure before hitting the road. With these simple steps, you can mount a spare tire on your single axle travel trailer and get back on the road in no time.
Align the Spare Tire on the Wheel Studs
Mounting the spare tire correctly is an essential skill that every driver needs to have. It is crucial to align the spare tire on the wheel studs, or else it could cause significant damage to your car and pose a severe safety risk. To start, ensure that your car is securely parked on a flat and level surface.
Then, locate the wheel studs, which are the bolts protruding from the hub. You need to match the spare tire’s holes with the wheel studs to ensure a secure fit. If the spare tire is not aligned correctly, there is a high probability that it will come loose while driving, causing damage to your car’s suspension or causing an accident.
Always tighten the lug nuts in a star pattern, ensuring that each nut is tightened to the appropriate torque setting. By taking these precautions, you can protect yourself and your passengers while driving with your spare tire.
Hand-Tighten the Lug Nuts
When changing a tire, it’s extremely important to properly mount the spare tire and ensure that the lug nuts are securely fastened. Once you’ve removed the flat tire and put the spare in place, it’s time to start tightening the lug nuts. But remember, you should only hand-tighten the lug nuts initially! Don’t try to crank them down with all your might just yet – you’ll want to use a lug wrench or tire iron to finish tightening them properly later.
The reason for this is simple: hand-tightening allows you to center the wheel and make sure it’s flush against the hub. If you tighten the lug nuts too much too soon, you may find yourself dealing with wobbling or other problems down the road. So, take your time, and use your hands to get those lug nuts started, then tighten them the rest of the way with your wrench in a star pattern to ensure even tightening.
Remember, safety should be your top priority when changing a tire, so always take the time to do it right.
Lower the Trailer and Tighten the Lug Nuts
Mounting the Spare Tire Getting a flat tire on the road can be frustrating, especially if you’re towing a trailer. In such situations, it’s essential to replace the damaged tire with a spare one as soon as possible. One crucial step in mounting the spare tire is to lower the trailer and tighten the lug nuts correctly.
To get started, find a flat and stable surface and put the trailer on a jack stand. Then, remove the hubcap or wheel cover and loosen the lug nuts with a lug wrench, but don’t take them off completely just yet. Next, lower the trailer until the flat tire is off the ground, and it’s safe to remove the lug nuts entirely.
Carefully place the spare tire on the wheel studs, and re-tighten the lug nuts in a star pattern to ensure even tightening. Finally, lower the trailer and finish tightening the lug nuts on the ground. These simple steps can keep you and your cargo safe on the road, so make sure to learn them before you hit the highway.
Final Tips
Changing a tire on a single axle travel trailer can seem daunting, but with the right tools and knowledge, it can be a simple process. Firstly, ensure that you have a spare tire that is properly inflated and has the appropriate load rating for your trailer. Next, locate the jack points on your trailer and position your trailer jack accordingly.
Remember to always work on a level surface and use wheel chocks to prevent any unwanted movement. Remove the lug nuts, and then carefully slide the flat tire off the hub and replace it with the spare. Tighten the lug nuts in a star pattern to ensure even pressure on the tire.
Finally, lower the jack and double-check the tightness of the lug nuts before hitting the road. Remember to periodically check the condition and air pressure of your tires to prevent any future mishaps on your travels.
Check the Air Pressure of the Spare Tire
When checking the air pressure of your tires, don’t forget about the spare tire! Many people overlook this important step, but it’s crucial to ensure that your spare tire is in good condition and ready for use in case of an emergency. Make sure that the spare has enough air pressure by consulting your owner’s manual or looking for a sticker in the trunk or on the tire itself. The keyword “air pressure” plays an important role in the longevity and effectiveness of your tires.
By regularly checking the air pressure of your tires, including the spare, you can ensure that they will last longer, provide better handling, and keep you safe on the road. So, don’t forget to check the air pressure of your spare tire and be prepared for any unexpected situations that may arise while driving.
Inspect the Damaged Tire for Repair or Replacement
When dealing with a damaged tire, it’s important to carefully inspect it before deciding whether to repair or replace it. Look for any visible signs of damage, such as cuts, punctures, or bulges. Keep in mind that some damages may not be immediately apparent, like internal damage or sidewall cracks.
In some cases, it may be possible to repair the tire, but in others, replacement may be the only viable option. Remember that driving on a damaged tire can put you and your passengers at risk, as well as cause further damage to your vehicle. Always prioritize your safety and seek the help of a professional if you’re unsure about what to do.
With proper care, your tires can last longer and help you get where you need to go safely. Don’t neglect them – give them the attention they deserve! The most important thing to remember is to never ignore tire damage, as it can quickly become a much bigger and expensive problem if left unresolved. Stay safe on the road and keep those tires in good shape!
Practice Changing a Tire before Hitting the Road
Before hitting the road, it’s crucial to practice changing a tire. This is an essential skill every driver must have in case of a blowout or a flat tire. Practice locating your car’s spare tire, jack, and lug wrench to ensure you know where they are and how to use them.
You don’t want to be fumbling around with these tools on the side of the road with cars speeding by. Also, make sure that your spare tire is in good condition. It won’t do you any good if it’s flat or damaged.
An excellent way to ensure your spare tire is in good shape is to check its pressure regularly, just like you would with your car’s regular tires. Remember to loosen the lug nuts before jacking up the car, use the jack correctly, and tighten the nuts once you replace the damaged tire. By practicing changing a tire, you’ll be better prepared for the unexpected and be back on the road quickly.
Conclusion
Changing a tire on a single axle travel trailer may seem daunting at first, but with these steps, it can be done in a jiffy. Just remember to prepare, stabilize, loosen, lift, remove and replace the tire, and you’ll be back on the road in no time! Don’t forget to pat yourself on the back for learning an essential skill that will save you time, money, and possibly even a marathon race to avoid that cab from Yellow when you’re on the way to your hotel.”
FAQs
What tools do I need to change a tire on a single axle travel trailer?
To change a tire on a single axle travel trailer, you will need a lug wrench, a jack, and a spare tire.
How do I properly jack up a single axle travel trailer to change a tire?
First, find a level and stable spot to park your trailer. Then, place the jack on the frame next to the tire you are changing. Use the jack to lift the trailer until the tire is off the ground.
Can I change a tire on a single axle travel trailer alone?
It is possible to change a tire on a single axle travel trailer alone, but it is safer and easier to have someone else present to help stabilize the trailer while you jack it up.
How often should I check the tires on my single axle travel trailer?
You should check the tires on your single axle travel trailer before every trip and at least once a month during the travel season.
What should I do if I don’t have a spare tire for my single axle travel trailer?
If you don’t have a spare tire for your single axle travel trailer, you should purchase one before your next trip. It is not safe to travel without a spare tire.
How do I know when it’s time to replace the tires on my single axle travel trailer?
You should replace the tires on your single axle travel trailer when the tread depth is less than 2/32 of an inch, the sidewalls are cracked or damaged, or the tires are over six years old.
Can I use any type of tire on my single axle travel trailer?
No, you should only use tires that are rated for trailer use and have a load capacity that meets or exceeds the weight of your trailer when fully loaded.

