
If you are a homeowner who takes pride in your yard, you know how important it is to keep your lawnmower in good condition. A flat tire can be a major inconvenience, but changing it yourself is a simple task that can save you time and money. In this guide, we will cover everything you need to know about how to change a lawnmower tire.
First, we’ll discuss the tools you’ll need and how to prepare the lawnmower for the tire change. Next, we’ll walk you through the step-by-step process of removing the old tire and replacing it with a new one. We’ll even provide tips for preventing future flat tires and maintaining the overall health of your lawnmower.
Whether you’re a seasoned DIYer or a newbie looking to tackle your first lawnmower repair, this guide will give you the confidence you need to get the job done right. So, let’s grab our tools, roll up our sleeves, and get to work on changing that tire!
Table of Contents
Step One: Prepare the Lawnmower for Tire Change
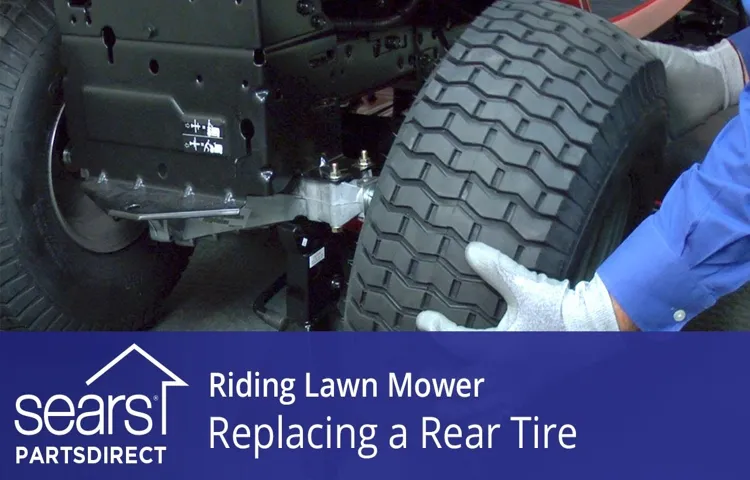
If you’re looking to replace a lawnmower tire, the first step is to prepare your lawnmower for the task. First, turn off the lawnmower and make sure it’s in a stable and level position. Next, use a jack or a block of wood to elevate the side of the lawnmower where you need to change the tire.
Once the lawnmower is elevated, use a wrench to loosen the bolts on the tire that needs to be replaced. Be sure to keep track of the bolts and the order in which they were removed. With the bolts removed, you can now slide the old tire off the axle.
It’s important to inspect the axle for any damage or debris that could cause problems down the road. With the axle clear, slide the new tire onto the axle and replace the bolts in the same order as they were removed. Be sure to tighten the bolts securely, but not so much that they damage the tire or the rim.
With the new tire in place, lower the lawnmower back to the ground and give it a quick test run to make sure everything is working smoothly. Overall, preparing your lawnmower properly is the first and most important step in changing a lawnmower tire.
Locate the tire to be changed and park the lawnmower on a level surface.
Changing the tire of a lawnmower can be a daunting task, especially if you’re new to this kind of DIY repair. But with the right preparation and some patience, you can get the job done in no time. The first step is to locate the tire that needs changing and park the lawnmower on a level surface.
You don’t want the lawnmower to tip over while you’re working on it, so make sure that the surface is as flat as possible. Finding the tire that needs to be changed may seem obvious, but if you’re not sure, check your manual or take a closer look at each tire to see if there are any visible signs of damage or wear. Once you’ve located the tire and parked your lawnmower, you’re ready to move on to the next step.
Remember to take your time and be patient, and soon enough, you’ll have a fully functioning lawnmower once again.
Disconnect the spark plug wire to prevent accidental starting.
When it comes to changing the tires on your lawnmower, safety should always be the first priority. The very first thing you should do before working on your lawnmower is to disconnect the spark plug wire. This will prevent any accidental starting of the engine while you are working on it.
It’s a simple step, but one that is often overlooked. Taking this small precaution can prevent serious injury or damage to your lawnmower. You don’t want the engine to suddenly start while you’re changing a tire, right? So, it’s better to be safe than sorry and disconnect that spark plug wire.
Always remember, safety first!
Use a jack or block of wood to prop up the lawnmower.
When it’s time to change the tires on your lawnmower, the first step is to prop it up using a jack or block of wood. This will help you safely remove the old tires and replace them with new ones. It’s important to make sure that the lawnmower is stable and won’t tip over while you’re working on it.
Once the lawnmower is propped up, you can move on to removing the old tires. Don’t forget to wear gloves and eye protection to keep your hands and eyes safe from debris and sharp edges. With a little bit of patience and careful attention to detail, changing the tires on your lawnmower is a straightforward task that can be done in just a few easy steps.
So don’t put it off any longer – get started today and enjoy a smoother, more efficient mowing experience!
Step Two: Remove the Old Tire
Now that you have gathered the necessary tools, it’s time to remove the old tire. Start by deflating the tire completely and use the lug wrench to loosen the lug nuts. Be sure to loosen all of them, but don’t take them off just yet.
Then, use your hands to lift the mower’s frame, and place it on a sturdy jack stand to make removing the wheel easier and safer. Once the mower is stable, remove all the lug nuts and gently slide the wheel off the axle. If the tire is stuck, use a rubber mallet to tap the wheel until it loosens up.
Finally, discard the old tire or save it for recycling, and move on to installing the new one. With this step complete, you’re one step closer to a fully functional lawnmower!
Use a wrench or pliers to remove the cap or cover.
Removing an old tire might seem daunting, but it’s actually a straightforward process. The second step in changing a tire is removing the old one. Before beginning, make sure your vehicle is on a flat surface and the emergency brake is engaged.
To remove the old tire, use a wrench or pliers to take off the cap or cover over the lug nuts. Then, use the wrench to loosen each lug nut, turning them counterclockwise. Be sure to loosen them enough to spin them off by hand.
Once all of the lug nuts are removed, slowly lift the old tire off the wheel hub. Set the old tire aside and retrieve the spare tire. It’s important to note that spare tires are not meant for long-term use and should only be used to travel a short distance until you can replace the original tire.
Deflate the tire and use a tire tool to break the bead.
Removing an old tire can seem daunting, but with the right tools and technique, it can be a breeze. The second step in this process is to deflate the tire using a tire tool to break the bead. Breaking the bead refers to separating the tire from the rim, which is necessary to remove the old tire.
This process involves pushing down on the tire tool and moving it around the circumference of the tire to loosen the seal between tire and rim. Once the bead is broken, the tire can be removed by gently pulling it off the rim. It’s essential to make sure the tire is deflated entirely before breaking the bead to avoid injury.
Using a tire tool might seem intimidating, but with a little practice, it becomes an effortless task. In no time, you’ll be ready to move on to the next step: installing your new tire.
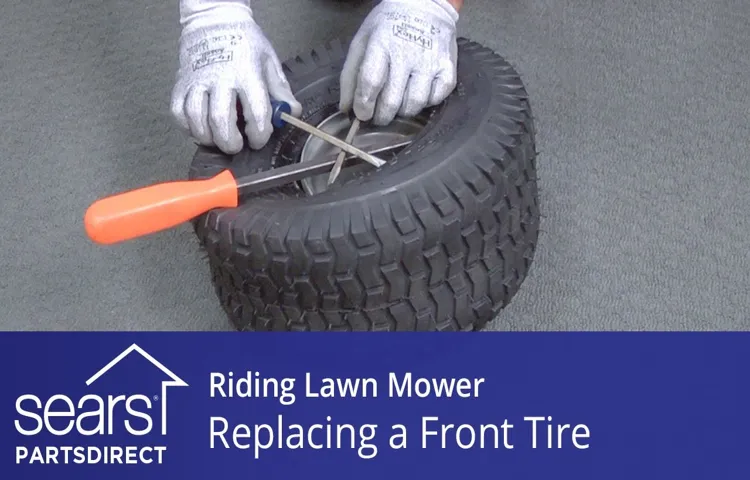
Remove the tire from the rim with tire irons or pry bars.
Removing the old tire from your vehicle is the second step in the tire replacement process. To get started, you will need a set of tire irons or pry bars. These tools will help you remove the tire from the rim without causing any damage.
The first thing you should do is locate the valve stem and remove the valve core to release any air remaining in the tire. Once the tire is deflated, you can begin the process of prying off the old tire from the rim. It’s essential to work your way around the tire carefully, using the tire irons to push the bead over the edge of the rim.
Be patient and take your time to avoid damaging the rim or the tire. Once the bead is entirely loosened from the rim, use the irons to remove the tire completely. Remember to take precautions and wear gloves to avoid injury while handling the tire irons.
By following these steps, you can safely remove the old tire and move on to installing the new one.
Step Three: Install the New Tire
Now that you’ve removed the old tire from your lawnmower, it’s time to install the new one. Before proceeding, make sure to check the sidewall of the new tire for proper inflation and load rating. Begin by lining up the valve stem with the rim hole and push the tire onto the rim.
Use a tire iron to work the tire over the rim, starting at the valve stem and working your way around the tire. Once the tire is fully seated on the rim, use a tire gauge to ensure the proper inflation pressure. This step is crucial to ensure that the tire will perform at its best and last longer.
Make sure to replace the valve stem cap and tighten the lug nuts evenly to ensure proper balance. You’re now ready to go back to mowing your lawn with a brand new tire. Changing a lawnmower tire may seem daunting, but with the right tools and a little bit of patience, you can do it yourself and save some money in the process.
Lubricate the bead and rim with soapy water or tire lube.
When it’s time to install a new tire, it’s important to lubricate the bead and rim with either soapy water or tire lube in order to make the process smoother. Without lubrication, the tire can be difficult to install and may even become damaged during the process. Soapy water is a great option because it’s easy to obtain and won’t damage the tire or rim.
Tire lube is another option, and although it may be a little messier, it does provide better lubrication and reduces the risk of the tire slipping during installation. Be sure to apply the lubricant to both the bead and rim evenly and thoroughly to ensure a proper fit. By doing this, you’ll be able to install your new tire quickly and easily, without any unnecessary hassle or frustration.
Place the tire on the rim and inflate it to the recommended PSI.
Installing a new tire is an essential part of maintaining a safe and reliable vehicle. The third step in this process is installing the tire onto the rim and inflating it to the recommended PSI. This is where many people tend to struggle, but it’s not as complicated as it may seem.
First, line up the tire onto the rim and ensure that it sits evenly all the way around. Next, use a tire iron to carefully push the tire onto the rim until it fits snugly. It’s important to note that if the tire is too loose on the rim, it can cause a dangerous blowout at high speeds.
Once the tire is securely in place, use an air compressor to inflate the tire to the PSI recommended by the manufacturer. This information can typically be found in your vehicle’s owner’s manual or on the tire itself. Overinflating the tire can cause it to wear quickly in the center, while underinflating can cause it to wear on the edges.
Therefore, it’s important to get the pressure just right for optimal performance and safety. By following these steps, you’ll have your new tire installed and ready to hit the road in no time.
Use a tire tool to seat the bead and inflate to the recommended pressure.
Installing a new tire can be a daunting task, but with the right tools and knowledge, it can be done easily and efficiently. The third step to install a new tire is to use a tire tool to seat the bead and inflate it to the recommended pressure. This step is crucial because it ensures that the tire is properly fitted onto the rim.
It is important to use a tire tool that fits the specific tire and rim size to avoid damage. Once the tool is secured around the tire and rim, inflate the tire slowly while keeping an eye on the bead. You should hear a popping sound when the bead is seated properly.
It’s important to inflate the tire to the recommended pressure listed by the manufacturer to ensure proper performance and safety. Remember that underinflated or overinflated tires can result in decreased fuel efficiency and tire wear. By following these steps, you can confidently install a new tire and hit the road with peace of mind knowing your vehicle is properly equipped.
Step Four: Reassemble the Lawnmower
Changing a lawnmower tire is a fairly straightforward process, but the last step, reassembling the machine, is an important one. After you have installed the new tire onto the lawnmower, you need to put everything back together so it is ready for action again. First, make sure that the wheel is securely attached by tightening the lug nuts with a lug wrench.
Then, reattach the washers and the cotter pin to keep the wheel in place. Finally, adjust the air pressure in the tire according to the manufacturer’s instructions, reconnect any wires or cables that you might have disconnected, and put everything back together. With the new tire properly installed and the lawnmower reassembled, you can get back to cutting grass without any worries.
Remember, this is just a general guide, and specific instructions may vary depending on your make and model, so refer to your owner’s manual for more detailed information on how to change your lawnmower tire.
Replace the cap or cover on the axle.
Replacing the cap or cover on the axle is the final step in reassembling your lawnmower. This small part, which covers the axle and helps keep the wheels in place, is often overlooked during maintenance and repairs. However, it is essential to replace it properly to ensure the smooth operation of your lawnmower.
To do this, simply slide the cover onto the axle and push it down firmly until it clicks into place. Make sure to check that it is securely fastened and not loose. It’s like putting a cap back onto a pen- if it’s not on securely, the ink will dry up and the pen won’t be usable.
Similarly, if the cover on the lawnmower axle is not secure, the wheels may end up wobbling or falling off completely. So be sure to take the extra minute to double-check that the cover is on correctly before starting up your lawnmower.
Lower the lawnmower off the jack or block of wood.
After you have successfully sharpened the blades and replaced the spark plug, it’s time to reassemble your lawnmower. Lower the lawnmower off the jack or block of wood and reattach any disconnected parts. Make sure that all screws and bolts are securely tightened and the oil and gas levels are filled.
As you reassemble the lawnmower, be mindful of the different parts and where they go. It’s always handy to keep an assembly manual or a diagram in case you need extra help in putting the mower back together. Reassembling the lawnmower can be a bit overwhelming, but with proper maintenance and care, it can last for many years.
A well-maintained lawnmower is not only beneficial to your pockets but also to the environment. So, go ahead and put the lawnmower back together and get ready for a freshly trimmed lawn!
Reconnect the spark plug wire.
Now that you’ve cleaned and checked everything, it’s time to put it all back together! So, let’s move on to Step Four: reassembling the lawnmower by reconnecting the spark plug wire. This is a crucial step as it ensures that the spark plug will receive the electrical current it needs to run. First, find the spark plug wire that you disconnected earlier.
Next, carefully line up the wire with the spark plug and press it down until it snaps into place. Make sure the wire is snug and has a tight connection, so the spark plug doesn’t come loose while mowing. Finally, give the wire a gentle tug to ensure it’s securely attached.
And there you have it! Your lawnmower should now be ready to start up and get back to work in no time. Remember to use caution when working with electrical components and follow all safety guidelines. Happy mowing!
Final Thoughts
Changing the tire on your lawnmower may seem like a daunting task, but with the right tools and know-how, it can be done easily in just a few simple steps. The first thing you’ll need to do is turn off the engine and disconnect the spark plug wire to prevent any accidental start-ups. Then, remove the old tire from the wheel hub by loosening the lug nuts with a wrench and sliding the tire off.
Next, clean the hub and install the new tire in its place, making sure the valve stem is in the correct position. Finally, tighten the lug nuts in a star pattern to ensure even distribution of pressure and reattach the spark plug wire before starting the engine. With these simple steps, you’ll be able to change the tire on your lawnmower like a pro and get back to maintaining your lawn in no time!
Changing a lawnmower tire is a simple task that can save you time and money.
Changing a lawnmower tire is a simple and easy task that can save you time and money in the long run. It’s a skill that every homeowner should acquire as it not only saves you the hassle of taking the lawnmower to a repair shop, but it also prevents you from spending unnecessary bucks. The good news is that changing a lawnmower tire is not rocket science, and you can easily do it yourself with a few basic tools.
First, ensure that you have the right tire size for your lawnmower. You can check the size on the tire sidewall, manual or online. Second, use a jack to lift the mower and remove the old tire.
Third, put the new tire in place, and tighten the lug nuts with a wrench. By changing your lawnmower tire, you can save a considerable amount of money that you would otherwise spend on repairs or replacements. This simple task allows you to keep your lawnmower in good condition, ensuring that it runs smoothly and efficiently.
Additionally, it gives you the freedom to tackle your yardwork at your own convenience without worrying about the need for a repair shop. In conclusion, changing a lawnmower tire is an effortless task that is worth learning. With the right tools and knowledge, you can skip the repair shop and save money while keeping your lawnmower in perfect condition.
This essential skill is one that every homeowner should acquire and can also be applied to other small engines. So why not try it out for yourself and see how easy it is?
Be sure to follow proper safety precautions and refer to the owner’s manual.
When it comes to using any equipment or machinery, it’s essential to prioritize safety. This applies to power tools, heavy machinery, or even something as simple as a kitchen appliance. Always read the owner’s manual and follow the manufacturer’s safety guidelines to ensure that you’re using the equipment correctly.
This not only protects you from injury or accidents but also optimizes the equipment’s performance. Be sure to use suitable personal protective equipment, such as gloves, goggles, or helmets, when necessary. You might think you know how to use a piece of equipment, but it’s always best to double-check and follow proper safety precautions.
Refer to the manual and pay attention to warning signs and labels on the equipment. Remember, taking shortcuts or being careless can lead to costly and dangerous consequences. So, take your time, be cautious, and prioritize safety first.
Conclusion
Changing a lawnmower tire may seem like a daunting task, but with a little knowledge and the right tools, it can be a breeze. Just remember to stay safe, use caution, and maybe even treat yourself to a refreshing beverage afterwards. Who said fixing things can’t be a bit rewarding? Happy mowing!”
FAQs
What tools do I need to change a lawnmower tire?
To change a lawnmower tire, you will need a jack, lug wrench, pliers, and a new tire.
How often should I change my lawnmower tires?
You should replace your lawnmower tires when they show signs of wear and tear such as cracks, blisters, or punctures.
Can I repair a punctured lawnmower tire?
Yes, you can repair a punctured lawnmower tire using a repair kit designed for lawnmower tires.
How do I know what size tire I need for my lawnmower?
You can find the tire size specifications in your lawnmower’s owner’s manual or on the sidewall of the tire.
What should I do if my lawnmower tire keeps going flat?
Check for any punctures or leaks in the tire. If you cannot find any, it may be time to replace the tire.
Can I use a car tire on my lawnmower?
No, car tires are not designed for the type of use and terrain that lawnmower tires are meant for. Always use tires specifically designed for your lawnmower.
How long does it typically take to change a lawnmower tire?
It should take no more than 30 minutes to change a lawnmower tire if you have the necessary tools and are comfortable with the process.