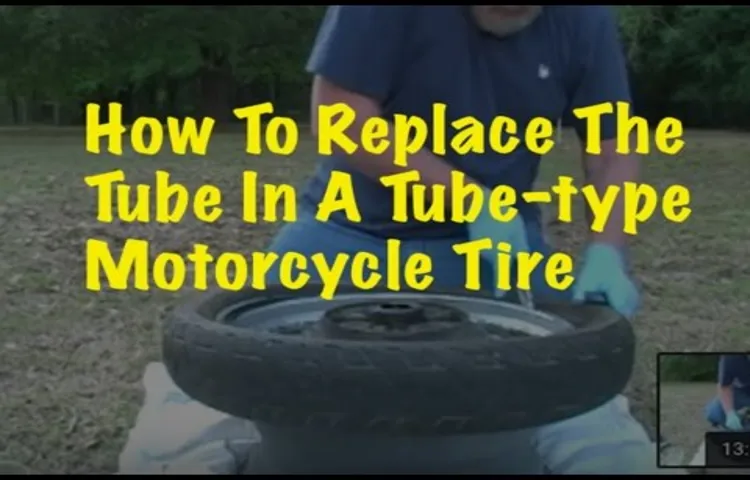
Changing a motorcycle tire can be a daunting task, especially if you’re new to it. But fear not, because with the right tools and a bit of patience, it’s a relatively simple process. In this post, we’ll be discussing how to change a motorcycle tire with a tube, step-by-step, so even those with no prior experience can do it themselves.
We’ll cover everything from removing the old tire to installing a new one, and all the nitty-gritty details in between. So let’s roll up our sleeves and get to work on changing that tire!
Table of Contents
Preparation
If you’re getting ready to change the tire on your motorcycle with a tube, there are a few important things to know before getting started. Firstly, make sure you have all the necessary tools handy, including a new tire and tube, tire levers, a valve tool, and a wrench. Next, remove the wheel from your motorcycle and deflate the tire.
Using tire levers, carefully remove the tire from the rim. Check the inside of the tire for any debris or damage, and be sure to replace the tube if there are any signs of wear and tear. Before mounting the new tire, ensure that the rim is clean and free of rust or debris to avoid any damage to the new tire or tube.
Finally, inflate the new tire to the recommended pressure and double-check that the tire is seated evenly on the rim before putting the wheel back on your motorcycle. By taking these precautions and ensuring that you have the necessary tools and equipment, you’ll be able to change your motorcycle tire with a tube quickly and easily.
Gather necessary tools and equipment
Preparing for a task is often as important as the task itself, and gathering the necessary tools and equipment is the first step towards ensuring a successful outcome. Whether you’re tackling a DIY project or a professional job, having the right tools and equipment can make all the difference. Start by assessing what tools you’ll need based on the task at hand.
This may include hand tools such as hammers, screwdrivers, and pliers, or power tools such as drills, sanders, and saws. Next, make sure you have all the necessary safety equipment, such as gloves, goggles, and dust masks, to protect yourself while working. Finally, prepare your workspace by clearing clutter and ensuring you have ample room to work.
Taking the time to gather the right tools and equipment before starting a project can save you time and frustration in the long run, and help you achieve the best possible results.
Position the bike safely and securely
Preparation is key when positioning your bike safely and securely. Before you even begin to think about where to place your bike, ensure that you have the necessary tools to secure it. A sturdy bike lock is essential, as well as a knowledge of which bike racks and other structures are safest and most secure.
Check the area for any potential hazards or obstacles that might affect the safety of your bike, such as uneven surfaces or loose fixtures. Once you have a safe and secure location in mind, make sure to position your bike correctly, with the wheels locked tightly and the frame correctly aligned. Remember, a properly positioned and secured bike is essential for both your safety and the safety of others around you.
By taking the time to prepare and position your bike properly, you can rest assured that it will remain safe and secure for as long as you need it to.
Deflate the tire and remove from bike
Before removing a bicycle tire, it’s essential to properly prepare. The first step in preparing to remove a tire is to deflate it. You don’t want to be trying to remove a tire while it’s still full of air, as it can create a lot of tension and make the process much harder.
Once the tire is deflated, you can move on to the next step, which is to remove it from the bike. To do this, you’ll need to loosen the bolts or quick-release levers that hold the wheel in place. Pay attention to how the wheel is positioned before you remove it, as this will make it easier to put it back on later.
Remember, safety first! Make sure your bike is stable before you start working on it, as you don’t want it to fall while you’re removing the tire. By following these steps, you’ll be prepared to safely and efficiently remove your bike tire and get back on the road in no time!
Removing the Tube from the Tire
Changing the tire on your motorcycle with a tube can be a bit of a challenge, but with some patience and the right tools, it can be done. One of the crucial steps in this process is removing the tube from the tire. Start by deflating the tire completely, which is essential to prevent any accidents.
Next, pry the tire off the rim using a tire iron or spoon. Once the tire is off the rim, inspect the tube for any damage or wear. If the tube is still in good condition, carefully remove it from the tire using your hands, being careful not to damage it.
Take your time and be gentle to avoid any punctures or tears in the tube. Once the tube is out, you can inspect the tire and ensure that it doesn’t have any cuts or punctures that could damage the new tube. Now that the tube is removed, you are ready to proceed with changing the tire.
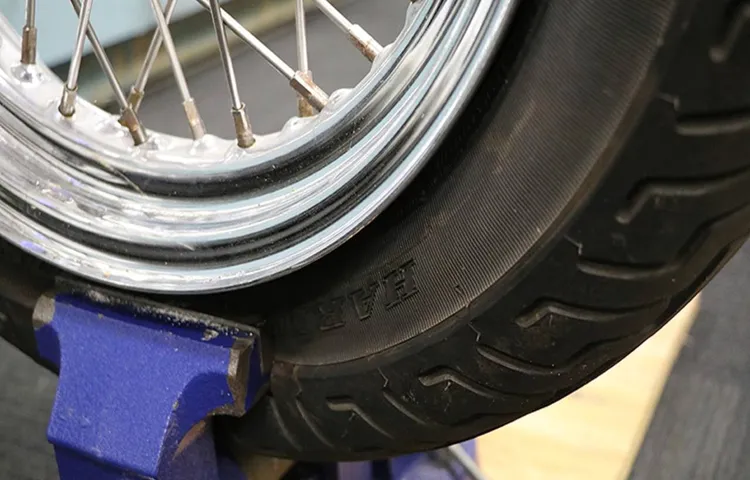
Loosen the tire bead
Loosening the tire bead is an essential step in removing the tube from the tire. To do this, you will need to use a tire lever. First, insert one end of the lever between the tire and the rim, ensuring it fits snugly around the bead of the tire.
Push down on the lever, pulling the tire towards you and away from the rim until you hear a popping sound. Repeat this step on the other side of the tire and work your way around the entire circumference of the tire, using two tire levers if necessary, until the entire bead is loose. By loosening the tire bead, you can easily slide out the tube from the tire, allowing you to inspect it for any potential punctures or damage.
Remember to work carefully and slowly to avoid damaging the tire or the tube. With this step done, you can now move on to the next stage of the tire repair or replacement process.
Remove the valve stem and core
Removing the tube from your tire can seem like a daunting task, but with a few simple steps, you can do it easily and quickly. The first step is to remove the valve stem and core. To do this, you will need a valve core remover tool, which you can purchase at your local bike shop.
Once you have the tool, locate the valve stem on the inner side of the tire. Use the valve core remover to unscrew the core from the stem and remove it completely. This step is important because it allows the air in the tube to escape so that you can easily remove it from the tire.
With the core removed, you can now push the tire inward with your thumbs to create a gap between the tire and the rim. You can then use your fingers to gently pull the tube out of the tire. Once the tube is removed, inspect it for any damage or punctures.
If there are no issues, you can reinsert it into the tire or replace it with a new tube. With the tube removed and replaced, reinsert the valve core into the stem and screw it in tightly. Pump up the tire to the recommended pressure and you’re ready to go! Remember to handle the valve stem and core with care as they are small, delicate components that can easily be damaged.
Remove one side of the tire bead
Removing the tube from your bike tire can be intimidating, but with a few simple steps, it can be done quickly and easily. One of the first things you need to do is remove one side of the tire bead. This involves using a tire lever to pry the bead away from the rim and pulling the inner tube out.
It’s important to be gentle while doing this, as you don’t want to damage the inner tube or the tire itself. This step can take a bit of practice, but once you get the hang of it, it becomes much easier. Make sure to work your way around the tire, slowly prying and pulling until the entire bead is free.
Once you’ve removed one side of the bead, you can then easily remove the inner tube. Be sure to inspect the tube thoroughly for any damage or punctures before reassembling the tire. Overall, removing the tube from your bike tire is a simple task that any cyclist can handle.
With a little bit of practice and patience, you can quickly and easily remove the tube, inspect it for damage, and reassemble your tire in no time. So, don’t be intimidated by the process – give it a try and you’ll see just how easy it can be!
Remove the tube from the tire
When it comes to fixing a flat tire, removing the tube from the tire is an essential step. Start by deflating the tire completely and using a tire lever to pry the tire away from the wheel rim. Once you have removed the tire from the rim, carefully pull out the inner tube from inside the tire.
It’s important to be gentle as you remove the tube to avoid damaging it or causing further punctures. Check inside the tire for any debris that may have caused the puncture, and make sure to remove it. Just like that, you’ve successfully removed the tube from the tire! Remember, taking your time and being careful is key to making sure that your tire is repaired correctly and safely.
Replacing the Tube and Tire
When it comes to changing the motorcycle tire with a tube, it can be a daunting task for some riders. However, with the right tools and a little bit of patience, it can be done relatively easily. First, remove the wheel from the motorcycle and release all the air from the tire.
To remove the tire from the rim, use tire irons and work your way around the rim. Once the tire is off, remove the tube and check it for any damage. If the tube is in good condition, it can be reused, but if it’s damaged, it’s best to replace it.
Installing a new tire onto the rim can be tricky, but with some practice, it will become easier. When placing the new tube into the tire, make sure there are no twists or kinks. Use tire irons to put the tire back onto the rim, and carefully inflate the tire.
Once the tire is properly seated on the rim, inflate it to the recommended pressure and reattach the wheel to the motorcycle. Remember to always double-check your work before going on a ride to ensure safety. With a little bit of practice and patience, changing a motorcycle tire with a tube can become an easy task.
Insert the new tube into the tire
After removing the damaged tire and tube, it’s time to replace them with new ones. The first step is to insert the new tube into the tire. To do this, start by inflating the new tube a little bit to give it some shape.
Then, place the valve stem through the hole in the rim and push the tube into the tire, starting at the opposite end of the valve stem. As you work your way around the tire, make sure the tube is fully seated inside the tire and not twisted in any way. Be careful not to pinch the tube between the tire and rim as you insert it.
Once the tube is in place, tuck the tire back onto the rim, starting at the valve stem end and working around to the opposite side. Make sure the tire is evenly seated on the rim before inflating it to the recommended pressure. With this simple step-by-step process, you’ll have your new tube and tire installed and ready to roll in no time!
Position the tire on the rim and inflate partially
When it comes to replacing a tube and tire, one important step is positioning the tire on the rim and inflating it partially. This is crucial to ensure that the tire sits properly on the rim without any twists or kinks. To begin, place one side of the tire onto the rim, starting at the valve stem.
Then, work your way around the rim, gently pushing the tire onto the rim using your hands. Once one side of the tire is on the rim, it’s time to partially inflate it. This helps to create a bit of tension and makes it easier to fit the remaining part of the tire onto the rim.
Be sure not to overinflate the tire at this stage; you only need to add enough air to create a slight bulge in the tire. By positioning the tire on the rim correctly and inflating it partially, you can ensure that the tire is properly seated and ready to be completely inflated and ridden on. So whether you’re fixing a flat or simply replacing an old tire, don’t skip this important step!
Align the tire bead and inflate to recommended pressure
Replacing the Tube and Tire When it’s time to replace a tire and inner tube on a bike, it may seem like a daunting task, but with the right tools and a bit of knowledge, it can be done easily. The first step is to remove the wheel from the bike and lay it flat on the ground. Next, use a tire lever to pry the tire away from the rim and remove the old inner tube.
It’s a good idea to inspect the tire for any signs of wear or damage while it’s off the bike. Once the tire and tube have been removed, the new tube can be inserted into the tire and then placed back onto the rim. It’s important to make sure that the tire is aligned with the rim correctly and that the bead of the tire is evenly seated on both sides of the rim.
To do this, start at the valve stem and work your way around the tire, pushing the bead into the rim with your fingers. Finally, it’s time to inflate the tire to the recommended pressure. Using a bike pump with a pressure gauge is the easiest way to ensure that the tire is inflated to the right amount.
It’s important not to overinflate the tire, as this can cause a blowout while riding. Once the tire is inflated, give it a quick spin to make sure it’s running true and adjust as necessary. By following these steps, replacing a bike tire and inner tube is a simple process that can be done in just a few minutes.
Check for leaks and adjust pressure as needed
When it comes to keeping your bike running smoothly, checking for leaks and adjusting tire pressure is crucial. A small leak can quickly become a big problem, causing a flat tire or even a dangerous blowout. That’s why it’s important to inspect your bike’s tires regularly and replace them if you notice any issues.
To replace a tire, start by removing the wheel from your bike and then removing the old tire and tube. Be sure to inspect the rim and spokes for any damage, as these can cause problems with your new tire. Once you’ve cleaned and inspected everything, it’s time to install the new tube and tire.
When putting the new tire on, make sure to align it with the valve stem and then work it onto the rim evenly. Don’t use any tools to force the tire onto the rim, as this can cause damage. Once the tire is on, check for any bulges or unevenness in the tire and adjust it as needed.
Finally, inflate the tire to the recommended pressure (which can be found on the sidewall of the tire) using a tire pump or compressor. Be careful not to over-inflate the tire, as this can cause it to burst. With the new tire and tube properly installed and inflated, your bike will be ready to hit the road once again.
Final Steps
Changing a motorcycle tire with a tube might seem like a complicated task, but it can be easily done with the right tools and knowledge. Once you’ve successfully removed the old tire, you’ll need to prepare the new one by lubricating the beads and lining up the valve stem with the rim hole. Before fully inflating the new tube, it’s important to check for any twists or kinks to avoid flats or a blowout.
Once you’ve double-checked everything, inflate the tire to the correct pressure and secure it back onto the motorcycle. It’s also helpful to do a quick test ride to ensure that the tire is properly seated and functioning before hitting the road. With some practice, changing a motorcycle tire with a tube will become an easy and quick task.
Reinstall the valve stem and core
After checking that the valve stem is clean and free from any debris, it’s time to reinstall it. Start by sliding the valve stem back into the rim hole carefully. Make sure that it’s sitting correctly and straight before tightening the locking nut and washer.
Use a valve core tool to insert the valve core back into the valve stem. Tighten it firmly, but don’t overdo it. Over-tightening can cause the valve core to break or strip the threads in the valve stem.
Once that’s done, inflate the tire to the recommended pressure using a tire gauge. You’re almost there! Finally, check the valve stem and core to ensure there are no leaks. If there aren’t any leaks, you’re good to go.
If there are, tool the valve core to tighten it a bit more or check for any damage to the valve stem or core. Remember, a properly installed valve stem and core are crucial in maintaining proper tire inflation, increasing tire life, and improving gas mileage.
Reinstall the tire onto the bike
Now that you have your newly repaired or replaced tire, it’s time to get back on the road! Before you begin, make sure you have all the necessary tools, including a tire lever, pump, and wrench. Start by lining up the valve with the hole on the rim and pushing the tire onto the rim, starting from the opposite side of the valve. Once the tire is in place, use your tire lever to carefully pry the tire over the rim until the last bit of the tire is tight.
Be careful not to puncture the tube! Now it’s time to inflate the tire to the recommended pressure. Check your bike manual or the tire itself for the right PSI level and use a pump to fill the tire. Finally, use your wrench to tighten the nuts or bolts that hold the wheel in place.
Once everything is secure, give the wheel a spin to make sure it’s centered and aligned properly. And with that, you’re ready to hit the road again!
Double check air pressure and ride test
One of the final steps in ensuring a safe and smooth ride on your bike is to double check the air pressure in your tires and take it out for a test ride. This may seem like a small detail, but it can greatly affect your comfort and performance on the road. Checking the recommended air pressure for your particular bike and tire type is crucial to maintaining proper traction and avoiding potential accidents.
Once you’ve topped off any under-inflated tires, take your bike for a spin to test out its responsiveness and handling. This will give you a good idea of whether you need to make any further adjustments before hitting the open road. So, before embarking on any adventure, make sure to pay attention to the pressure in your tires and give your bike a test ride to ensure optimal performance.
Conclusion
Changing a motorcycle tire with a tube may seem like a daunting task, but with a little bit of patience and know-how, you can become a pro in no time! Just remember to gather all the necessary tools, take your time, and don’t be afraid to ask for help if you need it. After all, it’s better to have a new tire than to be stuck on the side of the road with a flat! So go ahead, channel your inner mechanic, and get ready to give your tire a new lease on life!”
FAQs
What tools do I need to change a motorcycle tire with a tube?
You will need a tire iron set, a rim strip, a tube, and a tire pressure gauge.
How do I know if my motorcycle tire needs to be changed?
You should check for signs of wear such as cracks, bulges, or uneven tread wear. Additionally, if you experience frequent flats, it may be time to replace the tire.
Can I change a motorcycle tire with a tube myself, or do I need to take it to a professional?
It is possible to change the tire yourself, but it can be difficult and time-consuming. If you are uncertain about your ability to do so safely, it is best to take it to a professional.
How do I remove the old tire from the rim?
Use a tire iron to pry the tire off the rim, starting at the valve stem. Work around the tire, prying a small section at a time until the tire is fully removed.
How do I install the new tire on the rim?
First, make sure the tire is properly aligned with the rim. Then, use a tire iron to work the tire onto the rim, starting at the valve stem. Work your way around the tire, using the tire iron to push the tire onto the rim.
How do I properly inflate the tire once it is installed?
Use a tire pressure gauge to check the recommended pressure for your specific tire. Inflate the tire to the recommended pressure, being careful not to overinflate.
How do I check that the tire is properly balanced?
Use a motorcycle stand to lift the wheel off the ground. Spin the wheel and observe if it wobbles or vibrates. If it does, it may need to be rebalanced.