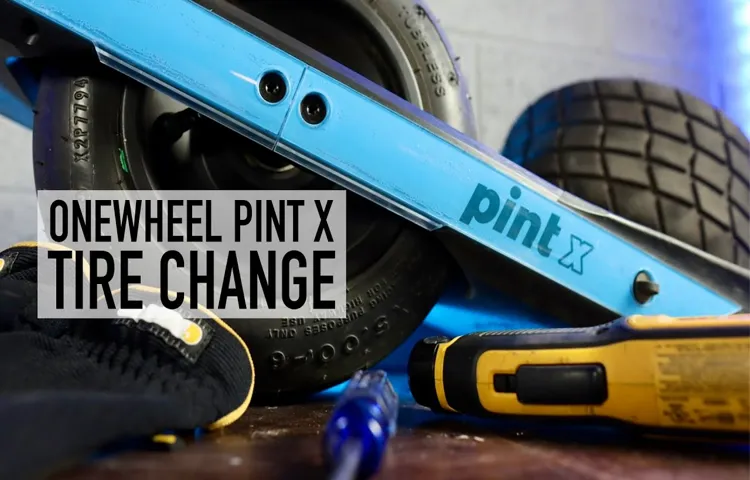
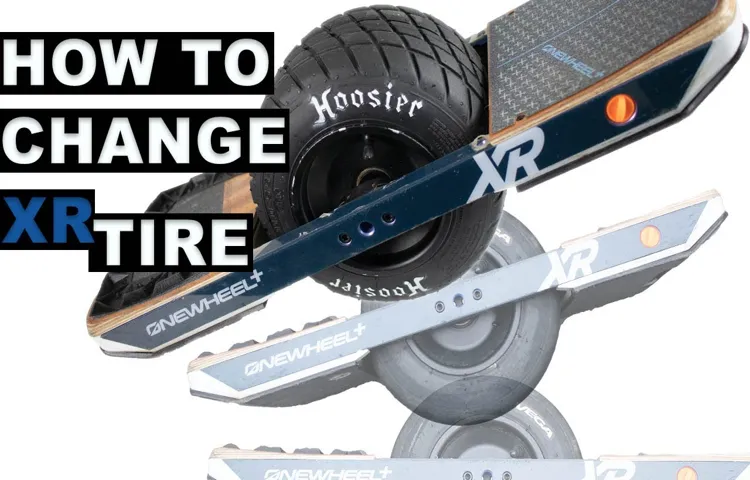
Tackling a DIY project on your Onewheel can be both exciting and daunting. Whether you’re a seasoned rider or just starting to explore the world of Onewheeling, changing your tire can seem like a complicated task. But fear not! By following some simple steps, you can easily swap out your old tire for a fresh new one.
This not only gives your Onewheel a refreshing update but also improves the overall riding experience and safety. In this blog, we’ll guide you through the entire process of changing your Onewheel tire and share some tips to make the job a breeze. So let’s get started!
Table of Contents
What You’ll Need
If you’re an avid Onewheel rider, there will come a time when you need to replace the tire. Changing the tire requires a bit of effort, but it’s definitely doable with a few tools and a bit of patience. Here’s what you’ll need: a tire lever or pry bar, a valve core remover, a bike pump, and a new tire.
It’s essential to get a tire that’s compatible with your Onewheel and has the correct sizing. Once you have everything ready, it’s time to get started. Changing a Onewheel tire can be a bit tricky, but with some know-how and elbow grease, you’ll have a fresh set of wheels in no time.
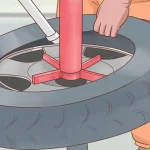
First, you need to remove the old tire. Use the tire lever or pry bar to pry the tire away from the rim. Once you’ve separated the tire from the rim, remove the valve core with the valve core remover.
This will release all the air from the tire. Pull the tire off the rim and discard the old tire. Next, it’s time to install the new tire.
Carefully place the new tire onto the rim, making sure that it fits snugly. Insert the valve core back into the valve stem and screw it back on. Use a bike pump to inflate the tire to your desired pressure.
Double-check that the tire is properly seated on the rim, and you’re good to go! In conclusion, changing a Onewheel tire requires some specialized tools, but it’s not rocket science. All you need is a tire lever or pry bar, a valve core remover, a bike pump, and a new tire. As long as you follow the steps carefully, you’ll be able to replace the tire in no time.
– A compatible replacement tire
When it comes to replacing a tire on your vehicle, there are a few things that you’ll need to consider. First and foremost, you’ll need to make sure that you’re choosing a compatible replacement tire for your specific make and model. This means taking a look at the tire size, load capacity, speed rating, and other important factors to ensure that the new tire will work well with your existing wheels and suspension system.
You’ll also want to consider the type of driving that you’ll be doing and what kind of weather conditions you’ll be facing. For example, if you’ll be doing a lot of off-road driving or live in an area with frequent snow and ice, you may want to opt for a tire with more aggressive tread patterns and better traction. When it comes to actually purchasing the replacement tire, you can either buy it online or from a local tire shop.
Just be sure to shop around and compare prices to ensure that you’re getting a fair deal. In some cases, you may also want to consider investing in a higher-quality tire that will last longer and perform better in a variety of conditions. By taking the time to choose a compatible replacement tire and considering all of the important factors, you can ensure that your vehicle remains safe, responsive, and reliable on the road for years to come.
– Tire levers
Tire levers are essential tools for any cyclist. They are small, lightweight, and easy to carry, but they can save you a lot of trouble if you get a flat tire. You will need a set of tire levers to remove the tire from the rim without damaging either one.
There are many different types of tire levers available on the market, so you should choose the ones that work best for you. Look for levers that are durable, easy to use, and comfortable to grip. Some levers are made of hard plastic, while others are metal or composite materials.
You can also choose between single and double-ended levers. Single-ended levers are fine for most cyclists, but double-ended levers are better if you need extra leverage. Overall, a good set of tire levers is a crucial component of any cyclist’s toolkit.
– Wrench or socket set
If you’re planning on doing some DIY work on your car or anything else that requires some serious turning power, you’re going to need a wrench or a socket set. These tools are essential for tightening and loosening bolts of all sizes, and they come in a variety of shapes and sizes to fit your needs. Whether you’re a seasoned pro or a newbie, having a good set of wrenches and sockets in your toolkit is a must.
When selecting a wrench or socket set, make sure to choose one that fits your needs and budget. There are a variety of options available, from basic sets with just a few sizes to advanced sets with dozens of different sockets and wrenches. So, before you start your next DIY project, make sure you have the right tools for the job, including a good quality wrench or socket set.
Removing the Old Tire
If you’re looking to learn how to change a Onewheel tire, the first step is to remove the old tire. This can seem like a daunting task, but with the right tools and technique, it’s actually quite simple. Start by loosening the bolts on the wheel hub using a socket wrench, making sure to keep them in a safe place for later.
Once the bolts are removed, gently pry the tire away from the hub using a tire lever or similar tool. It’s important to be careful during this step, as the tire may be quite tight, and you don’t want to damage the rim or spokes. Once the tire is free from the hub, carefully pull it off the wheel.
Take note of the position of any bearings or spacers, as these will need to be placed back in the correct locations when you install the new tire. With the old tire removed, you’re now ready to move on to the next step in the process – installing the new tire.
– Release air pressure
When it comes time to change your vehicle’s tire, the first step is always to release the air pressure from the old tire. But why is this necessary? Well, first of all, by deflating the tire, you make it much easier to remove from the wheel, preventing any potential damage or stress. Additionally, releasing the air pressure ensures that the tire bead is properly disengaged from the rim.
If you were to simply try and remove the tire without deflating it, you risk damaging both the tire and the wheel itself. So, before you start removing your old tire, grab a tire gauge or simply press down on the tire valve with your fingernail, and let out all the air until the tire is completely flat. This will make the task of removing and replacing the tire that much easier.
– Use tire levers to remove the tire from the rim
If you’re looking to replace your bike tire, then you need to remove the old one first. But don’t worry, it’s not as difficult as it may seem. One thing you’ll need is a tire lever.
These little tools are the key to removing the tire from the rim without damaging either one. To get started, first, release all the air from your bike tire. Then, insert the tire lever between the tire and the rim, working your way around the wheel.
Use the lever to pry the tire away from the rim, and then hook it onto a spoke to hold it in place. Repeat this process, working one section of the tire at a time, until the entire tire is removed. Remember, be careful not to puncture the tube as you remove the tire.
Once the tire is off, you can start fitting the new one. With a little practice, you’ll be able to change your bike tire in no time!
– Remove the inner tube
Removing the old tire is a crucial step when conducting a tire replacement. The first thing one has to do is remove the inner tube. This process involves taking out the valve stem cap and then deflating the tire completely.
Once the tire is completely deflated, place the tire flat on the ground or workbench. To remove the tire, use the tire lever to pry one side of the tire away from the wheel rim. Ensure to give the lever enough leverage and then work it around the entire circumference of the wheel rim, pulling the tire away from the rim.
Doing this can be tough, and one might encounter some resistance from the tire sidewall. However, with enough pressure, the tire should eventually come off the rim. It’s essential to keep in mind that each tire is unique, and so it’s essential to follow the manufacturer’s instructions when removing the tire.
Installing the New Tire
If you need to replace the tire on your Onewheel, don’t worry – it’s not as difficult as you might think. First, gather all the necessary tools: a tire lever, a valve core remover, and a replacement tire (make sure it’s the right size for your Onewheel model and riding style). Next, deflate the old tire completely and use the tire lever to remove it from the rim.
Be careful not to damage the rim or tire bead in the process. Once the old tire is off, remove the valve core using the valve core remover. Then, install the new tire by placing one side of the bead onto the rim, working your way around until it’s flush, and then doing the same with the other side.
Finally, inflate the tire to the recommended PSI and replace the valve core. Congratulations, you’ve successfully changed your Onewheel tire! Remember to check the tire pressure regularly and keep your Onewheel in tip-top condition for optimal riding performance.
– Insert inner tube into tire
Once you have inspected the rim tape and determined that it’s in good condition, it’s time to mount the new tire onto your bike wheel. Insert the inner tube into the tire and work your way around the perimeter, making sure that the tube is nestled evenly inside. Don’t forget to check that the valve stem is lined up properly and pointing towards the outside.
Next, match one bead of the tire to the rim and work your way around the wheel, using your thumbs to push the other bead into place. Be careful not to pinch the inner tube between the tire and the rim as you work your way around. Once the bead is fully seated, use a tire lever to finish seating it.
Repeat this process for the second bead. Finally, inflate the tire, making sure that it is seated evenly all the way around. Now, your new tire is ready to roll on the road or trail! Remember to dispose of your old tire responsibly by taking it to a bicycle shop or recycling center.
– Align the tire and rim valvestem
When it comes to installing a new tire, one essential step is to align the tire and rim valvestem. This might seem like a small detail, but it’s crucial for several reasons. First, aligning the valvestem ensures that you’ll be able to access it easily when inflating or checking the tire pressure.
It also helps to distribute the weight of the tire and wheel evenly, which is essential for smooth and safe driving. To align the valvestem, start by lining up the dot or mark on the tire with the dot or mark on the rim. Then, gently push the tire into place, making sure that the valvestem is pointing straight up.
Once you’ve aligned the tire and rim, you can move on to mounting and balancing the tire. By taking the time to align the valvestem, you can help ensure that your new tire functions effectively and safely on the road.
– Carefully use tire lever to put tire onto rim
When installing a new tire, it’s important to be careful and take your time to ensure a proper fit. One of the trickier parts of the process is using the tire lever to put the tire onto the rim. First, make sure the tire is fully deflated and all old tire pieces are removed from the rim.
Then, line up the tire valve with the hole in the rim and start working the tire onto the rim by hand. Once you can no longer do it by hand, use the tire lever to carefully pry the tire onto the rim. Make sure to slide the tire lever along the rim and not push too hard on any one spot, as this could damage the tire or rim.
With some patience and a steady hand, you’ll have your new tire installed in no time! Just remember, always double-check for any punctures or damages before taking your bike out for a spin.
Inflating the New Tire
When it comes to changing a Onewheel tire, one task that can’t be overlooked is inflating the new tire. Whether you’re using a manual pump or an electric pump, it’s important to make sure the tire is properly inflated before hitting the road. A good rule of thumb is to inflate the tire to the recommended pressure listed on the sidewall of the tire.
This information can also be found in the Onewheel manual. Overinflating or underinflating the tire can affect the performance and stability of the board, so it’s important to be accurate with the air pressure. It can take a bit of patience and effort to reach the desired pressure, but the end result will be a smooth and safe ride.
And once the tire is properly inflated, you’re ready to get back to cruising on your Onewheel.
– Inflate tire to recommended pressure
Inflating a new tire can be a bit of a daunting task, but it’s important to ensure that your tire is properly inflated to avoid accidents or damage to your vehicle. The first step is to check your car manual or the sticker on the inside of your car door for the recommended tire pressure. Once you know the recommended psi, it’s time to inflate your tire.
Start by removing the valve cap and attach the tire gauge to the valve stem. Most tire gauges have a small button or lever to release air, so press it until the gauge reads the recommended psi. If the pressure is too low, add air until you reach the correct pressure.
Be sure to check the pressure frequently so that you don’t overinflate the tire. Overinflated tires can burst and cause serious damage to your car. So, don’t forget to check your tire pressure regularly to keep your vehicle in top condition.
– Check for proper alignment and tightness
Inflating a new tire is an incredibly important step to ensure that it performs as expected and lasts for a long time. It’s crucial to check the proper alignment and tightness of the tire before inflating it. Aligning a tire properly means that it’s mounted straight onto the rim without any twists or bends.
There should be no visible gaps between the rim and the tire during the alignment. Additionally, the tire should be tightened snugly onto the rim to prevent any air leaks. Once you’ve confirmed that the alignment is correct and the tightness is sufficient, it’s time to inflate the tire to the recommended pressure.
It’s essential to inflate the tire to the correct PSI (pounds per square inch) as listed on the tire’s sidewall. Inflating the tire to the correct PSI ensures that it will perform optimally and reduce the risk of blowouts or flats while on the road. Remember that proper inflation levels can vary depending on the tire type and the vehicle weight, so make sure to check the owner’s manual to get the specific PSI for your vehicle.
Overall, taking these measures can ultimately save you money, prevent accidents, and ensure that your new tire stays in good condition for as long as possible.
Conclusion
In conclusion, changing the tire on your Onewheel may seem intimidating, but with the right tools and a bit of know-how, it’s actually a pretty straightforward process. It’s like changing a diaper on a baby – slightly messy, but ultimately necessary for a smoother ride. So, grab a beer, put on some tunes, and get to work.
Your Onewheel will thank you for it, and who knows, you might even gain a new found appreciation for all those mechanics out there. Happy riding!”
FAQs
What tools do I need to change the tire on my Onewheel?
To change the tire on your Onewheel, you will need a tire jack, tire irons, and a valve stem removal tool.
How often do I need to change the tire on my Onewheel?
The frequency of tire changes depends on how often you ride your Onewheel and the terrain you ride on. As a general rule, you should expect to change your tire every 1500 to 2000 miles.
Can I replace the stock tire on my Onewheel with a different brand or model?
Yes, you can replace the stock tire on your Onewheel with a different brand or model, as long as it is compatible with your Onewheel model.
How can I tell if I need to change my Onewheel tire?
Signs that you may need to change your Onewheel tire include excessive wear and tear, punctures or cuts in the tire, and decreased traction on surfaces.
Is it difficult to change the tire on my Onewheel?
While changing the tire on your Onewheel can be a bit of a challenge, it is not overly difficult if you have the right tools and instructions.
Do I need to be mechanically inclined to change the tire on my Onewheel?
No, mechanical experience is not required to change the tire on your Onewheel, but having some basic understanding of how the process works can be helpful.
Can I replace just the tire on my Onewheel, or do I need to replace the entire wheel assembly?
In most cases, you can just replace the tire on your Onewheel without having to replace the entire wheel assembly, as long as the wheel itself is still in good condition.