
Changing a scooter tire can be a daunting task for any rider, especially for those who are new to the world of scootering. Whether your tire has worn out or you simply want to change it, the process requires some attention and a bit of elbow grease. However, with the right tools and some basic knowledge, changing a scooter tire is not that difficult.
In this blog post, we will guide you through the step-by-step process of changing a scooter tire, from removing the old tire to installing the new one. So, grab your toolkit, put on your work clothes, and let’s get started!
Table of Contents
Gather Tools and Materials
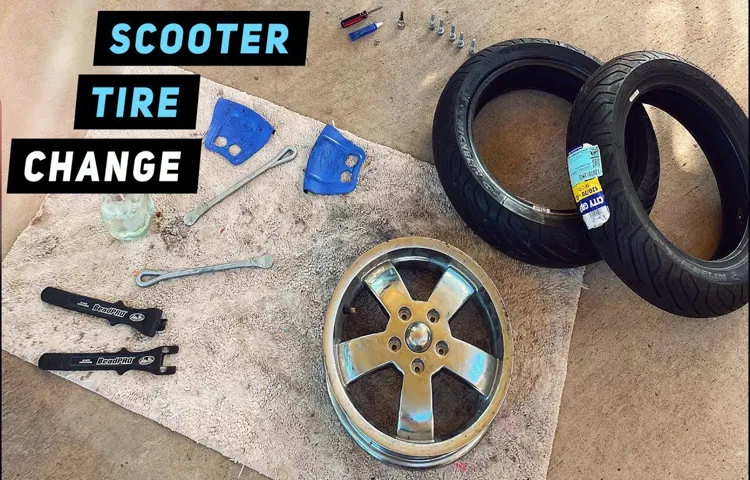
If you’re looking to change a scooter tire, the first step is to gather all the necessary tools and materials. You’ll need a jack to elevate your scooter off the ground, a wrench to remove the lug nuts that secure the wheel, and a tire iron to help pry the old tire off the rim and mount the new one. You’ll also need a new tire, which you can purchase at a local scooter shop or online.
Before you start the process, make sure you have a clear area to work in and a sturdy surface to jack up your scooter. It’s important to double-check that you have all the tools and materials you need before beginning, as it can be frustrating to have to stop mid-process to go grab something you forgot. With the right tools and preparation, changing a scooter tire is a manageable task that you can accomplish on your own.
Examples: wrench, tire lever, new tire
Gathering the right tools and materials is crucial when it comes to replacing a tire or performing any repairs. Whether you’re a seasoned mechanic or a DIY beginner, having the right tools and materials can make all the difference. The most important tool you’ll need is a wrench, which will be used to loosen the bolts on the tire.
It’s important to choose the correct size wrench to ensure a proper fit, so be sure to check the owner’s manual for the exact size needed. Another useful tool is a tire lever, which is used to help pry the tire off of the rim. A new tire will also be needed, of course, and it’s important to choose the right size and type for your vehicle.
A tire that doesn’t match your vehicle’s specifications can cause safety issues and potentially damage your vehicle. By taking the time to gather the right tools and materials, you’ll be able to safely and effectively replace your tire and get back on the road in no time.
Remove the Old Tire
Changing a scooter tire may seem like a daunting task, but it doesn’t have to be. The first step is to remove the old tire. Start by loosening the lug nuts on the wheel using a socket wrench.
Once they are loosened, use a vehicle jack to lift the scooter off the ground. Remove the lug nuts completely and slide the wheel off the axle. You may need to use some force to get it off, but be careful not to damage the axle.
Once the wheel is removed, you can take the old tire off. Use tire irons to pry the tire away from the wheel rim, working around the entire circumference. Be sure to be gentle and not damage the rim or the new tire may not fit properly.
With the old tire removed, you can move on to installing the new one.
Examples: loosen bolts, use tire lever to remove tire from rim
When it’s time to replace your bike tire, the first step is to remove the old one. To do this, you’ll need to loosen the bolts on the wheel and then use a tire lever to pry the tire away from the rim. Loosening the bolts is important as it will allow you to easily remove the wheel from the bike.
Once you have the wheel in hand, you can use a tire lever to separate the tire from the rim. This process can be a bit tricky, but with some practice, you’ll get the hang of it in no time. Remember to be patient, as rushing through this step could cause damage to your new tire or even your bike.
With the old tire removed, you can now move on to the next step of installing the new one. Just remember, take your time and be patient!
Prepare the New Tire
Changing your scooter tire can be simple and straightforward once you know how to do it. One of the essential steps in this process is preparing the new tire before fitting it onto the rim. Generally, new tires come with a lubricant coating that prevents it from adhering to the rim and making it easier to work with.
Before mounting the new tire, ensure that it is free of any dirt, debris, or foreign objects, which could damage or puncture the new tire. Check that the new tire has the correct size, specifications, and type to match the scooter manufacturer’s recommendations. Additionally, inspect the tire pressure, ensuring that it corresponds with the recommended PSI range indicated on the scooter and new tire.
Making sure that the new tire is clean, lubricated, and the right size will go a long way in ensuring that the scooter is safe and comfortable to ride.
Examples: check for any defects, add tube if necessary
Before installing a new tire, it’s essential to prepare it properly. Start by giving it a thorough check for any defects, such as bulges, cuts, or punctures in the sidewall or tread area. If you notice any defects, it’s best to return the tire to the seller or manufacturer, as these could cause further problems down the line.
Next, it’s time to add a tube if necessary. Tubes are often used in bicycle or ATV tires, and they help to prevent punctures and improve tire performance. If your new tire requires a tube, make sure to choose the correct size and thickness for your specific tire model.
It’s also a good idea to add a generous amount of talcum powder to the tube to prevent it from sticking to the inside of the tire. By preparing your new tire properly, you can extend its lifespan and prevent any potential issues on the road or trail.
Install the New Tire
When it comes to changing a scooter tire, installing the new tire is one of the most crucial steps in the process. Firstly, you need to place the new tire onto the rim of the wheel, making sure it’s aligned properly. Next, you’ll want to install the valve stem into the hole on the rim, followed by pushing the bead of the tire over the lip of the wheel.
This part may require some elbow grease, but with a bit of effort and maneuvering, it should slide over easily. Once the tire is in place, inflate it to the manufacturer’s recommended PSI using a tire pressure gauge. It’s important to double-check that the tire is seated properly and none of the beads are twisted or pinched.
Finally, inspect the tire for any visible issues before taking your scooter for a spin. With these steps, you’ll be able to change your scooter’s tire and get back to cruising in no time!
Examples: align valve stem, use tire lever to put tire onto rim
Installing a new tire can seem like an intimidating task, but with a little know-how, it is a job that can be easily accomplished. One important step in the installation process is aligning the valve stem with the hole in the rim. This may seem like a small detail, but it is crucial for the tire to be properly inflated and for the valve stem to stay securely in place.
Another helpful tip is to use a tire lever to put the tire onto the rim. This will make the process much easier and save you from unnecessary frustration and potential damage to the tire or rim. By using these simple techniques, you can install your new tire with ease and confidence.
Remember to also double-check that the tire is properly seated and inflated before hitting the road.
Inflate the Tire
When it comes to changing a scooter tire, one of the essential steps is to inflate the tire correctly. Before inflating, make sure to check the recommended tire pressure indicated in the owner’s manual. You can use a pressure gauge to measure the pressure accurately.
Overinflating or underinflating the tire can cause damage to the tire, affect the performance of the scooter and, most importantly, compromise rider safety. Once you have the correct pressure, remove the valve cap and attach the air pump to the valve stem. Pump the tire until it reaches the recommended pressure and then detach the air pump.
Be sure to check the tire pressure again after a few days to ensure it’s maintained at the recommended level. With proper inflation, your scooter tire will have better traction, be more fuel-efficient, and provide a smoother ride. Always remember to maintain the recommended tire pressure for optimal performance and safety.
Examples: use tire gauge to ensure correct pressure
One of the most important aspects of tire maintenance is ensuring that your tires have the correct amount of air pressure. This is where a tire gauge comes in handy. Using a tire gauge is simple, and can prevent a variety of issues that can arise from having underinflated or overinflated tires.
To start, find the recommended air pressure for your specific vehicle, which can be found in your owner’s manual or on a sticker located on the inside of the driver’s side door. Once you have this information, remove the valve cap on your tire and press the tire gauge onto the valve stem. A reading will appear on the gauge, indicating the amount of air pressure currently in the tire.
If the reading is below the recommended level, inflate the tire using an air compressor or air pump until the correct level is reached. Repeat this process for all four tires, as air pressure can vary from tire to tire. Properly inflated tires not only improve your car’s handling and fuel efficiency, but also extend the life of your tires, making it essential for safe driving.
Reattach the Wheel
Now that you’ve successfully removed your old scooter tire, it’s time to reattach the wheel with a new one. Before you begin, make sure that the wheel and tire are properly aligned with the axle of the scooter. If the alignment is off, you may experience difficulty when trying to reattach the wheel correctly.
Once you have ensured that the wheel and tire are aligned, you can begin reattaching the wheel. Start by lining up the holes in the wheel with the bolts on the axle. Then, use your hands to turn the nuts clockwise to begin tightening the wheel onto the axle.
Once the nuts are tightly secured, use a wrench to snug them down, ensuring that the wheel is tight and secure. Finally, give the wheel a spin to make sure that it rotates smoothly and without any wobbling. With a little bit of patience and some elbow grease, you’ll have a freshly changed scooter tire in no time!
Examples: tighten bolts, test ride the scooter
When it comes to reattaching a wheel on your scooter, it’s important to make sure that you’re taking all of the necessary precautions. First and foremost, you want to ensure that you have all of the proper tools on hand. This includes a wrench or socket that fits the bolts on your wheel.
Once you have everything ready to go, it’s time to begin the process of reattaching the wheel. Start by sliding the wheel back onto the axle, making sure that it’s properly aligned and seated. From there, you’ll want to tighten the bolts using your wrench or socket, making sure that they’re snug but not overly tight.
Once you’ve tightened all of the bolts, it’s important to give the wheel a good spin to make sure that it’s running smoothly. Lastly, take your scooter for a test ride around the block to make sure that everything feels secure and stable. By taking these steps, you’ll be able to safely and effectively reattach your scooter wheel and get back to riding in no time.
Conclusion
In conclusion, changing a scooter tire may seem daunting at first, but with a little bit of elbow grease and determination, anyone can do it. Just remember to prepare the necessary tools, deflate the tire, remove the old one, and install the new one. And if all else fails, just remember the wise words of a mechanic friend of mine: “If you can’t fix it, duct it!” Happy scooting!”
FAQs
What tools do I need to change a scooter tire?
To change a scooter tire, you will need a wrench, tire levers, a new tire, and a new inner tube (if the inner tube is being replaced).
How often should I change my scooter tire?
The lifespan of a scooter tire can vary depending on factors such as usage and terrain. It is recommended to change your scooter tire if you notice any signs of wear and tear or after every 2,000-3,000 miles of use.
Can I change the tire on my scooter myself or should I take it to a professional?
Changing a scooter tire can be done yourself with the proper tools and knowledge. However, if you are unsure or uncomfortable with the process, it is recommended to take it to a professional for assistance.
How do I know if my scooter tire needs to be replaced?
Signs that your scooter tire needs to be replaced include uneven wear, punctures, cracks, or a weak sidewall. Additionally, if you are experiencing decreased traction or handling, this may also be a sign of a worn tire.
Can I just replace the inner tube instead of the whole tire?
If the inner tube is the only issue, you can replace just the inner tube instead of the whole tire. However, if the tire itself is worn or damaged, it is recommended to replace both the tire and inner tube together.
What should I do with my old scooter tire after I replace it?
You can dispose of your old scooter tire at a local tire recycling facility or contact your local government for guidance on proper disposal methods.
Are there any special precautions I should take when changing a scooter tire?
It is important to ensure that the scooter is secure and not in motion when changing a tire. Additionally, using the proper tools and techniques can help prevent damage to the tire or scooter.