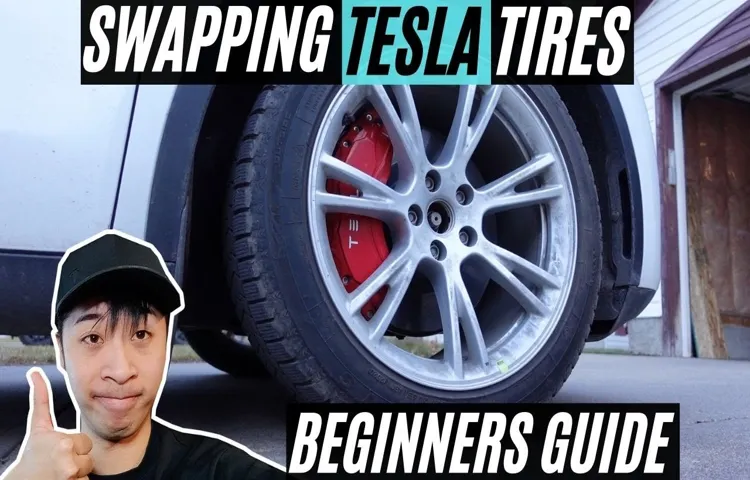
If you’re a Tesla owner, then you’re already aware of how amazing these cars are. From their incredible electric range to their sleek design, it’s no surprise that the Tesla brand is becoming increasingly popular each day. However, knowing how to change a Tesla tire is a skill that every owner should have.
Whether you get a flat tire on the road or simply need to rotate your tires, understanding the necessary steps will come in handy when you least expect it. While Tesla vehicles do come with a mobile tire repair service, sometimes you might find yourself in a situation where you need to change the tire yourself. Don’t worry, with a bit of knowledge and the right tools, you can easily do it yourself.
In this blog post, we’ll go through the steps of changing a tire on your Tesla, including the tools you need and some tips to make the process smoother. So, let’s dive in!
Table of Contents
Safety Precautions
If you need to change a tire on your Tesla, safety should be your top priority. Before you begin, make sure your vehicle is on level ground, turned off, and the parking brake is engaged. Next, locate the appropriate jack points and lift the car using a hydraulic jack.
It’s important to note that using the incorrect jack or lifting the car incorrectly can cause damage to your Tesla or result in injury. Once the car is lifted, remove the lug nuts using a lug wrench. Be sure to keep them organized and in a safe place.
After removing the flat tire, replace it with the spare tire and tighten the lug nuts by hand. Once the car is lowered, use a torque wrench to tighten the lug nuts to the recommended torque level listed in your Tesla’s owner manual. Finally, check the tire pressure on the spare tire and replace it with a permanent tire as soon as possible.
With these safety precautions in place, changing a Tesla tire can be a straightforward and safe process, allowing you to get back on the road in no time.
Park on a flat surface
When it comes to parking your car, one of the most crucial safety measures you can take is to find a flat surface. While it may seem like common sense, many people underestimate just how important it is to park on level ground. If your car is parked on an incline or decline, it’s at risk of rolling away and causing a serious accident.
Not to mention, it can also damage your car’s suspension and transmission over time. So, before you turn off the engine and step out of the car, take a quick look around to ensure that the surface is flat and stable. By taking this simple precaution, you can avoid a whole host of problems and keep both yourself and your car safe.

Turn on hazards on both the car and key fob
When it comes to driving, safety should always come first. One important safety precaution often overlooked is turning on the hazards both on the car and key fob. This simple step can make a huge difference in alerting other drivers on the road to proceed with caution.
By turning on the hazards, you are essentially communicating to other drivers that there is something out of the ordinary happening with your car. This could be due to a variety of issues such as a flat tire, a mechanical failure, or even a medical emergency. Whatever the reason may be, hazards on both the car and key fob can help to prevent accidents and promote safer driving practices.
Make it a habit to turn on your hazards whenever you think it may be necessary and ensure that you have a clear understanding of what they are and how to use them properly. By doing so, you are making the road a safer place for everyone.
Engage the parking brake
When it comes to parking your vehicle, it is crucial to take certain safety precautions. Among these precautions is engaging the parking brake. A common mistake people make is relying solely on the transmission to keep their vehicle from moving.
However, these systems can fail, especially when parked on slopes. Engaging the parking brake is an additional layer of safety that can help prevent accidents and damage to your vehicle. It’s a simple step that can save you a lot of trouble in the long run.
So, whether you’re parked on a hill or on flat ground, always make sure to engage your parking brake before stepping out of your vehicle. Your safety and that of those around you are worth the extra effort. Remember to be cautious and stay safe on the road!
Gather necessary tools (jack, lug wrench, spare tire)
When it comes to changing a tire, safety always comes first. Before you start gathering necessary tools like a jack, lug wrench, and spare tire, you need to take some safety precautions. Firstly, ensure that you are in a safe location and turn on your hazard lights to alert other drivers.
Then, make sure that your vehicle is parked on a level surface to prevent it from rolling. Always apply the parking brake to provide additional safety. In case you need to loosen the lug nuts, do it before you jack up the vehicle.
Don’t forget to wear gloves and eye protection to avoid any injuries. If possible, use wheel chocks to keep your vehicle from rolling or slipping. Keep in mind that your safety is always the top priority, so don’t hesitate to ask for help if you are unsure or uncomfortable with the process.
Remember, taking safety precautions is essential to ensure that changing your tire is as safe as possible.
Loosen the Lug Nuts
If you’re wondering how to change a Tesla tire, the first step is to loosen the lug nuts. But why is this important, you might ask? Well, the lug nuts keep the tire securely attached to the car, and you’ll need to loosen them before you can remove the tire. To do this, you’ll need a lug wrench or tire iron.
Make sure that the car is in park and the emergency brake is engaged, then use the lug wrench to turn each lug nut counterclockwise. Don’t remove the nuts completely at this stage – just loosen them enough so that you can unscrew them by hand once the car is lifted. It’s important to use the correct amount of force when loosening the lug nuts – too much and you risk damaging them, too little and they won’t budge.
With a little practice, you’ll get the hang of it and be on your way to changing your Tesla tire in no time!
Use the lug wrench to loosen the lug nuts without removing them
Loosening the lug nuts on your car’s wheels can be a frustrating task, especially if they’ve been overtightened or corroded. However, with the right tools and technique, it’s something you can easily do yourself. One of the key steps is to use the lug wrench to loosen the lug nuts without removing them.
This step is important because it ensures that the wheel doesn’t spin while you’re trying to loosen the nuts. To do this, place the lug wrench onto the first nut and turn it counterclockwise. You only need to loosen the nut enough so that it’s easy to remove by hand.
Then move on to the next nut and repeat the process until all the nuts are loose enough to remove by hand. Remember to work in a star pattern to loosen the nuts evenly and avoid damaging the wheel. Once all the nuts are loose, you can safely remove the wheel and continue with your maintenance or repair.
By following this approach, you can save yourself time and money by avoiding the need to take your car to a mechanic for something you can do yourself.
Place jack at the designated lift points
When it comes to changing a tire or doing any work under your car, the first thing you need to do is find the right spot to jack it up. Look for the designated lift points, which are usually indicated in your car’s manual or by a symbol on the chassis. Using the wrong spot to jack up your car can cause damage and risk your safety.
Once you’ve found the right spot, place your jack and get ready to start taking off your tire. But first, it’s important to loosen the lug nuts. These are the nuts that hold your tire in place and can be very tight.
To loosen them, you’ll need a lug wrench, which is often found in your car’s trunk or toolkit. Place the end of the wrench on the lug nuts and turn them counter-clockwise. It may take some effort to break their seal, so be sure to use your body weight to push down on the wrench.
And remember to only loosen the nuts, not remove them entirely just yet. By following these simple steps, you’ll be well on your way to changing your tire safely and getting back on the road.
Lift the Car
If you’re dealing with a flat tire on your Tesla, the first step is to lift the car. To do this, park your car on a flat surface, apply the emergency brake, and place a wheel chock behind the rear wheel. Locate the jack points on your vehicle, which are usually indicated by small notches on the side skirts or the owner’s manual.
Position the jack on the designated jack point and use it to lift the tire slightly off the ground. Once lifted, use a jack stand to secure the car in place and then lower the vehicle onto the jack stand. Be sure to only change your tires in a safe environment, away from traffic and with all necessary precautions in place.
With the car securely lifted, you can proceed to change your Tesla tire with confidence.
Use the jack to lift the car until the tire is slightly off the ground
When it comes to changing a tire on your car, the first step is to lift the car. This can be accomplished using a car jack. Place the car jack under a sturdy and stable part of the car, such as the frame or axle.
Make sure the jack is lined up properly and securely before beginning to lift the car. Insert the jack handle and pump the jack until the tire is slightly off the ground. It’s important to lift the car high enough to remove the old tire and install the new one, but not too high that it becomes dangerous or unstable.
It’s also important to keep the car balanced while lifting it by using the jack on a level surface and ensuring all passengers are out of the vehicle before beginning. By ensuring you have properly lifted the car, you can proceed to remove the flat tire and replace it with a new one, keeping you safe while driving on the road.
Fully remove the lug nuts and then remove the tire
If you need to remove a tire, you’ll need to lift your car first. Make sure to park on a level surface to ensure stability and safety. Grab your jack and locate the jacking points and apply the jack carefully.
Slowly raise the car until it’s high enough to comfortably remove the tire. Once you’re at that level, it’s time to remove the lug nuts completely. Make sure not to lose them and set them aside in a safe place.
Now you’re ready to take off the tire, but don’t forget to hold onto it tightly, especially if it’s a heavy wheel. As you remove the tire, keep in mind that it’s also a good time to check the tire’s overall condition. Look for any bulges or cracks in the sidewall or tread, and also inspect it for any objects that may be stuck in the rubber.
By doing this, you’ll have a chance to catch any potential tire issues before they become a bigger problem. Once you’ve finished inspecting, set the tire aside and repeat the process for any other tire removals necessary.
Install the Spare Tire
If you find yourself needing to change a tire on your Tesla, the first step is to safely pull over to a flat and level surface. Once you’ve done that, turn on your hazard lights and grab your spare tire and jack from the trunk. The spare tire should be in the foam insert on the right side of the trunk, and the jack can be found in the center console.
With your tools in hand, begin by using the jack to lift the car until the tire you want to replace is off the ground. Then, remove the lug nuts and take off the flat tire. Affix the spare tire onto the wheel and screw the lug nuts back on.
Finally, lower the car back down to the ground, tightening the wheel nuts one last time. It’s important to note that the spare tire isn’t designed for long-term use, so be sure to have your regular tire replaced as soon as possible. By following these steps, you’ll be back on the road in no time!
Align the spare tire with the holes and push onto the wheel hub
Installing a spare tire can be a daunting task, but with a little know-how, it can be done quickly and safely. Once you’ve located the spare tire, align it with the holes on the wheel hub. It’s important to make sure the holes are lined up correctly, or you may damage the wheel.
Once the holes are lined up, push the tire onto the hub until it clicks into place. Make sure the tire is snug on the hub before tightening the lug nuts. It’s crucial to inspect the tire and ensure it’s properly seated, securely fastened, and inflated to the correct pressure.
Remember to check your tire pressure regularly, especially if you frequently drive on rough terrain or in extreme temperatures. Taking care of your spare tire can be the difference between being stranded on the side of the road and getting home safely. So, be sure to maintain your spare tire’s reliability and ensure it’s always ready in case of an emergency.
Tighten the lug nuts as much as possible without using excessive force
When it comes to installing a spare tire, one of the most important steps is tightening the lug nuts. But how tight should they be? It’s important to remember that you want to tighten them as much as possible without using excessive force. What does that mean exactly? Well, you don’t want to overtighten them to the point where they’re difficult to remove later on, but you also don’t want them to be too loose, which could lead to the wheel coming off while you’re driving.
The best way to ensure that you have tightened the lug nuts to the proper level is to use a torque wrench, which will allow you to apply the proper amount of force. When in doubt, it’s always better to err on the side of caution and tighten them a bit more than you think you need to – after all, your safety is on the line!
Lower the car and remove the jack
Now that you have successfully changed your flat tire, it’s time to lower the car and remove the jack. This may seem like an easy task, but it’s important to make sure you do it correctly to avoid any accidents. To start, grab your lug wrench and use it to lower the car slowly back onto the ground.
Once the car is lowered, remove the jack and stow it away in your trunk. It’s important to make sure that your spare tire is securely in place before you hit the road. Check the lug nuts again to make sure they are tightened properly and give the tire a quick spin to make sure it’s seated correctly.
Remember to get your flat tire repaired or replaced as soon as possible, and don’t forget to give yourself a pat on the back for successfully changing your tire!
Finish Up
Changing the tire on a Tesla may seem intimidating, but it’s actually quite simple if you know what you’re doing. Firstly, ensure that the car is parked on a flat surface and engage the emergency brake. Next, use the jack and the lug wrench to lift the car up and remove the lug nuts from the tire that needs to be changed.
Once the lug nuts have been removed, slowly and carefully remove the tire from the car. Before installing the new tire, check its pressure to ensure that it meets the manufacturer’s recommended PSI. Then, line up the lug nut holes with the studs on the wheel and hand-tighten the nuts in a crisscross pattern.
Use the lug wrench to tighten the nuts until they are snug, but be careful not to overtighten them. Finally, lower the car to the ground and double-check the lug nuts to ensure that they are all tightened properly. With these simple steps, changing the tire on your Tesla will be a breeze!
Use the lug wrench to ensure the lug nuts are tightened correctly
After successfully changing your vehicle’s flat tire, it’s important to ensure the lug nuts are tightened correctly before hitting the road. This is where the lug wrench comes in handy. Use it to give each nut a final twist in a clockwise direction.
Tighten them as much as possible, but be careful not to overdo it as this can damage the threads. It’s recommended that you use your body weight to ensure the lug nuts are tightened enough. Once done, inspect the tire to ensure it’s flush against the hub and there’s no wobbling.
If everything looks good, stow away your tools and drive cautiously for the first few miles to ensure all is well. Remember, safety should always be a top priority when making any repairs on your vehicle.
Replace the wheel cover if necessary
Once you have successfully installed the new wheel cover, it’s time to finalize the task and make sure everything looks and feels good. You want to make sure that the cover is properly aligned and seated securely in place. Take a few moments to inspect the cover for any signs of damage or wear and tear.
If you notice any cracks, scratches, or other damage, it’s best to replace the cover as soon as possible. After all, a damaged cover can not only detract from the appearance of your vehicle but can also compromise the performance of your wheels. By ensuring that your wheel cover is in good condition, you can enjoy a smooth and safe ride every time you hit the road.
Keyword: Wheel Cover.
Check the tire pressure of the spare tire and replace the tire with a new one as soon as possible
Finishing up your tire check is an essential step that often gets overlooked. It involves checking the spare tire’s pressure and replacing it with a new one if needed. The last thing you want is to be stranded on the side of the road with a flat tire and an inadequate spare.
Make sure to check the spare tire’s pressure with a gauge, and if it’s low, inflate it to the recommended PSI. Additionally, inspect the tire for any cracks or signs of wear. Moreover, it’s crucial to replace the spare tire with a new one as soon as possible if it’s been used before.
An old spare could be just as unreliable as a flat tire, and driving on it could lead to dangerous situations. Remember, your safety on the road is paramount, and a well-maintained spare tire could be a lifesaver in an emergency situation. So, take a few extra minutes to finish up your tire check properly.
Your future self will thank you for it.
Conclusion
In conclusion, changing a Tesla tire is no small feat – it requires the right equipment, a bit of patience, and a healthy dose of ingenuity. But fear not, intrepid DIY-ers! With a little bit of elbow grease and a lot of determination, you too can become a tire-changing pro. Whether you’re battling a flat tire on a country road or simply looking to impress your friends with your automotive prowess, changing a Tesla tire is a skill that’s sure to come in handy.
So grab your tools, don your finest work clothes, and get ready to embark on a journey of tire-changing enlightenment. Your Tesla will thank you!”
FAQs
What tools do I need to change a Tesla tire?
To change a Tesla tire, you will need a jack, lug wrench, torque wrench, and a spare tire.
Where is the spare tire located in a Tesla?
Tesla cars do not come with a spare tire. Instead, they come equipped with a tire repair kit.
What should I do if I get a flat tire in my Tesla?
In the event of a flat tire, you can use the Tesla tire repair kit to patch the tire and re-inflate it to the recommended pressure.
Can I change a Tesla tire myself, or should I take it to a professional?
It is possible to change a Tesla tire yourself, but it is recommended to take it to a professional tire center for optimal safety and efficiency.
How often should I check the tire pressure in my Tesla?
It is recommended to check the tire pressure in your Tesla at least once a month to ensure safe and efficient driving.
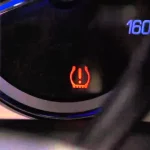
What should I do if my Tesla’s tire pressure warning light comes on?
If the tire pressure warning light comes on in your Tesla, you should check the tire pressure and inflate or repair the tire as needed.
Can I use any type of tire on my Tesla?
It is important to use the recommended tire size and type for your Tesla for optimal performance and safety. Check your owner’s manual or consult with a tire professional for guidance.