
Have you ever found yourself stranded on the side of the road with a flat tire? It’s easy to feel helpless and frustrated in that situation, but changing a tire on a rim is a skill that every driver should know. Whether it’s a popped tire or just a routine change, knowing how to change a tire can save you time, money, and a whole lot of stress. While it may seem daunting at first, changing a tire is actually a relatively simple process that can be done with just a few basic tools and a little bit of know-how.
In this blog, we’ll be walking you through the steps of changing a tire on a rim, from safety precautions to finish. We’ll also provide tips and tricks to help make the process smoother and easier. So, whether you’re a seasoned driver or a new one, it’s important to know how to change a tire on a rim.
After all, you never know when you might need to do it. So, sit back, relax, and get ready to become a tire-changing expert in no time!
Table of Contents
Gather the Necessary Tools and Materials
Changing a tire on a rim can be a daunting task, but with the right tools and materials, it can be done quickly and easily. To start, make sure you have a spare tire, a lug wrench, a jack, and wheel chocks. Wheel chocks prevent your car from rolling while you work on the tire.
Next, loosen the lug nuts using the lug wrench. Then, use the jack to raise your car off the ground, making sure to place the jack in the right spot to avoid damaging your car’s frame. Once your car is lifted, remove the lug nuts and take the flat tire off the rim.
Now, place the spare tire onto the rim and screw the lug nuts back on, making sure they are tightened evenly. Finally, lower your car and remove the jack. Congratulations, you have now changed a tire on a rim!
Wheel Chocks
If you own a car, truck, or any other vehicle that can be moved, then you may want to invest in a set of wheel chocks. These tools are designed to prevent your vehicle from rolling away when it’s stationary, which can be especially important when you’re changing a tire, working under the vehicle, or parking on a slope. To get started, you’ll need a few basic tools and materials.
First, you’ll need a set of wheel chocks. These are typically made of heavy-duty materials like rubber, plastic, or metal, and they come in a variety of sizes to accommodate different types of vehicles. You’ll also need a chock holder or bracket to keep your chocks organized and accessible.
Additionally, you’ll need a hammer to drive the chocks into place and a tape measure to ensure that they’re positioned correctly. With these tools and materials in hand, you’ll be ready to secure your vehicle and enjoy peace of mind while you work or park.
Car Jack
When it comes to changing a tire or performing routine maintenance on your vehicle, having a reliable car jack is a must-have tool. Before getting started, it’s essential to gather all the necessary tools and materials. First, ensure that you have a car jack appropriate for your vehicle’s weight and size.
You’ll also need a lug wrench to remove the lug nuts from the wheel, and a spare tire to replace the flat one. Additionally, a wheel chock or block can prevent the car from rolling while elevated, and gloves can protect your hands from dirt and grease. Safety is crucial, so make sure to read the instructions and warnings included with the car jack and understand how to use it properly.
By taking the time to gather the necessary tools and materials, you’ll be prepared to handle any unexpected road mishaps.
Lug Wrenches
When it comes to changing a flat tire on your vehicle, using the right tools and materials is essential. One of the key items you will need is a lug wrench. Before you begin, make sure you have the right size lug wrench for your vehicle’s lug nuts.
You should also gather a few other tools, such as a jack and jack stands, for safety. When selecting a lug wrench, you have a few options to choose from, such as a cross-shaped wrench or a telescoping lug wrench. The type you choose will depend on your preference and the amount of torque needed to remove your lug nuts.
Keep in mind that having a high-quality lug wrench can make the job easier and help prevent damage to your vehicle’s lug nuts. With the right tools and materials on hand, you’ll be well-prepared to handle a flat tire and get back on the road quickly and safely.
Spare Tire
When it comes to fixing a flat tire, having the right tools and materials is crucial. To start, you’ll need a spare tire that matches the size and type of the tire that needs replacing. In addition, you’ll want a lug wrench, which is used to remove the lug nuts that hold the tire in place.
A tire jack is also necessary to lift the car off the ground, making it easier to remove the tire. Other useful items include a flashlight, gloves, and a tire pressure gauge. It’s always a good idea to keep these items in your car at all times, just in case you experience a flat tire when you’re out on the road.
And remember, if you don’t feel comfortable changing a flat tire on your own, don’t hesitate to call for roadside assistance or ask for help from a nearby motorist. Stay safe on the road and don’t let a flat tire ruin your day.
Loosen the Lug Nuts
So you’ve got a flat tire and now it’s time to change it out. First things first, make sure your car is in a safe location off the road and turn on your hazard lights. Then, grab your lug wrench and find the lug nuts.
They’re usually located under a hubcap or exposed on the wheel. Use the lug wrench to loosen the lug nuts by turning them counter-clockwise. Don’t take them all the way off just yet, just loosen them enough so that you can easily remove them with your hands once the tire is off the ground.
This step is important because it can be much harder to loosen the lug nuts once the weight of the car is taken off the tire. Remember, safety first when changing a tire on the rim!
Use Lug Wrench to Loosen Nuts
If you’ve ever found yourself needing to change a tire, one of the first things you’ll need to do is loosen the lug nuts. Lug nuts are the fasteners that keep your wheel attached to the hub, and they’re typically quite tight. To loosen them, you’ll need a lug wrench.
Insert the lug wrench onto the nut and use your body weight to turn the wrench counter-clockwise. If the nut won’t budge, try standing on the wrench to get more leverage. Keep in mind that if you’re having a hard time getting the lug nuts loose, it’s important not to force things too much.
Applying too much pressure could cause the wrench to slip or could damage the lug nut itself. With a little patience and persistence, however, you should be able to loosen the lug nuts and get your tire changed in no time.
Do not Remove Nuts Yet
When it comes to changing a flat tire on your vehicle, there are a few important steps to follow to ensure you can do so safely. One of the first things to keep in mind is the order of operations when loosening the lug nuts on your tire. It may be tempting to immediately start removing the nuts, but it’s important to first use a lug wrench to loosen them while the tire is still on the ground.
This can be a bit of a workout, but it’s important to resist the urge to use your foot or body weight to loosen them, as this can put you at risk if the car falls off the jack or if the wrench slips. Instead, use your arms and upper body strength to slowly and steadily loosen each nut one by one, turning them counterclockwise. Once they’re all loosened, you can then safely jack up the car and remove the nuts and tire.
Remember, taking the time to do things in the right order can help prevent accidents and ensure you get back on the road safely.
Jack Up the Car
To change a tire on a rim, the first step is to safely jack up the car. Start by finding a flat, level surface and turning on the hazard lights to alert other drivers. Then, locate the jack and spare tire in the trunk.
Most modern vehicles have jacks and spare tires stored in the same compartment where the tire iron is located. Next, use the tire iron to loosen the lug nuts before you jack up the car. With all the necessary tools in place, position the jack under the car’s frame near the tire you wish to change.
Slowly crank the jack until it lifts the car off the ground, but make sure the jack is firmly in place before getting underneath the vehicle. Once the car is elevated, remove the lug nuts and the flat tire. You’re now ready to proceed with the next step of the tire-changing process.
Remember, safety is the number one priority when changing a tire, so always stay alert and be careful throughout the process.
Place Jack Under Car and Jack Up
If you need to change a flat tire or perform any kind of maintenance under your car, the first step is to jack up the vehicle. Make sure you have the right kind of jack for your car – consult the owner’s manual if you’re not sure. Place the jack in the right spot on the undercarriage, which is usually marked with an arrow or “X”.
Once you’ve found the right spot, place the jack under the car and pump the handle until the car starts to lift off the ground. Be careful not to exceed the weight limit for your jack. If you feel uncomfortable or unsure about the process, don’t hesitate to ask for help or hire a professional.
Remember, safety first!
Lift Car High Enough
When it comes to working on your car, one of the most important steps is lifting it high enough to get underneath it. To do this, you’ll need to jack up the car. Jacking up a car can be a bit intimidating, especially if you’ve never done it before.
But with the right tools and a bit of know-how, it’s actually quite simple. First things first, find a level spot to park your car. Place wheel chocks behind the rear wheels to keep the car from rolling.
Then, locate the jacking points on your car. These are specific areas on your car’s frame where the jack can be safely positioned. Once you’ve found them, position the jack under the jacking point and begin lifting the car.
Keep in mind that it’s important to lift the car high enough to work comfortably underneath it, but not so high that it becomes unstable or unsafe. Using a good quality floor jack and jack stands can help ensure your safety while working on your car.
Remove the Flat Tire
Changing a tire on a rim can be a challenging task, but with the right tools and some basic knowledge, you can do it yourself. The first step is to remove the flat tire. Begin by loosening the lug nuts with a wrench.
Make sure to loosen them in a diagonal pattern, to prevent the rim from shifting. Once the lug nuts are loosened, you can jack up the car using the factory-recommended jacking points. Remember to use jack stands for safety.
After the car is raised, remove the lug nuts and gently pull the flat tire off the hub. Be sure to inspect the tire to determine the cause of the flat and to see if it is repairable. If the tire is damaged beyond repair, it will need to be replaced with a new one.
Changing a tire on a rim may seem intimidating, but with proper knowledge and practice, it can be done efficiently.
Remove Lug Nuts Completely
Removing a flat tire can be a daunting task if you don’t know where to start. The first step is to remove the lug nuts completely. Lug nuts are what keep the tire attached to the vehicle, so you’ll need to remove them all before you can take the tire off.
To do this, use a lug wrench or a socket wrench to turn each lug nut counterclockwise. It’s essential to ensure that you turn them all the way until they come loose. Keep in mind that lug nuts may be tight, so it’s okay to use your body weight to loosen them.
Once you’ve removed all the lug nuts, you can pull the tire away from the car. Be sure to store the lug nuts somewhere clean and safe to avoid misplacing them. Removing a flat tire might seem intimidating, but with a little bit of know-how, it’s a relatively straightforward task.
Gently Remove Flat Tire
Removing a flat tire can be a daunting task, especially if you’re not familiar with the process. But don’t worry, it’s easier than you think. Firstly, ensure that your vehicle is parked on a level surface and turn on your hazard lights.
Use a lug wrench to loosen the lug nuts slightly, but do not remove them completely. Then, locate the jack points, typically found under the vehicle’s frame, and position the jack in the appropriate place. Begin to crank the jack to lift your vehicle a few inches off the ground.
It’s essential to double-check that the vehicle is securely lifted before fully removing the lug nuts and pulling the flat tire off the car. Once the flat tire is off, place it aside and install the spare tire by lining up the studs with the wheel’s holes and screwing the lug nuts back in by hand. Tighten the lug nuts with the wrench and then lower the car back to the ground.
Finally, give the lug nuts a final tightening in a star pattern to ensure they are evenly tightened. Remember, it’s vital to drive slowly after installing the spare tire and replace the flat tire or get it repaired as soon as possible to avoid any potential danger.
Install the Spare Tire
Changing a tire on your own can feel like a daunting task, but with a little bit of knowledge and practice, it can become second nature. One important step in changing a tire on a rim is installing the spare tire properly. First, you must ensure that your car is in a safe and stable position, away from any traffic or inclines.
Next, locate the spare tire and remove it from its storage space. Line up the tire with the wheel studs and push it onto the hub. Tighten the lug nuts by hand as much as possible, and then use a lug wrench to tighten them further.
Be sure to tighten them in a star pattern to ensure even pressure distribution. Finally, lower the car to the ground and use the lug wrench to give the lug nuts one final turn to ensure they are tight. Now you’re ready to hit the road with your newly installed spare!
Align and Place Spare on Rim
When you’ve located the spare tire, it’s time to install it. Start by aligning the holes on the spare tire’s rim with the bolts on the car’s hub. Then, carefully lift the spare tire onto the hub and wiggle it slightly until it’s in place.
Once it’s secure, use the lug nuts to attach the spare tire to the hub. It’s important to tighten the lug nuts in a criss-cross pattern, so that they’re evenly tightened and the tire sits on the hub properly. Don’t forget to check the tire pressure on the spare tire, as it may not be at the level recommended for your vehicle.
By following these steps, you’ll be able to safely replace a flat tire with ease.
Hand Tighten Nuts
Installing a spare tire is something most drivers will have to do at some point in their driving career. One important aspect of this process is ensuring that the nuts holding the tire in place are tightened properly. Remember, safety should always be the top priority when working with vehicles.
It’s recommended to hand-tighten the nuts as much as possible before using a wrench to finish the job. This ensures that the tire is secure and won’t come loose while you’re driving. Be sure to use the correct wrench size to tighten the nuts and check them again after driving a short distance.
By taking these precautions, you can have peace of mind knowing your spare tire is securely in place.
Lower the Car and Tighten Lug Nuts
If you need to change your tire on a rim, the first step is to safely lower your car and tighten the lug nuts. Start by finding a flat, stable surface to park your car on. Turn off your engine and engage your emergency brake.
Place a wedge or stone behind one of the tires on the opposite end of the car from the one you’re changing. Then, use your car’s jack to lift the side of the car that needs the new tire. Be sure to consult your owner’s manual for the proper jacking points on your car.
Once the car is safely elevated, remove the lug nuts on the wheel with the flat tire. Use a lug wrench to do this, turning the nuts counterclockwise. Once the nuts are off, remove the tire and put it aside.
Then, place the new tire onto the wheel hub and hand-tighten the lug nuts as much as you can. Once you’ve tightened them by hand, use the lug wrench to further tighten the nuts. Be sure to tighten them in a star pattern, working your way around the wheel until all the nuts are snug.
Double-check the tightness of each lug nut before lowering your car back to the ground.
Lower Car to Ground
Lowering your car can enhance its aesthetics and improve its handling. However, before you start adjusting the suspension, it’s essential to ensure your car is securely on the ground to avoid causing damage or injury. Start by parking your vehicle on a flat surface, engage the parking brake, and turn off the engine.
Next, use a hydraulic jack to raise the car until the wheels are slightly off the ground, and place jack stands under each corner of the car. Carefully lower the car onto the stands and ensure it’s resting securely. Now, it’s time to check the tightness of your lug nuts to make sure they’re holding the wheels fast securely.
Make sure to use a torque wrench to tight the lug nuts to the manufacturer’s specifications. If the lug nuts are loose, it can cause your wheel studs to break and put your safety at risk. Always remember that safety comes first, and it’s crucial to take the necessary precautions before modifying your vehicle.
Use Lug Wrench to Tighten Nuts
If you ever find yourself changing a flat tire or installing new wheels on your car, tightening the lug nuts is an important step that shouldn’t be taken lightly. To do this, you’re going to need a lug wrench – a tool designed specifically for this purpose. Once you have the lug wrench, you can start by lowering your car back to the ground.
It’s crucial to do this to ensure that the weight of the car is fully supported, reducing the risk of the car wobbling or falling. Once you’ve lowered the car, use your lug wrench to tighten the nuts by turning them in a clockwise direction. You’ll want to use the active voice and avoid overtightening.
Too much pressure could cause the nuts to become stripped, making them extremely difficult to remove in the future. A good rule of thumb is to tighten the nuts to around 75% of their capacity – just enough to make sure they’re securely in place. After you’ve tightened all the nuts, give them a final check to make sure everything’s good to go.
Remember, using a lug wrench is the safest and most effective way of tightening lug nuts, so make sure you have one handy whenever you’re working on your car.
Tighten Nuts in Star Pattern
When it comes to changing a tire on your car, it’s crucial to know how to properly tighten lug nuts to ensure your safety on the road. One common technique is to use a star pattern to tighten the nuts evenly. This involves tightening the nut across from the one you just tightened, like you’re tracing a star.
By doing this, you ensure that the pressure is distributed evenly across the wheel, preventing any side from becoming too loose or too tight. Once you’ve tightened all the nuts in a star pattern, it’s important to lower the car and then give the nuts one final tighten. This ensures that the tire is secure and won’t wiggle loose as you’re driving.
Remember, always double check your work and make sure the lug nuts are tightened to the proper torque before hitting the road.
Inspect Tire Pressure and Tightness
If you’re wondering how to change a tire on a rim, it’s important to know that inspecting tire pressure and tightness beforehand could save you from a potential accident. Ensuring that your tire has the proper amount of air pressure and is tightly secured to the rim could prevent it from coming loose while driving. To start, grab a tire pressure gauge and check the pressure of each tire on your car, including the spare.
Refer to your car’s manual for the recommended pressure, as over-inflated or under-inflated tires can cause uneven wear and tear, as well as decreased fuel efficiency. If the pressure is low, use an air compressor or pump to fill it to the recommended level. Next, it’s important to check the tightness of each lug nut.
Using a lug wrench, give each one a turn to make sure they’re securely tightened. Skipping this step could result in the wheel coming loose while driving, leading to a serious accident. Inspecting the tire pressure and tightness before changing a tire may seem like an extra step, but it’s crucial for safe driving.
Keep in mind that proper tire maintenance can also prolong the life of your tires and save you money in the long run. When changing a tire on a rim, remember to take the time to inspect each tire for safety.
Check Spare’s Pressure
Checking the spare tire pressure is often overlooked by many car owners. However, it is an essential maintenance task that shouldn’t be ignored. Spare tires lose pressure over time, especially when not used frequently.
Therefore, it is crucial to inspect the spare tire pressure to ensure it is inflated to the manufacturer’s recommended level. Driving with an underinflated tire can lead to reduced fuel economy, poor handling, and increased chances of a blowout. Moreover, it is crucial to inspect the tightness of the spare tire and ensure it is securely fastened.
Loose spare tires can cause vibrations, which can damage the wheel studs and even the brake system. It can also cause the tire to detach from the vehicle, leading to an accident. Therefore, make sure the spare tire is tightened to the correct torque specification.
In conclusion, checking the spare tire pressure and tightness is essential for safe driving and avoiding unnecessary car troubles. So always take the time to inspect the spare tire before embarking on a road trip or when you notice any tire issues. Remember, a well-inflated and securely fastened spare tire can save you from a lot of inconveniences, expenses and most importantly, keep you and other road users safe.
Double Check Nuts for Tightness
When it comes to maintaining the safety of your vehicle, it’s important to not overlook the small details. One crucial aspect to keep an eye on is the tire pressure and tightness of the nuts. Low tire pressure can cause uneven wear and tear on your tires, leading to potential blowouts or accidents on the road.
It’s recommended to regularly check the pressure and ensure that it matches the recommended levels for your vehicle. Additionally, it’s vital to double check the tightness of the nuts holding the tires in place. Loose nuts can cause the tire to wobble or even detach completely, causing hazardous driving conditions.
So, take a moment to inspect your tire pressure and tightness regularly to ensure a safe and smooth ride on the road. Remember, a small preventive measure can ultimately save you from unwanted roadside emergencies.
Conclusion
Changing a tire on a rim may seem daunting at first, but with a little bit of knowledge and some elbow grease, it can be a surprisingly simple task. Just remember to be patient, stay calm, and don’t be afraid to ask for help if you need it. Plus, being able to change a tire yourself not only saves time and money, but it also gives you a sense of independence and self-reliance.
So go ahead and get your hands dirty – you may just surprise yourself with what you’re capable of!”
FAQs
What tools do I need to change a tire on a rim?
To change a tire on a rim, you will need a car jack, lug wrench, and a spare tire.
How do I safely jack up my car to change a tire on a rim?
To safely jack up your car to change a tire on a rim, find a flat surface, engage your emergency brake, and use the car’s jack on the jacking points specified in the car’s manual.
Can I use a different size tire on my rim if I have a flat tire?
No, you cannot use a different size tire on your rim if you have a flat tire. Always make sure to use the same size tire for safety reasons.
How do I remove a flat tire from a rim?
To remove a flat tire from a rim, use the lug wrench to remove the lug nuts holding the tire in place. Then, gently pull the tire off the studs.
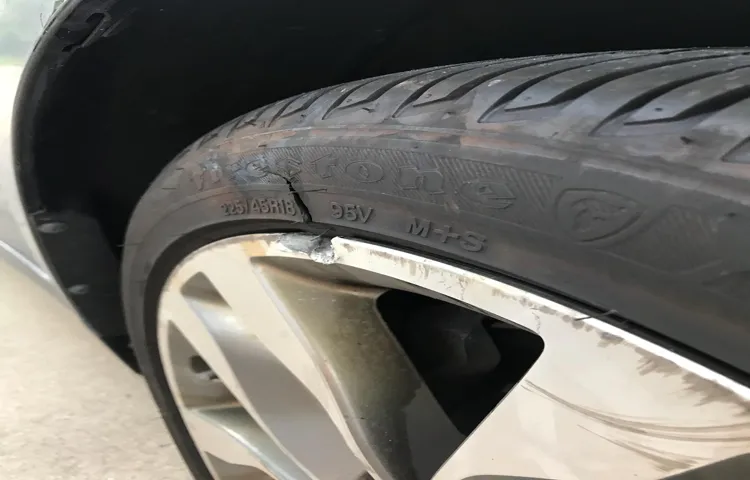
Can I repair a tire if it has a puncture on the sidewall?
No, if a tire has a puncture on the sidewall, it cannot be repaired and must be replaced.
How do I properly tighten lug nuts on my car’s rim?
To properly tighten lug nuts on your car’s rim, use a star pattern to tighten each one in sequence. Use a torque wrench to make sure each nut is tightened to the manufacturer’s specification.
How do I know when it’s time to replace my tires?
It’s time to replace your tires if they have worn down to the tread wear indicator, if they’re over six years old, or if you notice signs of damage such as cracks or bulges.