Hey there! Are you the proud owner of an Everstart 400W Power Inverter? If so, you’ve probably experienced the convenience and versatility it offers. This powerful little device allows you to charge your electronics and small appliances on the go, making it perfect for camping trips, road trips, or even just providing emergency backup power at home. But you may be wondering, how do you charge this handy inverter? Well, you’re in luck because I’m here to break it down for you.
So grab your coffee, sit back, and let’s dive into the world of charging your Everstart 400W Power Inverter.
Table of Contents
Introduction
If you’re looking for a reliable and efficient power inverter, the Everstart 400w is a great choice. This portable inverter allows you to charge and power your electronics and devices while on the go. To ensure that your Everstart 400w power inverter is ready to use whenever you need it, it’s important to properly charge it.
The easiest way to charge this power inverter is to connect it to a power source, such as your car’s battery or a wall outlet, using the included power cable. Once connected, the inverter will automatically start charging. It’s important to note that the time it takes to fully charge the Everstart 400w power inverter will vary depending on the power source and the battery level of the inverter.
So, make sure to plan ahead and allow enough time for it to charge fully before you need to use it. With a fully charged Everstart 400w power inverter, you’ll have peace of mind knowing that you can power your devices wherever you are.
Explanation of the Everstart 400W Power Inverter
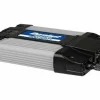
Everstart 400W Power Inverter Introduction Have you ever found yourself in a situation where you desperately needed to charge your electronic devices but couldn’t find a power outlet nearby? Whether you’re on a camping trip, road trip, or experiencing a power outage, having a reliable power inverter can be a game-changer. One such power inverter that has gained popularity is the Everstart 400W Power Inverter. In this blog post, we will explain what a power inverter is and how the Everstart 400W Power Inverter can be a convenient and reliable solution for your power needs.
So, buckle up and let’s dive into the world of portable power inverters!

Importance of Charging the Power Inverter
power inverter, charging, importance
Safety Precautions
Safety precautions are essential in various aspects of our lives, ranging from our homes to our workplaces and even when we are out and about. These precautions are designed to prevent accidents and injuries, and to ensure our well-being. Whether it’s wearing a seatbelt when driving, installing smoke detectors in our homes, or following safety protocols at work, these measures help to minimize risks and keep us safe.
Safety precautions are like a safety net that we can rely on to protect us from danger. They are the invisible shield that gives us peace of mind knowing that we have taken the necessary steps to maintain our safety. So, in this blog section, we will delve into the world of safety precautions and explore their importance in various aspects of our lives.
Charging Methods
If you’re wondering how to charge an Everstart 400W power inverter, don’t worry, it’s a straightforward process. To charge the inverter, you’ll need a power source, such as a car battery or a wall outlet. If you choose to use a car battery, you can connect the inverter directly to the battery terminals using the included cables.
Make sure to connect the positive (red) cable to the positive terminal and the negative (black) cable to the negative terminal. Once connected, you can plug the inverter into the car’s cigarette lighter socket or use the AC outlets on the inverter itself. On the other hand, if you prefer to charge the inverter using a wall outlet, you’ll need to use an AC adapter that converts the outlet’s power to a suitable level for the inverter.
Simply plug the AC adapter into the wall outlet and then connect it to the inverter’s AC input. Regardless of the charging method you choose, always make sure to follow the manufacturer’s instructions and safety guidelines to ensure proper and safe operation of the inverter.
Method 1: Using a Car Battery
charging a car battery, car battery charging methods, how to charge a car battery
Method 2: Using a Solar Panel
solar panel, charging methods
Method 3: Using a Wall Outlet
One of the most convenient and commonly used methods of charging electronic devices is by using a wall outlet. This method allows you to plug your device directly into a power source using a charging cable. It’s simple, fast, and efficient.
Whether you’re at home, at work, or in a public place, you can easily find a wall outlet to charge your device. This method is especially useful when you’re in a hurry and need to quickly charge your phone or tablet. Just find a nearby outlet, plug in your device, and let it charge.
It’s like giving your device a power boost, ensuring that it’s ready to go when you need it most. So next time you’re in need of a quick charge, look for a wall outlet and give your device the energy it needs.
Step-by-Step Guide: Charging with a Car Battery
If you’re wondering how to charge your EverStart 400W power inverter using a car battery, you’re in luck! It’s actually a fairly straightforward process. First, you’ll need to locate your car battery and ensure that your engine is turned off. Next, you’ll want to connect the positive (red) cable from the inverter to the positive terminal on your car battery.
Then, connect the negative (black) cable from the inverter to the negative terminal on the battery. Once the connections are secure, you can turn on your power inverter and start charging your devices. It’s important to note that the charging time will vary depending on the battery’s charge level and the power consumption of your devices.
Also, make sure to monitor your car battery’s charge level during this process to avoid draining it too much. So, with a few simple steps, you can easily charge your EverStart 400W power inverter using your car battery. Stay powered up no matter where you go!
Step 1: Gather the Necessary Equipment
battery, charging, car, equipment
Step 2: Connect the Inverter to the Car Battery
“So you’ve got your inverter ready to go, and now it’s time to connect it to your car battery. This step is crucial for effectively charging your devices using your car’s power. First, locate your car’s battery – it’s usually found under the hood in the engine compartment.
Then, identify the positive and negative terminals on the battery. The positive terminal is marked with a “+” sign, while the negative terminal is marked with a “-” sign. Once you’ve identified the terminals, make sure your car is turned off and remove the key from the ignition.
Next, grab your inverter and connect the positive terminal of the inverter to the positive terminal of the battery. Make sure the connection is tight and secure. Then, connect the negative terminal of the inverter to the negative terminal of the battery.
Again, ensure the connection is tight and secure. Once everything is connected, you can turn on your car and start using your inverter to charge your devices. It’s as simple as that! Happy charging!”
Step 3: Start the Engine
Starting the engine is the third step in the process of charging a car battery. Once you have connected the jumper cables correctly, it’s time to get the engine running. This step is crucial as it will provide the necessary power to the dead battery and allow it to recharge.
To start the engine, simply get into the driver’s seat and turn the ignition key or press the start button. You may need to give it a few tries, especially if the battery is completely drained. Once the engine starts, let it run for a few minutes to ensure that the battery is charging properly.
It’s important to note that while the engine is running, you should not disconnect the jumper cables as this can cause damage to both vehicles. Once you are confident that the battery has been sufficiently charged, you can turn off the engine and disconnect the jumper cables, starting with the negative cable first.
Step 4: Monitor the Charging Process
monitor the charging process, car battery
Step-by-Step Guide: Charging with a Solar Panel
If you’re looking for a step-by-step guide on how to charge your Everstart 400w power inverter using a solar panel, you’ve come to the right place! Charging your power inverter with solar power is not only eco-friendly, but it can also save you money in the long run. Here’s how you can do it: Start by ensuring that you have a compatible solar panel.
Most solar panels come with a built-in charge controller, which is necessary for charging the power inverter. Make sure that the voltage of the solar panel matches the voltage requirements of your power inverter.
Set up your solar panel in a location where it can receive maximum sunlight. Ideally, this would be an area with direct sunlight and minimal shading. You may need to adjust the angle of the solar panel to optimize its exposure to the sun.
Connect the solar panel to the charge controller using the appropriate cables. Make sure to follow the manufacturer’s instructions for proper connection.
Connect the charge controller to the power inverter using the provided cables. Again, refer to the manufacturer’s instructions for the correct connection.
Once everything is connected, turn on the power inverter and check the battery level indicator. The solar panel should start charging the battery of the power inverter.
Step 1: Gather the Necessary Equipment
solar panel charging A solar panel is a great way to harness the power of the sun and charge your electronic devices. But before you can start charging, you’ll need to gather the necessary equipment. First and foremost, you’ll need a solar panel itself.
There are many different types and sizes of solar panels available, so make sure to choose one that suits your needs. Next, you’ll need a charge controller. This device regulates the flow of electricity from the solar panel to your device, preventing overcharging and ensuring a steady and safe charge.
You’ll also need a battery to store the energy generated by the solar panel. This battery will serve as a power source for your devices when the sun isn’t shining. Finally, you’ll need the appropriate cables and connectors to connect the solar panel, charge controller, and battery together.
With these equipment in hand, you’ll be ready to start charging your devices using the power of the sun.
Step 2: Connect the Inverter to the Solar Panel
solar panel, inverter, charging
Step 3: Position the Solar Panel
In order to effectively charge your devices using a solar panel, one crucial step is to properly position the panel. The position of the solar panel determines how much sunlight it can receive and convert into energy. Ideally, you should place the panel in a location where it can receive direct sunlight for the majority of the day.
Look for an area with minimal shade and obstructions. It’s also important to consider the orientation of the panel. In the Northern Hemisphere, the panel should face south to maximize sun exposure.
Adjust the angle of the panel based on your latitude to ensure optimal positioning. By taking the time to position your solar panel correctly, you can maximize its efficiency and ensure a steady power supply for your devices.
Step 4: Monitor the Charging Process
solar panel charging process
Step-by-Step Guide: Charging with a Wall Outlet
If you’re looking for a step-by-step guide on how to charge your Everstart 400W power inverter using a wall outlet, you’ve come to the right place! Charging your power inverter is a simple process that can be done in just a few easy steps. First, make sure that your power inverter is turned off and unplugged from any devices. Next, locate the AC power input on your power inverter.
This is usually labeled and can be found on the back or side of the inverter. Once you’ve located the AC power input, plug one end of the power cord into it. The other end of the power cord should be plugged into a standard wall outlet.
Make sure that the outlet you choose is grounded and able to handle the voltage and current requirements of the inverter. Once the power cord is securely plugged in, turn on your power inverter and it should start charging. You can monitor the charging progress by checking the LED indicators on the inverter.
Once the charging is complete, you can unplug the power cord from the wall outlet and your Everstart 400W power inverter is ready to use. It’s important to note that charging times may vary depending on the current charge level of your power inverter and the capacity of the wall outlet you’re using. So, there you have it – a simple step-by-step guide on how to charge your Everstart 400W power inverter using a wall outlet.
Now you can power up your devices and enjoy the convenience of portable power wherever you go!
Step 1: Gather the Necessary Equipment
Charging your electric vehicle (EV) at home is convenient and cost-effective, and one of the easiest ways to do this is by using a wall outlet. To get started, you’ll need a few essential pieces of equipment. Firstly, you’ll need a portable charger, also known as an Electric Vehicle Service Equipment (EVSE).
This device will connect your vehicle to the electrical outlet, ensuring a safe and efficient charge. Make sure your EVSE is compatible with your vehicle’s make and model, as different EVs have different charging requirements. Additionally, you’ll need an appropriate adapter or connector to connect the EVSE to the wall outlet.
This will depend on the type of outlet you have in your home. Most EVSEs come with a standard Level 1 adapter that can be plugged into a regular household outlet. However, if you have a dryer or range outlet, you may require a different adapter.
Lastly, it’s crucial to have a dedicated circuit for your EV charging setup. This means having a separate electrical circuit that is solely dedicated to charging your vehicle. This ensures that the circuit is not overloaded and allows for safe and efficient charging.
By gathering these necessary equipment, you’ll be fully prepared to charge your EV using a wall outlet.
Step 2: Connect the Inverter to the Wall Outlet
Electric vehicle owners who want to charge their vehicles at home can easily do so by connecting the inverter to a wall outlet. This step-by-step guide will walk you through the process. Step 2: Connect the Inverter to the Wall Outlet Now that you have your inverter ready, it’s time to connect it to a wall outlet.
This is a crucial step in charging your electric vehicle at home. Find a suitable wall outlet: Look for a wall outlet that is easily accessible and can handle the load of your electric vehicle charger.
Make sure the outlet is in close proximity to where you park your car. Plug in the inverter: Take the plug end of the inverter and insert it into the wall outlet.
Ensure that it is securely plugged in to prevent any loose connections. Check the inverter display: Most inverters come with a display that shows the charging status.
Make sure it shows that the inverter is connected to a power source. Connect the inverter to the vehicle: Take the other end of the inverter cable and connect it to your electric vehicle.
There should be a designated charging port for this purpose. Start the charging process: Once the inverter is connected to both the wall outlet and the vehicle, you can start the charging process.
Step 3: Monitor the Charging Process
When it comes to charging your electric vehicle with a wall outlet, it’s important to monitor the charging process to ensure everything is running smoothly. This step-by-step guide will walk you through the process and provide tips for monitoring your charging session. First, make sure you have a dedicated outlet for your EV charger.
This will ensure the charger has its own circuit and won’t overload the electrical system in your home. Next, plug in your EV charger and connect it to your vehicle. Once plugged in, start monitoring the charging process.
Many EV chargers have an indicator light or display that shows the progress of the charge. Keep an eye on this to make sure the charge is progressing as expected. It’s also a good idea to periodically check the temperature of the charger and the charging cable.
If either feels excessively hot, it could indicate a problem and you should stop the charging process. Additionally, monitor the time it takes for your vehicle to fully charge. This can vary depending on the size of the battery and the charging speed of your charger.
By keeping an eye on the charging process, you can ensure a safe and efficient charging experience for your electric vehicle.
Conclusion
In conclusion, charging the Everstart 400W power inverter is as easy as pie…
or should I say, as easy as plugging in your favorite dessert? With its sleek design and user-friendly interface, this power inverter takes the hassle out of finding a charging solution. Just connect it to a reliable power source, sit back, and watch the magic happen as it revives itself with energy, ready to power up your devices whenever you need them. Much like a superhero, the Everstart 400W power inverter excels in its ability to charge and transform energy, turning the ordinary into the extraordinary.
Whether you’re on a camping trip, road trip, or simply looking for a backup power source at home, this nifty device has got your back…
and your devices! So, the next time your power-hungry gadgets start to drain your sanity, just remember that the Everstart 400W power inverter is here to save the day. With its reliable performance, impressive charging capabilities, and unmatched convenience, it’s no wonder it’s a top choice for tech-savvy individuals everywhere. So go ahead, unleash the power of the Everstart 400W power inverter, and let it light up your life in the most electrifying way possible.
Happy charging!”
Summary of Different Charging Methods
charging methods, wall outlet, step-by-step guide If you want to charge your electronic device using a wall outlet, you’re in luck because it’s one of the most common and convenient charging methods available. Here’s a step-by-step guide on how to do it. First, gather the necessary equipment, which includes your electronic device, a charging cable, and a wall adapter.
Next, locate an available wall outlet near you. Plug the wall adapter into the outlet, and then connect the charging cable to the adapter. Finally, connect the other end of the charging cable to your electronic device, and just like that, you’re ready to charge! It’s as simple as plugging in your device and letting it charge.
Wall outlets provide a reliable and steady source of power, making it a popular choice for charging devices like smartphones, tablets, and laptops. So, the next time your device is running low on battery, try charging it with a wall outlet – you’ll have it powered up in no time!
Best Practices for Charging the Everstart 400W Power Inverter
Everstart 400W Power Inverter, charging, wall outlet If you have an Everstart 400W Power Inverter and you’re wondering how to charge it with a wall outlet, we’ve got you covered. Charging your power inverter is a simple process that you can easily do at home. Here’s a step-by-step guide to help you out.
Step 1: Locate the charging port on your Everstart 400W Power Inverter. It is usually located on the side or the back of the unit. Step 2: Take the included charger cable and plug one end into the charging port on the inverter.
Step 3: Plug the other end of the charger cable into a standard wall outlet. Ensure that the outlet is working properly and providing electricity. Step 4: Once you have plugged in the inverter, check for any indicators on the unit that show it is charging.
Some inverters have a light that turns on to indicate that it is receiving power. Step 5: Leave the inverter plugged into the wall outlet for the recommended charging time. This can vary depending on the specific model of the Everstart 400W Power Inverter, so be sure to consult the user manual for the correct charging time.
Step 6: After the charging time has elapsed, unplug the inverter from the wall outlet. It is now ready to be used. Charging your Everstart 400W Power Inverter with a wall outlet is a convenient way to ensure that it is always powered up and ready to go.
By following these simple steps, you can quickly and easily charge your inverter at home. Remember to refer to the user manual for any specific instructions or recommendations for your particular model. Happy charging!
Final Thoughts on Charging the Power Inverter
In this final section on charging the power inverter, we will provide you with a step-by-step guide on how to charge your power inverter using a wall outlet. This method is great for when you have access to electricity and want to ensure that your inverter is fully charged and ready to use. Step 1: Start by finding a wall outlet that is in a convenient location for charging your power inverter.
Make sure that the outlet is easily accessible and has enough space for the inverter and any cords that you may need to use. Step 2: Next, locate the power cord for your inverter. This cord will typically have a standard plug on one end that can be inserted into a wall outlet, and a specific connector on the other end that is designed to fit into your inverter.
Step 3: Plug the standard plug of the power cord into the wall outlet. Make sure that the plug is securely inserted and that there are no loose connections. Step 4: Connect the specific connector end of the power cord to the corresponding input on your power inverter.
This connector will typically be labeled and may be color-coded to ensure that it is properly aligned. Step 5: Once the power cord is securely connected to both the wall outlet and the inverter, you can turn on the wall outlet. This will begin the charging process.
Step 6: Depending on the model of your power inverter, it may have an indicator light or display panel that will show the charging progress. This can be helpful for monitoring how much charge your inverter has and how long it will take to fully charge. Step 7: Allow your power inverter to charge for the recommended amount of time.
This will vary depending on the capacity of your inverter and the initial charge level. It is important to not interrupt the charging process and to let your inverter charge fully before using it. Step 8: Once your power inverter is fully charged, you can unplug it from the wall outlet and disconnect the power cord.
FAQs
How do I charge the Everstart 400W power inverter?
To charge the Everstart 400W power inverter, simply connect it to a power source using the included AC adapter or car battery cables.
Can I charge the Everstart 400W power inverter with a solar panel?
Yes, you can charge the Everstart 400W power inverter with a compatible solar panel. Just connect the solar panel to the inverter using the appropriate cables.
How long does it take to fully charge the Everstart 400W power inverter?
The charging time for the Everstart 400W power inverter depends on the power source and the remaining battery level. On average, it takes around 4-6 hours to fully charge.
Can I use the Everstart 400W power inverter while it’s charging?
Yes, you can use the Everstart 400W power inverter while it’s charging. However, keep in mind that it may take longer to charge if it’s being used simultaneously.
What is the maximum charging current for the Everstart 400W power inverter?
The maximum charging current for the Everstart 400W power inverter is 5A. Make sure to use a power source that can provide this level of current.
Is there a built-in overcharge protection feature in the Everstart 400W power inverter?
Yes, the Everstart 400W power inverter is equipped with overcharge protection to prevent damage to the battery during the charging process.
Can I leave the Everstart 400W power inverter plugged in for an extended period?
It is recommended to unplug the Everstart 400W power inverter once it’s fully charged to avoid excessive heat buildup and prolong the lifespan of the battery.