Maintaining proper tire pressure is an essential part of vehicle maintenance that should not be overlooked. Not only can it prolong the life of your tires, but it can also improve fuel efficiency and safety while driving. If you own a Ford Escape, you may be wondering how to check tire pressure on this particular vehicle.
Fortunately, it’s a relatively straightforward process that can be done with a few simple tools. In this blog post, we’ll take a closer look at the steps involved in checking tire pressure on a Ford Escape and why it is so crucial for your vehicle’s overall health. So buckle up and let’s get started!
Table of Contents
What You’ll Need
If you own a Ford Escape and are wondering how to check tire pressure on this vehicle, there are a few things you’ll need to get started. Firstly, you’ll need a tire pressure gauge – this can either be a digital or analog model, whichever you prefer. You’ll also need a tire pump, which can be electric or manual, depending on your preference.
It’s important to ensure that the tire pump is compatible with the valve stems on your Ford Escape’s tires. Additionally, you’ll need to know the correct tire pressure for your specific make and model – this information can typically be found in your owner’s manual or on a placard located on the driver’s side door jamb. Once you have all the necessary equipment and information, you can proceed with checking your Ford Escape’s tire pressure to ensure that your vehicle is performing optimally and safely on the road.
Tire pressure gauge
If you’re looking to maintain your car’s performance and safety, one of the essential tools you should have in your kit is a tire pressure gauge. It’s crucial to keep your tires inflated to the right pressure level to ensure they wear evenly and extend their lifespan. Plus, the right tire pressure can improve your gas mileage, save you money on fuel costs, and prevent accidents.
To get started, you’ll need a reliable tire pressure gauge that fits your vehicle’s tires’ specs. You can find tire pressure gauges at any auto parts store or online platform that fits your budget and needs. Investing in a quality tire pressure gauge is a smart move as it will help you avoid under-inflated or over-inflated tires, which can lead to dangerous driving conditions.
By regularly checking your tire pressure, you can ensure your car maintains its best performance and safety on the road.
Owner’s manual
When it comes to using or maintaining any new product or equipment, the owner’s manual is always the best place to start. So, when you get a new item, make sure you keep the owner’s manual in a safe and easily accessible place. Before you do anything, read through the owner’s manual carefully to familiarize yourself with the product’s functions and features.
This will save you a lot of time and effort down the line and help you get the most out of your purchase. Additionally, the owner’s manual usually contains important safety information, which you should take heed of to stay safe while using the product. So, whether it’s a new appliance or a new gadget, always start by reading the owner’s manual first.
Air compressor (optional)
If you’re looking to tackle some DIY projects or car repairs, there are a few tools that you’ll need to have on hand. One of those tools is an air compressor, although it’s not always necessary. An air compressor is a machine that forces air into a tank, which can then be used to power various pneumatic tools, such as drills, sanders, and nail guns.
While an air compressor can be incredibly helpful, it’s not always required for every project. If you’ll be using mostly hand tools or electric power tools, you may not need an air compressor. However, if you plan to work with pneumatic tools, an air compressor is a must-have.
Keep in mind that air compressors come in different sizes and shapes, so it’s important to choose one that fits your needs. Look for one with a large enough tank to handle whatever tools you’ll be using, as well as one with a strong enough motor to power those tools efficiently. Whether you decide to invest in an air compressor or not, having the right tools in your toolbox is key to any successful DIY project or car repair.
Step-by-Step Guide
Checking the tire pressure on your Ford Escape is an important maintenance task that many drivers neglect. Fortunately, it’s a simple process that you can do yourself with just a few basic tools. The first step is to grab a tire pressure gauge, which you can purchase at any auto parts store or online.
Next, locate the valve stem on each tire and remove the cap. Press the gauge onto the valve stem and take a reading of the pressure. Compare this reading to the manufacturer’s recommended pressure, which is typically listed on a sticker in the doorjamb or in your owner’s manual.
If the pressure is too low, use an air compressor to inflate the tire until it reaches the recommended pressure. Don’t forget to replace the valve stem caps and repeat this process on all four tires, including the spare. Checking your Ford Escape’s tire pressure regularly is an easy way to ensure your vehicle’s safety and performance on the road.
Step 1: Locate the Tire Pressure Information
When you’re setting out to check the pressure in your tires, the first step you need to take is to locate the tire pressure information. This information can typically be found in a few different places. Many cars will have a sticker on the driver’s side door jamb that displays the recommended PSI (pounds per square inch) for each tire.
If you can’t find the information there, you can also check your car’s manual or the tire itself. The recommended PSI may differ depending on the make and model of your car, so it’s essential to double-check the information before proceeding. It’s worth noting that it’s not uncommon for the front and back tires to require different PSI levels, so make sure you’re checking the recommended PSI for the specific tire you’re working on.
By taking the time to locate the tire pressure information, you’ll be able to ensure that you’re filling your tires to the correct pressure level, which can improve your car’s handling, extend the life of your tires, and even help save you money on gas.
Step 2: Check the Recommended PSI
When it comes to maintaining your vehicle’s tires, checking the recommended PSI is crucial. PSI stands for pounds per square inch, and it refers to the amount of air pressure in your tires. The recommended PSI can be found in your vehicle’s owner manual or on the tire information placard.
It’s essential to check the PSI regularly, as both under-inflated and over-inflated tires can have negative impacts on your car’s performance and even your safety. Under-inflated tires can decrease fuel efficiency and lifespan, while over-inflated tires can lead to poor handling and even potential blowouts. By consistently checking and maintaining your tire’s PSI, you can ensure your vehicle operates at peak performance and reduce the risk of an accident.
Remember, safety always comes first!
Step 3: Remove the Valve Cap
Now that you’ve loosened the valve stem, it’s time to move onto the next step – removing the valve cap. This small cap covers the valve and protects it from dirt and debris, but it needs to be removed to allow air to flow into the tire. Use your fingers to spin the cap off the stem in a counterclockwise motion.
If the cap is tight, you may need to use pliers to get a better grip. Just be careful not to damage the valve stem or cap in the process. Once the cap is off, set it aside in a safe place so it doesn’t get lost.
With the valve cap removed, your tire is ready for inflation. Remember to check the recommended air pressure level for your specific tire and to inflate it to that level using a tire pressure gauge. With a properly inflated tire, you’ll have a safer and more efficient driving experience, so take the time to do it right.
Step 4: Attach the Tire Pressure Gauge
Now that you’ve located your tire valve stem and unscrewed the cap, it’s time to attach the tire pressure gauge. Make sure the gauge is compatible with your vehicle’s tire pressure requirements. Most gauges will have a small metal stem that you need to insert into the tire valve stem.
Push it in securely and hold it steady for a few seconds to let the gauge get a reading of the tire pressure. The gauge will show a number that corresponds to the current pressure in the tire. If the reading is below the recommended level, it’s time to fill up the tire with more air.
If the reading is too high, you’ll need to release some air from the tire. Using a tire pressure gauge is a simple task that can prevent serious accidents and save you money in the long run. So, make sure to check your tire pressure regularly, and always keep a tire pressure gauge in your car for emergencies.
Step 5: Read the Tire Pressure Gauge
When it comes to checking tire pressure, using a tire pressure gauge is essential. The fifth step in the process is to read the gauge and determine whether the tire pressure is within the recommended range. First, remove the gauge from the valve stem and observe the reading.
The gauge will display the tire pressure in PSI (pounds per square inch). Compare the reading to the recommended pressure listed in the owner’s manual or on the sticker located on the door jamb or glove compartment. If the reading is too high, release air until it reaches the recommended pressure.
On the other hand, if the reading is too low, add air until it reaches the correct reading. It is important to note that tire pressure should be checked when the tires are cool, meaning before you start driving for the day or after you have driven less than a mile. By following these steps, you can ensure that your vehicle’s tires are at the optimal pressure for safe and efficient driving.
Step 6: Compare the Reading with the Recommended PSI
Comparing the reading of your tire pressure with the recommended PSI is crucial to ensure proper tire performance and safety. After inflating your tire, the next step is to use a tire pressure gauge and check the current tire pressure reading. Once you have the reading, you need to compare it with the recommended PSI indicated either in the vehicle owner’s manual or the tire placard located inside the driver’s door or gas cap.
If the reading is the same as the recommended PSI, you’re good to go. However, if the reading is lower or higher, you need to adjust the tire pressure accordingly. Remember that underinflated tires can affect fuel efficiency, handling, and cause premature wear and tear, while overinflated tires can lead to instability and loss of traction.
By comparing your tire pressure reading with the recommended PSI, you’re ensuring that your tires are operating at their optimal level.
Step 7: Inflate or Release Air as Needed
Inflating or releasing air as needed is an important step to ensure that your inflatable paddleboard is properly inflated and ready for use. First, you need to make sure that the valve is open before using a pump to inflate the board. Once you begin inflating, keep a close eye on the pressure gauge to make sure that you don’t overinflate the board.
If the pressure becomes too high, simply release some air using the valve until you reach the proper pressure levels. It’s also important to keep in mind that temperature changes can affect the pressure of your board, so be sure to periodically check the pressure throughout your paddleboarding session and adjust as needed. By properly inflating your paddleboard, you’ll ensure a safe and enjoyable experience on the water.
Tips and Tricks
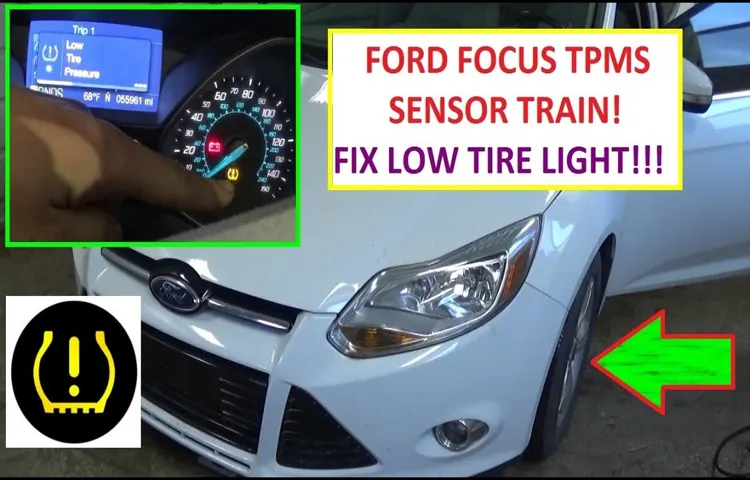
“Have you ever wondered how to check the tire pressure on your Ford Escape? It’s an important part of vehicle maintenance that ensures your safety and prolongs the life of your tires. First, you’ll need to locate the tire pressure monitoring system (TPMS) button in your car. It’s typically found on the dashboard or center console.
With the engine running, press and hold the TPMS button until the light blinks twice. Then, release the button and the system will start reading the tire pressure. Make sure to check all four tires and compare the readings to the recommended pressure listed in your owner’s manual or on the sticker located on the driver’s side door jamb.
If any of your tires are not at the recommended pressure, you can use a tire gauge to add or release air as needed. Remember to always check your tire pressure regularly, especially before long trips.”
Check tire pressure monthly
Tire pressure may seem like a small thing, but it can have a big impact on your car’s overall performance and safety. To ensure your tire pressure is always at the optimal level, it’s important to check it monthly. This task is relatively easy and can be done by anyone, with or without prior knowledge about cars.
All you need is a tire pressure gauge, which you can easily purchase at your local auto store or online. Once you have the gauge, follow the recommended pressure level indicated in your car’s manual and check all four tires. If there is any discrepancy, add or release air as needed until you reach the appropriate level.
Maintaining proper tire pressure can help extend the lifespan of your tires, improve fuel efficiency, and enhance your car’s handling. So don’t forget to check your tire pressure regularly, as it only takes a few minutes but can make a huge difference in your driving experience.
Check tire pressure when tires are cool
When it comes to maintaining your vehicle, one important aspect that often gets overlooked is tire pressure. It might not seem like a big deal, but having the correct tire pressure can greatly impact your vehicle’s performance and even your safety. One important tip to keep in mind is to always check your tire pressure when your tires are cool.
This means checking them first thing in the morning or after your vehicle has been parked for a few hours. The reason for this is that tire pressure increases as the tires heat up from driving. If you check your tire pressure after driving, you might get a higher reading than what is actually accurate.
This could cause you to over-inflate your tires, which could lead to a blowout or reduced traction. By checking your tire pressure when the tires are cool, you can ensure that you are getting an accurate reading and keeping yourself safe on the road. So, make it a habit to check your tire pressure regularly and always do it when the tires are cool.
Keep tires at optimal pressure for better gas mileage
Keeping your tires at their optimal pressure is an important yet often overlooked aspect of maintaining your vehicle’s fuel efficiency. Driving with under-inflated tires can cause increased friction and resistance on the road, which ultimately leads to decreased gas mileage. On the other hand, over-inflated tires can also negatively impact fuel efficiency and make for a bumpy and uncomfortable ride.
To stay within the recommended pressure range, check your tire pressure regularly and adjust accordingly, especially before long road trips. Doing so not only saves you money on gas in the long run, but also promotes safer driving by improving traction and stability on the road. So the next time you get behind the wheel, remember that keeping your tires properly inflated is an easy and effective way to improve your vehicle’s gas mileage.
Final Thoughts
Checking the tire pressure of your Ford Escape is crucial for maintaining the optimal performance of your vehicle. As suggested by the manufacturer’s recommendation, check your tire pressure once a month using a tire pressure gauge. The first step is to unscrew the valve cap, then place the gauge onto the valve stem and press down firmly until you hear a hissing sound.
Be sure to take note of the reading and repeat the process on all four tires. If your tire pressure levels are too low, inflate them to the recommended PSI level. Keep in mind that overinflated tires can be just as harmful as underinflated ones.
So it’s important to adhere to the recommended pressure levels stated on the tire information label, usually located inside the driver’s door jamb or within the owner’s manual. By regularly checking your tire pressure, it can help improve your vehicle’s fuel efficiency, extend tire life, and increase overall safety while driving.
Conclusion
In conclusion, checking the tire pressure on your Ford Escape is a quick and simple task that can save you time and money in the long run. Remember to use a reliable tire pressure gauge, check your pressure regularly, and adjust to the recommended pressure listed in your owner’s manual. Keeping your tires properly inflated not only improves your fuel efficiency but also ensures a smoother and safer ride.
So, don’t let your tire pressure go rogue, be a savvy driver, and keep those tires in tip-top shape!”
FAQs
What is the recommended tire pressure for a Ford Escape?
The recommended tire pressure for a Ford Escape is usually around 30-35 PSI.
Can I rely on the tire pressure monitoring system in my Ford Escape?
While the TPMS can provide an estimate of tire pressure, it’s always recommended to manually check tire pressure for accuracy.
How often should I check the tire pressure on my Ford Escape?
It’s recommended to check tire pressure on a Ford Escape at least once a month or before going on a long road trip.
What tools do I need to check the tire pressure on my Ford Escape?
You’ll need a tire pressure gauge and an air compressor or air pump.
Where can I find the recommended tire pressure for my specific Ford Escape model?
You can find the recommended tire pressure for your specific Ford Escape model in the owner’s manual or on the driver’s side door jamb.
Can incorrect tire pressure affect the performance of my Ford Escape?
Yes, incorrect tire pressure can affect the fuel efficiency, handling, and overall performance of your Ford Escape.
Is it safe to drive with low tire pressure on a Ford Escape?
No, it’s not safe to drive with low tire pressure as it can cause uneven tire wear, reduced handling, and in extreme cases, blowouts.