
Taking your RV on a road trip is an exciting adventure. Exploring new destinations, enjoying the freedom of the open road, and creating lifelong memories. But once you arrive at your campsite and set up your awning, it’s important to know how to keep it clean and well-maintained.
After all, the awning provides shade, protection from the elements, and an outdoor living space. So, how do you clean an RV awning and ensure it remains in top condition? In this blog post, we will guide you through the step-by-step process of cleaning your RV awning, from gathering the necessary supplies to using the right techniques. Whether it’s removing dirt, stains, or mold, we’ve got you covered.
Get ready to transform your awning from grimy to gorgeous and make the most of your RVing experience.
Table of Contents
Introduction
Cleaning an RV awning may seem like a daunting task, but with the right approach, it can be a breeze. A dirty awning can not only ruin the look of your RV but it can also lead to mold and mildew growth. To keep your awning in pristine condition, start by giving it a good rinse with a hose to remove any loose dirt and debris.
Next, create a mixture of warm water and mild detergent. Using a soft bristle brush, gently scrub the awning, paying special attention to any stubborn stains. Rinse thoroughly with clean water and allow it to dry completely before retracting.
Regularly cleaning your RV awning will help prolong its lifespan and keep it looking great for many road trips to come.
Why is it important to clean your RV awning?
RV awnings are a great addition to any recreational vehicle, providing shade and protection from the elements. However, like any part of your RV, it is important to clean your awning regularly to maintain its appearance and functionality. Cleaning your RV awning is crucial for several reasons, including preventing the buildup of dirt, stains, and mildew, as well as extending the lifespan of the fabric.
Neglecting to clean your awning can lead to costly repairs or even the need for a replacement. In this blog post, we will explore the importance of cleaning your RV awning and provide some tips on how to do it effectively. So, let’s dive in and learn why it is crucial to keep your RV awning clean.
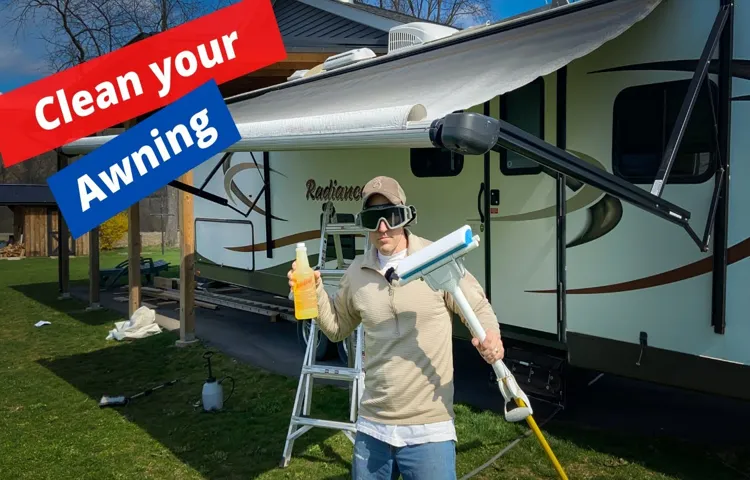
Tools and materials needed for cleaning an RV awning
tools and materials needed for cleaning an RV awning
Safety precautions
Safety precautions Introduction When it comes to ensuring the safety of ourselves and those around us, taking precautions is crucial. Whether you’re at home, work, or out and about, accidents can happen unexpectedly. That’s why it’s essential to be proactive and implement safety measures in our daily lives.
From practicing basic fire safety to being aware of potential hazards in our environment, there are various precautions we can take to minimize the risk of accidents and injuries. In this blog post, we will explore some of the important safety precautions that everyone should be aware of, as well as tips on how to stay safe in different situations. So let’s dive in and discover how we can prioritize safety and protect ourselves and our loved ones.
Cleaning Methods
Cleaning an RV awning may seem like a daunting task, but with the right methods and a little bit of elbow grease, it can be a relatively easy process. One method is to start by hosing down the awning to remove any loose dirt and debris. Then, mix a solution of mild soap and water and use a soft brush or sponge to gently scrub the entire surface of the awning.
Be sure to pay extra attention to any stains or areas of heavy dirt buildup. After scrubbing, rinse the awning thoroughly with clean water to remove all soap residue. If there are still stubborn stains remaining, you can try using a specialized awning cleaner or a mixture of vinegar and water.
Just make sure to follow the manufacturer’s instructions and test any cleaners on a small, inconspicuous area before applying them to the entire awning. Once the awning is clean, allow it to fully dry before retracting it or covering it up to prevent mold and mildew growth. By regularly cleaning your RV awning using these methods, you can keep it looking great and extend its lifespan.
Method 1: Basic Cleaning
cleaning methods, basic cleaning
Method 2: Deep Cleaning
deep cleaning Deep cleaning is an essential method that should be part of your regular cleaning routine. Unlike regular cleaning, which focuses on surface-level tidying, deep cleaning involves a more thorough and detailed approach. It is particularly useful for removing stubborn stains and dirt that may have accumulated over time.
Deep cleaning can be done on various surfaces, such as carpets, upholstery, and hard floors. For carpets, deep cleaning involves the use of specialized equipment, such as a carpet cleaner or steam cleaner, to extract deep-seated dirt and grime. Upholstery, on the other hand, may require spot cleaning or even professional cleaning services to ensure a thorough clean.
Hard floors can be deep cleaned by using a mop and a suitable cleaning solution to remove any dirt or grime that may be trapped in the crevices. By incorporating deep cleaning into your cleaning routine, you can ensure that your home is not only looking clean but also free from hidden dirt and allergens.
Method 3: Environmentally Friendly Cleaning
cleaning methods, environmentally friendly cleaning
Step-by-Step Cleaning Guide
Cleaning an RV awning may seem like a daunting task, but with a step-by-step guide, it can be a breeze. Start by retracting the awning fully to its closed position. This will make it easier to clean and prevent any damage.
Using a mixture of warm water and mild dish soap, gently scrub the awning with a soft bristle brush. Pay extra attention to any stubborn stains or dirt buildup. Rinse the awning thoroughly with a hose, making sure to remove all soap residue.
Next, allow the awning to air dry completely before retracting it back in. This will prevent any mold or mildew from forming. Finally, inspect the awning for any tears or damage and make any necessary repairs.
By following these simple steps, you can keep your RV awning looking clean and in top condition.
Step 1: Set up the cleaning area
“cleaning area” Cleaning your home can sometimes feel like a daunting task, but with a step-by-step guide, it can become easier and more manageable. The first step in this guide is to set up the cleaning area. This means finding a space where you can gather all your cleaning supplies and equipment.
It could be a dedicated cleaning closet or simply a corner of a room where you can keep everything organized. Having a designated space will make it easier for you to find what you need and ensure that everything is in its proper place. This will also save you time and effort in the long run, as you won’t have to search for cleaning products or tools when you need them.
So take a moment to establish your cleaning area before you start tackling the rest of your cleaning tasks.
Step 2: Brush off loose debris
In the second step of our step-by-step cleaning guide, it’s time to tackle the loose debris that may have accumulated on your surfaces. Before you dive into the cleaning process, it’s essential to brush off any loose dirt, dust, or crumbs. This step is crucial because trying to clean over debris can lead to smudging and streaking.
So grab a soft-bristle brush or a slightly damp cloth and gently sweep away any loose particles. Imagine this step as if you were priming a canvas before painting. By clearing away the loose debris, you create a clean and smooth surface for the next step of the cleaning process.
It’s a simple yet effective way to ensure that your surfaces receive the deep cleaning they deserve. So, take a few minutes to brush off that dirt, and you’ll be one step closer to a sparkling clean space.
Step 3: Prepare the cleaning solution
cleaning solution, cleaning guide, prepare Preparing the cleaning solution is an essential step in any cleaning process. To effectively clean your desired surface or area, you need a cleaning solution that is appropriate for the task at hand. The type of cleaning solution you need will depend on the material you are cleaning and the specific dirt or stains you are trying to remove.
For example, if you are cleaning a countertop with grease stains, you may need a degreasing agent. On the other hand, if you are cleaning a glass surface, you might need a glass cleaner. To prepare the cleaning solution, you will typically need to follow the instructions on the product label, which will provide you with the correct dilution ratio and any additional steps or precautions.
It is important to follow these instructions carefully to ensure that you create a safe and effective cleaning solution. Once you have prepared the cleaning solution according to the instructions, you are ready to move on to the next step in the cleaning process.
Step 4: Apply the cleaning solution
cleaning solution
Step 5: Scrub the awning
In the fifth and final step of our comprehensive awning cleaning guide, we’re going to tackle the task of scrubbing the awning. This step is crucial for removing any stubborn stains or dirt that may have built up over time. To start, mix a solution of mild detergent and warm water in a bucket.
Dip a soft-bristle brush into the soapy water and begin scrubbing the awning in a gentle, circular motion. Be sure to pay extra attention to any areas that appear heavily soiled or stained. Rinse the brush frequently and change the water in the bucket as needed to prevent spreading dirt around.
Continue scrubbing until the awning is clean and free of any visible stains. Once you’re satisfied with the results, rinse the entire awning thoroughly with a hose, making sure to remove all traces of soap. Finally, allow the awning to air dry completely before retracting or folding it back up.
By following these steps, you can keep your awning looking clean and beautiful for years to come.
Step 6: Rinse off the cleaning solution
Once you have scrubbed the surfaces of your home with the cleaning solution, it is time to rinse off all of that grime and dirt. This is an important step in the cleaning process, as it ensures that all of the cleaning solution and loosened dirt are completely removed from the surfaces. To rinse off the cleaning solution, you can use a bucket of clean water and a sponge or cloth.
Simply dip the sponge or cloth into the water and wipe down the surfaces, making sure to remove all traces of the cleaning solution. If you are cleaning larger surfaces, such as walls or floors, you can use a mop or a hose to rinse off the cleaning solution. Make sure to thoroughly go over the surfaces to ensure that no residue is left behind.
Once you have finished rinsing, use a clean towel or cloth to dry off the surfaces. This step is important to prevent any water spots or streaks from forming. By properly rinsing off the cleaning solution, you can ensure that your home is not only clean but also safe and free from any lingering chemicals.
Step 7: Dry the awning
drying the awning, cleaning guide After thoroughly cleaning your awning, the next step in the cleaning process is to dry it properly. Drying the awning is crucial to prevent any damage or mold growth. The first thing you should do is use a dry cloth or sponge to remove any excess water from the surface.
Gently pat the awning to absorb as much moisture as possible. You can also use a leaf blower or a dry towel to speed up the drying process. Make sure to pay attention to any creases or folds in the fabric and dry them thoroughly.
It’s important to avoid leaving the awning wet for too long, as this can lead to the growth of mold and mildew. Once the awning is completely dry, you can retract it or fold it back up, depending on the type, and securely store it until you’re ready to use it again. Taking the time to properly dry your awning will help extend its lifespan and keep it looking clean and fresh.
So don’t skip this important step in your awning cleaning routine!
Step 8: Apply protective coating (optional)
Step 8: Apply protective coating (optional) Once you have thoroughly cleaned your car’s exterior, you may want to consider applying a protective coating to keep it looking shiny and new for longer. This step is optional, but it can make a big difference in maintaining the overall appearance of your vehicle. There are several types of protective coatings available, such as wax or sealants, that can help guard against UV rays, water spots, and other environmental contaminants.
These coatings provide an additional layer of protection against dirt, dust, and grime, making it easier to clean your car in the future. To apply a protective coating, start by choosing a product that suits your needs and preferences. Make sure to read the instructions carefully to ensure proper application.
Generally, you will need to apply the coating using a clean applicator pad or microfiber cloth. Work in small sections and apply an even layer of the product, using circular motions. Allow it to dry for the recommended time, and then remove any excess product with a clean microfiber cloth.
Applying a protective coating can help preserve the glossy finish of your car’s paint and protect it from the elements. It can also make future cleaning easier and more effective. While optional, it is definitely worth considering to extend the lifespan and beauty of your vehicle.
So why not give it a try and see the difference it can make?
Maintenance Tips
Keeping your RV awning clean is an essential part of maintaining its lifespan and functionality. Regularly cleaning the awning not only helps to remove dirt, debris, and stains, but it also prevents the growth of mold and mildew. To clean an RV awning, start by retracting it fully and locking it in place.
Use a soft-bristle brush or sponge, along with a mild detergent solution, to scrub away any dirt or stains. Rinse the awning thoroughly with a hose, making sure to remove all soap residue. If there are any stubborn stains or spots, you can use specialized awning cleaners or natural solutions like vinegar and water.
Remember to always read the manufacturer’s instructions and test any cleaning products on a small, inconspicuous area before applying them to the entire awning. Once the awning is clean, allow it to dry completely before retracting it. Regularly cleaning your RV awning will not only keep it looking great but also help prolong its lifespan.
So, don’t neglect this important maintenance task and make sure to give your awning the TLC it deserves.
Regularly inspect the awning for any damages
awnings, maintenance, damages, inspection
Keep the awning rolled up when not in use
awnings, maintenance tips, rolled up, not in use.
Conclusion
In conclusion, cleaning an RV awning is no longer a chore, but a delightful dance of grime-busting prowess. By following the steps outlined above, you can transform your drab and dingy awning into a vibrant, shining work of art that will make your fellow campers green with envy. So, go forth, my friends, armed with brushes and hoses, and conquer the battle against dirt and mildew.
Let your awning sparkle like a disco ball in the sun, beckoning all who pass by to stop and admire your cleanliness prowess. Remember, cleaning your RV awning is not just about maintaining your investment, but also about embracing the RV lifestyle to its fullest. It’s about showing the world that you are a discerning individual who knows how to do more than just drive an RV – you know how to make it shine! So, rally your comrades and embark on this epic quest for cleanliness.
Embrace the suds, the soft scrub brushes, and the water spray guns. And when you’re done, stand back and admire your work with a proud smile, knowing that you have overcome the grime and emerged victorious. Now, go forth, my fellow adventurers, and clean those RV awnings like you’ve never cleaned before.
Happy cleansing!”
FAQs
How often should I clean my RV awning?
It is recommended to clean your RV awning at least once a year or more frequently if it gets dirty.
What is the best way to clean an RV awning?
To clean an RV awning, mix a solution of mild dish soap and warm water. Use a soft brush or sponge to gently scrub the awning, starting from the top and working your way down. Rinse thoroughly with clean water.
Can I use bleach to clean my RV awning?
It is not recommended to use bleach on an RV awning as it can damage the fabric. Stick to mild dish soap and water for regular cleaning.
How do I remove stubborn stains from my RV awning?
For stubborn stains, you can try using a specialized cleaner specifically designed for RV awnings. Follow the instructions on the cleaner and test it on a small, inconspicuous area first to ensure it doesn’t damage the fabric.
Should I let my RV awning dry before retracting it?
Yes, it is important to let your RV awning fully dry before retracting it. This helps prevent mold and mildew growth. If the awning is wet, extend it fully and allow it to air dry before rolling it back up.
Can I pressure wash my RV awning?
While pressure washing may seem like a quick and efficient way to clean your RV awning, it is not recommended. The high pressure can damage the fabric and the water can penetrate the seams, causing potential leaks.
How can I prevent mold and mildew from forming on my RV awning?
To prevent mold and mildew growth, make sure to clean your RV awning regularly and allow it to dry thoroughly before retracting. Additionally, consider using a mold and mildew-resistant fabric treatment to protect the awning.
