
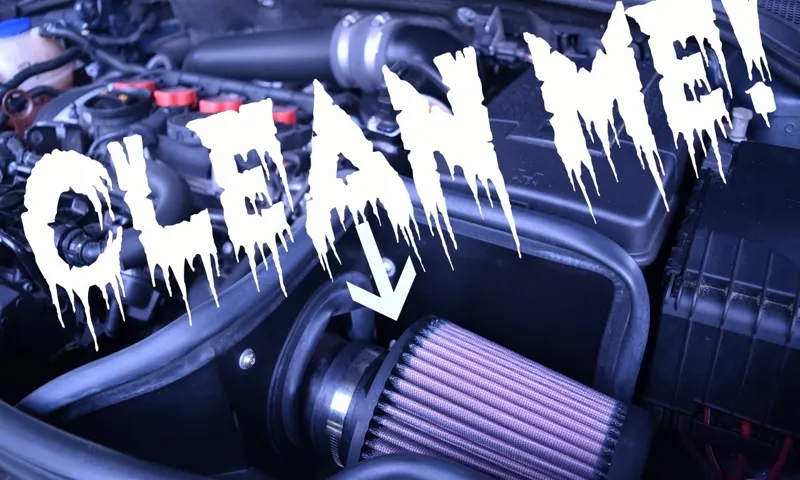
Do you ever wonder why your car feels sluggish or less powerful than usual? Have you noticed your fuel consumption becoming more frequent? Maybe it is time to check on your intake filter. Over time, the engine’s intake filter will accumulate dirt, dust, and debris that will restrict the airflow, resulting in poor engine performance. Neglecting the condition of your air filter could lead to more serious problems in the future, such as damaged engine components or reduced fuel efficiency.
Taking care of your intake filter is essential to maintaining the quality and longevity of your vehicle, and we’re here to guide you on how to clean it effectively and efficiently.
Table of Contents
What is an Intake Filter and Why is it Important?
If you are wondering what an intake filter is and why it’s so important, you’re not alone. Simply put, an intake filter is a device that traps harmful particles and contaminants from entering your vehicle’s engine. When these particles make their way into your engine, they cause damage over time and can decrease the efficiency of your vehicle’s performance.
Regularly cleaning your intake filter is crucial to ensure optimal performance and longevity of your engine. So, how do you clean an intake filter? It’s simple! First, remove the filter from its housing, then gently tap it against a solid surface to remove any loose dirt and debris. Next, use a cleaning solution specifically designed for intake filters and wash the filter thoroughly.
Once clean, let it dry completely before replacing it back in the housing. By taking care of your intake filter, you’re taking care of your engine and ensuring a smooth ride for years to come.
The Purpose of an Intake Filter
An intake filter is a crucial component of any engine-powered machine, including cars, HVAC systems, and industrial equipment. Its main purpose is to prevent dirt particles, debris, and other contaminants from entering the engine and causing damage. Without a proper intake filter, the engine would be subject to premature wear and tear, leading to a decline in performance and efficiency.
Think of an intake filter as your car’s immune system. Just as your body has white blood cells that neutralize harmful substances, the intake filter prevents harmful particles from entering the engine. Over time, the intake filter can become clogged with the debris it captures, impeding airflow and reducing the engine’s efficiency.
That’s why it’s essential to regularly check and replace your filter, ensuring that it’s clean and functioning correctly. In addition, modern intake filters come with advanced filtration technologies that can capture even smaller particles and pollutants like pollen, bacteria, and allergens. This makes them essential not just for engine maintenance but also for promoting overall air quality.
So, whether you’re a car owner or an industry professional, paying attention to your intake filter’s health is a must to keep your engine running smoothly and efficiently.

Why Clean Your Intake Filter
An intake filter is an essential component of your vehicle’s engine system. It is responsible for filtering out harmful particles such as dirt, dust, and debris, which can cause damage to your engine if left unchecked. Imagine your engine as a person breathing in air: just as you would not want to inhale dirty air, your engine should not take in dirty air either.
By using an intake filter, you can ensure that your engine is breathing in clean air, which will help it run more efficiently and last longer. Over time, however, your intake filter can become clogged with dirt and debris, reducing its ability to filter out harmful particles. This reduction in performance can negatively affect your engine’s efficiency and power.
By cleaning your intake filter regularly, you can ensure that it is working at its optimal level, helping your engine run smoothly and last longer. So, the next time you’re thinking about skipping out on cleaning your intake filter, remember the importance of keeping your engine breathing clean air.
Tools and Materials You Will Need
Cleaning your intake filter is an essential task that should be carried out regularly to keep your engine running efficiently. To do this, you will need a few tools and materials. Firstly, you will need to gather safety equipment such as gloves and goggles to protect your skin and eyes from dust particles that may be present.
In addition to safety equipment, you will also require a clean and flat working area and a set of screwdrivers and pliers to help with disassembling the casing of your intake filter. You should have a soft-bristled brush or a compressed air canister to blow out any accumulated dirt and debris from your filter. It is important to refer to your vehicle’s manual to establish specific tools you may need.
With these tools and equipment, you can easily clean your intake filter, which in turn ensures that your engine is not compromised by the intake of harmful dirt and debris.
Required Tools
When it comes to taking on a DIY project, having the right tools and materials is essential. For this particular project, you’ll need a few basic supplies like a measuring tape, screwdriver, pliers, and wire cutters. Additionally, you’ll need some specific materials like wood boards, nails, screws, and sandpaper.
Depending on the size and complexity of your project, you may also need a saw, drill, level, and paintbrushes. It’s important to have all the necessary tools before you begin so that you don’t have to stop in the middle of your project to run to the hardware store. Investing in quality tools and materials is also a wise decision, as it can save you time, money, and headaches in the long run.
So, gather up everything you need and get ready to embark on your DIY adventure!
Materials Needed for Cleaning
When it comes to cleaning, having the right tools and materials is essential. First and foremost, you’ll need a reliable set of gloves to protect your hands from any harsh chemicals or bacteria. Next, be sure to have a variety of cleaning cloths, sponges, and brushes on hand to tackle different surfaces.
For general cleaning, a multi-purpose cleaner and glass cleaner will come in handy. For tougher stains and grime, you may need specialized cleaners such as oven cleaner or tile and grout cleaner. Don’t forget to have a mop and bucket for cleaning floors, and a vacuum or broom for sweeping up debris.
With these tools and materials in hand, you’ll be able to tackle any cleaning task with ease.
Steps to Cleaning Your Intake Filter
If you’re wondering how to clean your intake filter, you’ve come to the right place! Cleaning your intake filter is an important part of keeping your engine running smoothly, helping to prevent damage from dirt and debris. The first step is to locate your intake filter, which is often located in a box near the engine. Once you have located it, remove the filter and take a look at its condition.
If it’s dirty or clogged, it’s time for a cleaning. You can clean your intake filter by using compressed air or a soft-bristled brush to remove any debris. You can also wash it with water and let it dry before replacing it.
Keep in mind that if your filter is damaged or too dirty to clean, it may need to be replaced entirely. By cleaning your intake filter regularly, you can help your engine perform at its best, while also promoting a longer lifespan for your vehicle.
Step 1: Remove the Filter
When it comes to cleaning your intake filter, it’s important to follow a few steps to ensure that you don’t damage the filter or your engine. The first step is to remove the filter from your vehicle. Depending on your make and model, this might involve removing a cover or housing first.
Once you have access to the filter, carefully remove it from its housing. Be sure to check for any screws or clips that might be holding it in place before pulling it out. It’s important to handle the filter carefully as it might be fragile and delicate.
Also, make sure to inspect the filter for any damage or tears before you start cleaning it. Taking the time to properly remove the filter will make the cleaning process much easier and stress-free. By following this first step, you’ll be on your way to a cleaner and more efficient intake filter.
Step 2: Inspect the Filter
Inspecting the air filter is an integral step to cleaning your intake filter. The filter plays a crucial role in keeping your engine functioning properly by preventing debris, dust, and dirt from entering the engine. First, locate the air filter housing and remove the air filter cover.
Inspect the filter for any signs of wear and tear, including holes, gaps, and other damages. Make sure to inspect the filter from both sides, front and back. If you notice any damage, it’s best to replace the filter rather than cleaning it since cleaning a damaged filter won’t improve its functionality.
In the case of a clean filter, use a flashlight to check for any residual debris or dirt. A clean filter should allow you to see the light through with ease. If it’s not the case, the filter needs a thorough cleaning.
By inspecting the filter and understanding its condition, you’ll have a better understanding of whether it needs replacing or cleaning. By regularly inspecting and cleaning your air filter, you can ensure that your engine runs smoothly, which can save you a lot of money down the line.
Step 3: Remove Loose Dirt and Debris
After unplugging and disassembling your intake filter, the next step in cleaning it is to remove any loose dirt and debris. This can be done by gently brushing the filter or using compressed air to blow away any surface particles. It’s important to be gentle so as not to damage the filter, but thorough enough to remove any visible debris.
This step is crucial because it prevents any loose particles from entering your engine, which could lead to reduced performance or even damage. Taking the time to properly remove loose dirt and debris is an essential part of maintaining a healthy intake filter. Keeping your engine running smoothly and efficiently requires attention to detail and regular maintenance, including cleaning your intake filter on a regular basis.
Step 4: Soak the Filter in Cleaning Solution
When it comes to cleaning your intake filter, one essential step is to soak the filter in a cleaning solution. This step is crucial since it helps eliminate any dirt, debris, or contaminants that the filter has accumulated over time. Before you proceed with this step, ensure that you have the right cleaning solution for your filter.
You can either purchase a filter cleaning solution or make your cleaning solution using specific ingredients. Once you have the solution, immerse the filter entirely and let it sit for about 10-15 minutes. Avoid scrubbing the filter too hard since it can damage the filter’s fibers, reducing its efficiency.
After soaking, rinse the filter thoroughly using warm water and let it dry entirely before reinstalling it. Regular cleaning and maintenance of your intake filter guarantee optimal performance and increased lifespan.
Step 5: Rinse the Filter and Dry
Once you’ve scrubbed the intake filter with soap, use warm water to rinse it off thoroughly until all the soap is removed. Make sure you get every nook and cranny, and if you notice any stubborn dirt or grime, use a soft-bristled brush to gently scrub it off. Once it’s completely cleaned, use a clean cloth or paper towel to gently pat the filter dry.
You want to make sure all the water is removed to prevent any mold or mildew buildup, but don’t rub too hard, or you risk damaging the filter. Once it’s dry, your filter will be like new and ready to reinstall in your car. Remember to clean it regularly to keep your engine running smoothly and protect against potential damage from dirty air.
When to Replace Your Intake Filter
If your air intake filter isn’t working efficiently, you could be facing decreased performance and increased fuel consumption. It’s important to know when to replace your intake filter to avoid these issues. A primary indicator that it’s time to change your filter is poor gas mileage.
Additionally, if you notice a decrease in engine power or a noisy engine, it’s probably time for a replacement. To maintain your intake filter, you should clean it regularly. How to clean intake filters varies depending on your filter type, but generally, you should clean it every 15,000-30,000 miles.
To clean your filter, remove it and tap it lightly to dislodge debris before using a cleaning solution. Wet the filter with the solution, allowing it to soak for 10-15 minutes. Rinse it thoroughly with water and air dry it completely before reinstalling.
Signs That Your Filter Needs Replacing
As a responsible vehicle owner, it is important to know when your intake filter needs replacing. A dirty or clogged intake filter can cause decreased performance, reduced fuel efficiency, and even engine damage. Fortunately, there are some signs that can indicate it’s time for a replacement.
If you notice a drop in fuel efficiency, reduced acceleration, or a decrease in engine power, it may be time to check your intake filter. Additionally, if the filter appears visibly dirty or clogged, it is definitely time for a replacement. Remember, a clean air filter ensures that the engine gets enough air for optimal combustion, and can save you money in the long run by preventing more serious engine problems.
So, make sure to check your intake filter regularly and replace it as needed to keep your vehicle running smoothly.
How Often Should You Replace Your Filter?
Maintaining your HVAC system is crucial for optimal performance and air quality. One essential part of your system is the intake filter, which removes dust, dirt, and other particles from your indoor air. But how do you know when it’s time to replace it? The short answer is that it depends on your usage and the filter type.
However, a good rule of thumb is to replace it every three months or sooner if you have pets, allergies, or frequently use your HVAC system. Some filters are washable and reusable, while others need to be disposed of and replaced entirely. It’s also important to note that a clogged or dirty filter can reduce airflow and strain your system, leading to energy waste and higher bills.
To stay on top of your filter replacements and extend the life of your HVAC system, mark your calendar and keep an eye on your filter’s condition. A clean filter means clean air and a healthy home.
Conclusion
So, now you’re an intake filter cleaning expert! All it takes is a little bit of time, a little bit of effort, and a whole lot of clean air flowing into your engine. Remember, keep your filter as clean as your conscience and your car will reward you with better performance and fuel efficiency. Happy cleaning!”
FAQs
What is an intake filter?
An intake filter is a device that protects the engine from dirt and debris and ensures clean airflow to the engine.
Why do we need to clean the intake filter?
We need to clean the intake filter to ensure it doesn’t clog with dirt and debris, which can restrict airflow and reduce engine performance.
How often should we clean the intake filter?
It is recommended to clean the intake filter every 12,000 to 15,000 miles.
Can a dirty intake filter affect fuel economy?
Yes, a dirty intake filter can restrict airflow to the engine, causing it to work harder and decreasing fuel economy.
What is the best way to clean the intake filter?
The best way to clean the intake filter is to use a soft-bristled brush to remove any loose dirt or debris, then rinse it with water. After it’s dry, you can use a specialized filter cleaner to remove any remaining dirt.
How long does it take to clean the intake filter?
It typically takes 30 minutes to clean the intake filter, including drying time.
Should we replace the intake filter or clean it?
If the intake filter is significantly damaged or clogged with dirt and debris, it’s better to replace it. Otherwise, cleaning the filter can extend its lifespan and save money in the long run.