
Oil leaks can happen to the best of us, and cleaning up the mess can be a real headache. Not only is it unsightly, but it can also damage your engine if left unattended. But fear not, cleaning oil from your engine is not as difficult as it may seem.
With a few simple steps and some basic supplies, you can have your engine looking as good as new in no time. In this article, we’ll teach you how to clean oil from your engine using easy-to-follow steps that anyone can do. Whether you’re a seasoned mechanic or a newbie DIYer, you’ll find these tips helpful in keeping your engine looking and performing its best.
So, let’s dive in and get started!
Table of Contents
Tools Needed
If you’re wondering how to clean oil from your engine, there are a few tools you’ll need to get started. First and foremost, you’ll need a high-quality degreaser. This chemical solution is specifically designed to break down oil and other stubborn build-up on your engine.
You’ll also need a pressure washer or hose with a high-pressure nozzle to blast away the greasy residue. A scrub brush or sponge is also helpful for getting into the nooks and crannies of your engine. Additionally, you may want to have some protective gear on hand, such as gloves and eyewear, to prevent any chemical exposure to your skin or eyes.
With these tools, you’ll be able to tackle any oil stains on your engine and keep it looking clean and running smoothly.
Oil Absorbent Material
One of the most essential things to have when dealing with oil spills is an oil absorbent material. However, simply having the material is not enough; you also need the right tools to use it effectively. One tool that is handy to have is a broom or a brush.
This tool can be used to spread out the absorbent material quickly and cover a large area. Additionally, you will need a dustpan to quickly collect the saturated material. Another tool that is helpful is a pair of gloves to protect your hands from the oil and the material itself.
If the oil has spilled over water, you might need a skimmer to collect the absorbent material. It’s important to have all these tools ready beforehand to ensure that you can quickly and effectively contain an oil spill if and when it occurs. With the right tools and the right materials, you can tackle any oil spill with confidence.
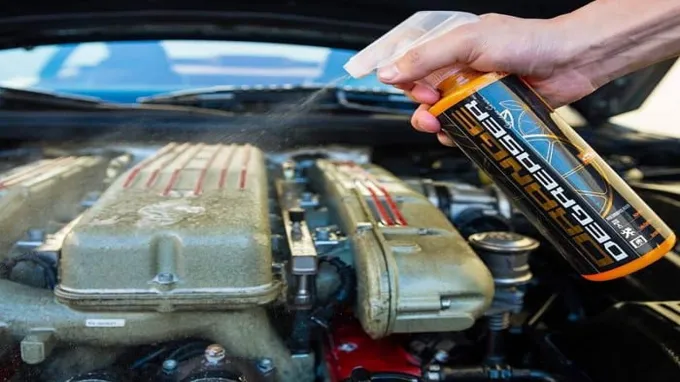
Degreaser or Engine Cleaner
When it comes to choosing between degreasers and engine cleaners, it’s important to have the right tools on hand to achieve the best results. First and foremost, you’ll need protective gear such as gloves and eye protection to keep yourself safe during the cleaning process. Additionally, you may want to invest in a good quality brush to help scrub away grime and buildup on your engine.
A pressure washer can also be a useful tool, but be careful not to use too much pressure as it can damage the engine. Finally, make sure you have plenty of clean rags or microfiber towels on hand to wipe away excess cleaner and dry the engine after cleaning. With the right tools and the right product, your engine will be looking like new in no time! So whether you choose a degreaser or engine cleaner, don’t forget to equip yourself with the right tools for the job.
Bucket or Spray Bottle
When it comes to cleaning, choosing the right tools can make a big difference. In the case of cleaning products and solutions, it’s important to consider the surface being cleaned, the type of dirt or grime being removed, and personal preferences. But what about the tools used to apply the cleaning solution? Specifically, should you use a bucket or a spray bottle? Both have their pros and cons, and ultimately the decision depends on personal preference and the task at hand.
A bucket offers the advantage of being able to hold a larger amount of cleaning solution, which can be great for larger surfaces or messier jobs. It also allows for the use of larger tools like mops or sponges for maximum coverage. On the other hand, spray bottles are great for smaller, more targeted areas and offer the advantage of being able to control the amount of solution being applied.
This can be especially useful for surfaces that are easily damaged from excessive moisture or those that require a gentler touch. Ultimately, both buckets and spray bottles have their place in the world of cleaning, and the choice comes down to personal preference and the specifics of the task at hand. So, whether you prefer the convenience and control of a spray bottle or the versatility of a bucket, make sure you’re using the right tool for the job.
Step-by-Step Guide
If you’ve ever had a leaky engine, you know how frustrating and messy it can be. Luckily, cleaning oil from your engine is a task you can easily do yourself with a bit of elbow grease. Here’s a step-by-step guide on how to clean oil from your engine.
First, let the engine cool down completely. Then, cover any sensitive areas with plastic bags or aluminum foil. Next, use a degreaser or engine cleaner to spray the oil-stained area and let it sit for a few minutes.
Scrub the area with a stiff brush, rinse with a hose, and repeat the process if necessary. Finally, let the engine dry completely before starting it up again. By following these simple steps, you can make your engine look and run like new!
Step 1: Locate the oil spillage
When dealing with an oil spill, the first step is to locate the source of the spillage. This may seem obvious, but it can be a challenging task as oil can spread quickly and recede beneath the water’s surface. The location of the spill is critical as it determines the severity of the incident and the measures required to control and clean up the oil.
One effective method to identify the oil spill’s origin is to use drones or helicopters to survey the affected area from above. These aerial views provide a broader perspective of the extent of the spillage and can assist in determining the exact source. Once the spill’s location is established, it’s essential to act swiftly to prevent further spreading and to contain the spread within the area.
Taking prompt action can significantly minimize the environmental impact of the oil spill.
Step 2: Prepare the cleaning solution
Preparing the cleaning solution is an essential step to ensure that your cleaning process is efficient and effective. Before mixing the cleaning solution, it is important to read the instructions on the product label, as the ratios may vary depending on the type of cleaning solution. Typically, cleaning solutions consist of water and a cleaning agent.
The cleaning agent may contain chemicals that require caution when handling, so it is important to wear gloves and protective eyewear. Once these precautions are taken, mix the solution according to the instructions and pour it into a spray bottle or bucket. Depending on the product, you may need to let the solution sit for a few minutes before beginning the cleaning process.
Using the correct amount of cleaning solution and allowing it enough time to work its magic can make all the difference in the outcome of your cleaning endeavors. Remember, safety always comes first, so be sure to follow all instructions carefully to achieve the best results.
Step 3: Apply the cleaning solution to the oil stain
Now that you’ve identified the oil stain and gathered the necessary materials, it’s time to get rid of the blemish once and for all. To do this, apply the cleaning solution you made earlier to the oil stain. Be sure to use a liberal amount, as you want to saturate the stain completely.
Gently rub the solution into the stain using a soft-bristled brush or cloth, making sure to work in circular motions. This will help lift the oil from the surface. Let the cleaning solution sit for a few minutes to fully penetrate the stain.
However, be careful not to let the solution dry out, as this could make the stain even harder to remove. After a few minutes, take a clean cloth and blot up the excess solution. With any luck, the oil stain should be considerably lighter.
If not, repeat the process until the oil stain disappears.
Step 4: Let the solution soak for a few minutes
After applying the cleaning solution onto your stained surface, it’s important to let it soak for a few minutes. This allows the cleaning agent to penetrate the dirt and stains, making it easier to remove them later. Plus, it gives you time to do something else, like answering emails or folding laundry, while the solution works its magic.
But don’t let it sit for too long, or it could dry out and become harder to clean. A good rule of thumb is to let it soak for 5-10 minutes, depending on the severity of the stain. If you’re dealing with a tougher stain, you may want to let it soak for a bit longer.
Once the time is up, proceed to the next step in your cleaning process with confidence, knowing that you have given the cleaning solution enough time to do its job. So next time you’re cleaning your surfaces, remember that patience is key and that letting the solution soak a bit longer can make all the difference in achieving a spotless home.
Step 5: Use a scrub brush to remove the oil stain
After letting the oil stain sit with the cornstarch for a while, it’s time to grab a scrub brush and get to work. Make sure that the bristles of the brush are stiff enough to really dig into the stain without being too rough on the surface. Begin by dipping the brush into your warm soapy water and then scrubbing the oil stain gently in circular motions.
You might need to apply some extra pressure in areas where the oil has soaked in more deeply. Don’t be afraid to use your fingers or a toothbrush for smaller areas or tricky spots. As you scrub, keep a close eye on the progress of the oil stain, and don’t be afraid to re-apply the soapy water and cornstarch if needed.
Just be careful not to over-saturate the surface and cause any damage. Once you’re happy with the results, use a clean cloth to wipe away any excess water or soap, and let the area air dry. With a little bit of patience and elbow grease, you’ll be able to say goodbye to that pesky oil stain for good!
Step 6: Rinse and repeat if necessary
After completing the previous steps, it’s time to evaluate the results. If your hair still feels oily or dirty, you can repeat the process until you achieve the desired cleanliness. However, it’s important to remember that over-washing your hair can strip it of its natural oils, leading to dryness and breakage.
Therefore, it’s essential to find an appropriate balance between cleanliness and hydration. Additionally, it’s worth noting that different hair types require different care. For instance, if you have curly hair, you may benefit from using a moisturizing shampoo and conditioner to avoid frizz and maintain your curls’ shape.
On the other hand, if you have oily hair, you may need to wash it more often to prevent scalp buildup. Ultimately, finding the right hair care routine may take some trial and error, but with patience and attention, you can achieve healthy, vibrant, and gorgeous hair.
Preventing Future Oil Stains
If you’re tired of dealing with troublesome oil stains on your driveway or garage floor, there are a few simple steps you can take to prevent them from happening in the future. First, it’s essential to keep your car’s engine and surrounding areas clean and tidy. This helps identify any leaks or spills early on and makes it easier to clean them up before they become stains.
Regularly checking your engine oil level and changing it as recommended by your car’s manufacturer can also help prevent spills and leaks. In the event of an oil spill, be sure to clean it up promptly with absorbent materials like kitty litter or sawdust. Additionally, consider using a drip tray or oil pan when doing any maintenance on your car to catch any spills or leaks.
By following these simple steps, you can keep your garage floor looking as good as new and avoid the headache of dealing with oil stains.
Check and replace worn engine gaskets
If you’re tired of dealing with oil stains on your driveway, it may be time to check and replace your engine gaskets. These small components play a big role in keeping oil from leaking out of your engine and onto the ground. Over time, gaskets can wear out and become damaged, leading to oil leaks and other issues.
By keeping an eye on your gaskets and replacing them when necessary, you can prevent future oil stains and keep your engine running smoothly. It’s important to make sure you use high-quality gaskets when replacing them, as this will help ensure they last as long as possible. Don’t let oil stains get you down – take proactive steps to prevent them by maintaining your engine gaskets.
Park in areas with minimal oil spills
If you’re like most people, you’ve probably had the unfortunate experience of walking to your car and seeing a nasty oil stain beneath it. Not only is it unsightly, but it can also damage the environment. So, how can we prevent future oil stains? One simple solution is to park in areas with minimal oil spills.
This may seem like a no-brainer, but many people don’t consider the impact of parking in oil-soaked areas. Look for spots that are well-lit and away from areas where cars tend to park for extended periods. If you do happen to spot oil spills in the area, it’s best to avoid parking there altogether.
By being mindful of where you park, you can help reduce the number of oil stains on your vehicle, and lessen the harmful effects on the environment.
Regular maintenance and inspections
Regular maintenance and inspections are crucial in preventing future oil stains. By regularly checking for leaks and cracks in your vehicle, you can catch any potential issues before they become major problems. This can save you money in the long run by avoiding costly repairs or even needing to replace your engine.
Additionally, keeping your vehicle clean and free of debris can also help prevent oil stains. Regularly washing your car and having it professionally detailed can remove any dirt or grime that may be accumulating on the vehicle’s underside, which can lead to oil stains. Think of your car like a body; just as you need to take care of yourself through regular exercise and check-ups with medical professionals, your vehicle also needs regular attention to avoid future issues.
By prioritizing maintenance and inspections, you can keep your car running smoothly and avoid unsightly and damaging oil stains.
Final Thoughts
In conclusion, dealing with oil spills in the engine is not an easy task. However, it’s essential to keep your engine in top shape by cleaning oil spills immediately. There are various ways to clean oil spills from engines, such as using absorbent materials, degreasers, and other cleaning agents.
It’s crucial to follow the recommended safety precautions when handling cleaning agents and to ensure that the engine has cooled down before attempting to clean it. Remember, prevention is better than cure, so it’s always advisable to regularly check your engine for leaks and oil spills to avoid any major damages. By following these simple steps, you can keep your engine clean and prevent any contamination that could affect its performance in the long run.
With a little patience and the right tools, you can quickly restore your engine to its optimal state and keep it running smoothly for years to come.
Conclusion
In conclusion, cleaning oil from your engine may seem like a daunting task, but with the right steps and precautions, it can be a breeze. Remember to wear protective gear, use the appropriate cleaning solutions, and take your time in ensuring the oil is completely removed. And if all else fails, just blame it on the car and say it’s “leaking personality.
” Happy cleaning!”
FAQs
What causes oil buildup in the engine?
Oil buildup in the engine can be caused by leaking gaskets, worn piston rings, or a faulty PCV valve.
How do I know if there is oil buildup in my engine?
You may notice symptoms such as increased oil consumption, white or blue smoke from the exhaust, or decreased engine performance.
What damage can oil buildup cause to my engine?
Oil buildup can lead to engine damage such as scoring of cylinder walls, worn bearings, and increased emissions.
How often should I clean the oil from my engine?
It is recommended to clean the engine oil every 3 to 6 months, or as advised in the owner’s manual.
Can I clean the oil buildup myself?
Yes, you can clean the oil buildup yourself by using a good engine flush or solvent and following the instructions carefully.
Should I clean the engine oil before or after an oil change?
It is recommended to clean the engine oil before an oil change so that the new oil can work more efficiently.
Is it safe to drive with oil buildup in the engine?
It is not recommended to drive with oil buildup in the engine as it can cause serious damage and reduce engine performance.