
Hello there! Are you a proud owner of an RV? If so, you probably know the feeling of hitting the open road, feeling the wind in your hair, and exploring new places at your own pace. And what better way to enhance your RV experience than by having an awning to provide shade, protection, and additional outdoor living space? But here’s the thing: as much as we love enjoying the beautiful outdoors under the shade of our RV awnings, there comes a time when we need to close them. Whether it’s due to the weather, the end of your trip, or simply because it’s time to store your RV, understanding the purpose of closing an RV awning is essential.
Think of it like this: just as you wouldn’t leave your car’s convertible top down in the pouring rain or wind, closing your RV awning serves a similar purpose. It’s all about protecting your awning from potential damage caused by strong winds, heavy rain, or other adverse weather conditions. Additionally, closing your awning when not in use can prevent unnecessary wear and tear, prolonging its lifespan.
But closing your RV awning isn’t just about protection. It’s also about convenience. When it’s time to hit the road or pack up your RV, closing the awning saves you time and effort.
No one wants to wrestle with a stubborn awning while trying to get on the road or set up camp. Closing it up properly ensures a smooth departure and a hassle-free journey. So, whether you’re a seasoned RV enthusiast or new to the world of RVing, understanding the purpose of closing an RV awning is crucial.
It not only protects your investment but also ensures a stress-free and enjoyable experience. So, the next time you’re preparing to leave your campsite or the weather takes a turn for the worse, make sure to close your awning – you’ll thank yourself later!
Table of Contents
Determining the Type of RV Awning
Closing an RV awning can be a straightforward task once you determine the type of awning you have. There are two common types of RV awnings: manual and electric. For a manual awning, you’ll need to follow these steps to close it safely.
First, make sure the awning is fully extended and the fabric is taut. Then, locate the awning arms, typically positioned on either side of the awning. You’ll usually find a release button or lever on each arm.
Press or pull the release mechanism to unlock the arms. Slowly and carefully, begin to roll up the awning fabric by turning the hand crank. Keep turning until the awning is fully rolled up and the arms are locked into place.
Finally, secure the awning using the straps or clips provided. If you have an electric awning, the process is even simpler. Look for the control panel, usually found near the RV’s entrance or inside a storage compartment.
Use the controls to retract the awning. Some electric awnings may also have a manual override option in case of power failure. Consult your RV’s manual for specific instructions on how to use the manual override if needed.
Remember to always exercise caution when closing an RV awning. Avoid windy conditions, and be mindful of any obstructions or debris that could get caught in the awning. It’s also essential to regularly inspect your awning for any signs of wear or damage.
Different Types of RV Awnings
RV awnings are a great addition to any recreational vehicle, providing shade and protection from the elements. However, there are different types of awnings available, and it’s important to choose the right one for your specific needs. The first thing to consider is the type of RV you have, as different awnings are designed to fit different models.
There are also various styles to choose from, including manual, electric, and hybrid awnings. Manual awnings require manual operation and are typically the most affordable option. Electric awnings, on the other hand, can be easily operated with the push of a button.
Hybrid awnings combine the best features of manual and electric awnings, allowing for easy operation while still offering some manual control. Ultimately, the type of RV awning that’s right for you will depend on your budget, preferences, and the specific needs of your RV.
Identifying Your RV Awning Type
RV awnings come in various types, and it is important to determine the type of awning your RV has in order to properly care for and operate it. One common type of RV awning is the manual awning. This type of awning requires manual labor to open and close it.
Another type is the electric awning, which can be operated with the push of a button. Some RVs also come equipped with a retractable awning, which can be easily pulled out and locked into place. Lastly, there are also slide-out awnings, which cover the slide-out sections of the RV to provide additional shade and protection.
It is important to know the type of RV awning you have so that you can properly maintain and use it for the best camping experience possible.
Gathering the Necessary Tools and Materials
When it comes to closing an RV awning, having the right tools and materials is essential. Before you begin, gather all the necessary items to ensure a smooth process. Firstly, you’ll need a ladder that is tall enough to reach the height of your RV’s awning.
This will allow you to safely access the awning and make any necessary adjustments. Additionally, you’ll need a ratchet or awning rod to manipulate the awning’s mechanism. This tool will help you retract and secure the awning in place.
Lastly, it’s important to have a clean, dry cloth on hand to wipe down the awning before closing it. This will prevent any dirt or debris from getting stuck in the mechanism and causing damage. With these tools and materials at your disposal, you’ll be well-prepared to close your RV awning properly.
List of Tools and Materials
“tools and materials for woodworking projects” When it comes to woodworking projects, having the right tools and materials is essential. It’s like having a well-stocked kitchen before attempting a complex recipe – you wouldn’t want to start cooking without all the necessary tools and ingredients, right? The same goes for woodworking. Whether you’re a beginner or an experienced DIY enthusiast, having the right tools and materials will make your project go much smoother and ensure a successful outcome.
So let’s take a look at some of the essential tools and materials you’ll need for your woodworking projects. First and foremost, you’ll need a good set of basic hand tools. These include a tape measure, a carpenter’s square, a hammer, chisels, screwdrivers, and a set of quality hand saws.
These tools will allow you to measure and mark your wood accurately, as well as cut and shape it to your desired specifications. Additionally, you’ll want to invest in a sturdy workbench or table, where you can safely secure your wood and work on your project. Next, you’ll need some power tools.
While hand tools are essential, power tools can significantly speed up your woodworking process. Some of the must-have power tools for woodworking include a drill, a jigsaw, a circular saw, and a router. These tools will allow you to cut intricate shapes, make clean and precise holes, and create smooth edges and finishes on your wood.
In terms of materials, the most basic material you’ll need for woodworking is, of course, wood. The type of wood you choose will depend on your project and personal preference. Common types of wood used in woodworking projects include pine, oak, cherry, and maple.
Additionally, you’ll need various types of screws, nails, and adhesives to secure your wood pieces together. Lastly, don’t forget about safety equipment. Woodworking can be dangerous, so it’s crucial to protect yourself.
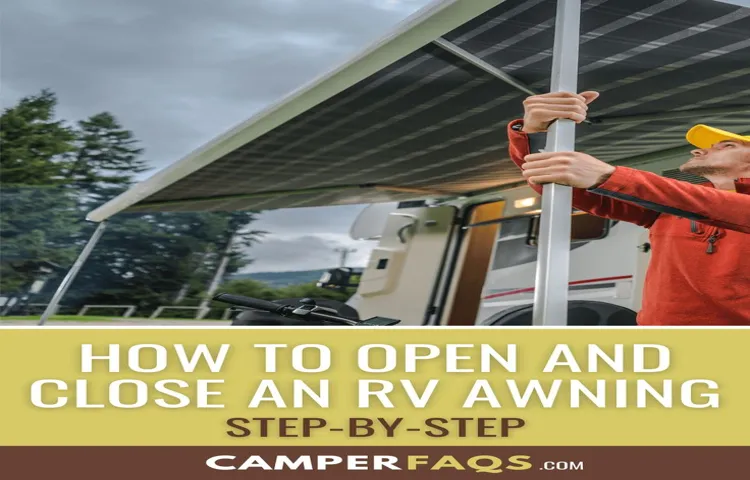
Step-by-Step Instructions for Closing an RV Awning
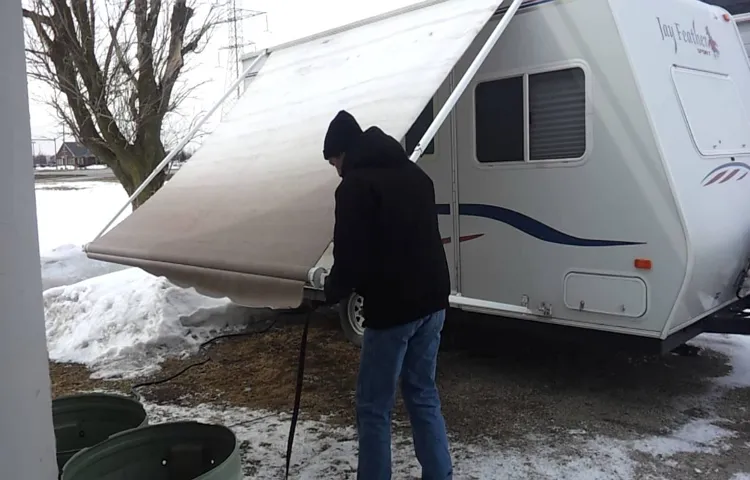
If you’re new to camping or just recently purchased an RV, you might be wondering how to close an RV awning. Closing an awning can seem a bit daunting at first, but with a little practice, it becomes a simple and quick task. To close your RV awning, start by making sure there are no obstacles in the way and the awning is clear of any debris.
Next, release the tension on the awning by loosening the rafter knobs on each of the support arms. Once the tension is released, slowly roll up the awning using the hand crank or motor, being careful to keep it straight and not let it sag. Once the awning is fully rolled up, secure it in place using the travel locks or straps provided.
It’s important to always follow the manufacturer’s instructions when closing your RV awning to ensure it is done safely and correctly. So, the next time you’re ready to pack up and hit the road, you’ll know exactly how to close your RV awning like a pro.
Step 1: Lowering the Support Arms
Step-by-Step Instructions for Closing an RV Awning Closing an RV awning can seem like a daunting task, but with the right instructions, it can be done easily. One of the first steps in the process is lowering the support arms. These arms are what hold the awning in place and provide support.
To lower them, start by finding the locking mechanism on each arm. This may be a lever or a button, depending on the type of awning you have. Once you locate the locking mechanism, simply release it to unlock the arm.
Then, slowly lower the arm down until it is fully extended. Repeat this process for the other support arm. Lowering the support arms is an important first step in closing an RV awning, as it allows you to safely and effectively roll the awning back up.
Step 2: Retracting the Awning Fabric
RV awnings are a great addition to any camper or motorhome, providing shade and protection from the elements. But when it’s time to hit the road or pack up the campsite, it’s important to know how to properly close and retract the awning. In this step-by-step guide, we’ll walk you through the process of retracting the awning fabric for safe and easy travel.
The first step is to make sure the awning is fully extended and the support arms are locked in place. Once everything is secure, locate the awning tension knobs and release them. These knobs are typically found on the roller tube near the ends of the awning.
By loosening these knobs, you will release the tension on the awning fabric, allowing it to be retracted smoothly. After loosening the tension knobs, grab onto the pull strap located at the end of the awning and give it a firm tug to begin rolling up the fabric. As the fabric begins to roll up, continue pulling on the strap to ensure that it rolls evenly onto the roller tube.
Be careful not to let the fabric roll up too quickly, as this can cause it to bunch up or become uneven. Once the fabric is fully retracted, secure it in place by locking the travel locks on the roller tube. These locks prevent the awning from unrolling during travel and help to keep everything in place.
With the fabric retracted and secured, double-check that all knobs, locks, and support arms are properly in place before hitting the road. By following these simple steps, you can quickly and safely retract your RV awning fabric, ensuring a smooth and hassle-free journey to your next destination.
Step 3: Adjusting the Awning Tension
Closing an RV awning may seem like a daunting task, but with the right instructions, it can be done easily. Step 3 in the process is adjusting the awning tension. This step is crucial to ensure that the awning is properly secured and won’t come loose during travel.
To adjust the tension, start by locating the tension knobs on both sides of the awning. These knobs control the tension of the awning fabric. Begin by loosening the knobs until you feel some resistance.
Then, slowly tighten the knobs until the fabric is taut and there are minimal wrinkles. Be careful not to overtighten, as this can cause damage to the fabric or the awning frame. Once you have adjusted the tension to your desired level, tighten the knobs securely.
This will ensure that your awning is secure and ready for travel. By following these step-by-step instructions, closing your RV awning can be a simple and stress-free process.
Tips and Tricks for Closing an RV Awning Safely
Closing an RV awning safely is an essential skill for any RV owner. One important tip to keep in mind is to always check the weather before closing the awning. If the wind is strong or if there is a storm approaching, it’s best to leave the awning open and secure it properly.
Another important trick is to lower the legs of the awning before closing it. This will help relieve any tension and make it easier to fold up. When closing the awning, it’s also important to take it slow and steady.
Rushing the process can lead to accidents and damages. Lastly, don’t forget to double-check that the awning is securely locked in place before hitting the road. Taking these tips and tricks into consideration will help ensure a safe and smooth closing of your RV awning.
Safety Precautions to Consider
RV awnings can provide much-needed shade and protection from the elements while camping or traveling. However, it’s important to take precautions when closing an RV awning to ensure your safety and prevent any damage to the awning or surrounding area. Here are some tips and tricks to consider when closing an RV awning:
Check the weather: Before closing your awning, check the weather forecast for any strong winds or storms. It’s best to avoid closing the awning during such conditions as it can cause damage to the awning and potentially harm you or others nearby.
Clear the area: Make sure there are no obstacles or debris in the way of the awning as you close it. This includes removing any chairs, tables, or other items that may be underneath the awning. Clearing the area will prevent any potential accidents or damage.
Use caution: When closing the awning, do it slowly and carefully to avoid any sudden movements or jerking motions. This will help prevent any damage to the awning or the RV itself.
Take your time and pay attention to the process. Secure the awning: Once the awning is fully closed, make sure to securely fasten it in place.
Many RV awnings have straps or buckles to keep them secure. Double-check that everything is properly fastened to prevent any unexpected opening or damage during transit.
Special Considerations for Awning Fabric Care
Closing an RV awning may seem like a simple task, but there are some important considerations to keep in mind for the safety of both your awning and yourself. First and foremost, it’s crucial to ensure that the awning is properly secured before attempting to close it. This means checking that all the arms and supporting structures are fully locked into place.
It’s also important to make sure that the awning fabric is in good condition and free from any tears or damage. If you spot any issues, it’s best to have them repaired before attempting to close the awning. Additionally, it’s a good idea to have someone assist you when closing the awning, as it can be a bit of a balancing act.
By following these tips and tricks, you can safely and effectively close your RV awning and protect it for years to come.
Conclusion: Maintaining Your RV Awning for Longevity
In conclusion, closing an RV awning is like folding a giant origami masterpiece with a dash of circus acrobatics. It requires the precision of a ninja, the dexterity of a contortionist, and the patience of a saint. But fear not, brave adventurers, for with these simple steps and a sprinkle of wit, you too can conquer the mighty awning beast.
First, channel your inner Sherlock Holmes and inspect the scene for any loose items that may cause havoc during the process. Trust me, you don’t want to end up with a tangled mess resembling a modern art installation. Next, summon your inner MacGyver and gather the necessary tools for the endeavor – a sturdy ladder, some trusty bungee cords, and perhaps a stick of bubblegum for good measure (you never know, it might come in handy).
Now, let the magic begin! Start by gently but firmly closing the awning with the power of a Jedi master. Remember, an RV awning is like a delicate flower – treat it with care and it shall reward you with shade and protection. As the awning gracefully starts its descent, it’s time to release your inner Cirque du Soleil performer.
Stand back, find the perfect angle, and prepare for the grand finale – the perfectly executed roll-up. This part requires coordination, finesse, and a bit of imagination. Imagine you’re a graceful swan gliding across the water, not a clumsy bear attempting a high-wire act.
And just like that, ta-da! Your RV awning is closed, neatly packed away for its next grand unveiling on your next outdoor adventure. Take a moment to bask in your achievement, for you have defeated the awning dragon with flair and finesse. So next time you find yourself facing the daunting task of closing an RV awning, fear not, my fellow adventurers.
Armed with these steps and a pinch of creativity, you have the power to transform what seems like a mundane chore into a grand spectacle worthy of a standing ovation. Happy awning-closing, my fearless nomads!”
FAQs
How do I close my RV awning?
To close your RV awning, start by removing any accessories or attachments. Then, locate the awning control panel or switch, usually found near the door or on the side of the RV. Press the “Close” or “Retract” button to retract the awning. Make sure to hold onto the roller tube as it retracts to ensure a smooth operation. Finally, secure the awning arms or straps to keep it in place during travel.
What is the proper way to close an RV awning during strong winds?
During strong winds, it is important to close your RV awning to prevent damage or accidents. To close it properly, follow these steps: first, check the weather forecast and if strong winds are expected, close the awning preemptively. Remove any accessories or attachments and lower the awning using the control panel or switch. Secure the arms or straps tightly to prevent them from coming loose. It is also recommended to use additional supports like awning tie-downs or de-flapper kits for added stability in windy conditions.
Can I close my RV awning partially to provide shade without fully retracting it?
Yes, you can partially close your RV awning to provide shade without fully retracting it. Most awnings have adjustable arms that can be lowered to create a partially closed position. This allows you to control the amount of shade you want while still keeping the awning extended. However, it is important to note that leaving the awning partially closed for an extended period may put extra stress on the arms and fabric, so it is best to fully retract it when not in use.
Is it necessary to close an RV awning when it’s raining?
It is generally recommended to close your RV awning when it’s raining to prevent damage to the fabric and frame. However, some modern awnings are designed to handle light rain and have water runoff features to prevent pooling. If you choose to leave the awning open during rain, make sure to monitor the weather conditions and close it if the rain intensifies. Also, ensure that the awning is appropriately angled to allow water to run off properly.
What should I do if my RV awning gets stuck while closing?
If your RV awning gets stuck while closing, the first step is to stop any further attempts to close it manually. Trying to force it closed may cause further damage. Check for any obstructions or debris that may be blocking the awning’s retraction. Clear away any obstacles and try again. If the awning still doesn’t close, refer to your RV awning manual for troubleshooting steps or contact a professional for assistance.
How often should I close and open my RV awning to keep it in good condition?
It is recommended to regularly open and close your RV awning to prevent the fabric from getting stiff or developing mildew. Aim to open and use the awning at least once every few weeks, weather permitting. Closing the awning when not in use for an extended period, such as during the off-season, also helps in maintaining its longevity. Follow the manufacturer’s recommendations and guidelines for specific care and maintenance instructions.
Can I close my RV awning manually if the motor or control panel malfunctions?
Yes, most RV awnings can be closed manually if the motor or control panel malfunctions. Refer to your RV awning manual to locate the manual override mechanism, which is often a hand crank or lever. Insert the crank or engage the lever and slowly turn or move it in the direction indicated to retract the awning. Be cautious and take your time to avoid any mishaps or injuries. If you’re unsure or uncomfortable with manual retraction, consult a professional for assistance.