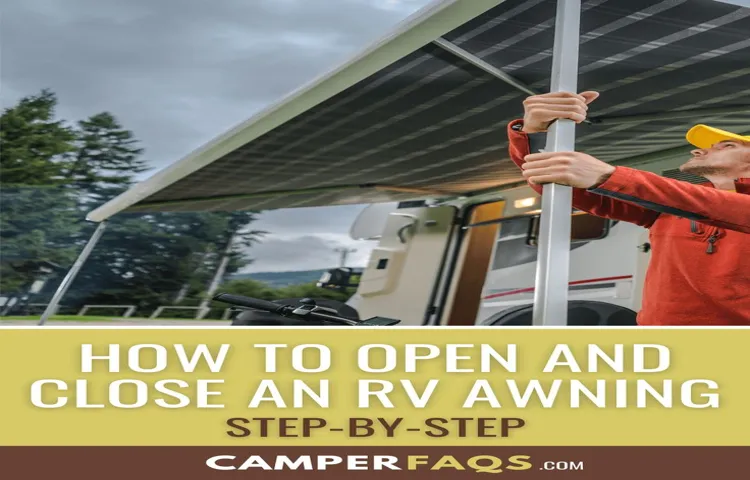
Closing your RV awning can seem like a daunting task, especially if you’re new to RVing. But don’t worry, it’s easier than you think! Not only is it important to close your awning properly to avoid damage, but it’s also necessary for safety reasons. In this step-by-step guide, we’ll walk you through the process of closing your RV awning so you can do it with confidence.
From retracting the arms to rolling up the fabric, we’ve got you covered. So let’s get started and make sure your awning is properly secured for your next adventure!
Table of Contents
Step 1: Secure Your Awning
If you’re wondering how to close the awning on your RV, the first step is to secure it properly. This means ensuring that all of the arms and support bars are securely fastened to the RV and the ground. If you have an automatic awning, you’ll need to switch it to “manual” mode and use a crank to wind it in.
For manual awnings, you can simply roll it in by hand. Before you begin, make sure the area around the awning is clear of any furniture or debris. It’s also a good idea to have someone help you, as the process can be much easier and safer with an extra set of hands.
By properly securing your awning, you’ll be well on your way to safely closing it and protecting it from any potential damage or wear and tear.
Check for any loose screws or bolts and tighten them if necessary
When it comes to ensuring the safety and functionality of your awning, the first step should always be to secure it properly. This means checking for any loose screws or bolts and tightening them if necessary. Loose fasteners can cause the awning to sway in the wind or even collapse, posing a serious hazard to anyone nearby.
You don’t want to leave it to chance when it comes to the safety of your family and friends! Take the time to thoroughly inspect each fastener, making sure that everything is tight and secure. With this simple step, you can enjoy your awning worry-free and feel confident that you’ve taken the necessary precautions to keep everyone safe. So, why not take a few minutes to check the screws and bolts on your awning today? Your peace of mind is worth it!
Step 2: Detach Any Accessories
When it’s time to close up your RV awning, the first thing you’ll want to do is detach any accessories that may be attached to it. This includes any string lights, wind chimes, or other decorative items you may have hanging from the awning itself. Not only will this make it easier to roll up the awning, but it will also help protect your accessories from potential damage.
Plus, it ensures that everything is ready to go the next time you set up camp. So before you start cranking away at the awning, take a few minutes to remove any attachments and stow them away safely. With a little care and attention, you’ll be able to close up your RV awning like a pro in no time!
Remove any clips, lights or decorations from your awning
When it comes to preparing your awning for storage or transportation, one important step is to detach any accessories. This means removing any clips, lights, or decorations that you may have attached to your awning. Not only does this help prevent damage to the accessories themselves, but it can also protect the awning from wear and tear.
Before you start dismantling your awning, take the time to carefully remove any accessories and pack them away separately. You may want to label each item to make it easier to reattach everything later on. By taking this extra step, you can ensure that your awning and all its accessories are in top condition for the next time you need to use them.
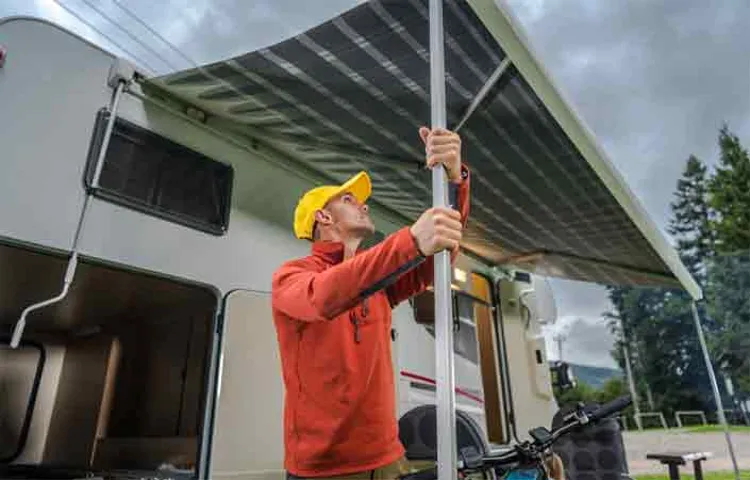
Step 3: Activate Your Awning’s Retractable Mechanism
Now that your RV awning is fully rolled up and secured, it’s time to activate the retractable mechanism to close it. The process of retracting the awning will vary depending on the specific model of RV that you have. Most RVs come equipped with a motorized retractable mechanism that is activated by a remote or a button inside the vehicle.
Other models require manual hand cranking to retract the awning. Whichever system your RV has, it’s important to follow the manufacturer’s instructions carefully to avoid damaging the awning or the retractable mechanism. Once the awning is fully rolled up, double-check that it is securely fastened before you hit the road.
Remember to store the awning in a dry and clean place to prevent mold and mildew formation. With these simple steps, you can easily close your awning on your RV and be ready to take on your next adventure!
Use your RV’s controller or manually wind up your awning
When it comes to retracting your RV awning, you have two options: using the controller or doing it manually. If your RV is equipped with an automated system, you can use the controller to retract the awning. Simply press the retract button, and the awning will start rolling up automatically.
However, if you don’t have a controller, you’ll need to do it manually. This involves physically winding up the awning by rotating the hand crank. While it may take a bit more effort, it’s still a relatively simple process.
Just make sure to keep a firm grip on the crank, and turn it in a clockwise direction until the awning is fully retracted. Whether you use the controller or do it manually, it’s important to make sure the awning is fully retracted before hitting the road. This will prevent it from getting damaged or causing any accidents while you’re driving.
So, take your time and make sure it’s secured properly.
Step 4: Secure Your Awning During Transport
When it’s time to hit the road in your RV, one important task is to secure your awning during transport. First, retract the awning by pressing the button on the control panel or turning the hand crank. Make sure the awning is fully retracted and locked into place.
Next, use bungee cords to tie down the arms and legs of the awning to the side of your RV. This will prevent the awning from flapping or unfurling during transport. It’s also a good idea to add extra support by using awning center support poles.
By properly securing your awning, you can have a stress-free journey without worrying about damage to your RV or nearby vehicles. Remember to always check your awning’s manual for manufacturer instructions and safety precautions.
Use bungee cords or fabric straps to attach your awning to your RV’s exterior wall
When it comes to securing your RV awning during transportation, using bungee cords or fabric straps is a great option. Not only will they keep your awning securely in place, but they also won’t damage your RV’s exterior wall. To attach your awning, simply loop the bungee cords or fabric straps around the awning arms and then attach them to your RV’s exterior wall using hooks or loops.
Just make sure that the tension is tight enough to keep the awning in place but not so tight that it causes damage. Another important tip is to make sure that your awning is fully retracted and locked in place before you hit the road. This will prevent any unexpected unfurling and potential damage to your awning or RV.
By taking the time to properly secure your awning, you can enjoy a stress-free and safe journey wherever your RV adventures may take you!
Step 5: Store Your Awning Safely
Safely storing your awning after closing it on your RV is an important step to ensure its longevity and avoid damage. First, make sure to clean any debris or dirt from the awning and allow it to dry completely before rolling it up. Next, retract the awning slowly and evenly to prevent any tears or creases from forming.
Secure the arms and legs of the awning with straps or bungee cords to prevent them from shifting during travel. If you have an electric awning, make sure to disconnect any power sources before storing it. Finally, place a cover over the awning to protect it from any weather elements while it’s in storage.
Following these steps will help prolong the life of your awning and ensure it’s ready for the next adventure.
Fold down your awning on top of its cover and lock it in place
When it comes to storing your awning, it’s important to follow proper steps to ensure its longevity. Once you’ve rolled up your awning, the next step is to fold it down on top of its cover. This will not only protect it from the elements and potential damage, but it will also keep it secure in place while in storage.
Once you’ve folded it down, make sure it’s locked in place to prevent any potential accidents. By taking these precautions, you’ll be able to store your awning safely and be able to use it for years to come. Remember, proper maintenance and storage is key in keeping your awning in excellent condition.
Wrapping Up
Now that we have covered how to extend and use your RV awning, it’s time to discuss the process of closing it up. First and foremost, it is important to remember safety protocols when working with your RV awning. Make sure all family members and pets are a safe distance away, and avoid retracting the awning during high wind conditions.
Once you are ready to close your awning, begin by releasing the tension on the arms and emergency lock mechanism. Next, slowly retract the awning by pressing the retract button or using the hand crank. Keep an eye on the fabric to make sure it is not caught or wrinkled during the process.
Once fully retracted, secure the awning arms and locks in their travel positions. It’s always a good idea to double-check everything before hitting the road to prevent any accidents or damages while in transit. By following these simple steps, you can easily and safely close up your RV awning after a fun-filled day of adventure.
Following these simple steps can help you safely and easily close your RV awning
Closing your RV awning may seem like a daunting task, but by following a few simple steps, you can do it safely and easily. First, make sure that all of the items under the awning are cleared away to avoid any damage. Next, release the tension of the awning by slowly retracting it until it is fully closed.
Don’t forget to lock the awning in place to prevent it from opening while you are traveling. Finally, give the awning a quick cleaning to prevent any dirt or debris from getting stuck in the mechanism. By taking the time to properly close and maintain your RV awning, you can ensure that it will last for many years to come.
Conclusion
In conclusion, closing an awning on an RV may seem daunting at first, but with a little bit of practice and patience, it can become second nature. Just remember to follow the manufacturer’s instructions carefully, take your time, use caution and never be afraid to ask for help. With these tips in mind, you’ll be able to impress your fellow campers with your expert awning-closing skills in no time.
So go forth and conquer the world of RV awnings – or at least your own backyard!”
FAQs
What is an RV awning?
An RV awning is an extension that provides shade and shelter on the outside of recreational vehicles.
Why is it important to know how to close an RV awning?
It is important to know how to close an RV awning to prevent damage from wind, rain, and other weather conditions. Leaving the awning open can also increase the risk of theft or damage from falling debris.
How do I close an RV awning?
To close an RV awning, start by retracting the arms and braces. Then, use the winch handle to retract the awning fabric. Be sure to secure the awning before moving or driving the RV.
Can I close an RV awning manually?
Yes, most RV awnings can be closed manually if the power source is not available. Consult the owner’s manual for instructions on how to manually retract the awning.
How can I prevent damage to my RV awning?
To prevent damage to your RV awning, always retract it in inclement weather, secure it properly when not in use, and inspect it regularly for any signs of wear or tear.
How often should I clean my RV awning?
It is recommended to clean your RV awning at least twice a year to prevent mildew and mold buildup. Use a soft brush and mild soap to gently scrub the fabric, and rinse thoroughly with water.
Can I repair a damaged RV awning?
Yes, some minor damages can be repaired with a patch kit or by sewing the fabric back together. However, if the damage is significant, it may be better to replace the awning completely.