Are you looking to connect a 48-volt battery converter? If so, you’re in the right place! In today’s world, where technology is advancing at lightning speed, it’s essential to stay up-to-date with the latest trends and innovations. One piece of technology that has become increasingly popular is the 48-volt battery converter. This versatile device allows you to convert the power from a 48-volt battery into a usable form for your electronic devices.
Whether you’re powering up a camper van, an electric car, or a renewable energy system, a 48-volt battery converter is a must-have. But how exactly do you connect it? Let’s dive in and find out!
Table of Contents
Introduction
So you’ve got a 48-volt battery converter and you’re ready to connect it, but you’re not sure where to start. Don’t worry, I’ve got you covered! Connecting a 48-volt battery converter is easier than you might think. The first step is to locate the positive and negative terminals on the battery where you will be connecting the converter.
Once you’ve identified the terminals, it’s time to make the connection. Simply attach the positive terminal of the converter to the positive terminal of the battery, and then connect the negative terminal of the converter to the negative terminal of the battery. It’s as simple as that! Just be sure to double-check your connections and make sure everything is securely fastened before powering on your device.
With this quick and easy process, you’ll have your 48-volt battery converter up and running in no time!
Explanation of what a 48 volt battery converter is
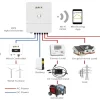
48-volt battery converter Introduction A 48-volt battery converter is a device that allows you to convert the voltage from a 48-volt system to a different voltage that is suitable for your specific application. When it comes to power systems, different devices and equipment require different voltages to operate efficiently. This is where a battery converter comes into play.
It takes the 48-volt power supply from the battery and converts it to the voltage required by your equipment. For example, if you have a device that requires 12 volts to function, you can use a 48-volt battery converter to step down the voltage from the battery and provide the necessary power.
Importance of connecting a battery converter correctly
Importance of connecting a battery converter correctly Introduction: In today’s world, where technology is ever-advancing, batteries play a crucial role in powering our devices. Whether it’s a smartphone, a laptop, or an electric car, batteries provide the necessary energy to keep them running. However, the way we connect these batteries to the devices is equally important.
One crucial component in this process is a battery converter. A battery converter is a device that converts the electrical energy stored in a battery into a usable form for the connected device. Connecting a battery converter correctly is vital for ensuring the efficient and safe operation of our devices.
In this article, we will discuss the importance of connecting a battery converter correctly and the potential consequences of improper connections. So, let’s dive in and explore this important topic further.
Step 1: Safety Precautions
When it comes to connecting a 48 volt battery converter, safety should be your top priority. Before you even begin the process, make sure to wear protective gear such as gloves and safety glasses. This will help protect you in case of any accidents or mishaps that may occur.
Additionally, it’s important to work in a well-ventilated area to avoid the buildup of any potentially harmful fumes. Before connecting the converter, make sure that the power source is turned off and that all wires and cables are properly insulated to prevent any electric shocks. Taking these safety precautions will ensure that you can connect your 48 volt battery converter with peace of mind.
Importance of safety precautions when working with high voltage
safety precautions, high voltage, working
Safety gear and tools required
safety gear and tools, safety precautions In any DIY project or home improvement task, safety should always be a top priority. Before you begin, it’s essential to have the right safety gear and tools on hand to protect yourself and prevent accidents. Some of the necessary safety gear includes goggles or safety glasses to protect your eyes from dust or flying debris, gloves to protect your hands, and a dust mask to prevent inhaling harmful particles.
Additionally, it’s crucial to have the appropriate tools for the job. For example, if you’re working with electrical wires, make sure you have insulated tools to prevent shocks. If you’re using power tools, ensure they’re in good working condition and have all the necessary safety features.
Taking these safety precautions and having the right safety gear and tools will not only keep you safe but also make your project more efficient and successful.
Step 2: Understanding the Battery Converter
So, you’ve got yourself a shiny new 48 volt battery converter and you’re ready to connect it to your system. But before you dive in, let’s take a moment to understand how this converter works. Essentially, a battery converter is a device that takes the direct current (DC) output from your battery and converts it into alternating current (AC) power.
This AC power is then used to run your electronic devices. Now, you might be wondering why you need a converter in the first place. Well, it all comes down to compatibility.
Most electronic devices are designed to run on AC power, so if you’re using a battery to power them, you’ll need a converter to bridge the gap. To connect your 48 volt battery converter, you’ll first need to locate the DC input terminals on the converter. These are usually labeled with a positive (+) and negative (-) sign.
Once you’ve found these terminals, you’ll need to connect the positive terminal of your battery to the positive terminal of the converter, and the negative terminal of your battery to the negative terminal of the converter. This will ensure that the current flows in the right direction and allows the converter to do its job properly. It’s worth noting that some converters may also have additional terminal connections for grounding or auxiliary power.
If this is the case, consult the manufacturer’s instructions for guidance on how to make these connections. Once you’ve made the necessary connections, double-check that everything is secure and tight. Loose connections can lead to poor performance or even damage to your system.
And that’s it! You’ve successfully connected your 48 volt battery converter. Now you can power up your electronic devices and enjoy the convenience of portable, battery-powered AC power.
Explanation of the different components of a battery converter
battery converter, components In order to truly understand how a battery converter works, we need to take a closer look at its different components. A battery converter is a device that allows you to convert the voltage of a battery to a different voltage level. This is especially useful when you need to power devices that have different voltage requirements than the battery you are using.
The main components of a battery converter include the input voltage source, the controller circuit, the power switching circuit, and the output voltage circuit. The input voltage source is the battery itself. It provides the initial voltage that needs to be converted.
The controller circuit is responsible for monitoring and controlling the entire conversion process. It ensures that the output voltage is stable and within the desired range. The power switching circuit is the heart of the battery converter.
It is responsible for switching the input voltage on and off rapidly, which in turn allows for the conversion process to take place. Lastly, the output voltage circuit takes the converted voltage and makes it available for use by the device or system that is being powered. Think of the battery converter as a translator.
It takes the language of one voltage and translates it into another. Just like a translator needs different components like a language input, a control system, a translator tool, and an output language, so does a battery converter. The input voltage source is like the initial language, the controller circuit is like the control system, the power switching circuit is like the translator tool, and the output voltage circuit is like the final translated language.
All these components work together to ensure that the voltage is converted properly and efficiently. So the next time you need to power a device that requires a different voltage than your battery, remember that it’s the battery converter that makes it possible. Understanding the different components of a battery converter can help you troubleshoot any issues that may arise and ensure that your devices receive the correct voltage they need to operate effectively.
Understanding the input and output terminals
input and output terminals, battery converter In step 2 of understanding the battery converter, it’s important to familiarize yourself with the input and output terminals. These terminals play a crucial role in connecting the battery converter to other devices and components in an electrical system. The input terminal of a battery converter is where the power source, typically a battery, is connected.
This is where the electrical energy is received by the converter. It’s important to ensure that the battery is properly connected to the input terminal to ensure a secure and efficient power supply. On the other hand, the output terminal of a battery converter is where the converted electrical energy is delivered to other devices or components in the electrical system.
This is where the power output of the converter is connected. It’s important to connect the output terminal to the intended device or component to ensure that the converted power is properly utilized. Understanding the input and output terminals is crucial in ensuring the proper functioning and compatibility of the battery converter with other devices in the electrical system.
It’s essential to follow the manufacturer’s instructions and guidelines when connecting the battery converter to ensure a safe and efficient power transfer. So, you can think of the input terminal as the “power receiver” of the battery converter, while the output terminal is the “power transmitter” that delivers the converted energy to other devices. By understanding and properly connecting these terminals, you can ensure a smooth and efficient power transfer within your electrical system.
Step 3: Preparing the Battery
So, you’ve got your 48 volt battery converter and you’re ready to start connecting it to your battery. But before you dive in, there are a few things you need to do to prepare the battery for the conversion process. The first step is to ensure that the battery is fully charged.
This is important because a fully charged battery will ensure optimal performance and efficiency from your converter. Next, you’ll want to clean the battery terminals to remove any dirt, debris, or corrosion that may have built up over time. This can be done using a mixture of baking soda and water and a wire brush.
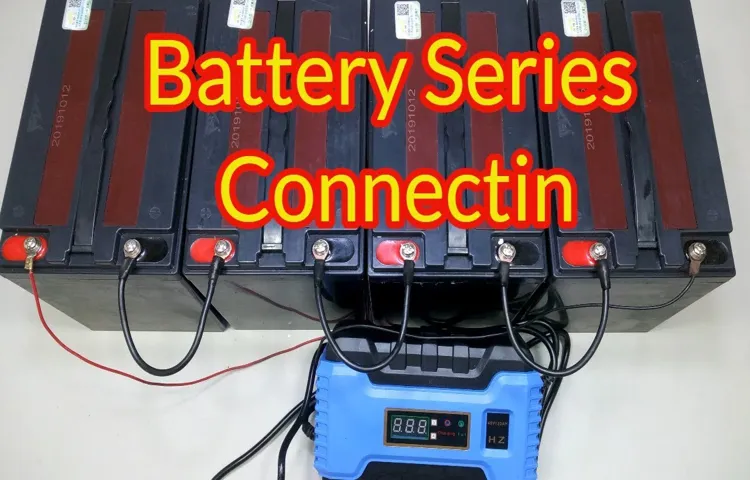
Once the terminals are clean, you can then connect the positive and negative cables from the battery converter to the corresponding terminals on the battery. It’s important to make sure that the connections are secure and tight to avoid any loose connections or sparks. Once everything is connected, you’re ready to start using your 48 volt battery converter!
Checking the voltage of the battery
battery, checking the voltage, preparing the battery
Preparing the battery for connection
Preparing the battery for connection is an essential step before you can power up your device. It’s like laying the foundation before building a house – without a solid groundwork, everything else can become a mess. To ensure a smooth and safe connection, there are a few important things you need to do.
First, make sure you have the right type of battery for your device. Different devices require different types of batteries, so check your user manual or consult with the manufacturer to make sure you have the correct one. Once you have the right battery, inspect it for any damages or leaks.
If you find any, do not use the battery and dispose of it properly. Next, clean the battery terminals with a soft brush or cloth to remove any dirt or corrosion. This will help ensure a good and stable connection.
Finally, check the battery voltage to make sure it is fully charged. If not, charge it up before connecting it to your device. By following these steps, you can ensure that your battery is ready to provide reliable power to your device.
Step 4: Connecting the Battery Converter
So, you’ve got yourself a 48-volt battery converter and you’re ready to connect it. Great! Connecting a 48-volt battery converter is a relatively simple process, but it’s important to do it correctly to avoid any potential issues. First, you’ll want to make sure that you have all the necessary tools and materials on hand.
This includes a wrench or screwdriver, depending on the type of connectors your converter has. Once you have everything you need, start by locating the positive and negative terminals on your battery. The positive terminal is typically marked with a plus sign, while the negative terminal is marked with a minus sign.
Next, connect the positive terminal of your battery to the positive terminal of your converter using the appropriate connector. Make sure the connection is tight and secure. Do the same for the negative terminals, connecting them together using the appropriate connector.
Once all the connections are made, double-check to ensure that everything is securely fastened and there are no loose connections. Finally, turn on the power to your converter and check for any error messages or indicators that may require further troubleshooting. And there you have it! Your 48-volt battery converter is now connected and ready to use.
Identifying the input and output terminals on the converter
battery converter, input and output terminals In order to properly connect the battery converter, it is important to know how to identify the input and output terminals. This step is crucial in ensuring that the converter functions correctly and reliably. The input terminal is where you connect the battery, and it is typically labeled as “+ In” or “B+”.
The output terminal, on the other hand, is where you will connect the load or device that you want to power. It is usually labeled as “+ Out” or “V+”. Identifying these terminals can sometimes be tricky, especially if the converter is not labeled clearly.
In such cases, you can refer to the user manual or documentation provided by the manufacturer. Additionally, the terminals may also be color-coded, with the input terminal often being red and the output terminal being black. By correctly identifying the input and output terminals, you can ensure that your battery converter works seamlessly and provides power to your desired device or load.
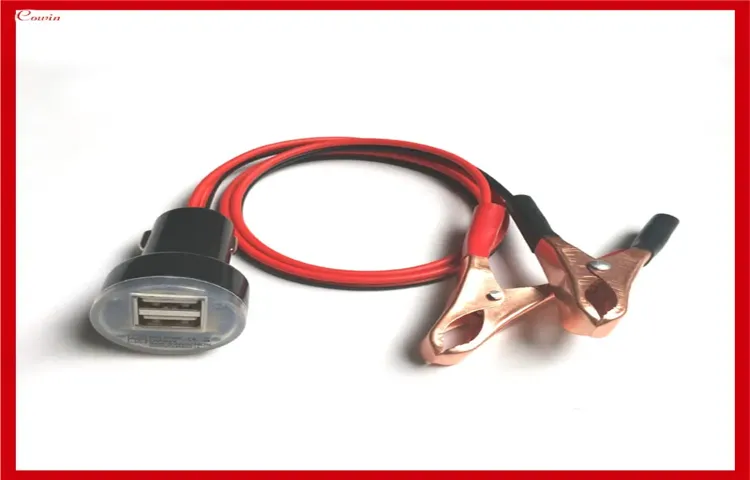
Connecting the battery cables to the converter
In Step 4 of connecting the battery cables to the converter, we are getting into the nitty-gritty of the installation process. This step is crucial because it ensures that power is properly delivered from the battery to the converter, allowing it to do its job effectively. It’s like the connection between the engine and the wheels of a car – without this connection, the car wouldn’t be able to move forward.
So, let’s get down to business. To connect the battery cables to the converter, you will need a few tools like a wrench or pliers, depending on the type of connectors you have. First, locate the positive (+) and negative (-) terminals on your battery.
It’s important to identify these correctly as connecting them the wrong way can cause serious damage to your converter or even pose a safety hazard. Once you’ve identified the terminals, clean them with a wire brush to remove any corrosion or dirt. This will ensure a good and reliable connection.
Next, take the positive cable and connect it to the positive terminal on the battery. Tighten the connection securely using your wrench or pliers. Repeat the same process for the negative cable, connecting it to the negative terminal on the battery.
Make sure both connections are tight and secure. Once you’ve completed this step, you can move on to the next exciting phase of the installation process.
Step 5: Testing the Connection
Once you have successfully mounted and wired your 48 volt battery converter, it’s time to test the connection to ensure everything is working as it should. Start by checking all the connections and making sure they are secure and properly tightened. Next, turn on the power and monitor the converter’s display panel or voltage meter.
The display should indicate that the converter is receiving power from the battery and converting it to the desired voltage output. If the display shows any errors or warning messages, consult the manufacturer’s instructions or contact technical support for troubleshooting guidance. In addition to checking the display, you can also test the connection by connecting a load device, such as a light or small appliance, to the converter’s output terminals.
If the load device operates properly and receives the correct voltage, then your connection is successful. However, if the load device does not work or receives an incorrect voltage, double-check your wiring and connections, and make any necessary adjustments. It’s important to test the connection to ensure that your battery converter is functioning correctly and providing the desired voltage output for your specific power needs.
Using a multimeter to test the voltage output
testing the voltage output, multimeter, connection
Checking for any loose connections or errors
In order to have a smooth and reliable internet connection, it is important to check for any loose connections or errors that may be affecting the performance. This step is crucial as it helps identify any potential issues that may be causing a weak or unstable connection. One way to do this is by checking the cables and wires that are connected to your modem or router.
Make sure that all the cables are securely plugged in and there are no loose connections. Additionally, you can also check for any visible signs of damage or wear and tear on the cables. If you find any damaged cables, it is recommended to replace them as they can cause interruptions in the connection.
Another aspect to consider is checking the settings on your modem or router. Ensure that the settings are properly configured and there are no errors or conflicts that could be impacting the connection. By taking these steps to check for any loose connections or errors, you can ensure a smooth and uninterrupted internet experience.
Conclusion
In conclusion, connecting a 48-volt battery converter is a task that requires a combination of technical prowess and an innate ability to navigate the labyrinth of wires and circuitry. It’s like embarking on a treasure hunt, except instead of gold, you’re seeking the knowledge to power your devices efficiently. Think of it as a delicate dance, where you must delicately place each wire in its designated port, similar to how you delicately place your foot in the right dance move.
Remember, one wrong step and you could be left in the dark, much like a dance partner who has been left behind. But fear not, intrepid adventurer! With a little patience, a dash of courage, and maybe a YouTube tutorial or two, you’ll be well on your way to connecting your 48-volt battery converter like a seasoned pro. So, grab your tool belt and embark on this electrifying escapade! Just remember to stay grounded and not get too charged up with excitement.
And if all else fails, there’s always the option of calling in an electrician, because sometimes even the most daring adventurers need a helping hand. Happy connecting!”
Importance of following the correct steps to connect a 48 volt battery converter
In the process of connecting a 48 volt battery converter, step 5 is all about testing the connection. This is a crucial step to ensure that everything is working properly and that the battery converter is functioning as it should. Testing the connection involves a few different aspects.
First, you’ll want to make sure that all of the wires and cables are securely connected. This includes checking that there are no loose or frayed wires, and that all of the connections are tight and secure. Next, you’ll want to test the voltage output of the battery converter.
This can be done using a multimeter or other testing device. By measuring the voltage, you can confirm that the battery converter is producing the correct amount of power. Finally, it’s important to test the load that the battery converter is powering.
This can be done by connecting the load to the battery converter and checking that it is receiving power and functioning correctly. By thoroughly testing the connection, you can ensure that your 48 volt battery converter is working properly and providing the necessary power for your application.
Summary of the process explained in the blog post
In the previous sections, we have discussed the importance of setting up a VPN connection and the step-by-step process to do it. Now, we are at the final step of the process – testing the connection. This step is crucial to ensure that your VPN is working properly and that you are safe and secure while browsing the internet.
To test the connection, you can start by checking your IP address. Just open a web browser and search for “what is my IP address”. If the IP address shown on the search results page is different from your actual IP address, it means that the VPN connection is successful.
Another way to test the connection is by visiting a website that detects your IP address and location. If the website shows a different location than your actual one, it means that the VPN is working correctly. Finally, you can also test the connection by accessing websites or online services that are blocked or restricted in your location.
If you are able to access them without any issues, it means that the VPN is bypassing the restrictions successfully. So, take the time to test your VPN connection to ensure that it is providing you with the privacy and security you need.
FAQs
How do I connect a 48 volt battery converter to my electrical system?
To connect a 48 volt battery converter to your electrical system, you will need to identify the positive and negative terminals on the battery converter and the corresponding terminals on your electrical system. Then, simply connect the positive terminal of the battery converter to the positive terminal of your electrical system and the negative terminal of the battery converter to the negative terminal of your electrical system. Ensure a secure and tight connection to avoid any loose connections or short circuits.
What precautions should I take when connecting a 48 volt battery converter?
When connecting a 48 volt battery converter, it is important to ensure that the power is turned off before making any connections. This will prevent any electrical shocks or accidents. Additionally, double-check that the voltage rating of your battery converter matches the voltage requirements of your electrical system to avoid any damage or malfunction.
Can I use a 48 volt battery converter with a lower voltage system?
It is not recommended to use a 48 volt battery converter with a lower voltage system. Using a battery converter with a lower voltage system can result in insufficient power supply, leading to issues such as reduced performance or damage to the electrical components. It is best to use a battery converter that matches the voltage requirements of your system.
How do I choose the right size of a 48 volt battery converter for my application?
When choosing the right size of a 48 volt battery converter, consider the power requirements of your application. Calculate the power consumption or wattage of your electrical devices or appliances, and ensure that the battery converter can provide sufficient power to meet these requirements. It is also recommended to choose a battery converter with a slightly higher power rating to allow for any power surges or fluctuations.
Can I connect multiple 48 volt battery converters in parallel?
Yes, it is possible to connect multiple 48 volt battery converters in parallel to increase the overall power capacity. To do this, ensure that the positive terminals of all the battery converters are connected together, and likewise, connect the negative terminals together. By connecting the battery converters in parallel, you can increase the available power output to meet the demands of your electrical system.
Is it necessary to use a battery isolator when connecting a 48 volt battery converter?
Using a battery isolator can be beneficial when connecting a 48 volt battery converter. A battery isolator helps to separate the charging system from the electrical system, allowing for independent operation and preventing any backflow of power between the systems. This can help to protect the battery converter and ensure efficient charging and power supply.
What maintenance is required for a 48 volt battery converter?
Regular maintenance for a 48 volt battery converter includes keeping the terminals clean and free from corrosion, ensuring proper ventilation to prevent overheating, and checking for any loose connections or damaged cables. It is also important to monitor the battery voltage and performance periodically, and replace the battery if it shows signs of deterioration or reduced capacity.