Hey there! So you just purchased a Power Drive Inverter 1000 and you’re ready to use it in your vehicle to power your electronics on the go. But wait, how do you actually connect and troubleshoot this fancy device? Don’t worry, we’ve got you covered! In this blog post, we’ll walk you through the step-by-step process of connecting and troubleshooting the Power Drive Inverter 1000, so you can have power wherever you need it. No more worrying about drained batteries or running out of juice for your devices.
Let’s get started!
Table of Contents
- 1 Introduction
- 2 Connection Process
- 3 Troubleshooting
- 3.1 Common Power Drive Inverter 1000 Issues
- 3.2 Issue 1: Inverter not turning on
- 3.3 Issue 2: Appliance not receiving power
- 3.4 Issue 3: Strange noises or smell coming from the inverter
- 3.5 Issue 4: Overheating of the inverter
- 3.6 Solution 1: Check the power source
- 3.7 Solution 2: Inspect the connections
- 3.8 Solution 3: Reset the inverter
- 3.9 Solution 4: Contact customer support
- 4 Conclusion
- 5 FAQs
Introduction
“Are you having trouble with your Power Drive Inverter 1000? Don’t worry, you’re not alone! Connecting and troubleshooting power drive inverters can be a bit tricky, but with a little know-how, you’ll be up and running in no time. One of the most important things to check when troubleshooting your Power Drive Inverter 1000 is the power source. Make sure that the inverter is properly connected to a stable power supply and that the power switch is turned on.
Additionally, check the battery connections to ensure they are secure and free from corrosion. If everything seems to be in order with the power source, it’s time to move on to the next step of troubleshooting.”
Overview of the Power Drive Inverter 1000
Power Drive Inverter 1000, Inverter Features, Power Drive Technology, Power Generation, Portable Power Solution
Connection Process
If you are experiencing trouble with your Power Drive Inverter 1000, don’t worry, we’ve got you covered! Connecting the inverter is a simple process, but sometimes issues can arise. The first step is to make sure that the inverter is properly connected to your vehicle’s battery. Double-check the positive and negative terminals, ensuring they are securely attached.
If the inverter still isn’t working, it’s important to troubleshoot the problem. Check the inverter’s power switch to make sure it is in the “ON” position. Additionally, inspect the fuse in the inverter to see if it is blown or damaged.
If it is, replacing the fuse should fix the issue. Another helpful tip is to check the voltage of your battery. If the battery voltage is low, it may not provide enough power to the inverter.
In this case, charging or replacing the battery should solve the problem. Remember, it’s always a good idea to consult the user manual for your specific inverter model for detailed troubleshooting steps.
Step 1: Review the manual and gather necessary tools
The first step in the vehicle tracking system installation process is to review the manual provided by the manufacturer. The manual will provide all the necessary instructions and guidelines for the installation process. It is important to thoroughly understand the manual before proceeding with the installation to ensure everything is done correctly.
In addition to the manual, it is also important to gather all the necessary tools and equipment needed for the installation. This may include tools such as screwdrivers, wire cutters, and electrical tape. By reviewing the manual and gathering the necessary tools, you are setting yourself up for a successful and efficient installation process.
Step 2: Ensure proper power source
When it comes to setting up your electronic devices, one crucial step is ensuring that you have a proper power source. Without a reliable power supply, your devices may not function correctly or could be at risk of damage. To ensure a smooth connection process, make sure you have a power source that matches the voltage requirements of your device.
Different countries may have different voltage standards, so it’s essential to check if you need a power converter or adapter. Additionally, avoid using power strips or extension cords that are overloaded or damaged, as this can lead to electrical hazards. By taking these precautions, you can ensure that your devices are powered properly and stay protected from any potential electrical issues.
So, before plugging in your device, double-check that you have the right power source to keep everything running smoothly.
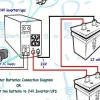
Step 3: Connect the inverter to the power source
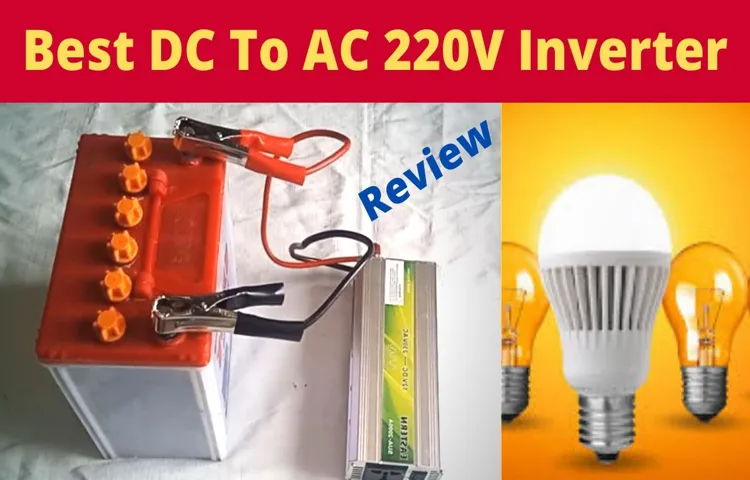
connecting the inverter to the power source. Now that you have your inverter and batteries properly installed, it’s time to connect the inverter to the power source. This step is crucial because it allows your inverter to draw power from the source and convert it into usable electricity for your appliances and devices.
First, you’ll need to locate the main power source in your home or RV. This is typically where the electrical panel or breaker box is located. It’s important to note that you should always turn off the power before connecting your inverter to avoid any electrical accidents.
Once you have turned off the power, you can then proceed to connect your inverter. Start by identifying the wiring that goes from your main power source to the breaker box. This is usually a thick cable or set of wires that carry the electricity into your home or RV.
Next, you’ll want to locate the input terminals on the inverter. These will be labeled clearly and may be color-coded as well. The input terminals are where you will connect the wires from your power source.
Using a screwdriver, loosen the screws on the input terminals of the inverter. This will create a small opening where you can insert the wires from your power source. Make sure to connect the positive wire (usually colored black or red) to the positive (+) terminal on the inverter, and the negative wire (usually colored white or green) to the negative (-) terminal.
Once the wires are securely connected, tighten the screws on the input terminals of the inverter to ensure a good connection. Double-check that all connections are secure and that there are no loose wires. Finally, you can turn the power back on and test your inverter.
Step 4: Connect the inverter to the appliance
In this step, we will connect the inverter to the appliance, which is an essential part of using a power inverter. First, you need to locate the power cord of the appliance and plug it into the AC outlets on the inverter. This will provide the necessary power supply for the appliance to function.
Once the power cord is securely connected, make sure to check if the inverter is properly set to the correct voltage and frequency settings that are required by the appliance. This information can usually be found in the appliance’s user manual or on its label. It is important to ensure that the voltage and frequency settings of the inverter match those of the appliance to prevent any damage or malfunction.
Once you have made the connection and verified the voltage and frequency settings, you can now turn on the inverter and the appliance should start running smoothly using the power from the inverter. It is always a good idea to monitor the operation of the appliance to ensure that it is working properly and to be aware of any unusual noises or behaviors.
Troubleshooting
Having trouble connecting your Power Drive Inverter 1000? Don’t worry, troubleshooting the issue is easier than you think. First, double-check that all the connections are secure and properly plugged in. It’s also a good idea to verify that the power source you’re using is functioning correctly.
If the inverter still isn’t working, try resetting it by disconnecting it from the power source and waiting for a few minutes before plugging it back in. If none of these steps resolve the problem, consult the user manual or reach out to the manufacturer’s customer support for further assistance. Remember, sometimes technical issues can be frustrating, but with a little patience and perseverance, you’ll be able to get your Power Drive Inverter 1000 up and running smoothly in no time.
Common Power Drive Inverter 1000 Issues
power drive inverter 1000, troubleshooting
Issue 1: Inverter not turning on
If you’re experiencing issues with your inverter not turning on, there are a few troubleshooting steps you can take to try and resolve the problem. First, check the power source to make sure it’s working properly. Check if the power switch is turned on and if the circuit breaker hasn’t tripped.
You can also try resetting the inverter by turning it off for a few minutes and then turning it back on. If the inverter still doesn’t turn on, there may be an issue with the internal components or wiring. In this case, it’s best to consult a professional electrician or contact the manufacturer for further assistance.
Remember to always prioritize safety and turn off the power supply before inspecting or attempting any repairs.
Issue 2: Appliance not receiving power
“troubleshooting appliance not receiving power” Is your appliance suddenly not turning on? Don’t panic – there are a few common reasons why an appliance may not be receiving power. First, make sure that the power cord is securely plugged into an outlet. It’s possible that it may have become loose or disconnected.
If the power cord seems fine, check the circuit breaker or fuse box to see if any circuit has tripped or blown. Resetting a tripped breaker or replacing a blown fuse may solve the problem. Another possibility is that there is a problem with the appliance’s power switch.
Try toggling the switch on and off a few times to see if that restores power. If none of these solutions work, it’s possible that there is a more serious issue with the appliance’s internal wiring or components, and it may require professional repair. By troubleshooting these common issues, you can often get your appliance up and running again without the need for costly repairs.
Issue 3: Strange noises or smell coming from the inverter
troubleshooting strange noises or smells from inverter If you’ve noticed strange noises or smells coming from your inverter, don’t panic! It’s important to address the issue promptly to prevent any further damage or potential safety hazards. The first step in troubleshooting this problem is to determine the source of the noise or smell. Is it coming from the inverter itself, or is it originating from another component of your solar system? If it’s the inverter, it could be a sign of an internal fault or malfunction.
In this case, it’s crucial to contact a qualified technician or the manufacturer to investigate the issue further. On the other hand, if the noise or smell is coming from another component, such as the batteries or wiring, it may indicate a problem with the overall system. Again, it’s important to consult with a professional to identify and resolve the issue.
Remember, strange noises or smells should never be ignored when it comes to your solar system, as they can be signs of underlying problems that require immediate attention. By addressing these issues promptly, you can ensure the safety and efficiency of your solar power system.
Issue 4: Overheating of the inverter
Inverters are an important component of solar power systems, as they convert the direct current (DC) produced by solar panels into alternating current (AC) that can be used to power homes and businesses. However, one common issue that can arise with inverters is overheating. This can be caused by a variety of factors, such as poor ventilation, high ambient temperatures, or excessive loads.
When an inverter overheats, it can lead to reduced performance, shortened lifespan, or even complete failure. To troubleshoot this issue, it is important to first ensure that the inverter has proper ventilation and is not located in a confined space. Additionally, checking the ambient temperature and reducing any excessive loads on the inverter can help prevent overheating.
If the issue persists, it may be necessary to consult with a professional to assess the situation and determine if any repairs or replacements are needed. By addressing the issue of overheating promptly, you can help ensure the longevity and effectiveness of your solar power system.
Solution 1: Check the power source
If you’re experiencing trouble with your electronic device, the first thing you should check is the power source. Is it properly plugged in? Is the outlet functioning? Sometimes, a loose connection or a blown fuse can prevent your device from turning on or charging. Double-check the power cord and make sure it’s securely connected.
Try plugging it into a different outlet to see if that resolves the issue. If you’re using a battery-powered device, make sure the battery is charged or replace it if necessary. By addressing the power source first, you can quickly determine if that’s the cause of the problem and potentially save yourself a lot of troubleshooting time.
Solution 2: Inspect the connections
Inspecting the connections can be a simple yet effective solution when troubleshooting issues with your devices or equipment. Sometimes, the problem may be caused by loose or faulty connections, and a quick inspection can help determine the cause. Start by checking all cables and plugs to ensure they are securely connected.
A loose connection can result in a poor signal or no signal at all. If you find any loose cables, try disconnecting and reconnecting them firmly to see if the issue is resolved. Additionally, check for any damaged or frayed cables that may need replacing.
In some cases, the problem may not be with the cables themselves, but with the ports or sockets they are connected to. Inspect these areas for any signs of damage or dirt that may be affecting the connection. Cleaning the ports or sockets using compressed air or a soft cloth can sometimes help restore a stable connection.
By taking the time to inspect and address any issues with the connections, you may find that your devices or equipment work seamlessly once again.
Solution 3: Reset the inverter
solar inverter, inverter reset, troubleshooting, power issues, solar power system, electricity, solar panels If you’re experiencing power issues with your solar power system, one possible solution is to reset the inverter. The inverter is an important component of your solar panels as it converts the DC electricity generated by the panels into AC electricity that can be used to power your home. Sometimes, the inverter can encounter minor glitches or errors that can disrupt its normal functioning.
In such cases, resetting the inverter can often resolve the issue and restore power to your home. Resetting the inverter is a simple process that involves turning it off, waiting for a few minutes, and then turning it back on. This allows the inverter to reset itself and clear any temporary errors or malfunctions.
However, it’s important to note that resetting the inverter should only be done as a troubleshooting step and not as a regular maintenance activity. If the power issues persist after resetting the inverter, it may be a sign of a more serious problem that requires professional assistance.
Solution 4: Contact customer support
customer support, troubleshooting
Conclusion
In conclusion, troubleshooting the Power Drive Inverter 1000 is as easy as connecting the dots – or should I say, connecting the power! While it may seem like a daunting task at first, with a little wit and cleverness, you’ll have this inverter humming like a well-oiled machine in no time. Firstly, make sure all connections are secure and in proper order. Just like solving a puzzle, each piece must fit perfectly for the big picture to come together.
If you find yourself scratching your head, don’t fret – this is where the wit comes into play. Approach the problem from different angles, thinking outside the box, and before you know it, you’ll have cracked the code. Remember, troubleshooting is an art as much as it is a science.
Don’t be afraid to get creative and shake things up a bit. Just like a clever joke, a simple change in perspective could lead to a brilliant punchline – or in this case, a successfully connected inverter. And if all else fails, don’t despair.
Even the sharpest minds encounter roadblocks from time to time. Take a moment to recharge your own batteries, gather your wit, and return to the problem with a fresh set of eyes. You never know, the solution might just reveal itself with a wry smile and a clever quip.
So, next time you find yourself troubleshooting the Power Drive Inverter 1000, remember to embrace your inner comedian. Connecting the power may be the punchline, but the journey there is where the real fun begins. Happy troubleshooting!”
FAQs
How do I connect the Power Drive Inverter 1000 to my electrical system?
To connect the Power Drive Inverter 1000 to your electrical system, you will need to follow the installation instructions provided in the user manual. Typically, you will need to identify the positive and negative terminals of your power source, connect the appropriate cables to these terminals, and then connect the other end of the cables to the input terminals of the inverter. Make sure to double-check all connections and ensure they are secure before turning on the inverter.
What should I do if the Power Drive Inverter 1000 is not working?
If the Power Drive Inverter 1000 is not working, there are a few troubleshooting steps you can try. First, check that the power source is functioning properly and supplying enough voltage for the inverter to operate. Then, inspect all the connections to ensure they are secure and not damaged. If everything seems to be in order, try resetting the inverter by turning it off, disconnecting it from the power source, waiting for a few minutes, and then reconnecting it and turning it back on. If the problem persists, consult the user manual or contact the manufacturer for further assistance.
How can I determine the cause of an error code displayed on the Power Drive Inverter 1000?
If the Power Drive Inverter 1000 displays an error code, it is indicating that there is a problem with its operation. Consult the user manual or the manufacturer’s website to determine the meaning of the specific error code. Typically, the manual will provide a list of error codes and their corresponding causes. Once you have identified the cause, you can take the necessary steps to troubleshoot and resolve the issue. This may involve checking the connections, performing a reset, or contacting technical support for further assistance.
Can the Power Drive Inverter 1000 be used with sensitive electronic devices?
The Power Drive Inverter 1000 is designed to provide power to a wide range of devices, including sensitive electronics. However, it is important to check the specifications of your specific device to ensure compatibility. Some devices may require a pure sine wave inverter to operate properly, while others may have specific voltage or current requirements. If you are unsure, consult the user manual or contact the manufacturer of your device for guidance on using it with an inverter.
Is it possible to use the Power Drive Inverter 1000 in a vehicle or on a boat?
Yes, the Power Drive Inverter 1000 can be used in a vehicle or on a boat, provided that the electrical system of the vehicle or boat is compatible with the inverter’s specifications. When using the inverter in a vehicle, make sure to connect it directly to the battery or a designated power outlet, and take precautions to prevent the inverter from overheating or getting damaged due to vibrations or movement. Similarly, when using the inverter on a boat, ensure that it is securely mounted and protected from moisture and other environmental factors.
How can I maximize the efficiency of the Power Drive Inverter 1000?
To maximize the efficiency of the Power Drive Inverter 1000, it is important to ensure that all connections are secure and free from corrosion or damage. Use appropriate cable sizes to minimize voltage drop and avoid overheating. Additionally, try to minimize the length of the cable runs between the inverter and the power source or the devices being powered. This will help reduce energy losses and improve overall performance. Finally, make sure to operate the inverter within its specified input voltage range and avoid overloading it with excessive power demands.
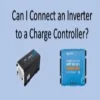
Can the Power Drive Inverter 1000 be used in conjunction with a solar panel system?
Yes, the Power Drive Inverter 1000 can be used in conjunction with a solar panel system to convert the direct current (DC) generated by the solar panels into alternating current (AC) suitable for powering household appliances and devices. To connect the inverter to a solar panel system, you will typically need a charge controller that regulates the voltage and current from the solar panels, as well as the appropriate cables and connectors. Follow the installation instructions provided by the manufacturer of the inverter and the solar panel system to ensure proper and safe operation.