Hey there reader! Are you ready to dive into the fascinating world of “Introduction”? Well, buckle up because we’re about to embark on an exciting journey together. Think of an introduction as the opening scene of a movie, setting the stage and grabbing your attention right from the start. It’s the first impression you make on someone, be it in a conversation, a presentation, or even in writing.
Just like a well-crafted movie intro, a good introduction should captivate your audience, leaving them eager to learn more. It should be concise yet impactful, making sure to grab their attention and guide them towards the main ideas and arguments of your content. In this blog, we’ll explore the art of creating an engaging introduction.
We’ll discuss the different types of introductions and provide you with valuable tips and tricks to make yours shine. Whether you’re a student working on an essay, a blogger crafting a compelling post, or a professional delivering a presentation, mastering the art of introductions is a must. So get ready to unleash your creativity, capture attention, and make a lasting impression.
By the end of this blog, you’ll have all the tools you need to craft introductions that leave a lasting impact and set the stage for an engaging and memorable experience. Now, let’s dive in and explore the fascinating world of introductions!
Table of Contents
- 1 What is a Power Inverter?
- 2 Why Connect a Power Inverter to a Car Battery?
- 3 Step 1: Gather the Necessary Materials
- 4 Step 2: Preparing the Car Battery
- 5 Step 3: Choosing the Right Power Inverter
- 6 Step 4: Connecting the Power Inverter to the Car Battery
- 7 Step 5: Testing the Connection
- 8 Conclusion
- 9 FAQs
- 10 Additional Tips and Safety Precautions
- 11 FAQs
What is a Power Inverter?
When it comes to powering your electronic devices on the go, a power inverter is a must-have. But what exactly is a power inverter? Well, think of it as a kind of magic box that allows you to turn your car’s battery power into AC power that can be used to charge or operate your devices. It’s basically like having a portable electrical outlet in your car! Now, you might be wondering how to connect a power inverter to your car battery.
Don’t worry, it’s actually quite simple. First, you’ll need to locate your car’s battery, which is usually located under the hood or in the trunk. Once you’ve found it, you’ll need to connect the positive and negative terminals of the inverter’s cables to the corresponding terminals on the battery.
Just make sure to connect the red cable to the positive terminal (+) and the black cable to the negative terminal (-). And voila! You’re all set to power up your devices on the go. Just remember to always disconnect the inverter from the battery when it’s not in use to avoid draining your car’s battery unnecessarily.
Happy charging!
Why Connect a Power Inverter to a Car Battery?
If you’re someone who loves camping, road trips, or spending time outdoors, connecting a power inverter to your car battery can be a game-changer. It allows you to power electronic devices or appliances that are typically used in your home, such as laptops, TVs, refrigerators, or even power tools. So, how exactly do you connect a power inverter to a car battery? Well, it’s not as complicated as it may seem.
You’ll need a power inverter, which converts the DC power from your car battery to AC power, and a set of jumper cables to connect the inverter to the battery. Simply connect the positive (+) terminal of the inverter to the positive (+) terminal of the battery and the negative (-) terminal of the inverter to the negative (-) terminal of the battery. Once you have everything set up and your car is running, you can plug in your devices or appliances directly into the power inverter and enjoy the convenience of having electrical power on the go.
So, next time you’re planning a road trip or heading out camping, make sure to bring along a power inverter and stay connected wherever you go!
Step 1: Gather the Necessary Materials
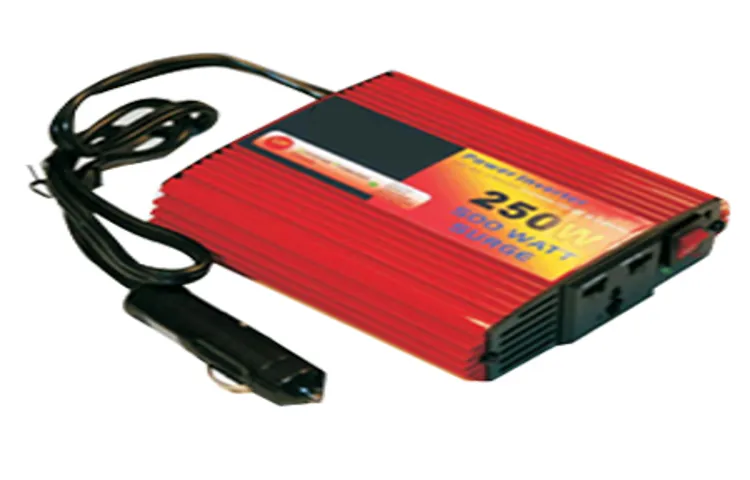
So you want to connect a power inverter to your car battery? Well, before you can get started, you’ll need to gather a few essential materials. First and foremost, you’ll obviously need a power inverter. Make sure to choose one that is compatible with the voltage of your car battery and has the wattage capacity to handle the electronics you plan on using.
Next, you’ll need some cables to connect the inverter to the battery. Look for cables that are thick and sturdy, as they will need to handle the power load. Don’t forget to grab some nuts and bolts to securely fasten the cables to the battery terminals.
Lastly, having a clean and dry work area, some protective gloves, and safety glasses is always a good idea when working with car batteries. With all these materials on hand, you’ll be ready to successfully connect your power inverter to your car battery.
Step 2: Preparing the Car Battery
Once you have gathered all the necessary supplies and have chosen the perfect power inverter for your needs, it is time to prepare your car battery for the connection. The first step is to make sure your vehicle is turned off and in park. This will ensure your safety as well as prevent any electrical accidents.
Next, locate your car’s battery. It is usually located under the hood, and it will be a rectangular box with two poles sticking out. Before connecting the power inverter, it is important to disconnect the negative terminal of the battery.
This is usually indicated by a “-” sign on the battery. Use a wrench to loosen the nut holding the cable in place and gently remove the cable from the terminal. This step is crucial because it will prevent any accidental electrical surges when connecting the power inverter.
Once the negative terminal is disconnected, you can safely proceed with connecting the positive terminal to the power inverter. Just remember to always handle the battery and the cables with care to avoid any injuries. With the battery prepared, you can now move on to the next step of connecting the power inverter to your car battery.
Checking the Battery Voltage
car battery, battery voltage, preparing car battery
Checking the Battery Terminals
In the second step of preparing the car battery, we need to check the battery terminals. The battery terminals are an essential part of the battery that helps deliver power to the vehicle’s electrical system. Over time, these terminals can become corroded or loose, which can affect the performance of the battery.
To check the battery terminals, start by disconnecting the negative cable, which is usually black, from the battery. Then, inspect the terminals for any signs of corrosion or damage. If you notice any corrosion, you can use a wire brush or a mixture of baking soda and water to clean the terminals.
After cleaning, make sure the terminals are tight and secure before reattaching the negative cable. Taking the time to check and clean the battery terminals can help ensure a reliable electrical connection and extend the life of your battery.
Step 3: Choosing the Right Power Inverter
So, you’re ready to connect a power inverter to your car battery and start enjoying the convenience of having AC power on the go. But before you dive into the installation process, it’s important to choose the right power inverter for your needs. Consider factors such as wattage, output voltage, and the type of devices you’ll be using.
Are you planning to power small electronics like a laptop or phone charger, or do you need to run larger appliances like a refrigerator or power tools? Determining your power requirements will help you select an inverter that can handle the load without draining your car battery too quickly. Additionally, you’ll want to ensure that the inverter you choose has the necessary safety features, such as overload protection and low voltage shutdown, to protect both your devices and your car battery. By taking the time to research and choose the right power inverter before connecting it to your car battery, you’ll be setting yourself up for a successful and efficient power source on the go.
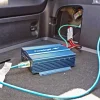
Step 4: Connecting the Power Inverter to the Car Battery
So, you’ve decided to install a power inverter in your car to have access to AC power on the go. Nice choice! Whether you want to charge your laptop, run a small appliance, or even power a mini-fridge during a road trip, a power inverter can definitely come in handy. Now, let’s get to the nitty-gritty of connecting that shiny new power inverter to your car battery.
Before you start, it’s crucial to disconnect the negative terminal of your car battery to avoid any potential accidents. Safety first, right? Once that’s done, locate a suitable spot in your vehicle to mount the power inverter. It should be close to the battery, but well-protected from any potential damage or interference.
Once you’ve found the perfect spot, it’s time to connect the power inverter to your car battery. Begin by attaching the positive (red) cable from the power inverter to the positive terminal of your car battery. Tighten the nut securely to ensure a solid connection.
Next, connect the negative (black) cable from the power inverter to the negative terminal of your car battery. Again, tighten the nut snugly. Now, here comes the tricky part.
You’ll need to run a fuse from the positive terminal of your car battery to the power inverter. This will protect your inverter and other power devices from any electrical mishaps. Make sure to use an appropriate fuse inline with the power inverter’s specifications.
After connecting the fuse, double-check all the connections to ensure they are tight and secure. You don’t want any loose connections that could potentially cause a short circuit. Once you’re confident everything is in order, reconnect the negative terminal of your car battery.
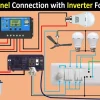
Locating the Positive and Negative Terminals
In order to connect the power inverter to your car battery, you need to locate the positive and negative terminals. These terminals are typically marked with a “+” symbol for the positive terminal and a “-” symbol for the negative terminal. They can usually be found on the top or side of the battery.
Once you have located the terminals, it’s important to ensure that your power inverter is properly connected. The positive terminal of the car battery should be connected to the positive terminal of the power inverter, and the negative terminal of the car battery should be connected to the negative terminal of the power inverter. This will ensure that the power flows in the correct direction and that the inverter is receiving the proper voltage.
It’s essential to make sure that the connections are secure and tight. Loose connections can lead to a weak or intermittent power supply, which can cause issues with your electronics. You can use a wrench or a pair of pliers to tighten the connections if needed.
Remember, always follow the manufacturer’s instructions when connecting your power inverter to your car battery. This will ensure that you are doing it safely and correctly. Once you have made the connections, you can test the inverter by plugging in your electronics and turning them on.
If everything is connected properly, you should be able to power your devices using the car battery.
Connecting the Positive Terminal
power inverter, car battery, connecting, positive terminal
Connecting the Negative Terminal
power inverter, car battery, connecting, negative terminal Alright, folks, we’re getting closer to the finish line! Step 4 in installing a power inverter in your car is connecting it to the car battery. This is where the magic happens and your inverter comes to life! But first, we need to find the negative terminal on your car battery. It may sound a bit intimidating, but don’t worry, it’s not as complicated as it sounds.
The negative terminal is usually marked with a minus sign (-) and is often black in color. You can also refer to your car’s manual if you’re unsure. Once you’ve located the negative terminal, it’s time to make the connection.
Make sure your inverter is turned off before proceeding. You’ll need a wrench to loosen the nut on the negative terminal. Once loosened, slide the inverter’s ring terminal over the negative terminal, making sure it fits snugly.
Then, tighten the nut back in place to secure the connection. And just like that, your power inverter is officially connected to your car battery! It’s time to power up and enjoy all the benefits of having an inverter in your vehicle.
Securing the Connections
power inverter, car battery, connecting
Step 5: Testing the Connection
So you’ve got your power inverter and you’re ready to connect it to your car battery. First, make sure your vehicle is turned off and the keys are removed from the ignition. Locate your car’s battery, which is usually under the hood.
Remember, safety first! Before touching anything, put on some gloves and safety goggles to protect yourself. Next, take a look at the power inverter. On one end, you’ll see a set of cables with clamps attached.
These clamps are used to connect the inverter to the battery. The positive clamp is usually red, and the negative clamp is usually black. Find the positive terminal on your car battery, which is marked with a plus (+) sign.
Attach the red clamp to the positive terminal, making sure it’s secure. Now, it’s time to connect the negative clamp. Find the negative terminal on your car battery, marked with a minus (-) sign.
Attach the black clamp to the negative terminal, ensuring a tight connection. With both clamps securely attached, you can now turn on the power inverter. It should light up, indicating a successful connection.
If you’re using the inverter to power electronic devices, you can now plug them in and start using them. Remember, when using a power inverter, it’s important not to overload it. Check the wattage rating of your inverter and make sure the devices you’re using don’t exceed that rating.
Testing with a Small Appliance
testing the connection with a small appliance Now that you’ve set up your small appliance and connected it to your Wi-Fi network, it’s time to test the connection. Testing the connection will ensure that your appliance is properly connected and ready to use. To test the connection, simply turn on your small appliance and see if it connects to Wi-Fi.
You can check this by either using the appliance itself, or by checking the status lights on the device. If the Wi-Fi symbol lights up or if the appliance successfully completes its startup process, then congratulations! Your small appliance is successfully connected to Wi-Fi.
Monitoring the Battery Voltage
monitoring the battery voltage. In Step 5 of testing the connection for monitoring the battery voltage, it is important to ensure that everything is working properly before moving forward. This step involves checking if there is a stable connection between the monitoring device and the battery.
One way to do this is by using a multimeter to measure the voltage of the battery. By connecting the multimeter’s leads to the positive and negative terminals of the battery, you can get an accurate reading of the voltage. This measurement can help determine if the battery is fully charged or if it needs to be replaced.
It is crucial to perform this step correctly because an unstable or loose connection can lead to inaccurate voltage readings and potentially damage the monitoring device. By double-checking the connection at this stage, you can ensure that the monitoring system will work correctly and provide accurate information about the battery’s voltage.
Conclusion
In conclusion, connecting a power inverter to your car battery is like giving your ride an extra power boost. It’s like strapping a jet engine onto a bicycle – suddenly, you have the ability to power up your electronic devices on the go and transform your vehicle into a mobile charging station. It’s a clever and efficient way to stay connected, no matter where your adventures take you.
So, go forth and embrace the power of the inverter – your car battery will thank you for it!”
FAQs
If you want to connect a power inverter to your car battery, there are a few steps you need to follow. First, you’ll need to find a suitable location to mount the inverter, such as the trunk or under a seat. Next, you’ll need to determine the correct size of power cable to use.
This will depend on the wattage of the inverter and the length of cable needed to reach your battery. You’ll also need to install a fuse near the battery to protect against overloading. Once you have the correct cable and fuse, you can connect the inverter to the battery terminals.
Make sure to connect the positive cable to the positive terminal and the negative cable to the negative terminal. Finally, you can connect your devices to the inverter and start using them. Just remember to turn off the inverter when you’re not using it to prevent draining your car battery.
Additional Tips and Safety Precautions
When connecting a power inverter to your car battery, it is important to take certain precautions to ensure safety and proper functioning. First and foremost, make sure to choose a power inverter that is compatible with your car’s electrical system. Check the owner’s manual or consult with a professional if you are unsure.
Before starting the installation process, disconnect the negative cable from the battery to prevent any accidental short circuits. When connecting the power inverter, ensure that the positive cable is securely connected to the positive terminal of the battery and the negative cable is connected to a suitable ground point, such as a metal frame or engine block. It is also important to use the appropriate gauge of wire for the power inverter’s requirements to avoid overheating and damage.
Finally, always double-check all connections and secure them tightly to prevent any potential issues while using the power inverter. Following these simple steps will help ensure a safe and successful connection of the power inverter to your car battery.
FAQs
How do I connect a power inverter to my car battery?
To connect a power inverter to your car battery, follow these steps:
1. Locate your car battery and ensure the engine is turned off.
2. Connect the black (negative) terminal of the power inverter to the black (negative) terminal of the car battery.
3. Connect the red (positive) terminal of the power inverter to the red (positive) terminal of the car battery.
4. Double-check the connections to ensure they are secure.
5. Start the engine and test the power inverter to make sure it is working properly.
What size power inverter do I need for my car battery?
The size of the power inverter you need depends on the devices you plan to power. Consider the wattage requirements of the devices you intend to use with the power inverter and choose an inverter that can handle their total wattage. It is also important to consider the peak power rating of the inverter, as some devices may require a higher surge of power when starting up.
Can I use a power inverter with a hybrid or electric car?
In most cases, it is not recommended to use a power inverter with a hybrid or electric car unless it has been specifically designed for such use. Hybrid and electric car batteries function differently from traditional car batteries, and using a power inverter that is not compatible can potentially damage the vehicle’s electrical system.
Is it safe to leave a power inverter connected to a car battery when the engine is off?
It is generally not recommended to leave a power inverter connected to a car battery when the engine is off. This can drain the car battery and potentially cause starting issues. If you need to use a power inverter while the engine is off, it is advisable to connect it to a separate power source, such as a standalone battery or a portable power station.
How can I prevent my power inverter from draining my car battery?
To prevent your power inverter from draining your car battery, you can:
– Limit the use of the power inverter while the engine is off.
– Monitor the battery voltage and disconnect the inverter if it drops too low.
– Use a power inverter with a low voltage cutoff feature that automatically shuts off when the battery voltage reaches a certain level.
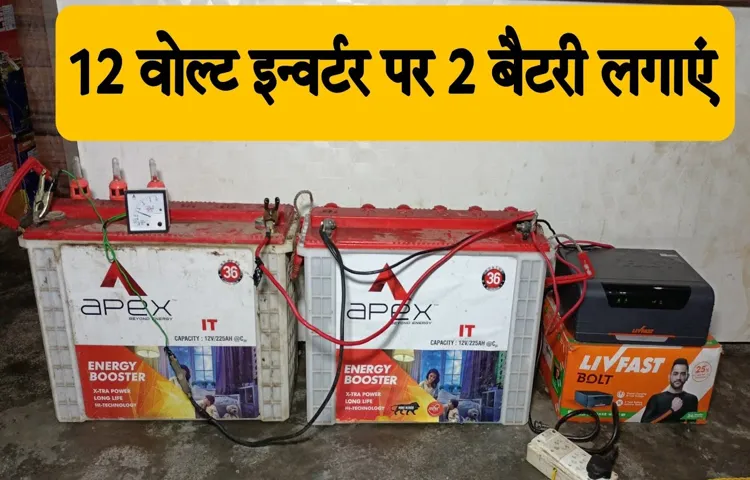
– Consider using a deep cycle battery or a dual battery system to power your inverter.
Can I connect multiple power inverters to my car battery?
It is generally possible to connect multiple power inverters to a car battery, but it depends on the capacity of the battery and the total power requirements of the devices you plan to use. Make sure the combined wattage of the inverters does not exceed the maximum power output of the car battery and charging system.
How can I protect my power inverter from overheating?
To protect your power inverter from overheating, it is important to:
– Ensure proper ventilation around the inverter to allow for heat dissipation.
– Avoid placing the inverter in direct sunlight or near heat sources.
– Monitor the temperature of the inverter and disconnect it if it becomes excessively hot.
– Use a power inverter with built-in overheating protection features, such as automatic shutdown or thermal sensors.