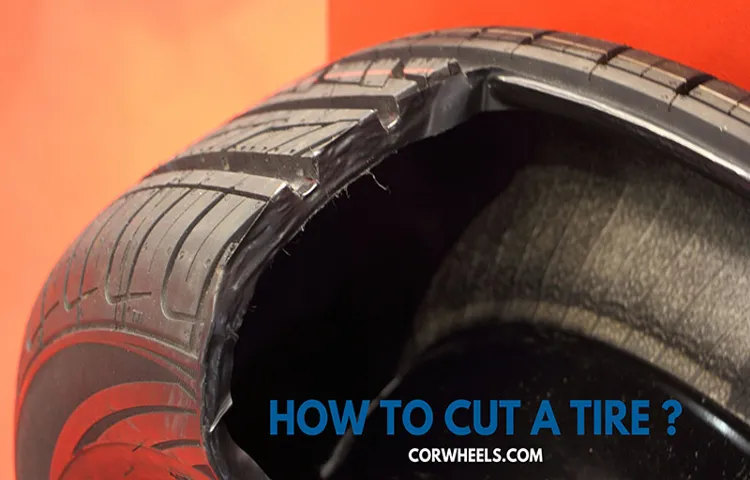
Have you ever wondered what the inside of a tire looks like? Have you ever considered cutting a tire in half just to satisfy your curiosity? Well, we’ve got you covered with this step-by-step guide on how to cut a tire in half. First things first, you’ll need some safety gear. A pair of safety glasses, heavy-duty work gloves, and a dust mask are a must.
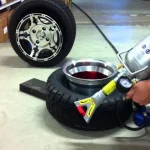
Once you have your gear on, you’re ready to start. The first step is to remove the tire from the rim. Use a tire iron to remove any valve stems and deflate the tire entirely.
Once the tire is deflated, use a tire machine or tire irons to separate the tire from the rim. Next, make a line using a permanent marker where you want to cut the tire. You can cut it in half lengthwise or across the center, depending on what you want to see.
Then, using a reciprocating saw or a hacksaw, start cutting along the line you marked. It’s best to have someone hold the tire while you’re cutting to avoid it moving around. Once you’ve made your cut, inspect the inside of the tire and take a closer look at its construction.
Cutting a tire in half can be a fascinating experience, not only for the curious but also for those who want to learn more about the composition and design of tires. Plus, it’s a great way to repurpose old tires and create unique DIY projects. So, grab your safety gear, follow this step-by-step guide, and explore the inside of a tire for yourself.
Who knows, you might just discover something new.
Table of Contents
What You’ll Need
Cutting a tire in half may sound like a daunting task, but with the right tools and precautions, it can be done fairly easily. Before you start, gather necessary items such as safety glasses, work gloves, a handsaw, and a jigsaw with a metal-cutting blade. It’s important to wear safety gear as the tire material can be tough to cut through and flying debris could cause harm.
Once you have your tools ready, secure the tire to a stable surface like a workbench or sawhorse using clamps, making sure it doesn’t shift during cutting. Then, use the handsaw to cut a straight line down the center of the tire from the rim to the tread. Once the handsaw is through, switch to the jigsaw and continue cutting in a straight line until the tire is in half.
Remember to cut slowly and steadily and not force the saw through the rubber to avoid damaging it. With a little patience and care, cutting a tire in half can be a simple process.
Tire
When it comes to changing a tire, there are a few things you’ll need to have on hand to make the process go as smoothly as possible. First of all, you’ll need a spare tire – this should be stored in your vehicle at all times, along with the tools you’ll need to change it. These typically include a lug wrench, a jack, and a tire iron.
Depending on the type of vehicle you have, you may also need a locking wheel nut key. It’s a good idea to keep a flashlight and some gloves in your trunk as well, in case you need to change a tire in the dark or in inclement weather. Remember, it’s important to always be prepared and to know how to change a tire in case of an emergency.
Box cutter or utility knife
When it comes to cutting through boxes or opening packages, the right tool is essential. A box cutter or utility knife is a must-have for any home, office, or warehouse. These tools feature a sharp, retractable blade that can slice through cardboard, tape, and plastic with ease.
But which one is the better choice? Well, it depends on your preferences and the task at hand. A box cutter is easy to use, lightweight, and has a smaller blade, making it perfect for cutting through small boxes or tight spaces. On the other hand, a utility knife has a larger blade that can handle tougher materials, such as wood or drywall.
It also has a more substantial handle, making it easier to grip and control. Ultimately, it comes down to personal preference and what you plan to cut. Regardless of which one you choose, always use caution and professionalism when handling sharp objects.
Safety gloves and goggles
If you’re planning to undertake any task that might expose you to certain hazards, investing in appropriate safety gear is essential. This includes gloves and goggles, which are typically the two most common items required for many hazardous activities. From construction work to laboratory experiments, protective gloves can shield your hands from chemicals, heat, or sharp objects.
Meanwhile, safety goggles protect your eyes from debris, dust, or chemical splashes. When choosing your gloves and goggles, remember to pick the ones that suit the risks involved. For instance, if you’re working with chemicals that may cause burns, opt for gloves that can withstand extreme temperatures like Nitrile gloves.
Similarly, if you’re doing any grinding or welding work, select safety goggles that can hold up to sparks and flash. Remember, ensuring your safety should be your top priority, so take time to assess the hazards associated with the task at hand and invest in the appropriate safety gear to protect yourself against potential injuries.
Preparing the Tire
Cutting a tire in half might seem like a daunting task, but with the right tools and preparation, it can be done easily. First, you will need to remove the tire from the wheel rim and ensure it is free of any debris or sharp objects. Next, make a small cut in the center of the tire with a utility knife or scissors, and slowly work your way around the tire, making sure to maintain an even cut.
Be sure to wear protective gloves and eyewear to prevent any injury. Once the tire is cut in half, you can use it for a variety of DIY projects, such as creating planters or dog beds. Remember to dispose of the leftover rubber responsibly.
With these simple steps, you can successfully cut a tire in half and repurpose it for a variety of creative uses.
Secure the tire in place
When preparing to secure a tire in place, there are a few important steps you should follow. Firstly, ensure that the area surrounding the tire is clear of any obstacles that may hinder the process. Place the tire in a stable and flat location to avoid any accidents during the securing process.
Next, check that the lug nuts on the tire are tightened securely before moving forward. This is to ensure that the tire remains in place and doesn’t come loose while driving. Once this is done, it’s time to secure the tire in place using either tire chocks or other methods.
This is important not only for safety reasons but also to prevent damage to the tire or vehicle. By taking these simple yet crucial steps, you can be confident that your tire is safely secured and ready for use. So go ahead and hit the road with peace of mind, knowing that your tire is securely in place!
Mark where you want to cut
When preparing a tire for cutting, one of the essential steps is marking the area where you want to cut. This simple step ensures that you have a clear guideline on where to make your cut, giving you a cleaner and more precise result. Start by cleaning the tire with soap and water to remove any dirt and debris.
Once the tire is clean, use a bright marker to mark the area where you want to cut. Avoid using a dark marker as it may be difficult to see on the black surface. Make multiple marks around the tire, ensuring that your guidelines are clear and easy to follow.
This step will give you the exact shape and size of the cut you want to make, making the following steps much easier. With the tire marked, you are now ready to move to the next step of cutting, confident you will achieve great results. Remember, take your time when marking the tire, as accuracy is key.
Make sure the area is clear of debris and flammable materials
When preparing to do some tire maintenance, one of the essential things to do is to ensure the area is free from debris and flammable materials. Imagine working on your tires and accidentally hitting a sharp object that punctures it. That would not only ruin your tire, but it could also injure you.
Additionally, if there’s any flammable material around while you’re replacing your tire, you could be in danger of a fire outbreak. Before you start, ensure there is no debris around, such as loose stones or twigs. Clear the area of anything that might pose a risk.
It’s vital to prioritize safety when working on your tires. So, begin by making sure the area is clear of any flammable materials, such as oil or gas that might ignite a fire. Take care of yourself and your surroundings, and you will have a safe and successful tire-changing experience.
Put on your safety gear
Before you start preparing your tire, it’s important to put on your safety gear. This includes gloves to protect your hands and safety glasses to shield your eyes from debris. Once you’re properly protected, you can begin preparing the tire.
Start by thoroughly cleaning the tire to remove any dirt or debris that may interfere with your work. You can use a tire cleaner or a simple mixture of soap and water to get the job done. Once the tire is clean and dry, it’s time to inspect it for any damage.
Check for any cracks, cuts, or punctures that could compromise the safety of the tire. If you find any significant damage, the tire should be replaced. Finally, check the tire pressure to ensure that it’s at the proper level.
Proper tire pressure is crucial for safe driving and can also impact fuel efficiency. By taking these steps to prepare your tire, you can ensure safe driving and extend the life of your tire.
Cutting the Tire
Cutting a tire in half might seem like a daunting task, but with the right tools and technique, it can be done safely and easily. First, you’ll need a saw that is capable of cutting through rubber. A reciprocating saw with a fine-toothed blade is a good option.
Next, mark the tire where you want to make your cut using a marker or chalk. Then, using the saw, carefully cut along the line, making sure to keep your hands and the saw blade clear of the tire’s steel belts. It’s important to wear the proper safety gear while doing this, including gloves and eye protection.
Once you’ve made the cut, you’ll have two halves of the tire that can be repurposed for a variety of DIY projects, such as creating planters or sandboxes. Overall, cutting a tire in half can be a useful tool for upcycling and repurposing materials, and it’s a straightforward process once you know how to do it safely.
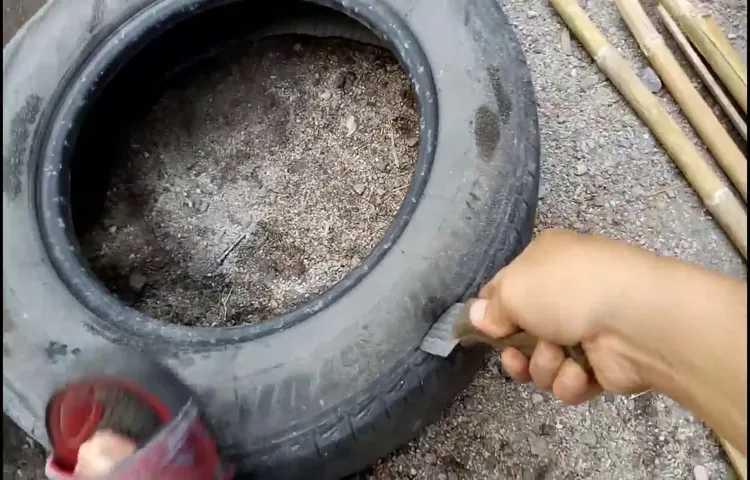
Score the tire with a box cutter or utility knife
When it comes to cutting a tire, the first step is to score it with a box cutter or utility knife. This is done to create a groove or a channel in the rubber, which will make it easier to cut through the tire. When scoring the tire, it’s important to be careful and precise, as you don’t want to damage the tire too much.
Start by making a small cut and gradually work your way around the tire, following the line you want to cut. Once you’ve scored the tire, you can then use a saw or other cutting tool to make the actual cut. Keep in mind that cutting a tire is not without its risks, so it’s important to take the necessary safety precautions before beginning the process.
Wear gloves and eye protection, and make sure you have a stable work surface to prevent the tire from slipping. Remember to take your time and work slowly and methodically to ensure a clean cut and a safe outcome.
Use a saw or reciprocating saw to cut through the tire
When it comes to cutting through a tire, two methods stand out: using a saw or a reciprocating saw. A traditional saw features a sharp-toothed blade that can be used to slice through the tire material, while a reciprocating saw relies on a back-and-forth motion, similar to a jigsaw. Regardless of which tool you choose, it’s crucial to take safety precautions to avoid injuring yourself or others.
Make sure you wear protective gear such as gloves, goggles, and a dust mask to prevent debris from flying into your face. Additionally, keep the saw blade lubricated with oil or water to prevent friction and ensure a clean cut. Overall, cutting through a tire can be a challenging task that requires precision, patience, and the right tools.
But with the right approach and safety measures in place, you can get the job done with ease and efficiency. So, try out the saw or reciprocating saw method today and see how it works for you!
Take your time and use even pressure
When it comes to cutting a tire, it’s important to take your time and use even pressure. Make sure you have the right tools for the job, such as a sharp blade or a tire cutter. The first step is to mark the tire where you want to make the cut.
This can be done with a piece of chalk or a marker. Next, use the blade or cutter to slowly and methodically apply pressure, making sure to keep your hands steady. It’s important to maintain even pressure throughout the cut, as uneven cutting can result in a tire that is difficult to install or unsafe to use.
With patience and a steady hand, cutting a tire can be a simple and straightforward task. So, don’t rush it and take your time to ensure a smooth and precise cut that won’t compromise the safety of your vehicle.
Finishing Up
Congratulations on making it this far in your tire-cutting journey! By following the steps outlined in this guide, you should now have a tire that is cleanly cut in half. However, before you dispose of the tire, it’s important to consider proper waste management. Tires can be recycled and used for other purposes such as playground surfaces or fuel for industrial processes.
Make sure to check with your local waste management facility to see if they accept tires for recycling. Additionally, it’s important to wear proper protective gear when cutting tires to avoid injury. Remember, safety always comes first! Overall, learning how to cut a tire in half can be a useful skill for DIY projects and upcycling, but it’s crucial to consider the environmental impact and safety measures involved.
Check for any sharp edges and sand them down
As you near completion of your woodworking project, you’ll want to look out for any sharp edges that could cause injury or damage to the piece itself. Sanding down these rough spots can help avoid accidents and ensure a smooth finish. Take your time to carefully inspect all edges of the piece, including corners and joints, and use an appropriate sandpaper grit to smooth out any roughness.
Not only does this help with safety, but it also elevates the overall quality of your final product. Keep in mind that even small imperfections can be noticeable, so be thorough in your inspection and sanding process. By taking these extra steps, you can ensure that your woodworking project is not only beautiful but safe as well.
Clean up any debris or remnants
After completing any sort of outdoor work, it’s important to take the time to clean up any debris or remnants left behind. This not only helps maintain the appearance of your property, but it can also prevent accidents and injuries. Start by collecting any loose branches, rocks, or other objects and disposing of them properly.
If you’ve trimmed shrubs or trees, make sure to gather up all the trimmings and place them in yard waste bags. Don’t forget to check your gutters and remove any leaves or sticks that may have accumulated. By taking these simple steps, you can ensure that your yard is clean and safe for everyone to enjoy.
Conclusion
In conclusion, cutting a tire in half may seem daunting at first, but with the right tools and technique, it can be a breeze. Whether you’re looking to repurpose the rubber for a DIY project or simply fascinated by the inner workings of a tire, remember to prioritize safety and take your time. And as always, be sure to use your newfound tire-cutting skills for good, not mischief.
Happy slicing!”
FAQs
What tools are needed to cut a tire in half?
A sturdy utility knife or saw and a pair of heavy-duty gloves are essential tools for cutting a tire in half.
How can I safely cut a tire in half?
Wear protective gloves and goggles, secure the tire firmly in place, and use a saw or rotary tool to make the cut slowly and carefully.
Will cutting a tire in half damage the blade or tool I use?
Tires are made of tough materials like rubber and steel, so it’s important to use a high-quality and durable saw or rotary tool with a strong blade to prevent damage.
What are some creative ways to use halves of tires?
Cut tires can be repurposed as flower planters, sandbox borders, swings, and even fitness equipment like sleds or tractor tires for workouts.
Can I use partially damaged or flat tires for cutting in half?
It’s not recommended to use tires that are heavily damaged or have punctures, as they may be unsafe to handle and may not provide a clean cut.
How long does it take to cut a tire in half?
The time it takes to cut a tire in half depends on the tools used, the thickness of the tire, and the skill of the person doing the cutting. It can take anywhere from five to fifteen minutes.
Where can I find detailed instructions and videos on cutting a tire in half?
There are many online resources and tutorials that provide step-by-step instructions and video demonstrations for cutting tires in half, including DIY blogs, YouTube channels, and home improvement websites.