Changing a tire is an essential skill for every driver. It’s something that everyone should know how to do. However, removing a tire from a rim can look daunting, especially if you don’t have the proper tools.
But, worry not, because in this blog, we’ll break down how to dismount a tire by hand. Yes, you read that right – by hand. While having a tire changing machine is ideal, it’s not always practical or accessible.
In many cases, dismounting a tire manually can save you time, money, and effort. With this tutorial, you’ll be dismounting tires like a pro in no time!
Table of Contents
Introduction
If you’re looking to do a tire replacement or repair, dismounting a tire by hand can be a useful skill to have. While it may seem daunting, it’s actually quite simple with the right tools and technique. One thing to keep in mind is to ensure safety during the process, as the tire and wheel assembly can be heavy and potentially dangerous if mishandled.
To start, use a tire iron to remove the valve stem and deflate the tire. Then, use a pry bar or tire iron to pop the bead away from the rim by levering it down. Once one side of the tire is off the rim, you can use your hands or a tire iron to remove the other side by pulling it over the rim.
When doing this, be careful not to damage the bead, as this could potentially cause a leak or lead to further damage. With a bit of practice and patience, you’ll become a pro at dismounting tires by hand in no time.
Explanation of Tire Dismounting
Tire dismounting is an essential skill that every car owner should know. It involves removing the tire from the wheel, which can be a bit tricky, but with the right tools and steps, it’s an easy process. The first step in dismounting a tire is to loosen the lug nuts using a lug wrench.
Once the lug nuts are loose, lift the car using a jack and remove the lug nuts and wheel. Next, deflate the tire completely and place it on a tire changing machine. The tire changing machine is a handy tool that helps in the dismounting process.
The machine has a bead breaker that breaks the seal between the tire and the wheel, allowing you to remove the tire easily. You can then use a tire iron to pry the tire off the wheel, starting at the valve stem and working your way around until the tire is fully removed. It’s crucial to be cautious during the dismounting process as the tire can be quite heavy, and there is the risk of damaging the wheel or injuring yourself.
It’s important to have proper tools, such as a jack stand, tire changing machine, and tire iron, to make the process smoother and safer. In conclusion, tire dismounting is not a complex process, but it requires patience, caution, and the right tools. By following the steps mentioned above, you can efficiently dismount your tire without any problems.
Keep in mind that proper maintenance of your tires is crucial for safe driving, so it’s essential to check your tire pressure and rotate your tires regularly.
Tools and Materials Needed
If you need to dismount a tire by hand, you’ll need a few essential tools and materials. First, you’ll need a tire iron or pry bar. This tool helps remove the tire from the rim.
You may also need a rubber mallet to coax the tire off the rim and a pair of pliers to manipulate the valve stem. A tire bead breaker is another useful tool that helps separate the tire from the rim. Additionally, a good quality lubricant is necessary to reduce friction and ease the dismounting process.
You may also want to wear gloves to protect your hands and prevent injuries while working with sharp edges or tools. Always ensure you have the appropriate tools and materials before dismounting a tire to ensure a safe and efficient process. By following these steps and having the necessary tools, you’ll be able to dismount a tire by hand with ease and save money on repair costs.
List of Required Materials
When it comes to starting a new project, it is essential to have all the necessary tools and materials on hand. Whether you are a DIY enthusiast or a professional, having the right tools and equipment is crucial to achieve the perfect result. For example, if you are planning to do some woodworking, you will need various cutting tools, power tools, measuring devices, sanding tools, and finishing supplies.
Additionally, it would help if you considered the type of wood you are using, the hardware required, and other accessories like clamps, screws, and nails. Other common materials and tools you might need for home improvement projects include paint and brushes, plumbing supplies, electrical equipment, cleaning supplies, and safety gear like gloves and protective eyewear. By making a list of all the required tools and materials, you can avoid making unnecessary trips to the store and ensure you have everything you need to complete your project successfully.
Step-by-Step Guide
If you need to dismount a tire by hand, no worries! It’s a task that you can quickly and easily complete with a few basic tools and some elbow grease. The first step is to remove the wheel from the vehicle and secure it in a steady place. Then, deflate the tire fully by removing the valve core and pressing down on the valve stem.
Once the tire is flat, place it on a flat surface or tire changing stand with the outside facing down. Now, using a tire iron or pry bar, carefully lever the edge of the tire over the rim, then work your way around the circumference of the wheel, prying the tire away from the rim. Be very careful not to damage the tire or the rim during the process.
Once one side of the tire is off, flip the wheel over and repeat the process to dismount the other side. Voila! Your tire is now dismounted and ready for repair or replacement.
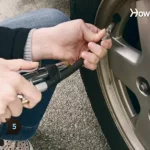
Removing the Valve Core
If you want to remove the valve core from your tire, you’ll need a valve core remover tool. It’s a simple, inexpensive tool that saves you lots of time and frustration. Once you have your tool, start by loosening the valve cap and releasing any air from the tire.
Then, insert the valve core remover tool into the valve stem and turn it counterclockwise until it feels loose. You should be able to remove the valve core by pulling it out with a pair of pliers or your fingers. Be sure to keep the valve core safe for reuse or disposal.
If for any reason your valve core gets stuck or you encounter resistance, don’t force it. Instead, try lubricating the valve stem with a few drops of oil or use a pair of pliers to gently wiggle the valve core back and forth until it comes out. Remember, removing the valve core allows you to add sealant and check for leaks, so don’t forget to replace the valve core once you’re finished.
By following these simple steps, you can easily remove and replace your valve core, ensuring your tire stays in top shape.
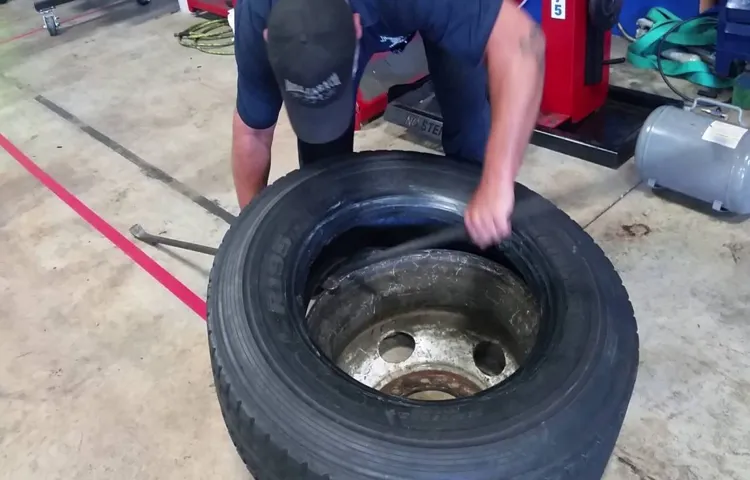
Breaking the Bead of the Tire
Breaking the bead of a tire can seem like a daunting task, but it’s actually a fairly simple process. The purpose of breaking the bead is to separate the tire from the rim so it can be changed or repaired. You’ll need a few tools to get started, including a bead breaker or tire iron, and a jack.
Begin by loosening the lug nuts on the tire you’re working on using your lug wrench. Next, use your jack to lift the tire off the ground and remove the lug nuts. Now, position your bead breaker or tire iron against the tire bead and apply pressure until the bead pops off the rim.
You may need to work your way around the tire, repeating the process until the entire bead is off the rim. Once the bead is broken, you can remove the tire from the rim. With some practice, breaking the bead will become an easy and quick process.
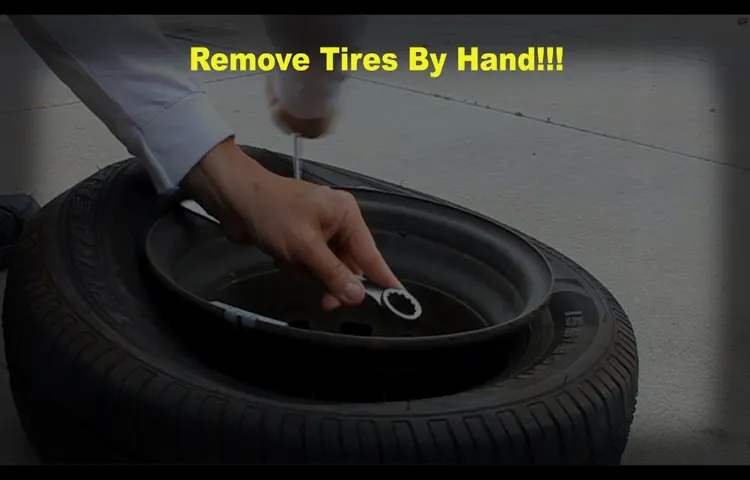
Removing the Tire from the Rim
Removing a tire from a rim can seem like a daunting task, but it’s actually quite simple when you follow the right steps. First, deflate the tire completely and remove the valve stem using pliers. Next, position the wheel over a tire changing stand or a couple of cinder blocks.
Use tire irons to pry the tire bead over the rim, working your way around the circumference of the tire until the entire bead is free. Then, use your hands to pull the tire away from the rim, starting at the valve stem and working your way around. Be sure to use gloves to protect your hands from any sharp edges.
Once the tire has been removed, you can inspect it for damage and patch any holes before reinstalling it on the rim. By following these steps, you can safely and easily remove a tire from its rim, allowing you to perform any necessary repairs or maintenance.
Removing the Inner Tube
Removing the inner tube of a bicycle tire can seem like a daunting task at first, but with the right tools and a bit of patience, it can actually be quite simple. The first step is to fully deflate the tire and release any air pressure that may be inside the inner tube. Once the tire is fully deflated, you will need to use tire levers to detach the tire from the rim of the wheel.
This will allow you to access the inner tube, which is located inside the tire. You can then gently remove the inner tube from inside the tire, being careful not to damage it in the process. Depending on the type of valve stem your inner tube has, you may need to unscrew it from the rim of the wheel before completely removing it.
Overall, removing the inner tube requires a bit of finesse, but with some practice, it can become an easy and routine part of bike maintenance.
Safety Tips
When it comes to tire maintenance, it’s important to prioritize safety. Learning how to dismount a tire by hand is a useful skill to have, but it’s crucial to take the appropriate precautions to avoid injury. First, make sure the tire is completely deflated and remove the valve core.
Use a tire iron to break the bead by gently prying between the tire and rim. Once the bead is broken, work your way around the tire with the tire iron, using small movements to lift the tire away from the rim. Be careful not to puncture the tire with the tire iron.
If the tire is particularly stubborn, try using soapy water or a lubricant to make it easier to dismount. Always wear protective gloves and eyewear when working with tires to avoid cuts, punctures, or debris flying into your eyes. By taking your time and being cautious, you can successfully dismount a tire by hand without risking injury.
Importance of Safety
When it comes to staying safe, it’s important to take certain precautions. Whether you’re walking down the street alone or driving on the highway, there are safety tips that can help minimize the risk of accidents and other mishaps. One easy way to stay safe is to always be aware of your surroundings.
This means avoiding distractions like texting while walking or driving, and staying alert to potential dangers around you. It’s also essential to wear appropriate safety gear, such as a helmet when riding a bike or a seatbelt when in a car. Another important tip is to be cautious when interacting with strangers, whether in person or online.
Don’t share personal information or agree to meet up with someone you don’t know well. By following these safety tips and staying vigilant, you can help ensure that you stay out of harm’s way and enjoy all that life has to offer.
Conclusion
To dismount a tire by hand, you must channel your inner superhero strength and embrace the power of persistence. With determination and a little elbow grease, you can conquer any stubborn tire and emerge victorious. So next time you find yourself in a tire-changing bind, remember this mantra: no tire is too tough, no rim too resistant, for the fearless tire-dismounting hero within you.
“
FAQs
What tools are needed to dismount a tire by hand?
To dismount a tire by hand, you will need a tire spoon, bead breaker, and a tire stand.
Is it possible to dismount a tire without any special tools?
It is possible to dismount a tire by hand without any special tools, but it can be more difficult and time-consuming.
What is the proper technique for dismounting a tire by hand?
The proper technique for dismounting a tire by hand involves using the tire spoon to release the bead from the rim, then using the bead breaker to loosen the tire from the rim, and finally using the tire spoon to remove the tire from the rim.
Can a beginner dismount a tire by hand?
Yes, a beginner can dismount a tire by hand with the proper tools and technique. It may take some practice, but it is a skill that can be learned.
How much time does it take to dismount a tire by hand?
The time it takes to dismount a tire by hand can vary depending on the skill level of the person doing the work and the condition of the tire. Generally, it can take anywhere from 10 to 30 minutes.
What are the benefits of dismounting a tire by hand?
Disassembling a tire by hand can save money since it does not require special equipment or a mechanic. It can also help you to learn more about your vehicle and become more self-sufficient.
Are there any safety precautions to take when dismounting a tire by hand?
Yes, when dismounting a tire by hand, be sure to wear gloves and eye protection to avoid injury. Additionally, make sure the vehicle is properly supported and the tire is completely deflated before starting the disassembly process.