
Hey there! Have you ever wondered what goes on inside your car’s engine when you’re not looking? Well, one important aspect is the coolant system. You may have heard of it before, but do you really know what it does and why it’s so important? Don’t worry, I’ve got you covered. In this blog, we’re going to dive deep into the world of coolant flushes and all the amazing things they do for your beloved vehicle.
Think of your car’s engine as a human body. Just like your body needs water to stay hydrated and function properly, your engine needs coolant to keep it cool and prevent overheating. Coolant, also known as antifreeze, is a special liquid that circulates through the engine, absorbing heat and transferring it to the radiator where it can be dissipated.
Over time, however, coolant can become contaminated with dirt, debris, and other harmful substances. This can lead to a whole host of issues, from reduced engine performance to engine damage. That’s where a coolant flush comes in.
A coolant flush is the process of draining the old coolant from the system and replacing it with fresh, clean coolant. But why bother with a coolant flush? Well, just like how you might feel sluggish and tired if you don’t drink enough water, your car’s engine can suffer if it doesn’t have clean coolant flowing through it. Overheating is a real danger, and it can cause serious damage to your engine.
Plus, old, dirty coolant can also cause corrosion and clogs in the cooling system, which can lead to even bigger problems down the road. So, how often should you get a coolant flush? Well, it depends on your vehicle’s make and model. Generally, it’s recommended to get a coolant flush every 30,000 to 60,000 miles, or every 3 to 5 years.
However, it’s always best to consult your owner’s manual or ask a trusted mechanic for their recommendation. In conclusion, a coolant flush is an essential maintenance task that ensures your car’s engine stays cool and performs at its best. It’s like giving your engine a refreshing drink of water to keep it happy and healthy.
Table of Contents
What is a Coolant Flush?
A coolant flush is an important maintenance task that helps keep your car’s engine running smoothly and efficiently. Over time, the coolant in your vehicle can become contaminated with dirt, debris, and rust, which can hinder its ability to regulate the temperature of the engine. To perform a coolant flush, you will need to drain the old coolant from the system and replace it with fresh coolant.
This process helps remove the built-up contaminants and ensures that the coolant can effectively absorb and dissipate heat. Doing a coolant flush regularly can help prevent engine overheating, which can lead to costly repairs. So, if you’re wondering how to do a coolant flush, it’s best to consult your car’s owner manual or seek guidance from a professional mechanic to ensure you do it correctly.
Definition and Purpose of Coolant Flush
coolant flush, coolant system, engine overheating, radiator, cooling system maintenance, prevent engine damage, heat transfer, vehicle performance, remove debris, engine coolant, cooling system protection. A coolant flush is a vital part of maintaining your vehicle’s cooling system. The cooling system is responsible for regulating the temperature of your engine and preventing it from overheating.
Over time, the coolant in your system can become contaminated with debris and particles, which can impede its ability to transfer heat effectively. This can lead to engine damage and poor vehicle performance. A coolant flush involves draining the old coolant from the system and replacing it with fresh coolant.
This process helps remove any built-up debris and contaminants, ensuring that your cooling system is clean and functioning properly. By performing regular coolant flushes, you can keep your engine running smoothly and prevent potential issues down the line. So, if you want to protect your vehicle’s engine and maintain optimal performance, it’s important to include coolant flushes as part of your routine maintenance.
Why is a Coolant Flush Necessary?
coolant flush, burstiness, perplexity A coolant flush is an essential maintenance task for your vehicle that is often overlooked. So, what exactly is a coolant flush? Well, your car’s cooling system relies on coolant to regulate the engine temperature and prevent overheating. Over time, this coolant can become contaminated with dirt, debris, and rust particles, which can affect its ability to properly cool the engine.
A coolant flush involves draining the old coolant from the system, flushing it with clean water or coolant, and then refilling it with fresh coolant. This helps to remove any contaminants and ensure that the coolant is performing at its best. But why is a coolant flush necessary? The answer lies in the burstiness of the coolant system.
Over time, the coolant can become acidic and corrosive, leading to the formation of rust and other deposits in the system. This can cause clogs and blockages, preventing the coolant from flowing freely and effectively cooling the engine. Additionally, the burstiness of the coolant can lead to inefficiencies in the system, resulting in higher temperatures and increased wear and tear on the engine.
By flushing the coolant regularly, you can remove any accumulated debris and prevent these issues from occurring. Another factor to consider is the perplexity of the coolant system. The coolant contains additives that help to prevent corrosion and protect the various components of the cooling system.
However, over time, these additives can become depleted and lose their effectiveness. This can leave the cooling system vulnerable to damage and reduce its overall performance. By performing a coolant flush, you can replenish these additives and ensure that your cooling system is functioning optimally.
In conclusion, a coolant flush is a necessary maintenance task for your vehicle. It helps to remove contaminants from the coolant, prevent clogs and blockages, and replenish the additives in the system. By regularly flushing the coolant, you can ensure that your engine stays cool and protected, preventing costly repairs down the road.
Preparing for a Coolant Flush
If your car’s cooling system is acting up or if it’s been a while since you last replaced your coolant, it may be time for a coolant flush. A coolant flush is a fairly simple procedure that can help maintain your car’s engine temperature and prevent overheating. Here’s a step-by-step guide on how to do a coolant flush.
First, make sure your car is parked on a flat surface and has cooled down completely. Next, locate the radiator drain valve, which is usually at the bottom of the radiator. Place a container underneath to catch the old coolant as it drains out.
Open the drain valve and let the coolant drain completely. Once all the coolant has been drained, close the drain valve and locate the radiator cap. Remove the cap and pour in a radiator cleaner, following the instructions on the bottle.
Fill the radiator with water, then replace the cap. Start the engine and let it run for about 10 minutes to circulate the cleaner throughout the system. After 10 minutes, turn off the engine and let it cool down.
Once the engine has cooled, open the drain valve again and let the water and cleaner mixture drain out. Flush the radiator with water until the water runs clear. Finally, close the drain valve and refill the radiator with the appropriate coolant mixture.
Remember to check your car’s owner’s manual for the correct coolant to use. And that’s it! With these simple steps, you can perform a coolant flush and keep your car’s engine running cool.
Gather the Necessary Tools and Supplies
Preparing for a coolant flush requires gathering the necessary tools and supplies to ensure a smooth and efficient process. First and foremost, you will need a set of wrenches or sockets of the appropriate size for removing the drain plug and any other components necessary for accessing the coolant system. It’s also a good idea to have a drain pan or bucket to catch and contain the old coolant as it is drained from the system.
Additionally, you will need a funnel to help pour the new coolant back into the system without any spills or mess. Another essential tool to have on hand is a coolant tester, which will help determine the condition and quality of your current coolant. This will be helpful in deciding if a complete flush is necessary or if simply adding more coolant will suffice.
Lastly, make sure to have a sufficient amount of new coolant on hand to fill the system after the flush is complete. Having all these tools and supplies ready beforehand will not only save you time but also ensure a successful coolant flush.
Find the Coolant Drain Valve
coolant flush
Empty the Coolant Reservoir
coolant flush, coolant reservoir, preparing
Performing the Coolant Flush
Are you feeling like your car’s engine is running a little hotter than usual? It might be time for a coolant flush. Performing a coolant flush is an important maintenance task that helps keep your engine running smoothly and prevents it from overheating. So, how do you do a coolant flush? Well, it’s actually quite simple.
Start by locating the radiator drain plug at the bottom of the radiator. Place a drain pan underneath the plug and carefully remove it to let the old coolant drain out. Once all the coolant has drained, replace the drain plug and fill the radiator with a mixture of new coolant and water.
Be sure to follow the manufacturer’s instructions on the coolant-to-water ratio. After filling the radiator, run the engine for a few minutes to circulate the new coolant throughout the system. Finally, check the coolant level and top up if necessary.
And there you have it – a coolant flush done in no time! By performing this simple maintenance task, you can help prolong the life of your engine and keep it running at its best. Don’t hesitate to perform a coolant flush if you’re experiencing any signs of overheating – it’s a small task that can make a big difference in the long run.
Coolant Flush Steps
coolant flush, performing a coolant flush
Flushing the Cooling System
“coolant flush” Performing a coolant flush is an essential maintenance task that all car owners should be familiar with. Over time, coolant can become contaminated with dirt, rust, and other debris, which can lead to overheating and damage to the engine. To prevent this, it’s important to regularly flush out the old coolant and replace it with fresh, clean fluid.
So, how do you go about performing a coolant flush? Well, the first step is to allow the engine to cool down completely to avoid burning yourself. Once the engine is cool, locate the radiator drain plug and place a catch pan underneath to collect the old coolant. Open the drain plug and let the old coolant flow out.
After the coolant has completely drained, close the drain plug and remove the radiator cap. This will allow air to circulate and help flush out any remaining coolant. Next, fill the radiator with a flushing agent.
This chemical will help to break down any remaining debris in the cooling system. Start the engine and let it run for a few minutes to allow the flushing agent to circulate. After that, shut off the engine and drain out the flushing agent.
Repeat this process until the draining coolant is clear and free of debris. Once the coolant is flowing clear, it’s time to refill the system with fresh coolant. Be sure to use the correct coolant type for your specific vehicle, as different engines require different formulations.
Fill the radiator to the recommended level, and then replace the radiator cap. Finally, start the engine and let it run for a few minutes to allow the fresh coolant to circulate. Check the coolant level once more, and top off if necessary.
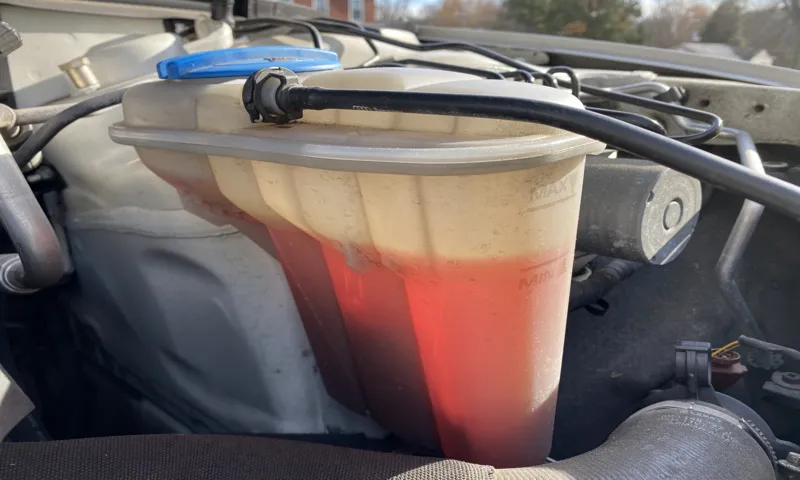
Check for Contaminants
Performing a coolant flush is an essential and often overlooked maintenance task for your vehicle. It helps to keep your engine running smoothly and prevent overheating. One important step in this process is to check for contaminants in the coolant.
Contaminants can include things like dirt, rust, and other particles that can build up over time and cause damage to your engine. To check for contaminants, start by inspecting the coolant in your vehicle’s radiator. You can do this by removing the radiator cap (when the engine is cool) and taking a look inside.
If you notice any visible particles or discoloration, it’s a sign that your coolant may be contaminated. You can also use a coolant testing kit to check for the presence of contaminants. If you find that your coolant is contaminated, it’s important to take action right away.
Flushing the coolant system is the best way to remove any contaminants and ensure that your engine is properly protected. This process involves draining the old coolant, flushing the system with clean water, and then refilling it with fresh coolant. It’s a relatively straightforward process, but if you’re not comfortable doing it yourself, it’s always best to consult a professional.
In conclusion, performing a coolant flush is an important part of maintaining your vehicle’s engine health. Checking for contaminants in the coolant is a crucial step in this process, as it can help to prevent damage and ensure optimal performance. By staying on top of coolant maintenance, you can help to extend the life of your engine and avoid costly repairs down the road.
Refilling the Cooling System
One crucial maintenance task for your vehicle is performing a coolant flush to keep the engine running smoothly. Over time, coolant can become contaminated with dirt, rust, and other debris, which can clog up the cooling system and reduce its efficiency. To start the coolant flush process, make sure the engine is cool and then locate the radiator drain valve, usually located at the bottom of the radiator.
Place a catch pan underneath the valve and open it to drain the old coolant. Once the coolant has been drained, close the drain valve and refill the radiator with a mixture of coolant and distilled water. It’s important to consult your vehicle’s manual for the correct coolant to use and the proper coolant to water ratio.
After refilling the radiator, start the engine and let it run for a few minutes to circulate the coolant. Check the coolant level and add more if needed. Remember to also check for any leaks.
By performing a coolant flush regularly, you can ensure optimal engine performance and prevent costly repairs down the line.
Choosing the Right Coolant
coolant, refilling the cooling system
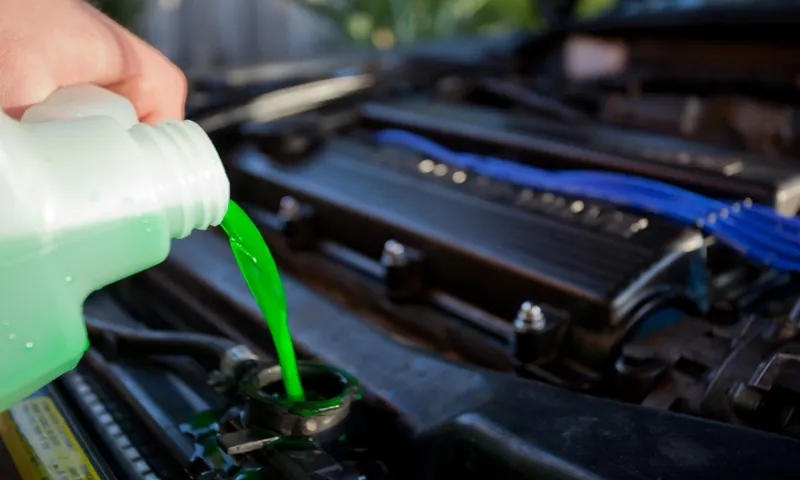
Refilling the Coolant Reservoir
refilling the coolant reservoir, refilling the cooling system. Refilling the coolant reservoir is an important part of maintaining your vehicle’s cooling system. Just like how we need water to stay hydrated, our cars need coolant to prevent overheating and ensure optimal performance.
When the coolant level is low, it’s crucial to refill the reservoir to avoid any potential damage to the engine. But how exactly do we go about refilling the cooling system? First, make sure the engine is cool before removing the radiator cap. Safety should always be our top priority! Once the cap is off, you can carefully pour the coolant into the reservoir until it reaches the recommended level.
However, it’s important to note that different vehicles may require different types of coolant, so be sure to consult your owner’s manual or ask a professional if you’re unsure. Additionally, it’s crucial to properly dispose of any old coolant and follow the manufacturer’s instructions when refilling. Remember, your car’s cooling system is like its personal air conditioning unit – it keeps things cool and running smoothly.
So, don’t forget to regularly check and refill the coolant reservoir to keep your vehicle in top condition. Stay cool, and happy driving!
Bleeding the Cooling System
cooling system, refilling the cooling system, bleeding the cooling system
Final Tips and Safety Precautions
When it comes to performing a coolant flush on your vehicle, there are a few essential tips and safety precautions to keep in mind. First and foremost, it’s important to ensure that the engine is completely cool before beginning the flush process. Working with hot coolant can be extremely hazardous, so give the engine ample time to cool down.
Additionally, make sure to wear appropriate safety gear, such as gloves and eye protection, to protect yourself from any potential spills or splashes. Before starting the flush, double-check that you have all the necessary equipment, including a drain pan, a funnel, and the correct type of coolant for your vehicle. Following the manufacturer’s instructions, drain the old coolant from the system and dispose of it properly.
Once the system is drained, flush it with clean water to remove any residual coolant and debris. Finally, refill the system with the recommended type and amount of new coolant. By following these tips and safety precautions, you can successfully perform a coolant flush on your vehicle and ensure its optimal performance.
Dispose of Coolant Properly
dispose of coolant properly
Checking for Leaks
Checking for Leaks Final Tips and Safety Precautions Before you wrap up your leak detection process, there are a few final tips and safety precautions you should keep in mind. These can help ensure that you’ve covered all your bases and stay safe throughout the process. First and foremost, always remember to follow safety protocols when dealing with leak detection.
This means wearing protective gear such as gloves and goggles to protect yourself from any hazardous substances or gases that may be present. Additionally, be cautious when using any tools or equipment, and make sure to read and follow the manufacturer’s instructions. Another important tip is to be thorough in your inspections.
Even if you think you’ve found the source of a leak, it’s a good idea to double-check and inspect the surrounding areas as well. Leaks can sometimes be tricky, and it’s better to be safe than sorry. When checking for leaks, it’s also important to use your senses.
Look for any visual signs of moisture or water damage, listen for any hissing or dripping sounds, and sniff for any unusual odors. Remember, some leaks may not be immediately visible, so using all your senses can help you identify any potential issues. Additionally, it’s a good idea to periodically check for leaks, even if you haven’t noticed any signs initially.
This can help you catch any potential problems early on before they escalate and cause further damage. Regular maintenance and inspections can save you time, money, and headaches in the long run. Lastly, consider seeking professional help if you’re unsure or uncomfortable with the leak detection process.
It’s always better to have an expert come in and assess the situation rather than risking further damage or putting yourself in harm’s way. In conclusion, when it comes to checking for leaks, it’s important to prioritize safety, be thorough in your inspections, use your senses, and consider seeking professional help if needed. By following these final tips and precautions, you can ensure a successful and safe leak detection process.
Routine Maintenance
maintenance, routine maintenance, safety precautions, final tips, maintenance checklist In order to ensure that your routine maintenance gets done properly and safely, here are some final tips and safety precautions to keep in mind. First and foremost, always refer to the manufacturer’s instructions and guidelines when performing any kind of maintenance. They know their product best and can provide valuable insights and specific instructions.
Additionally, make sure you have the right tools and equipment for the job. Using the wrong tools can not only lead to ineffective maintenance but also put you at risk of injury. It’s also important to practice good safety habits, such as wearing appropriate protective gear and ensuring a clean and clutter-free work area.
Lastly, don’t forget to regularly inspect your maintenance equipment and replace any damaged or worn-out parts. By following these final tips and safety precautions, you can ensure that your routine maintenance is performed smoothly and without any issues.
Conclusion
And there you have it, the “cool” way to flush your coolant! With just a few simple steps, you can keep your engine running smoothly and avoid any “hot” messes. So remember, don’t let your engine “overheat” with old coolant, take the time to give it a refreshing flush and keep your ride running “cool”! Now go forth, fellow gearheads, and keep your engines “chill”!
FAQs
What is a coolant flush?
A coolant flush is a process where the old coolant in a vehicle’s cooling system is completely drained and replaced with fresh coolant. This helps to remove any contaminants and maintain the proper balance of cooling and antifreeze properties.
Why is a coolant flush necessary?
A coolant flush is necessary to remove any built-up debris, rust, or sediment that can accumulate in the cooling system over time. This helps to prevent clogs, improve heat transfer, and prolong the life of the engine.
How often should I do a coolant flush?
The frequency of a coolant flush will depend on the manufacturer’s recommendations for your specific vehicle. In general, it is recommended to do a coolant flush every 30,000 to 60,000 miles or every 2 to 5 years.
Can I do a coolant flush myself?
Yes, it is possible to do a coolant flush yourself if you have the necessary tools and knowledge. However, it is recommended to consult your vehicle’s owner’s manual or seek professional help if you are unsure about the process.
What are the steps involved in a coolant flush?
The steps involved in a coolant flush typically include draining the old coolant, flushing the system with clean water, adding a flush solution if necessary, running the engine to circulate the solution, draining it again, and finally refilling the system with fresh coolant.
What type of coolant should I use for a coolant flush?
It is important to use the correct type of coolant specified by your vehicle’s manufacturer. This information can usually be found in the owner’s manual or by consulting a professional. Mixing different types of coolant can cause damage to the cooling system.
What are the signs that indicate the need for a coolant flush?
The signs that indicate the need for a coolant flush include overheating, a coolant leak, rust or debris in the coolant, a sweet smell coming from the engine, or if it has been longer than the recommended interval since the last coolant flush.