
Welcome to our blog on the topic of “Introduction”! Whether you’re a seasoned reader or a newbie to the world of blogging, we’re here to provide you with an engaging and informative intro that will leave you wanting more. So sit back, relax, and let us take you on a journey through the world of introductions. Think about the last time you picked up a book or clicked on an article.
What was it that drew you in? It was most likely the introduction, the first few sentences that set the stage and captivated your attention. An introduction is like the front door to a house – it’s the first thing you see and sets the tone for what’s to come. But what exactly is an introduction? Simply put, it’s the opening paragraph or section of a piece of writing that gives the reader a glimpse into what they can expect.
It’s where the writer grabs your attention and makes you want to keep reading. Whether it’s an intriguing question, a bold statement, or a captivating story, a good introduction hooks you and reels you in. Introductions come in all shapes and sizes.
They can be short and sweet, like a teaser for what’s to come, or longer and more detailed, giving you a taste of what the entire piece will be about. They can be serious and informative, or light-hearted and funny. The key is to grab the reader’s attention and make them want to keep reading.
So why are introductions so important? Well, imagine if you walked into a party and nobody introduced themselves or told you what the party was all about. You’d probably feel a bit lost and unsure of what to expect. The same goes for writing – an introduction sets the stage and gives the reader a sense of what they can expect from the rest of the piece.
In this blog series, we’ll explore the art of writing introductions. We’ll delve into different techniques and strategies that writers use to engage readers and make their pieces stand out. Whether you’re a blogger, a student, or someone who just loves to read, this series is for you.
Table of Contents
What is a Coolant Flush?
So, you’ve heard that it’s important to do a coolant flush on your car, but what exactly does that mean? Well, a coolant flush is a maintenance procedure that involves completely draining and replacing the coolant in your vehicle’s cooling system. Coolant, also known as antifreeze, is a liquid that helps regulate the temperature of your engine and prevents it from overheating. Over time, coolant can become contaminated with dirt, rust, and other debris, which can reduce its effectiveness.
By performing a coolant flush, you can remove these impurities and ensure that your engine stays cool and protected. But how exactly do you do a coolant flush? Let’s find out!
Definition and Purpose
coolant flush, automotive maintenance A coolant flush is a type of automotive maintenance that involves removing the old coolant from a vehicle’s cooling system and replacing it with new coolant. The purpose of a coolant flush is to ensure that the cooling system is clean and free of any debris or contaminants that could cause overheating or engine damage. Over time, coolant can become contaminated with rust, dirt, and other particles that can clog the radiator and limit its ability to remove heat from the engine.
By flushing the coolant and replacing it with fresh coolant, you can help maintain optimal engine temperature and prevent overheating issues. A coolant flush is typically recommended every 30,000 to 60,000 miles, depending on the manufacturer’s guidelines. It is an important part of regular vehicle maintenance that can help extend the lifespan of your engine and ensure optimal performance.
So, if you’re noticing any signs of overheating or it has been a while since your last coolant flush, it may be time to schedule this essential maintenance task.
Why is it Important?
coolant flush,replacing coolant, engine cool, car maintenance, radiator, overheating The coolant flush is an essential part of car maintenance that many people overlook. But why is it important? Well, the coolant in your car’s radiator is responsible for keeping the engine cool and preventing it from overheating. Over time, however, the coolant can become dirty and contaminated with debris, rust, and other particles.
This can cause it to become less effective at cooling the engine, leading to overheating and potential damage. A coolant flush involves draining the old coolant from the radiator and replacing it with fresh, clean coolant. This helps to remove any contaminants and ensure that the coolant is able to do its job properly.
By regularly flushing the coolant, you can help to prolong the life of your engine and prevent costly repairs down the road. So, don’t forget about this important maintenance task and keep your car running cool!
When Should You Do a Coolant Flush?
“How to do a coolant flush” is a common question that many car owners ask. A coolant flush is an important maintenance task that should be done regularly to keep your engine running smoothly. But when exactly should you do a coolant flush? Well, there are a few signs that indicate it might be time for a coolant flush.
For example, if you notice that your engine is running hotter than usual, it could be a sign that your coolant is dirty or contaminated. Another sign is if you see rust or sediment floating in your coolant. This can reduce the efficiency of your cooling system and lead to overheating.
Additionally, if it’s been a while since your last coolant flush, it’s a good idea to schedule one to ensure that your coolant is fresh and effective in protecting your engine from corrosion and overheating. So, if you notice any of these signs or if it’s been a while since your last coolant flush, it’s definitely time to roll up your sleeves and get to work on a coolant flush.
Materials Needed
When it comes to performing a coolant flush on your vehicle, there are a few materials that you will need to gather beforehand. These materials include a drain pan, a socket wrench or pliers, a funnel, distilled water, and a coolant mix. The drain pan is essential for catching and disposing of the old coolant safely.
The socket wrench or pliers are necessary for removing the drain plug or hose on the radiator to drain the old coolant. A funnel will help you pour the new coolant mixture back into the radiator without spilling. Lastly, you will need distilled water to dilute the coolant mix properly.
By having all of these materials prepared, you will be ready to tackle the coolant flush with confidence and ensure that your vehicle’s cooling system is in top-notch condition.
Step-by-Step Guide
If you’ve noticed that your car’s engine is running hotter than usual or that your coolant levels are decreasing rapidly, it may be time to perform a coolant flush. Over time, coolant can become contaminated with debris and lose its effectiveness in cooling your engine. A coolant flush involves draining the old coolant from your car’s system and replacing it with fresh coolant.
Here’s a step-by-step guide on how to do a coolant flush. Safety first: Before you begin, make sure your car is parked on a level surface and the engine has had enough time to cool down.
Coolant can reach extremely high temperatures and can cause burns if mishandled. Locate the drain plug: The first step is to locate the drain plug on your car’s radiator.
It is usually located on the bottom of the radiator and can be accessed by removing a plastic cover. Place a drain pan beneath the drain plug: Position a drain pan beneath the drain plug to catch the coolant as it drains out.
Remove the drain plug: Using a wrench or pliers, carefully loosen and remove the drain plug. Allow the coolant to drain completely into the drain pan.
Flush the system: Once all the coolant has drained out, it’s time to flush the system. Replace the drain plug and refill the radiator with water.
Step 1: Preparation
“preparation for a house renovation” So, you’ve finally decided to take the plunge and renovate your house. Congrats! But before you embark on this exciting journey, it’s important to start with good preparation. After all, failing to plan is planning to fail, right? The first step in your house renovation journey is preparation.
This involves taking the time to really think about what you want to achieve with your renovation. Are you looking to create an open-plan living space? Or perhaps you want to add an extra bedroom or a home office? Whatever your goals, it’s essential to have a clear vision in mind. Once you have a vision for your renovation, it’s time to set a budget.
Renovations can be costly, so it’s crucial to determine how much you’re willing to spend on the project. Consider factors such as the scope of the renovation, the materials you want to use, and any additional costs such as permits or hiring professionals. Next, you’ll need to create a timeline for your renovation.
How long are you willing to wait for your dream home to become a reality? Keep in mind that renovations can sometimes take longer than expected, so it’s a good idea to build in some extra time for unexpected delays. Another important aspect of preparation is research. Take the time to gather inspiration and ideas for your renovation.
Browse through home design magazines, visit showrooms, or hop on platforms like Pinterest and Instagram for inspiration. This will help you narrow down your design choices and ensure that the end result is everything you hoped for. Lastly, don’t underestimate the power of organization.
Before the renovation begins, make sure to create a system for keeping track of all the details, such as contracts, invoices, and design plans. This will ensure that everything runs smoothly and minimize any potential confusion or misunderstandings. By taking the time to prepare properly, you’ll set yourself up for a successful house renovation.
Step 2: Draining the Old Coolant
draining the old coolant If you’re planning to replace your car’s coolant, you’ll first need to drain out the old coolant. Draining the old coolant is an important step in the process, as it allows you to remove any impurities or debris that may have accumulated in the system. Additionally, replacing the old coolant with fresh coolant will help maintain the proper functioning of the engine and prevent overheating.
In this blog post, we’ll provide you with a step-by-step guide on how to drain the old coolant from your car. With just a few simple tools and a little bit of time, you’ll be able to complete this task on your own and keep your car running smoothly. So let’s get started!
Step 3: Flushing the System
Flushing the system is a crucial step in maintaining the overall health and performance of your vehicle. Over time, contaminants and debris can build up in the system, causing clogs, reduced efficiency, and even damage to your engine. Flushing the system involves removing the old coolant or transmission fluid and replacing it with fresh, clean fluid.
This not only helps to remove any contaminants but also replenishes the system with the fluid it needs to operate at its best. Think of it like giving your car a refreshing drink to quench its thirst and keep it running smoothly. Just like we need to stay hydrated to function properly, your car’s engine needs clean fluid to stay cool and operate efficiently.
Flushing the system is a simple yet effective way to ensure that your vehicle continues to perform at its best and avoid costly repairs down the line. So don’t overlook this important step in your car maintenance routine!
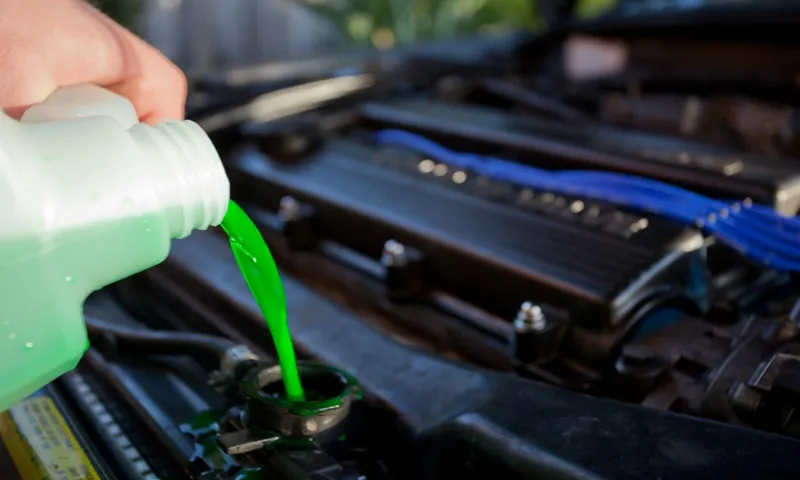
Step 4: Refilling with New Coolant
As we continue with the coolant flushing process, the next step is to refill the coolant with a fresh batch. This step is crucial in maintaining the cooling system’s efficiency and preventing any engine damage. To begin, make sure the draining plug is securely tightened to avoid any leaks.
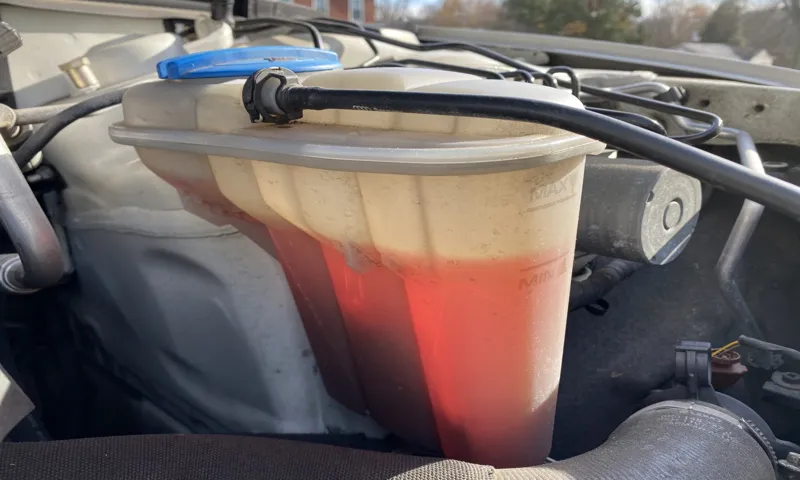
Then, locate the coolant reservoir tank, usually located near the radiator, and remove the cap. Take note of the type and quantity of coolant recommended for your specific vehicle, as using the wrong coolant can lead to corrosion and other issues. Pour the coolant into the reservoir slowly, taking care not to spill any.
It’s essential to fill the reservoir to the recommended level but avoid overfilling, as excess coolant can cause pressure build-up and lead to leaks. Once the reservoir is filled, replace the cap securely. It’s a good idea to check for any signs of leakage or seepage around the cap area before moving on.
Finally, start the engine and let it idle for a few minutes, allowing the coolant to circulate. Check the coolant level again after the engine has cooled down to ensure it is still at the proper level. By following these steps, you can ensure that your cooling system is working effectively and keeping your engine at the optimal temperature.
Tips and Precautions
Doing a coolant flush is an important maintenance task for your vehicle that can help prevent overheating and engine damage. To start, you’ll need to gather the necessary supplies, including a coolant flush kit, new coolant, a drain pan, and a funnel. It’s also a good idea to have some protective gloves and goggles on hand to protect yourself from any spills or splashes.
Before you begin, make sure your engine is cool to the touch to avoid any burns. Once you’re ready, locate the radiator drain valve and place the drain pan underneath it to catch the old coolant. Open the valve, allowing the coolant to drain completely.
Once the coolant has drained, close the drain valve and remove the radiator cap. Use the flush kit to add the flushing solution to the radiator, following the instructions on the package. After adding the solution, replace the radiator cap and start your engine.
Let it run for a few minutes to circulate the flush solution. Then, turn off the engine and allow it to cool completely. Once the engine is cool, open the drain valve again and let the flush solution drain into the pan.
Close the valve and flush the radiator with water until it runs clear. Finally, add the new coolant to the radiator using a funnel, making sure to mix it with the recommended amount of water if necessary. Replace the radiator cap and start the engine to check for any leaks.
Doing a coolant flush regularly can help keep your engine running smoothly and prevent costly repairs in the future.
Coolant Type
coolant type, tips and precautions When it comes to choosing the right coolant type for your vehicle, there are a few tips and precautions you should keep in mind. First and foremost, it’s important to understand the different types of coolant available. The two most common types are ethylene glycol and propylene glycol.
Ethylene glycol is the traditional coolant that has been used for many years, while propylene glycol is a newer, more environmentally friendly option. One tip to keep in mind is to always check with your vehicle’s manufacturer to see what type of coolant they recommend. Each vehicle may have specific requirements, and using the wrong type of coolant can cause damage to your engine.
In addition, it’s important to note that some vehicles may require a special type of coolant, such as a long-life or extended-life coolant. Another tip is to make sure to use the correct coolant-to-water ratio. This ratio can vary depending on the type of coolant you are using, so it’s important to read the instructions on the coolant container carefully.
Using too much coolant or too little water can affect the performance of your coolant and potentially damage your engine. Precautions should also be taken when handling coolant. Coolant is toxic and can be harmful if ingested or if it comes into contact with your skin or eyes.
It’s important to wear gloves and protective eyewear when handling coolant, and to keep it out of reach of children and pets. In conclusion, choosing the right coolant type and taking proper precautions is essential for maintaining the health and performance of your vehicle’s engine. By following these tips and guidelines, you can help ensure that your engine stays cool and runs smoothly for years to come.
Safety Precautions
safety precautions, tips and precautions, safety measures, staying safe, personal safety, avoiding accidents, preventing injuries. In our daily lives, safety should always be a top priority. Whether we’re at home, at work, or out and about, taking the right precautions can help us stay protected and avoid accidents or injuries.
Here are some tips and precautions you can follow to ensure your personal safety. First and foremost, it’s important to be aware of your surroundings. Pay attention to your environment and remain alert.
This can help you identify potential hazards or unsafe situations and take necessary action to avoid them. It’s also a good idea to trust your instincts. If something doesn’t feel right, it’s better to be safe than sorry.
Another important safety measure is to always wear appropriate protective gear. Whether it’s a helmet when riding a bike or a seatbelt when driving a car, these simple precautions can greatly reduce the risk of injury in case of an accident. It’s better to be prepared and protected than to deal with the consequences of not taking these precautions.
Additionally, it’s important to practice good safety habits. This includes things like keeping a first-aid kit handy, knowing basic first-aid procedures, and having emergency contact numbers readily available. These small steps can make a big difference in a moment of crisis.
Furthermore, it’s crucial to avoid distractions when engaged in potentially hazardous activities. For example, when driving, avoid using your phone or engaging in other activities that take your focus away from the road. It only takes a split second of distraction for an accident to occur.
Conclusion
And there you have it, the art of performing a coolant flush like a seasoned pro! By following these steps, you can keep your engine running smoothly and avoid any overheating mishaps. So go ahead, grab your wrenches and channel your inner mechanic. Just remember, a coolant flush is like a refreshing spa day for your engine, giving it the TLC it deserves.
And who knows, maybe your car will thank you by purring like a contented kitten. So don’t be afraid to dive in, because now you’re armed with the knowledge to tackle this task with finesse and a touch of flair. Happy flushing, my friends!”
FAQs on Coolant Flush
If you’re wondering how to do a coolant flush, you’ve come to the right place. A coolant flush is an important maintenance task that helps keep your vehicle’s engine running smoothly. Over time, coolant can become contaminated with dirt, debris, and other contaminants, which can hinder its ability to regulate engine temperature effectively.
To perform a coolant flush, start by gathering the necessary tools and materials, such as a drain pan, a flush kit, and fresh coolant. Next, locate the radiator drain valve, usually located at the bottom of the radiator. Place the drain pan underneath the valve, then open the valve to drain the old coolant.
Once all the old coolant has drained, close the drain valve and fill the cooling system with a mixture of fresh coolant and water according to your vehicle’s specifications. Finally, start the engine and let it run for a few minutes, checking for any leaks or overheating. Performing a coolant flush regularly can help extend the life of your engine and ensure it runs at optimal efficiency.
Q1: How often should I do a coolant flush?
coolant flush, coolant maintenance, maintenance schedule, engine coolant system, cooling system, car maintenance (other relevant variations: how often to flush coolant, importance of coolant flush) When it comes to maintaining your car’s cooling system, one important task is performing a coolant flush. But how often should you do it? Well, the answer depends on a few factors. In general, it is recommended to have a coolant flush every 30,000 to 50,000 miles or every four to five years, whichever comes first.
However, it’s important to consult your vehicle’s owner’s manual or the manufacturer’s recommendations for the most accurate maintenance schedule. Different car models, makes, and even engine types may have different requirements. Why is a coolant flush necessary? Over time, the coolant in your engine coolant system can become contaminated with rust, debris, and other particles.
This can lead to inefficient cooling, overheating, and potentially damage the engine. A coolant flush helps to remove these contaminants and replace the old coolant with fresh, clean coolant. By doing so, you can ensure that your engine stays cool and runs smoothly.
If you’re not sure when the last time your coolant was flushed, or if you notice any signs of coolant issues such as overheating or a sweet smell coming from the engine, it’s a good idea to have a coolant flush sooner rather than later. Additionally, if you live in an area with extreme temperatures or if you frequently drive in stop-and-go traffic, your coolant may need more frequent changes. Remember, a coolant flush is a crucial part of your car’s maintenance routine.
By keeping up with it, you can help prevent expensive repairs and keep your engine running at its best. So, if you’re unsure about when to perform a coolant flush, consult your owner’s manual or reach out to a trusted mechanic for guidance.
Q2: Can I do a coolant flush by myself?
Yes, you can definitely do a coolant flush by yourself! It’s actually a fairly simple task that can save you a trip to the mechanic and some money in the process. A coolant flush is important because over time, coolant can become contaminated with dirt, rust, and other debris, which can lead to engine overheating and damage. To start the process, you’ll need to gather some supplies, including a coolant flush kit, a drain pan, and fresh coolant.
Then, locate the drain plug on your radiator and place the drain pan underneath to catch the old coolant. Open the drain plug and let the coolant drain completely. Once drained, close the drain plug and use the flush kit to add a flushing agent to your cooling system.
Follow the instructions on the kit for the specific amount of time to let the flushing agent circulate. After the flushing period is over, open the drain plug again to remove the flushing agent. Replace the drain plug and refill the cooling system with fresh coolant.
Be sure to check your vehicle’s owner’s manual for the correct type and mix of coolant to use. And that’s it! You’ve successfully done a coolant flush on your own. It’s a relatively easy and cost-effective task that can help keep your engine running smoothly and efficiently.
FAQs
What is a coolant flush?
A coolant flush is a maintenance procedure done on a vehicle to remove old coolant from the cooling system and replace it with fresh coolant.
How often should a coolant flush be done?
It is generally recommended to do a coolant flush every 30,000 to 50,000 miles or every two to five years, depending on the manufacturer’s recommendations.
Why is a coolant flush important?
A coolant flush helps to remove any debris or contaminants that may have accumulated in the cooling system over time. It also helps to prevent overheating, corrosion, and other cooling system issues.
Can I do a coolant flush myself?
Yes, a coolant flush can be done as a DIY project. However, it is important to follow the manufacturer’s instructions and use the correct type of coolant for your vehicle.
How long does a coolant flush take?
The duration of a coolant flush can vary depending on the vehicle and the condition of the cooling system. It can take anywhere from 30 minutes to a few hours to complete.
What are the signs that indicate the need for a coolant flush?
Some signs that may indicate the need for a coolant flush include coolant leaks, overheating, a sweet smell inside the vehicle, or visible particles in the coolant.
Can a coolant flush help improve the vehicle’s performance?
Yes, a coolant flush can help improve the vehicle’s performance by ensuring that the cooling system is clean and functioning properly. This can help prevent engine overheating and optimize the vehicle’s cooling efficiency.