Hey there! Are you curious about the fascinating world of introductions? Well, you’ve come to the right place! An introduction is like the welcoming handshake of any piece of writing – it sets the tone, captures the reader’s attention, and serves as a sneak peek into what’s to come. Just like a captivating movie trailer, an engaging introduction leaves you eager for more. Think of it this way: Imagine you’re at a party, and you walk into a room full of strangers.
The first person you meet, their introduction, is your first impression of them. It’s what piques your interest and determines whether you want to engage in further conversation or head straight for the snacks. Similarly, in writing, an introduction is your chance to make a powerful impact.
It’s a way to grab your reader’s attention and hook them right from the start. Whether you’re writing a blog post, an essay, or even a novel, a well-crafted introduction can make all the difference in keeping your reader engaged, eager to explore further, and hungry for more of your content. But wait, what makes a good introduction? Well, it’s a blend of art and science.
A good introduction should be concise, yet intriguing. It should be informative, yet leave room for curiosity. It should be like a tantalizing appetizer, just enough to make your reader’s mouth water and crave the main course.
So, if you want to master the art of captivating introductions and leave a lasting impression, stick around! In this blog, we’ll delve into the secrets of crafting irresistible introductions, explore different techniques, and provide practical tips to help you make your writing shine. So, grab a cup of coffee, get comfortable, and get ready to become a master of introductions. Together, we’ll unravel the mysteries of captivating your readers right from the get-go.
Let’s dive in!
Table of Contents
What is windshield repair?
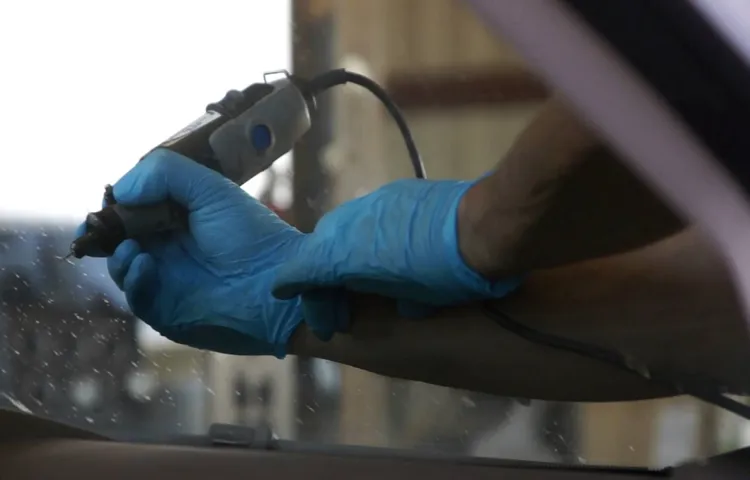
So you’ve got a crack or chip in your car windshield, and you’re wondering how to fix it yourself. Well, one common method is windshield repair, which involves drilling into the glass to create a small hole. Now, before you start drilling away, it’s important to know what you’re doing.
The drilling process needs to be done carefully and precisely to avoid any further damage to the windshield. This is where a professional touch comes in handy. Professional windshield repair technicians have the experience and knowledge to drill the hole in just the right spot and with the right amount of pressure.
They use specialized tools to ensure that the drilling is done properly, minimizing the risk of cracks spreading or the windshield shattering. So if you’re not confident in your drilling abilities, it’s best to leave it to the pros. They can assess the damage and determine the best course of action for repairing your windshield.
Why drill a windshield for repair?
If you ever find yourself with a chip or crack in your windshield, you may be wondering how to fix it. One method that is commonly used by professionals is drilling into the windshield for repair. But why would someone drill into a windshield? The answer lies in the process of repairing the damage.
By drilling a small hole into the outer layer of the windshield, technicians gain access to the crack or chip to fill it with a resin material. This allows the resin to penetrate the damaged area and bond with the surrounding glass, restoring its strength and preventing further damage. So, while it may seem counterintuitive to drill into a windshield, it is actually a necessary step in the repair process to ensure a successful and long-lasting fix.
Tools and materials needed
To successfully drill a windshield for repair, you will need a few essential tools and materials. First and foremost, you will need a high-quality drill. It is recommended to use a drill with a variable speed control as this will allow you to adjust the speed according to the thickness and strength of the glass.
Additionally, you will need a diamond drill bit specifically designed for glass drilling. Diamond drill bits are durable and able to withstand the rigors of drilling through glass without breaking or chipping. It is also important to have a water bottle or spray bottle filled with water handy.
The water will act as a lubricant and coolant, preventing the glass from overheating or cracking under the pressure of the drill. Lastly, you will need a clean cloth or towel to wipe away any excess water and debris during the drilling process. With these tools and materials in hand, you will be well-equipped to successfully drill a windshield for repair.
Types of drills
Drills are essential tools for various DIY projects and professional tasks. There are different types of drills available, each designed for specific purposes. One type of drill is the corded drill, which is powered by an electrical cord and offers a consistent power source.
These drills are great for heavy-duty tasks that require prolonged use, such as drilling into concrete or metal. Another type is the cordless drill, which is powered by rechargeable batteries. These drills offer more portability and versatility, allowing you to work in areas without access to electrical outlets.
Cordless drills are ideal for tasks that require mobility, such as assembling furniture or installing shelves. In addition to drills, there are several tools and materials that are needed for drilling projects. Firstly, you will need drill bits.
These come in various sizes and are made from different materials, such as high-speed steel or carbide. The type of drill bit you choose will depend on the material you are drilling into. For example, masonry drill bits are designed for drilling into concrete, while twist drill bits are suitable for drilling into wood or metal.
It’s important to have a variety of drill bits on hand to ensure you have the right tool for the job. Another essential tool is the screwdriver bit. This attachment allows you to use your drill as a power screwdriver, saving time and effort when driving screws into various surfaces.
Screwdriver bits come in different types, such as Phillips or flathead, and can be used with both corded and cordless drills. Additionally, you will need safety equipment, such as safety glasses and ear protection, to ensure your safety while using the drill. When working with a cordless drill, it’s crucial to have spare batteries and a charger, as the drill’s power source is limited by the battery life.
Safety equipment
When it comes to safety equipment, every DIY enthusiast knows that having the right tools and materials is crucial. One of the most essential items to have is protective gear, such as safety goggles, gloves, and a face mask. These items are designed to keep you safe from potential hazards, such as flying debris, chemicals, and dust.
In addition to protective gear, another important safety tool to have is a fire extinguisher. Accidents happen, and having a fire extinguisher readily available can prevent a small mishap from turning into a disaster. Other tools and materials to consider include a first aid kit, a sturdy ladder, and a good set of tools, such as a hammer, screwdrivers, and pliers.
By investing in the right safety equipment, you can ensure that you are well-prepared and protected while working on your DIY projects.
Repair kit
When it comes to repairing things around the house, having a well-stocked repair kit can be a game-changer. It’s important to have the right tools and materials on hand to tackle any DIY project or fix. So what exactly do you need in your repair kit? Firstly, having a set of basic hand tools is essential.
This includes a hammer, screwdrivers (both Phillips and flathead), pliers, and an adjustable wrench. These tools will cover the majority of tasks you’ll encounter. In addition to hand tools, it’s also a good idea to have a variety of screws, nails, and fasteners on hand.
Different projects may require different sizes and types of fasteners, so having a mix of options will save you a trip to the hardware store. Another important item to include in your repair kit is a quality tape measure. This will come in handy for measuring and marking dimensions for various projects.
A tape measure is a must-have for any DIY enthusiast. For more specialized repairs, it’s a good idea to have some adhesive options in your repair kit. This could include super glue, epoxy, and duct tape.
These materials can be lifesavers when it comes to fixing broken objects or securing loose parts. Lastly, keeping a selection of safety gear in your repair kit is crucial. This includes gloves, safety glasses, and a dust mask.
Protecting yourself while carrying out repairs is incredibly important, so having these items easily accessible is a must. Having a well-equipped repair kit will make tackling household repairs a breeze. Whether it’s fixing a loose doorknob, reattaching a cabinet hinge, or repairing a leaky faucet, having the right tools and materials at your fingertips will save you time and frustration.
Cleaning supplies
Cleaning supplies are essential tools and materials needed to keep your home clean and organized. There are a wide variety of products available for different cleaning tasks, so it’s important to have a good selection on hand. Some common cleaning supplies that you should have in your arsenal include a broom and dustpan for sweeping up dirt and debris, a mop and bucket for cleaning floors, and a vacuum cleaner for removing dust and allergens from carpets and upholstery.
You’ll also want to have a stock of cleaning solutions, such as all-purpose cleaner, window cleaner, and disinfectant wipes, to tackle different surfaces and kill germs. Other supplies that come in handy are sponges and scrub brushes for scrubbing away tough stains, microfiber cloths for polishing surfaces, and gloves to protect your hands while cleaning. Having these tools and materials readily available will make your cleaning tasks easier and more efficient, ensuring that your home stays spotless and hygienic.
Preparation
Drilling a windshield for repair may seem like a daunting task, but with the right preparations, it can be done effectively and safely. The first step is to gather the necessary tools and materials, which include a drill with the appropriate size bit, masking tape, a cutting fluid or lubricant, and a vacuum cleaner. It’s important to choose the correct size bit to avoid damaging the windshield further.
Once you have all the tools, clean the area around the crack or chip with a glass cleaner to remove any dirt or debris. Next, use masking tape to create a barrier around the damaged area, which will help prevent the drill from slipping and causing further damage. Apply the cutting fluid or lubricant to the bit to reduce friction and increase drilling efficiency.
As you begin drilling, be sure to apply light, steady pressure and keep the drill bit perpendicular to the windshield surface. Take breaks as needed to allow the bit to cool down and prevent overheating. Finally, use a vacuum cleaner to remove any glass particles or dust that may have accumulated during the drilling process.
By following these steps and taking the necessary precautions, you can successfully drill a windshield for repair.
Park the vehicle in a safe location
One of the most important steps in preparing for any journey is to park your vehicle in a safe location. This may seem like a simple task, but it is crucial for the safety of both you and your vehicle. Parking in a safe location ensures that your vehicle is not at risk of being damaged or stolen while you are away.
It also allows you to easily access your vehicle when you return and minimizes the risk of accidents or collisions. When choosing a parking spot, look for well-lit areas that are visible to others. Avoid parking in secluded or dimly lit areas where your vehicle may be a target for thieves or vandals.
Additionally, make sure you are parked in a designated parking space and not blocking any driveways or access points. Taking the time to find a safe location to park your vehicle before you begin your journey will give you peace of mind and help ensure a smooth and hassle-free trip.
Clean the windshield
clean the windshield
Mark the damaged area
preparation, damaged area, marking, burstiness
Drilling the windshield
So, you’ve got a chip or a crack in your windshield and you’re wondering how to fix it. Well, drilling the windshield may not be the first thing that comes to mind, but it can actually be an effective way to prepare the area for repair. When you’re dealing with a chip or a crack, it’s important to create a clean and smooth surface for the repair materials to adhere to.
By drilling a small hole at the end of the crack or chip, you can prevent it from spreading further and make it easier for the repair resin to seep into the damaged area. But don’t worry, drilling a windshield is not as daunting as it sounds. It’s a relatively simple process that can be done with a few basic tools and some careful technique.
Just make sure to use caution and follow proper safety precautions while doing it. So, next time you find yourself with a chip or crack in your windshield, don’t be afraid to give drilling a try!
Choose the right size drill bit
When it comes to drilling the windshield, it’s crucial to choose the right size drill bit. You want to make sure that the hole you drill is the perfect fit for the fastener or anchor you’ll be using. Using a drill bit that is too small can result in a weak connection, while a drill bit that is too large can damage the glass.
So how do you determine the right size? Well, it depends on the type of fastener or anchor you’ll be using. Take a close look at the packaging or instructions for the fastener, as this will usually indicate the recommended drill bit size. If you can’t find this information, a general rule of thumb is to choose a drill bit that is slightly smaller than the diameter of the fastener.
This will ensure a snug and secure fit. Just remember, it’s always better to start with a smaller hole and gradually enlarge it if needed, rather than starting too big and risking damage to your windshield. So take your time, choose the right size drill bit, and make sure to follow all safety precautions when drilling into your windshield.
Use a guide for accuracy
“drilling the windshield” So you’ve decided to install a new accessory on your car that requires drilling into the windshield. This can be a daunting task, but with the right guide, you can do it accurately and without causing any damage. Before you start, make sure you have all the necessary tools and equipment, including a drill with a glass drill bit, tape measure, marker, and safety goggles.
First, determine the exact spot where you want to drill the hole. Measure and mark the location using the tape measure and marker. It’s important to be precise and ensure that the hole is placed in the right spot.
You don’t want to end up with a crooked or off-centered hole in your windshield. Next, put on your safety goggles to protect your eyes from any debris that may fly off during the drilling process. Safety should always be your top priority when working with power tools.
Now it’s time to start drilling. Make sure your drill is set to a slow speed and apply gentle pressure to the windshield. Remember, glass is a delicate material, so it’s important not to rush the drilling process.
Start drilling slowly and steadily, ensuring that the drill bit stays perpendicular to the windshield. This will help prevent any cracks or damage to the glass. As you drill, it’s important to keep the area lubricated to reduce friction and heat.
You can use water or a glass lubricant for this purpose. Simply apply a small amount of lubricant to the drill bit and the area where you’re drilling. Once the hole is drilled, remove the drill bit and clean up any debris or glass fragments that may have accumulated.
Begin drilling with low pressure
When it comes to drilling the windshield of a vehicle, it’s important to begin with low pressure. This is crucial because windshields are made of laminated glass, which is more prone to cracking under high pressure. By starting off with low pressure, you can reduce the risk of any damage occurring during the drilling process.
It’s also a good idea to use a drill bit specifically designed for glass, as this will help to minimize the chance of chipping or cracking. Taking these precautions can ensure that your windshield remains intact while you work on drilling any necessary holes. So, remember, low pressure is the way to go when drilling into your windshield.
Drill slowly and steadily
Drilling the windshield carefully and steadily is an essential step when it comes to automotive maintenance. Whether you’re replacing a windshield or installing accessories like a dashcam or GPS mount, drilling can be a daunting task. It’s important to take your time and approach this task with caution to avoid any damage to your windshield.
Slow and steady wins the race here! You don’t want to rush through the drilling process and end up with a cracked or shattered windshield. Instead, take your time to ensure that you’re drilling in the right places and applying the right amount of pressure. It’s better to be safe than sorry! So, grab your drill, take a deep breath, and let’s get drilling.
Avoid excess pressure
When it comes to repairing or replacing a windshield, it’s important to avoid excess pressure. One common mistake that people make is drilling directly into the windshield. This can be incredibly damaging and may lead to further cracks or even a shattered windshield.
Instead, it’s best to leave the drilling to the professionals who have the proper tools and expertise to handle the job. By avoiding excess pressure and entrusting the task to professionals, you can ensure that your windshield is repaired or replaced without further damage or complications. So, the next time you notice a chip or crack in your windshield, remember to resist the urge to drill and leave it to the experts.
Your windshield will thank you for it!
Finishing the repair
When it comes to repairing a windshield, knowing how to properly drill a hole is crucial. While it may seem intimidating, drilling a hole in a windshield is actually a straightforward process. Start by gathering the necessary tools, including a drill with a glass bit, tape, and a lubricant such as water or oil.
Before drilling, clean the area around the damaged spot with a glass cleaner to ensure a smooth surface. Next, place a piece of tape over the damaged area to prevent the drill bit from slipping. With the tape in place, apply a few drops of lubricant to the drill bit to reduce the chances of cracking the glass.
Begin drilling slowly, applying steady pressure, and keeping the drill bit perpendicular to the windshield’s surface. Every few seconds, lift the drill to let any glass shavings clear away. Once the hole is drilled, remove the tape and continue with the windshield repair process.
By following these steps, you can confidently and successfully drill a hole in your windshield for repair.
Clean the drilled hole
clean drilled hole, repair, finishing
Apply resin to the crack
To finish the repair of a cracked surface, the next step is to apply resin to the crack. Resin is a thick, sticky substance that can effectively seal the crack and provide added strength to the repaired area. Before applying the resin, it’s important to clean the crack thoroughly to remove any dirt or debris that may prevent the resin from adhering properly.
Once the crack is clean, mix the resin according to the manufacturer’s instructions. Then, using a brush or a spatula, carefully apply the resin to the crack, making sure to cover it completely. It’s important to apply enough resin to fully fill the crack, but be careful not to apply too much, as excess resin can create a messy finish.
Once the resin is applied, give it time to cure according to the manufacturer’s instructions. This may take a few hours or even overnight, depending on the type of resin used. After the resin has cured, the crack should be sealed and the repaired surface should be strong and durable.
Cure the resin with a UV light
To complete the repair process for your resin project, you’ll need to cure the resin with a UV light. This step is crucial for ensuring that the resin sets properly and achieves the desired hardness and clarity. UV curing involves exposing the resin to ultraviolet light, which initiates a chemical reaction that causes the molecules in the resin to cross-link and form a solid.
Most resins are photosensitive, meaning that they react to UV light by undergoing this curing process. The UV light acts as a catalyst, speeding up the curing time and ensuring that the resin hardens evenly. It’s important to follow the manufacturer’s instructions when curing your resin, as different types of resins may require different exposure times.
Some resins may also require multiple stages of curing to achieve optimal results. Once the resin is fully cured, it will be strong, durable, and ready for whatever creative purpose you have in mind. So grab your UV light and get ready to see your resin project come to life!
Remove excess resin
When it comes to repairing resin projects, it’s important to have a smooth and flawless finish. One crucial step in achieving this is to remove any excess resin that may have overflowed during the repair process. Excess resin can create uneven surfaces and detract from the overall appearance of the project.
To remove excess resin, you can start by using a razor blade or scraper to gently scrape away any raised areas or drips. It’s important to be careful and take your time with this process to avoid damaging the surrounding resin. Once you have removed the excess resin, you can then use sandpaper or a sanding block to smooth out the surface.
Start with a lower grit sandpaper and gradually work your way up to a higher grit for a super smooth finish. Remember to wear a mask and protective goggles while sanding to protect yourself from any harmful particles. By removing excess resin and sanding down the surface, you can achieve a professional-looking repair that is virtually seamless.
Conclusion
And there you have it, the art of drilling a windshield for repair. This delicate operation requires precision, patience, and a touch of finesse, much like performing brain surgery..
. on a car. But fear not, with the right tools and technique, you can restore that chip or crack to its former glory, and maybe even impress that cute mechanic with your newfound skills.
So go forth, my courageous DIY-ers, and conquer those windshield woes. Just remember, safety first, and maybe invest in a good backup camera while you’re at it.”
FAQs
How do you drill a windshield for repair?
To drill a windshield for repair, you need to first mark the area that needs drilling with a permanent marker. Then, use a glass drill bit with a low-speed drill. Apply steady pressure and drill at a slow speed to prevent cracking the windshield. It’s important to wear safety goggles and gloves to protect yourself from glass shards.
What size drill bit should I use to repair a windshield?
It is recommended to use a specialized glass drill bit that is specifically designed for drilling into windshields. These typically come in various sizes, but the most commonly used size is 1/4 inch. However, it’s best to consult the repair kit or professional advice for the specific size required for your windshield repair.
Can I use a regular drill bit to repair a windshield?
No, it is not recommended to use a regular drill bit to repair a windshield. Regular drill bits are not designed to handle the pressure and hardness of glass, which can lead to cracking or shattering. It’s essential to use a specialized glass drill bit to ensure a safe and effective repair.
How deep should I drill into the windshield for repair?
When drilling into a windshield for repair, you should only drill until the bit penetrates the top layer of glass. This is typically around 1/8 inch or less. Avoid drilling too deep as it can weaken the windshield and compromise its structural integrity.
Do I need to apply water while drilling a windshield for repair?
Yes, it is recommended to apply water as a lubricant while drilling a windshield for repair. This helps to prevent overheating and reduces the risk of cracking. The water also helps to flush away glass debris and keeps the drill bit cool.
Can I use a cordless drill to repair a windshield?
Yes, you can use a cordless drill to repair a windshield. However, it’s important to ensure that the drill has enough power and torque to handle drilling through glass. Additionally, make sure the drill has a low-speed setting to prevent excessive force that might crack the windshield.
What precautions should I take before drilling a windshield for repair?
Before drilling a windshield for repair, make sure to cover any surrounding areas to protect them from glass shards. Wear safety goggles, gloves, and protective clothing to safeguard yourself from potential injuries. It’s also advisable to practice on a scrap piece of glass before attempting the repair on the windshield to gain confidence and precision.