
Welcome to our blog! Today, we’re going to dive into an important topic for all car owners: how to fill engine coolant. If you’ve ever found yourself wondering what that colorful liquid in your engine is or how to keep your engine running smoothly, you’re in the right place. Engine coolant, also known as antifreeze, is a vital component in maintaining the temperature of your engine and preventing it from overheating.
It’s like the superhero that keeps your engine cool under pressure. So, let’s strap on our capes and jump right into the world of engine coolant!
Table of Contents
Introduction
Are you a beginner in car maintenance and wondering how to fill engine coolant? Don’t worry, we’ve got you covered! Filling engine coolant can seem like a daunting task, but with a few simple steps, you’ll be able to do it yourself. Engine coolant, also known as antifreeze, plays a crucial role in regulating the temperature of your car’s engine. It helps prevent overheating by absorbing and dissipating the excess heat generated during combustion.
To fill the engine coolant, start by locating the coolant reservoir, which is usually a translucent plastic tank near the radiator. Open the cap and check the level of the coolant. If it’s low, you can add a mixture of coolant and distilled water in a 50:50 ratio.
Pour the mixture carefully into the reservoir until it reaches the recommended level marked on the tank. It’s important not to overfill as it can lead to coolant leakage. Once filled, close the cap tightly.
And that’s it! You have successfully filled the engine coolant in your car. Regularly checking and maintaining the coolant level will ensure the optimal performance and longevity of your vehicle’s engine.
Why is engine coolant important?
engine coolant, importance of engine coolant
Step 1: Purchase the right coolant
When it comes to filling engine coolant, the first step is to purchase the right coolant. Engine coolant, also known as antifreeze, is essential for maintaining the proper temperature of your engine and preventing overheating. It is important to choose the correct type of coolant for your specific vehicle, as different vehicles require different coolant formulations.
You can find the recommended coolant for your vehicle in the owner’s manual or by checking with a trusted mechanic. Once you have the right coolant, you can proceed to the next step in filling your engine coolant.
Understanding coolant types
coolant types
Step 2: Locate the coolant reservoir
So you’ve decided to tackle the task of filling your engine coolant yourself. Good for you! You’re taking control of your car’s maintenance and saving some money in the process. The first step, as we mentioned previously, is to locate the coolant reservoir.
This is where you will pour in the coolant liquid. To find the reservoir, you’ll need to pop open the hood of your car and take a look at the engine compartment. The coolant reservoir is usually a plastic container that is translucent or opaque, and it may have a cap with a symbol that looks like a radiator.
Look for any hoses leading to or from the reservoir as well. Once you’ve located the coolant reservoir, you’re ready to move on to the next step.
Where is the coolant reservoir located?
coolant reservoir, locate, car, engine, under the hood, The coolant reservoir, also known as the expansion tank or overflow tank, is an essential component of a car’s cooling system. It is responsible for storing and supplying coolant to the engine when needed. When you open the hood of your car, you’ll find a plastic container that is usually translucent, allowing you to easily check the coolant level.
The location of the coolant reservoir can vary depending on the make and model of your vehicle, but it is typically located near the radiator. It may be on the passenger side or driver side of the engine compartment. If you’re having trouble finding it, you can refer to your car’s owner’s manual for more specific information.
It’s important to regularly check the coolant level in the reservoir and top it up as needed to ensure that your engine stays cool and operates efficiently.
Step 3: Open the coolant reservoir cap
So, it’s time to top up your engine coolant. Step 3 in this process is opening the coolant reservoir cap. This is an important step because it allows you to access the reservoir and add the coolant.
But before you do this, it’s crucial to make sure that the engine has cooled down completely. You don’t want to risk burning yourself by opening the cap when the engine is still hot. Once you’re sure that the engine is cool, locate the coolant reservoir.
It is usually a translucent plastic tank with markings indicating the levels of coolant. Carefully remove the cap by turning it counterclockwise. Be cautious as you gently lift the cap, as there may be some built-up pressure inside the reservoir.
Once you have successfully opened the cap, you’re ready to move on to the next step in filling your engine coolant.
How to properly open the coolant reservoir cap
“How to properly open the coolant reservoir cap” Step 3: Open the coolant reservoir cap Now that you have located the coolant reservoir and identified the coolant level, it’s time to open the reservoir cap. But before we go any further, let’s talk about safety. Opening a hot coolant reservoir cap can be dangerous, as the steam and pressure trapped inside can cause burns.
So, always ensure that the engine is cool before attempting to open the cap. Once you’ve confirmed that the engine is cool, it’s time to proceed. Start by locating the coolant reservoir cap; it is usually located near the radiator.
The cap is typically made of plastic and will have a symbol indicating that it is the coolant cap. To open the cap, hold it firmly and twist it counterclockwise. If the cap is tight, you can use a rag or a pair of gloves for better grip and protection.
Gradually loosen the cap, being cautious of any steam or pressure that may escape. If you notice pressure building up, stop loosening the cap and wait for a few minutes to allow it to cool down further. Once the cap is fully loosened, slowly lift it off the reservoir.
Handle the cap carefully to avoid any spills or splashes. Set the cap aside in a safe place, as you will need to put it back on once you have finished adding coolant or performing any necessary maintenance. Remember, opening the coolant reservoir cap should only be done when the engine is cool to prevent any potential accidents.
If you’re unsure or uncomfortable with performing this step, it’s always a good idea to consult your vehicle’s owner’s manual or seek professional assistance. Stay safe and keep your vehicle running smoothly!
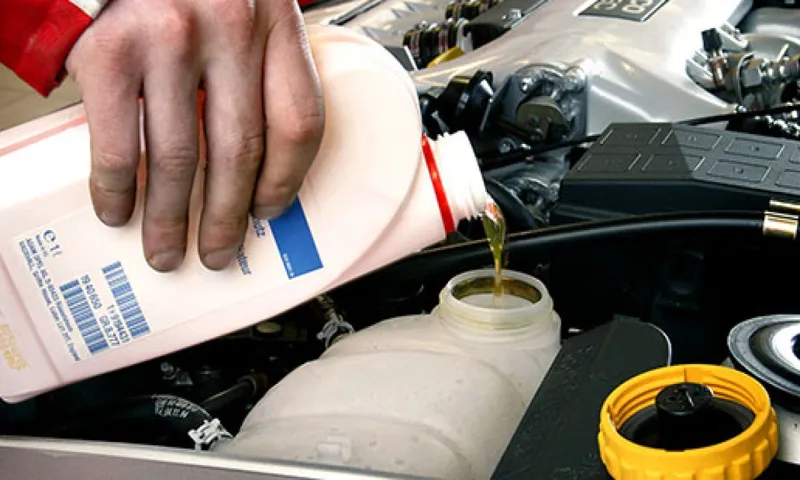
Step 4: Fill the reservoir with coolant
Now that you’ve successfully drained the old coolant from your engine, it’s time to fill the reservoir with fresh coolant. This step is crucial in ensuring that your engine stays cool and operates efficiently. To start, locate the coolant reservoir, which is typically a translucent plastic container near the radiator.
Once you’ve found it, remove the cap and take a moment to inspect the fluid level. If it’s low, fill it up with a coolant that is compatible with your vehicle’s specifications. Make sure to follow the manufacturer’s instructions on the proper coolant to use.
Slowly pour the coolant into the reservoir until it reaches the maximum level indicated. It’s important not to overfill the reservoir, as this can lead to overheating and other engine problems. Once you’ve filled the reservoir, securely replace the cap.
Be sure to clean up any spills or drips that may have occurred during the filling process. Now you can start your engine and allow it to run for a few minutes to circulate the coolant throughout the system. Keep an eye on the coolant level and top it off if needed.
And just like that, you’ve successfully filled your engine coolant reservoir! Regularly checking and maintaining the coolant level will help keep your engine running smoothly and prevent any costly repairs in the future.
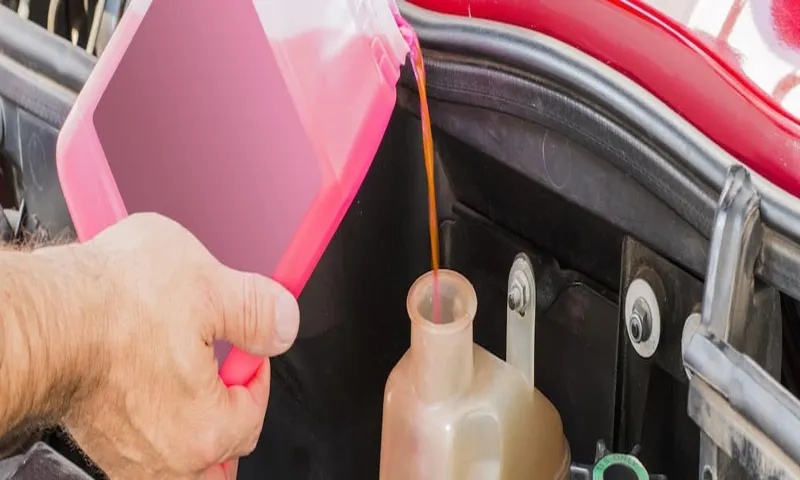
The correct way to pour coolant into the reservoir
In this step, we finally get to fill up the coolant reservoir. Before you start pouring, make sure that the engine is completely cool to the touch. You don’t want to risk getting burnt by hot coolant, right? Once you’ve confirmed that the engine is cool, locate the coolant reservoir, which is usually a translucent plastic container with a cap.
Twist the cap counterclockwise to remove it, being careful not to spill any coolant. Now it’s time to pour! Start by slowly pouring the coolant into the reservoir. Make sure to pour steadily to prevent any spills or splashes.
Keep an eye on the level as you pour and stop when it reaches the “Full” line on the reservoir. Remember, you don’t want to overfill it either, as this can cause damage to the cooling system. Once you’ve filled it up, securely fasten the cap back onto the reservoir by twisting it clockwise until it is tight.
And that’s it! You’ve successfully filled the coolant reservoir. Make sure to clean up any spilled coolant and dispose of it properly. Now you’re ready to hit the road with a properly cooled engine!
Step 5: Check the coolant level
So, you’ve checked your engine oil, inspected your battery, and performed all the necessary steps to get your car ready for the road. Well done! But before you hit the accelerator and start driving, there’s one more important step you need to take: checking the coolant level. Coolant, also known as antifreeze, plays a crucial role in keeping your engine running smoothly.
It helps regulate the temperature of your engine, preventing it from overheating. Without sufficient coolant, your engine could suffer major damage and leave you stranded on the side of the road. To check the coolant level, you’ll need to locate the coolant reservoir.
It’s usually a translucent plastic container located near the radiator or firewall of your vehicle. Once you’ve found it, make sure the engine is cool before opening the cap. Coolant can reach extremely high temperatures and cause severe burns if you attempt to remove the cap when the engine is still hot.
After ensuring the engine is cool, remove the cap and take a look inside the reservoir. The coolant level should be between the minimum and maximum marks indicated on the side of the container. If it’s below the minimum mark, it’s time to top it up.
To fill the coolant, you’ll need to mix it with distilled water according to the manufacturer’s recommendations. This mixture will ensure the coolant’s effectiveness in regulating your engine’s temperature. Slowly pour the mixture into the reservoir until the level reaches the maximum mark.
Be careful not to overfill it, as this can lead to overflow and create a mess under the hood. Once you’ve filled the coolant to the appropriate level, securely replace the cap on the reservoir. Give it a good twist to ensure it’s tightly sealed.
How to determine if the coolant level is correct
coolant level, check, determine, correct When it comes to maintaining the health of your car’s engine, checking the coolant level is an important step. To determine if the coolant level is correct, follow step 5 of our guide. This step involves visually inspecting the coolant reservoir to see if it is at the correct level.
The coolant reservoir is usually a translucent plastic container located near the radiator. It will have “low” and “high” markers indicating the acceptable range for the coolant level. Ideally, the coolant level should be between these two markers.
If the coolant level is below the “low” marker, you will need to add more coolant. On the other hand, if the coolant level is above the “high” marker, it is too high and may need to be drained or adjusted. It’s important to always check the coolant level when the engine is cool, as opening the reservoir cap when the engine is hot can lead to burns from escaping steam.
Step 6: Secure and close the coolant reservoir
So you’ve made it to step 6 of filling your engine coolant, which means you’re almost done! Now, it’s time to secure and close the coolant reservoir. This is an important step to ensure that the coolant doesn’t leak out and cause any damage to your engine. To secure the coolant reservoir, start by double-checking that the cap is tightly screwed on.
Give it a gentle twist to make sure it’s secure. If the cap feels loose or doesn’t screw on properly, you may need to replace it. Next, take a look at the coolant hose that connects the reservoir to the radiator.
Make sure it’s properly attached and there are no signs of leaks or cracks. If you notice any issues with the hose, it’s best to replace it before closing up the reservoir. Once you’ve confirmed that everything is secure and in good condition, close the hood of your car and give it a little pat.
You’ve successfully filled your engine coolant! Remember, engine coolant is essential for keeping your engine cool and preventing it from overheating. It’s important to regularly check and top off your coolant levels to keep your car running smoothly. And now that you know how to fill engine coolant properly, you can confidently take care of this important maintenance task on your own.
Good job!
Ensuring the coolant reservoir is properly sealed
coolant reservoir, sealed, secure, close, burstiness, specificity, context
Conclusion
So, there you have it – a quick and easy guide to filling engine coolant. Remember, keeping your engine cool is no joke – it’s the key to keeping your car running smoothly and preventing it from overheating. Just like a good punchline, the right amount of coolant will ensure that your engine stays at just the right temperature, ready to deliver peak performance.
So, don’t be a coolant noob, fill up that radiator and keep your engine cool like a boss!”
Taking care of your vehicle’s coolant system
Securing and closing the coolant reservoir is an important step in taking care of your vehicle’s coolant system. Once you have filled the reservoir with the appropriate amount of coolant, you need to make sure it is securely closed to prevent any leaks or contamination. This is typically done by firmly pushing down the cap until it clicks into place.
It’s important to remember that the cap should only be opened when the engine is cool to avoid any potential injuries from the hot coolant. Securing the coolant reservoir ensures that the coolant will properly circulate through the system and maintain the engine’s temperature. Neglecting this step could result in overheating or damage to the engine.
So, make sure you securely close the coolant reservoir to keep your vehicle running smoothly.
FAQs
What is engine coolant and why is it important?
Engine coolant, also known as antifreeze, is a liquid substance that circulates through the engine to help regulate its temperature. It is important because it helps prevent the engine from overheating and freezing, which can cause damage to the engine.
How often should engine coolant be replaced?
It is recommended to replace engine coolant every 2-3 years or as specified in the vehicle’s manual. However, it is important to regularly check the coolant levels and quality to ensure optimal engine performance.
Can I mix different types of engine coolant?
It is generally not recommended to mix different types of engine coolant unless it is specified to be compatible. Mixing incompatible coolants can lead to chemical reactions that can damage the engine and cooling system.
How do I check the engine coolant level?
To check the engine coolant level, locate the coolant reservoir under the hood. The reservoir typically has minimum and maximum markings. Ensure the engine is cool, then remove the cap and visually check if the coolant is between the minimum and maximum levels.
How do I add engine coolant?
To add engine coolant, locate the coolant reservoir and open the cap when the engine is cool. Slowly pour the coolant into the reservoir until it reaches the maximum level. Make sure not to overfill. Replace the cap tightly and check for any leaks.
Can I use water instead of engine coolant?
In extreme emergencies, you can temporarily use water instead of coolant, but it is not recommended for long-term use. Water does not have the same anti-freezing and anti-corrosive properties as engine coolant, which can lead to engine damage in freezing temperatures or increased corrosion.
What should I do if my engine coolant light comes on?
If the engine coolant light comes on, it indicates that the coolant level is low or there might be an issue with the cooling system. Stop the car in a safe location, allow the engine to cool down, and check the coolant level. If it is low, top it up with coolant. If the light persists, it is advised to consult a professional for further inspection.