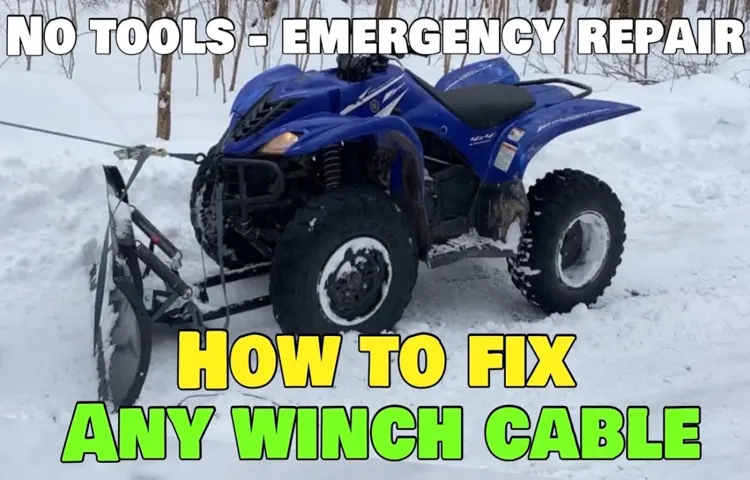
Have you ever found yourself in a sticky situation while out in the woods, relying on your trusty ATV winch to salvage your off-road adventures? It’s a common scenario for ATV enthusiasts, but what happens when that essential lifeline, the winch cable, breaks? Don’t fret! In this blog post, we’re diving headfirst into the world of fixing a broken ATV winch cable. Think of it as your step-by-step guide to getting back on track and conquering those treacherous terrains once more. Picture this: you’re out exploring rugged paths and navigating through rocky landscapes with your ATV, when suddenly, disaster strikes.
Your winch cable snaps, leaving you stranded in the middle of nowhere. But fear not, because we’re here to save the day! Fixing a broken ATV winch cable may seem daunting, but with the right tools and a little know-how, you’ll be back in action in no time. Just like any adventure, the key is preparation.
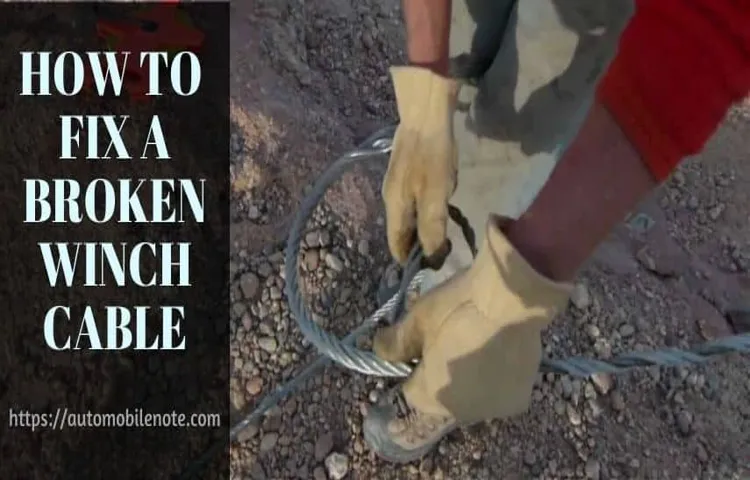
Before you start fixing the broken cable, gather the necessary tools and materials. You’ll need a replacement winch cable, gloves, pliers, and a winch rope thimble. These items will ensure you can tackle the task with ease and efficiency.
And remember, safety first – be sure to wear protective gloves to prevent any injuries while handling the cable. Now that you’re all set, it’s time to dive into the process of fixing your broken ATV winch cable. First things first, locate the winch drum and remove any remnants of the broken cable.
Check for any remaining fragments, as they can cause damage to your winch if left unattended. Once you’ve cleared the debris, it’s time to install the new winch cable. Begin by feeding the replacement cable through the fairlead and attaching the winch rope thimble.
This will ensure a secure connection between the cable and your winch. Slowly feed the cable onto the winch drum, making sure it wraps tightly and evenly. Avoid overlapping or tangling the cable, as this could lead to future complications.
Table of Contents
Introduction
If you’re an ATV enthusiast, you understand the importance of having a reliable winch cable. However, over time, these cables can become worn or even break completely, leaving you stranded in a sticky situation. But fear not! Fixing a broken ATV winch cable is easier than you might think.
By following a few simple steps, you can get your winch back in working order without breaking the bank. So grab your tools and let’s dive in to learn how to fix a broken ATV winch cable.
What is an ATV Winch Cable
ATV winch cables are an essential accessory for off-roading enthusiasts. Whether you’re conquering muddy terrain, pulling yourself out of a sticky situation, or towing heavy loads, a winch cable is your go-to tool. It is made from durable materials such as steel or synthetic fibers, ensuring its strength and longevity.
This reliable cable is designed to withstand high tension and extreme weather conditions, making it a must-have for ATV owners. But what exactly is an ATV winch cable, and how does it work? Let’s dive in and explore the world of winch cables!
Why is it important to fix a broken ATV winch cable?
ATV winches are an essential tool for off-road enthusiasts. They allow you to pull heavy loads, recover stuck vehicles, and navigate difficult terrain. However, like any mechanical device, ATV winches can experience problems over time.
One common issue is a broken winch cable. This can happen due to wear and tear, improper use, or accidents. While it may be tempting to ignore a broken winch cable and continue using the winch, it is crucial to address the issue immediately.
In this blog post, we will explore why it is important to fix a broken ATV winch cable and the potential risks and consequences of not doing so. So, let’s dive in and discover why taking action is necessary to maintain a functioning and safe winch system.
Tools and Materials Needed
If you find yourself with a broken ATV winch cable, don’t worry, it happens to the best of us. Luckily, fixing a broken winch cable is a relatively simple task that you can do yourself with just a few tools and materials. Firstly, you will need a replacement winch cable.
It’s important to choose a cable that is the correct length and diameter for your ATV’s winch. You will also need a pair of gloves to protect your hands and a set of pliers to help remove the old cable. Additionally, having a socket or wrench set on hand will be helpful for removing any bolts or screws that may be holding the cable in place.
Once you have these tools and materials gathered, you’ll be ready to tackle the task of fixing your broken winch cable and getting your ATV back in action.
List of tools needed
“Essential Tools and Materials for Your DIY Projects” When it comes to tackling DIY projects, having the right tools and materials can make all the difference. Whether you’re a seasoned DIY-enthusiast or just starting out, there are a few basic items you’ll want to have on hand. First and foremost, a good set of screwdrivers is a must-have.
From tightening loose screws to assembling furniture, screwdrivers come in various sizes and types to accommodate different tasks. Another essential tool is a hammer. Whether you’re hanging pictures or building a bookshelf, a sturdy hammer is indispensable.
Alongside these basics, a tape measure is essential for any project that requires accurate measurements. From cutting wood to hanging curtains, a tape measure is your best friend. Additionally, a power drill is a versatile tool that can accomplish a multitude of tasks, from drilling holes to driving screws.
Other useful tools to consider include pliers, a level, and a utility knife. As for materials, a well-stocked toolbox should include a variety of screws, nails, and anchors, as well as sandpaper, paintbrushes, and a selection of adhesives. Having these tools and materials at your disposal will not only make your DIY projects easier and more efficient but also give you the confidence to take on new challenges.
So go ahead and stock up on your essential tools and get ready to unleash your creativity!
List of materials needed
In order to successfully complete any DIY project, it is important to have the right tools and materials on hand. When it comes to building or crafting something, having the proper tools can make a world of difference in the final outcome. Some important tools to consider having include a tape measure, a level, a power drill, a hammer, a screwdriver set, and a utility knife.
These basic tools will be useful for a wide variety of projects and are a good starting point for any DIY enthusiast. In addition to tools, it is also important to have the right materials for your project. This could include things like lumber, nails, screws, paint, and any other materials specific to your project.
By having the right tools and materials, you can ensure that your DIY project goes smoothly and that you have everything you need to get the job done right.
Step-by-Step Guide
If you’re an ATV enthusiast, you know how important it is to have a functioning winch cable. But what do you do when that cable breaks? Don’t worry – fixing a broken ATV winch cable is easier than you might think. Here’s a step-by-step guide to getting your winch back in working order.
First, gather your tools. You’ll need a pair of pliers, a screwdriver, a wrench, and some replacement cable. Next, locate the broken section of the cable.
This might require removing the winch cover or other parts of the ATV. Once you’ve found the break, use the pliers to separate the broken ends of the cable. Then, thread the replacement cable through the winch drum and secure it with the provided tensioning bolt.
Finally, reattach any parts you removed and test the winch to make sure it’s working properly. With a little bit of time and effort, you can easily fix a broken ATV winch cable and get back to enjoying your off-road adventures.
Step 1: Assess the damage
“assess the damage” The first step in dealing with any problem is to assess the damage, and this is especially true when it comes to tackling any kind of issue or setback. Whether it’s a personal setback or a business problem, taking the time to fully understand the extent of the damage is crucial in order to come up with an effective plan of action. Just like a doctor would examine a patient before determining the best course of treatment, it’s important to evaluate the situation and gather all the necessary information before taking any further steps.
This involves asking yourself questions such as: What caused the damage? How extensive is it? Are there any immediate steps that need to be taken to prevent further damage? By thoroughly assessing the situation, you can gain a clearer picture of what needs to be done and make informed decisions moving forward. In short, taking the time to assess the damage is the first step in addressing any problem effectively.
Step 2: Gather necessary tools and materials
In this step of the DIY project, we will gather all the necessary tools and materials needed to complete the task at hand. Before diving into the project, it’s important to have all the right tools and materials so that the process goes smoothly. Some of the tools you may need include a screwdriver, hammer, pliers, measuring tape, level, and a power drill.
It’s also a good idea to have some safety equipment on hand like gloves and safety goggles. As for materials, it will depend on the specific project you are working on. It could be anything from wood, screws, nails, paint, or even electrical wiring.
It’s helpful to have a detailed plan or list of all the tools and materials needed so that you can gather everything before you get started. Once you have everything you need, you’ll be ready to move on to the next step and start putting your DIY skills to the test.
Step 3: Remove the old cable
To remove the old cable, you will need a few tools such as a pair of wire cutters, a wrench, and some electrical tape. Start by shutting off the power to the cable and disconnecting any devices that are connected to it. Then, trace the cable to locate where it enters the wall or ceiling.
Use the wire cutters to carefully cut the cable near the entry point. Be sure to leave enough length on the cable to work with later. Next, use the wrench to remove any connectors or fasteners that are holding the cable in place.
Once everything is disconnected, gently pull the cable out of the wall or ceiling, being careful not to damage any surrounding structures. Finally, use the electrical tape to secure any exposed wires and make sure they are safely tucked away. Now that the old cable is removed, you can move on to the next step of installing the new cable.
Step 4: Measure and cut the new cable
In this step-by-step guide, we will walk you through the process of measuring and cutting a new cable for your project. Once you have determined the necessary length for your cable, it’s time to gather your tools and get to work. Make sure you have a measuring tape, wire cutters, and a cable cutter on hand.
Using the measuring tape, carefully measure out the desired length of cable, taking into account any bends or corners in your project. Once you have measured the cable, use the wire cutters to cut off the excess length. Be sure to double-check your measurements before making the final cut to ensure accuracy.
Once you are ready, use the cable cutter to cut the cable at the designated spot. Remember to use caution when handling sharp tools and always wear protective gloves. With the new cable cut to size, you are one step closer to completing your project.
Step 5: Attach the new cable to the winch drum
To attach the new cable to the winch drum, you will need to follow a few simple steps. First, make sure the winch drum is clean and free of any debris or old cable. Next, locate the end of the new cable and thread it through the opening on the winch drum.
Once the cable is threaded through, make sure it is securely attached to the drum by either using a bolt or by wrapping it around the drum several times. Once the cable is securely attached, you can begin winding it onto the drum. This can be done manually using a handle or by using a power winch if available.
Make sure to wind the cable tightly and evenly onto the drum to ensure it is properly secured. Once the cable is fully wound onto the drum, you can test the winch to make sure it is working properly. This can be done by attaching a load or weight to the end of the cable and slowly engaging the winch to see if it can properly lift the load.
If everything is working correctly, you can now use your winch with the new cable attached.
Step 6: Secure the new cable to the fairlead
To secure the new cable to the fairlead, follow these step-by-step instructions. First, locate the fairlead on your vehicle. The fairlead is a device that guides the cable and helps prevent it from getting caught or tangled.
Once you’ve found the fairlead, position the new cable so that it aligns with the opening. Insert the cable through the fairlead, ensuring that it goes all the way through and is properly aligned. Next, use a securement method such as a clamp or a bolt to fasten the cable to the fairlead.
Make sure the cable is tight and secure, as this will prevent it from slipping or coming loose during use. Finally, give the cable a gentle tug to ensure that it is properly attached and will not come undone. By following these steps, you can securely fasten your new cable to the fairlead, ensuring safe and efficient operation.
Step 7: Test the winch and cable
winch, test, cable, step-by-step guide
Prevention Tips
If your ATV winch cable is broken, don’t fret! Fixing it can be a simple task with the right tools and techniques. Here are a few prevention tips to save you from future frustration. First, always inspect your winch cable before each use.
Look for signs of wear, such as fraying or kinks. If you notice any damage, replace the cable immediately to avoid potential accidents or breakdowns. Secondly, when using your winch, make sure to spool the cable evenly and tightly on the drum.
This will prevent the cable from tangling or binding, which can cause it to break. Lastly, avoid overloading your winch by exceeding its weight capacity. Using the winch beyond its limits can cause excessive strain on the cable and ultimately lead to failure.
By following these prevention tips, you can keep your ATV winch cable in excellent condition and ensure reliable performance when you need it most.
Regularly inspect the winch cable
When it comes to the regular maintenance of your winch, one important aspect that should never be overlooked is inspecting the winch cable. The winch cable is responsible for carrying the load and ensuring the safety of your winching operations, so it is crucial to keep it in good condition. Regular inspections can help you identify any potential issues before they become major problems, ultimately saving you time and money in the long run.
So, what should you look for when inspecting your winch cable? Start by checking for any signs of damage such as fraying, kinks, or broken strands. These can weaken the cable and make it more prone to failure. Also, be on the lookout for any rust or corrosion, as this can also compromise the strength and integrity of the cable.
Additionally, make sure to inspect the ends of the cable and the attachment points for any wear or damage. If you notice any of these issues, it is important to address them immediately by either repairing or replacing the cable. Keeping your winch cable in top shape is essential for ensuring smooth and safe operations, so don’t neglect this important maintenance task.
Avoid excessive strain on the cable
Prevention Tips: Avoid excessive strain on the cable When it comes to preventing cable damage, it’s important to pay attention to the strain we put on the cables. Excessive strain can lead to fraying, cracking, or even complete failure of the cable. So, how can we avoid this? Firstly, it’s important to be mindful of the way we handle and store our cables.
Avoid bending or twisting them too much, as this can weaken the internal components. Instead, try to coil them in loose loops or use cable management solutions to keep them organized and protected. Secondly, consider the length of the cable and the distance you need to cover.
Using a cable that is too short can put unnecessary strain on the connectors, causing them to bend or break. On the other hand, using a cable that is too long can result in excessive twisting or tangling, which can also lead to damage. So, always choose a cable that is the right length for your needs.
Lastly, be mindful of how you plug and unplug your devices. Avoid yanking on the cable to disconnect it, as this can damage both the connectors and the cable itself. Instead, gently pull on the connector itself and use the release mechanism if your device has one.
This will ensure a smooth disconnection without putting strain on the cable. By following these prevention tips, you can avoid excessive strain on your cables and prolong their lifespan. Remember, taking care of your cables now will save you from the hassle of dealing with damaged cables later on.
So, be mindful of how you handle, store, and use your cables to keep them in optimal condition.
Properly maintain the winch
winch maintenance, winch performance, winch durability Proper maintenance of your winch is crucial for ensuring its optimal performance and durability. Regular maintenance not only extends the lifespan of your winch but also prevents potential malfunctions and accidents. Here are some prevention tips to help you properly maintain your winch.
Firstly, it is important to regularly inspect your winch for any signs of wear and tear. Check the cable or rope for any fraying, kinks, or knots that could compromise its strength. Also, examine the winch drum for any signs of rust or corrosion, as this can affect its smooth operation.
If you notice any issues during the inspection, make sure to address them immediately before they escalate into bigger problems. Secondly, ensure that the winch is properly lubricated. This is necessary to reduce friction and keep all moving parts functioning smoothly.
Use a high-quality winch grease or lubricant to coat the gears, bearings, and other important components. Regular lubrication will not only enhance the performance of your winch but also prevent premature wear and tear. Additionally, make it a habit to clean your winch after each use, especially if you frequently operate it in muddy or dusty conditions.
Use a mild detergent and water to remove any dirt, debris, or grime that may have accumulated. This will prevent the build-up of dirt and extend the lifespan of your winch. Furthermore, always pay attention to the weight capacity of your winch and avoid overloading it.
Exceeding the recommended weight limit can strain the winch’s motor and lead to premature failure. Make sure to check the owner’s manual or consult a professional if you are unsure about the weight capacity of your winch. Lastly, don’t forget to regularly test your winch to ensure its proper functionality.
Conclusion
So, there you have it – a simple and effective guide on how to fix a broken ATV winch cable. By following these steps and using a little bit of creativity, you can get your winch back in action and tackle any tough situation with ease. Just remember to be safe, use the right tools, and don’t be afraid to get a little inventive.
After all, a broken cable is just a temporary setback for the resourceful ATV enthusiast. So get out there and show that broken cable who’s boss! Happy winching!”
Summary of the repair process
preventing appliance repairs, appliance maintenance. Appliances are an essential part of our daily lives, but when they break down, it can be a major inconvenience. That’s why it’s important to take preventive measures to make sure your appliances are in good working order.
One of the simplest things you can do is clean your appliances regularly. Dust and dirt can accumulate over time and put a strain on the machine’s components. By cleaning them regularly, you can prevent the build-up of debris that can cause malfunctions.
Another important tip is to pay attention to any strange noises or smells coming from your appliances. These can be early warning signs of a potential problem, and addressing them early can prevent a full breakdown. Regularly checking and replacing filters, such as those in your air conditioner or refrigerator, can also help ensure they operate efficiently and minimize the risk of repairs.
Additionally, reading and following the manufacturer’s instructions for proper use and maintenance can go a long way in preventing appliance malfunctions. Finally, consider investing in routine professional maintenance for your appliances. A qualified technician can identify and address any potential issues before they become major problems.
By following these prevention tips, you can extend the lifespan of your appliances and avoid costly repairs in the future.
Importance of regular maintenance and inspection
regular maintenance, inspection, prevention tips
FAQs
How do I know if my ATV winch cable is broken?
You can visually inspect the cable for any signs of fraying, kinks, or wear. Additionally, if the winch is not functioning properly or if you hear unusual noises when operating it, it could be a sign of a broken cable.
Can I fix a broken ATV winch cable myself?
While it is possible to repair a broken ATV winch cable, it is recommended to replace it with a new one for safety reasons. Repairing a cable requires specialized tools and knowledge to ensure it is done correctly.
Where can I purchase a replacement ATV winch cable?
You can find a replacement ATV winch cable at a variety of places, including ATV dealerships, online retailers, or specialty stores that sell ATV accessories and parts.
How often should I inspect my ATV winch cable for damage?
It is recommended to inspect your ATV winch cable before each use and periodically during regular maintenance. This will help ensure its integrity and prevent any potential accidents due to a damaged cable.
Can I use a regular steel cable as a replacement for my ATV winch cable?
It is recommended to use a specifically designed ATV winch cable as a replacement to ensure proper functioning and safety. Regular steel cables may not have the necessary strength or durability required for ATV winching applications.
Are there any safety precautions I should take when using an ATV winch cable?
Yes, it is important to follow the manufacturer’s guidelines and safety recommendations when using an ATV winch cable. This may include wearing gloves, eye protection, and ensuring proper installation and operation of the winch.
How much does it cost to replace an ATV winch cable?
The cost of replacing an ATV winch cable can vary depending on the brand, length, and quality of the cable. On average, you can expect to spend between $50 to $200 for a replacement cable.