

Have you noticed a puddle forming under your car? Is the temperature gauge constantly rising? These are signs that you may have a coolant hose leak. Don’t panic, though! This is a common issue that can be easily fixed. Imagine your coolant system as the plumbing in your house.
The coolant hoses are like the pipes that carry the water throughout your car’s engine, keeping it cool and preventing it from overheating. Just like a leaky pipe can cause water damage in your home, a coolant hose leak can lead to engine damage if left untreated. But fear not! Fixing a coolant hose leak is not as daunting as it may seem.
With a few basic tools and some simple steps, you can get your car back on the road in no time. In this blog post, we will guide you through the process of identifying and fixing a coolant hose leak. We will explain the common causes of coolant leaks, walk you through the necessary tools and materials, and provide you with step-by-step instructions to patch or replace the damaged hose.
By the end of this post, you will feel confident in your ability to tackle this DIY repair and save yourself a trip to the mechanic. So grab your toolbox and let’s get started on fixing that coolant hose leak!
Table of Contents
Introduction
So you’ve discovered a coolant hose leak in your car, and now you’re wondering how to fix it. Well, you’ve come to the right place! A coolant hose leak can be a frustrating problem to deal with, but with a little bit of knowledge and the right tools, you can fix it yourself and save a lot of money in the process. The first thing you’ll want to do is locate the leak.
This can be done by visually inspecting the hoses and looking for any signs of damage or wear. Once you’ve found the leak, you’ll need to drain the cooling system and remove the hose to replace it. It’s a relatively simple process, but it’s important to take your time and be careful not to damage any other components.
Once the new hose is in place, refill the cooling system, start the engine, and check for any leaks. If everything looks good, you’re all set! Remember, if you’re not comfortable doing this yourself, it’s always best to seek the help of a professional mechanic.
What is a coolant hose leak
coolant hose leak
Importance of fixing a coolant hose leak
coolant hose leak
Identifying the Leak
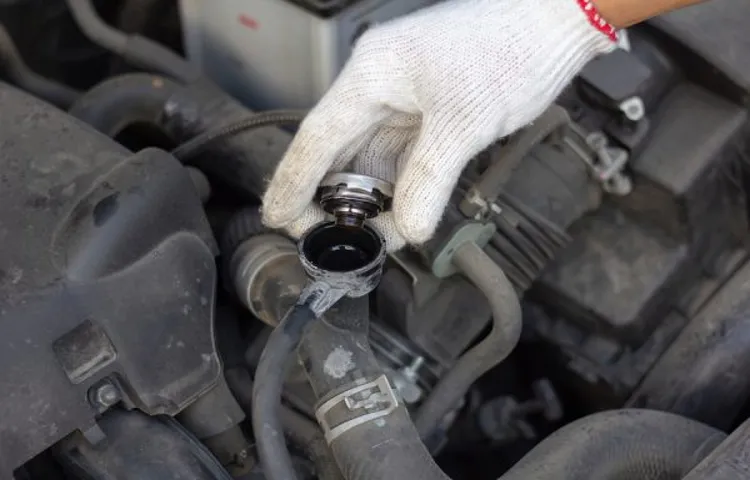
So you’ve discovered a coolant hose leak in your car. Don’t panic, it’s a common issue that can be easily fixed. The first step is to identify the location of the leak.
Start by inspecting all of the hoses connected to your car’s cooling system. Look for any signs of damage, such as cracks or bulges. Sometimes the leak may not be visible, so you’ll need to use your sense of touch.
Feel along the hoses for any wet or damp spots. If you find a leak, mark the location with a piece of tape or a marker so you can easily find it again. Once you’ve identified the leak, you can move on to fixing it.
If the hose is simply cracked or damaged, you may be able to patch it up with some rubber repair tape or epoxy. However, if the hose is severely damaged or worn out, it’s best to replace it entirely. Make sure to buy a replacement hose that is the same size and type as the original.
Finally, when installing the new hose, make sure it is securely attached and that all clamps are tightened properly. Remember, fixing a coolant hose leak is a relatively simple task that can save you from more serious problems down the road.
Signs of a coolant hose leak
coolant hose leak
Locating the leak
Identifying the Leak: A Guide to Locating the Source of Your Plumbing Problem Dealing with a leak in your home can be a frustrating and stressful experience. Not only can it cause damage to your property, but it can also lead to expensive repairs if not addressed promptly. The first step in fixing a leak is to locate its source.
This can be a challenging task, as leaks can occur in hidden areas such as behind walls or under floors. However, with a careful and systematic approach, you can identify the leak and take the necessary steps to fix it. The first thing you should do when trying to identify a leak is to turn off all water sources in your home.
This includes faucets, toilets, and any appliances that use water. By doing this, you can determine if the leak is coming from a specific area or if it is a more widespread issue. Once all water sources are off, pay close attention to any signs of water damage or moisture.
Look for water stains on walls or ceilings, dampness on the floor, or a musty smell in the air. These are all indicators that there may be a leak nearby. Next, inspect all visible pipes and plumbing fixtures in your home.
Check for any signs of corrosion, rust, or loose connections. Leaks are often caused by deteriorating pipes or faulty fittings, so it’s important to thoroughly examine these areas. If you notice any abnormalities, such as dripping or pooling water, there’s a good chance that you have found the source of the leak.
If you are unable to locate the leak using the above methods, it may be necessary to use more advanced techniques. One option is to use a moisture meter, which can detect water hidden behind surfaces. By running the meter along walls and floors, you can pinpoint areas of increased moisture and narrow down the location of the leak.
Checking other components
When it comes to identifying a leak in your plumbing system, it’s not always as straightforward as it seems. While a visible water spot or dripping pipe may be the obvious signs, checking other components is crucial to pinpoint the exact location of the leak. Start by examining all the fixtures in your home, such as faucets, showerheads, and toilets.
Look for any signs of water damage or excess water around these areas. Additionally, check the water meter to see if it is continuously running when all the water sources in your home are turned off. This could indicate a hidden leak in the main water line.
It’s essential to carefully inspect all the possible components to ensure you don’t miss any potential sources of the leak. By doing so, you can effectively identify and address the leak before it causes significant damage to your property.
Materials Needed
If you’re dealing with a coolant hose leak, there are a few materials you’ll need to fix the problem. First and foremost, you’ll need a replacement coolant hose. It’s important to get the correct hose for your specific vehicle make and model, so be sure to check the part number or consult with a trusted mechanic or auto parts store.
In addition to the hose, you’ll also need a hose clamp. These clamps are used to secure the hose to the connections and prevent any leaks. Depending on the severity of the leak and the condition of your vehicle’s coolant, you may also need some coolant to top off or replace any that was lost.
It’s always a good idea to check your vehicle’s owner’s manual for the recommended coolant type and quantity. Lastly, you’ll need a set of basic hand tools such as pliers, a screwdriver, and possibly a wrench to detach and reattach the hose and clamp. Once you have all of these materials gathered, you’ll be ready to fix that coolant hose leak and get back on the road.
Coolant
coolant Keywords used in the blog section: – materials needed Paragraph: When it comes to taking care of your car, one important aspect to consider is the coolant. The coolant is a vital fluid that helps regulate the temperature of the engine and prevent it from overheating. If you want to maintain your car’s performance and prolong its lifespan, it’s essential to regularly check and replace the coolant as needed.
To do this, you’ll need a few materials. First and foremost, you’ll need the right type of coolant for your car. Make sure to consult your car’s manual or speak with a professional to determine the correct coolant to use.
You’ll also need a funnel to safely pour the coolant into the radiator. Additionally, having a clean cloth or rag on hand can be helpful to wipe up any spills or drips that may occur during the process. It’s important to remember that coolant is toxic, so wearing gloves and protective eyewear is crucial to ensure your safety.
Lastly, having a wrench or pliers can be useful for removing the radiator cap and drain plug when it’s time to drain and replace the old coolant. With these materials on hand, you’ll be well-equipped to take care of your car’s coolant and maintain its optimal performance.
New coolant hose
One of the essential components of a car’s cooling system is the coolant hose. This hose plays a crucial role in transporting the coolant from the engine to the radiator, where it can cool down before returning to the engine. Over time, coolant hoses can become worn out or damaged, leading to leaks or reduced performance.
When it comes time to replace a coolant hose, there are a few materials that you will need. Firstly, you will need the appropriate replacement hose for your specific make and model of car. It’s important to ensure that you get the right hose to ensure a proper fit and function.
Additionally, you will need a set of pliers or a hose clamp tool to remove and secure the hose clamps. It’s also a good idea to have some rags or paper towels on hand to clean up any coolant that may spill during the process. Finally, you may choose to use a coolant hose lubricant to make installation easier.
With these materials ready, you can successfully replace a coolant hose and keep your car’s cooling system running smoothly.
Clamps
clamps, materials needed
Pliers
pliers, materials needed
Repairing the Leak
If you notice a coolant hose leak in your vehicle, it’s important to address it as soon as possible to prevent further damage to your engine. The first step is to locate the leak by checking all the hoses and connections for any signs of coolant dripping or spraying. Once you’ve identified the source of the leak, you’ll need to determine if the hose can be repaired or if it needs to be replaced.
If the hose is only slightly damaged, you may be able to temporarily fix it using a hose repair kit or with a small amount of duct tape. However, keep in mind that these are temporary solutions and you should schedule a professional repair as soon as possible. If the hose is severely damaged or has burst, it will need to be replaced entirely.
To do this, you’ll need to drain the coolant system, remove the clamps holding the hose in place, and carefully remove the damaged hose. Be sure to take note of the exact make and model of your vehicle and purchase a replacement hose that matches those specifications. Once you have the new hose, carefully attach it to the appropriate connections, secure it with clamps, and refill the coolant system with the proper mixture of coolant and water.
Finally, start the engine and check for any leaks or overheating. If everything looks good, you can breathe a sigh of relief knowing that you have successfully repaired the coolant hose leak.
Draining the coolant
repairing the leak
Removing the old hose
Now that we’ve identified the source of the leak, it’s time to roll up our sleeves and get to work. The first step in repairing the leak is removing the old hose. This may seem like a simple task, but it can be quite tricky depending on the location of the hose and how it is connected.
First, we need to shut off the water supply to avoid any further leakage. Once the water is turned off, we can use a wrench to disconnect the hose from the spigot or faucet. It’s important to be gentle and avoid applying too much force, as this can damage the fittings or cause them to break.
Once the hose is disconnected, we can then remove it from any other attachments or connections along its length. This might involve unscrewing clamps or fittings, depending on how the hose is secured. Once all the attachments are undone, we can simply pull the old hose out from where it was installed.
It’s important to inspect the hose for any signs of damage, such as cracks or holes, that may have caused the leak in the first place. If the hose is damaged beyond repair, it will need to be replaced. If it’s still in good condition, it can be reused or stored for future use.
Now that the old hose is out of the way, we can move on to installing the new one and finally putting an end to that pesky leak. Stay tuned for the next step in our guide to repairing a leaking hose.
Installing the new hose
installing the new hose, repairing the leak So, you’ve identified the leak in your hose and now it’s time to fix it. Don’t worry, it’s not as complicated as it may seem! First, make sure you have the necessary tools and materials on hand. You’ll need a new hose, hose clamps, and a screwdriver or wrench.
Once you have everything ready, turn off the water supply to the hose and detach it from the faucet. Next, locate the source of the leak and carefully remove the damaged section of the hose. Take your new hose and slide it onto the faucet and the other end onto the desired attachment point.
Secure the hose in place by tightening the hose clamps with your screwdriver or wrench. Once everything is securely in place, turn on the water supply and check for any leaks. If everything looks good, congratulations – you’ve successfully repaired the leak and installed your new hose!
Securing with clamps
Securing with clamps When it comes to repairing a leak, one effective solution is to secure the damaged area with clamps. Clamps are a versatile tool that can be used to hold two objects together tightly, creating a seal that prevents leakage. Whether you’re dealing with a small hole in a pipe or a larger crack in a container, clamps can provide a temporary fix until you’re able to make more permanent repairs.
To use clamps to repair a leak, start by identifying the source of the leak and assessing the severity of the damage. If the leak is minor, you may be able to simply tighten the clamp around the affected area to stop the flow of liquid. However, if the damage is more extensive, you may need to apply a patch or sealant before securing it with the clamp.
Once you have prepared the damaged area, position the clamp over the leak and tighten it securely. Make sure to apply enough pressure to create a tight seal, but be careful not to over-tighten and cause further damage. It’s also important to choose the right size and type of clamp for the job.
There are various types of clamps available, including C-clamps, bar clamps, and pipe clamps, so make sure to select one that suits your specific needs. While securing a leak with clamps can provide a temporary fix, it’s important to note that this is not a permanent solution. It’s always best to address the underlying issue and make permanent repairs as soon as possible.
If you’re unsure how to proceed or if the leak persists, it’s recommended to seek the assistance of a professional plumber or repair specialist. In conclusion, using clamps to secure a leak can be an effective way to temporarily stop the flow of liquid. It’s a simple and versatile solution that can be used in a variety of situations.
However, it’s important to remember that this is not a permanent fix and that further repairs may be necessary.
Refilling the coolant
In case you notice that your car’s coolant level is low, it might be due to a leak somewhere in the cooling system. Repairing this leak is crucial to prevent any further damage to the engine. The first step is to identify where the leak is coming from.
Check for any visible signs of coolant around the engine or underneath the car. Once you have located the source of the leak, you can determine the best course of action to fix it. In some cases, a simple tightening of a hose clamp might be all that is needed.
However, if the leak is coming from a cracked radiator or a damaged hose, it may require replacement. It is essential to ensure that you use the correct type of coolant for your car, as different vehicles require different coolant formulations. Once the leak has been repaired, you can refill the coolant by pouring it into the coolant reservoir, making sure you do not overfill it.
Taking care of leaks promptly not only helps maintain the proper functioning of your car’s cooling system but also prevents more significant issues down the line. So, if you notice a coolant leak, it’s best to address it sooner rather than later.
Preventing Future Leaks
If you’ve noticed a coolant hose leak, it’s important to take action right away to prevent any further damage to your vehicle’s cooling system. Luckily, fixing a coolant hose leak is a relatively simple process that can be done with a few tools and some know-how. The first step is to locate the source of the leak.
This can usually be done by visually inspecting the hoses for any signs of damage or wear. Once you’ve identified the problematic hose, you’ll need to remove it from its fittings. This can be done using a pair of pliers or a wrench, depending on the type of clamp used.
After the hose is removed, you’ll want to clean both the hose and the fittings thoroughly to ensure a tight seal when the new hose is installed. When installing the new hose, be sure to use the appropriate size and type for your vehicle. It’s also a good idea to replace any clamps that may be worn or rusty.
Once the new hose is in place, it’s important to properly tighten the clamps to prevent future leaks. Finally, refill the cooling system with the appropriate amount of coolant and check for any additional leaks. By following these steps, you can effectively fix a coolant hose leak and prevent any future leaks from occurring.
Regular inspection
To prevent future leaks in your home, it is important to conduct regular inspections. By taking the time to inspect your home, you can identify any potential issues or weaknesses in your plumbing system that may lead to leaks down the line. This proactive approach can save you from costly repairs and water damage.
During your inspections, be sure to check for any signs of water damage, such as discoloration on walls or ceilings, musty odors, or dripping sounds. Additionally, inspect visible pipes for any signs of corrosion or damage. Look for any areas where pipes may be exposed to extreme temperatures or potential damage from nearby objects.
By identifying and addressing these issues early on, you can prevent leaks from occurring in the future and ensure the long-term integrity of your home’s plumbing system. So, next time you’re doing your routine home maintenance, don’t forget to include a thorough inspection of your plumbing system. It could save you a lot of headache and expense down the road.
Replacing worn hoses
Replacing worn hoses in your vehicle is an essential maintenance task that can help prevent leaks and avoid more serious problems down the line. Over time, hoses can become worn and cracked, leading to leaks and potential damage to your engine. By regularly checking and replacing any worn hoses, you can ensure that your vehicle’s systems are working properly and reduce the risk of costly repairs.
Think of your hoses as the veins of your vehicle, carrying vital fluids to various parts of the engine. Just like a leak in your veins can cause serious health problems, a leak in your vehicle’s hoses can lead to engine failure. So, it’s important to replace worn hoses as soon as you notice any signs of wear or damage.
By doing so, you can save yourself time, money, and the headache of dealing with a major repair in the future.
Maintaining proper coolant levels
coolant levels, preventing future leaks
Knowing the signs of a leak
Preventing Future Leaks Now that you know the signs of a leak, it’s important to take steps to prevent them from happening in the future. One of the best ways to do this is to regularly inspect your plumbing system. Look for any signs of wear and tear, such as corroded pipes or loose connections.
By catching these issues early on, you can fix them before they turn into major leaks. Additionally, it’s a good idea to have your plumbing system professionally inspected on a regular basis. A professional plumber can spot potential problems that you may not notice and can make any necessary repairs.
Another way to prevent future leaks is to be careful about what you put down your drains. Avoid pouring grease or oil down the sink, as this can clog the pipes and lead to leaks. Similarly, be mindful of what you flush down the toilet.
Flushing items like baby wipes or paper towels can also cause clogs and leaks. Finally, insulate your pipes to prevent them from freezing in cold weather. Frozen pipes can burst and cause extensive water damage.
By following these tips, you can help ensure that your plumbing system stays leak-free for years to come.
Conclusion
In conclusion, fixing a coolant hose leak is like performing surgery on your car’s circulatory system. You need precision, a steady hand, and a healthy dose of determination. Just like a quick-thinking doctor, you must diagnose the problem, locate the leak, and perform the necessary repair with finesse.
But fear not, for with the right tools and a little ingenuity, you can navigate the labyrinth of hoses and conquer this leak like a true automotive hero. Whether you choose to patch it up with a trusty bandage or replace the hose altogether, you’ll soon have your car running smoothly again. Remember, a coolant hose leak is no match for your DIY skills.
So grab your toolbox and get to work, because you’ve got this leak licked faster than a thirsty dog on a hot summer day. Just don’t forget to pat yourself on the back when you’re done, because you, my friend, just became a bonafide coolant hose whisperer. Happy fixing!”
Importance of timely repair
timely repair, preventing future leaks The importance of timely repair cannot be overstated when it comes to preventing future leaks. Ignoring a small issue now can lead to significant damage later on. A leak may seem like a minor inconvenience, but it can quickly escalate into a major problem if left untreated.
Not only can leaks cause structural damage to your home, but they can also lead to mold growth and water damage. By addressing the issue promptly, you can save yourself from potential headaches and expensive repairs in the future. Think of it as putting a Band-Aid on a small cut before it becomes a gaping wound.
Taking action now and fixing the problem will help ensure that you won’t have to deal with a full-blown water catastrophe down the line. So, don’t wait until it’s too late. Stay proactive and stay on top of any repairs that need to be made.
Your home and your peace of mind will thank you for it.
Taking care of your vehicle
preventing future leaks, taking care of your vehicle, vehicle maintenance Are you tired of dealing with annoying leaks in your vehicle? It’s time to take preventative measures and save yourself the hassle. Regular maintenance and a little bit of attention can go a long way in preventing future leaks. Start by inspecting your vehicle regularly, checking for any signs of leaks such as puddles or stains on the ground.
Keeping an eye on your vehicle’s fluids is also crucial. Make it a habit to check your oil, coolant, and transmission fluid levels on a regular basis. If you notice any low levels, be sure to top them up immediately.
Additionally, getting your vehicle serviced according to the manufacturer’s recommendations can help identify and fix any potential issues before they turn into major leaks. Remember, a stitch in time saves nine! Taking care of your vehicle now can prevent costly repairs and keep you on the road for longer. So, don’t wait until it’s too late.
Incorporate these preventative measures into your routine and enjoy a leak-free driving experience.
FAQs
What are the common signs of a coolant hose leak?
Common signs of a coolant hose leak include low coolant levels, overheating engine, coolant odor, and visible coolant puddles under the vehicle.
How can I identify the location of a coolant hose leak?
You can identify the location of a coolant hose leak by inspecting the hoses for visible cracks, bulges, or leaks. You can also use a coolant pressure tester to pressurize the system and identify any leaks.
Can I drive my vehicle with a coolant hose leak?
It is not recommended to drive a vehicle with a coolant hose leak as it can lead to engine overheating and potential damage. It is best to address the issue as soon as possible.
How much does it cost to fix a coolant hose leak?
The cost to fix a coolant hose leak can vary depending on the make and model of the vehicle and the location of the leak. On average, the cost can range from $150 to $300.
Can I repair a coolant hose leak myself?
If you have some mechanical knowledge and the necessary tools, you may be able to repair a coolant hose leak yourself. However, it is recommended to consult a professional mechanic for proper diagnosis and repair.
How long does it take to fix a coolant hose leak?
The time it takes to fix a coolant hose leak can vary depending on the location of the leak and the accessibility of the hose. On average, it can take 1 to 2 hours for a professional mechanic to fix a coolant hose leak.
How often should coolant hoses be inspected for leaks?
Coolant hoses should be inspected for leaks during regular maintenance intervals, typically every 30,000 to 60,000 miles. It is also important to inspect the hoses if you notice any signs of a coolant leak.