If you own a vehicle, it’s only a matter of time before you encounter a flat tire. Flat tires are something no one ever wants to deal with, especially when they happen unexpectedly. One common cause of a flat tire is a leaking bead.
This is when the tire’s inner and outer rubber edges are not lining up properly with the wheel’s edges, causing air to escape. Fixing a leaking tire bead may seem intimidating, but it’s a manageable task if you know what to do. Keeping your tires properly inflated is crucial for your safety on the road, making it essential to address a tire leak as soon as possible.
With some simple tools and a few expert tips, you can fix a leaking tire bead and get back on the road in no time. In this post, we’ll share tips to help you fix a leaking tire bead and keep rolling safely. You’ll learn about the causes of a bead leak and the essential tools needed to remedy the situation.
So, whether you’re stranded on the side of the road or just want to be prepared for an emergency, keep reading for expert advice.
Table of Contents
Understanding Tire Beads and Leaks
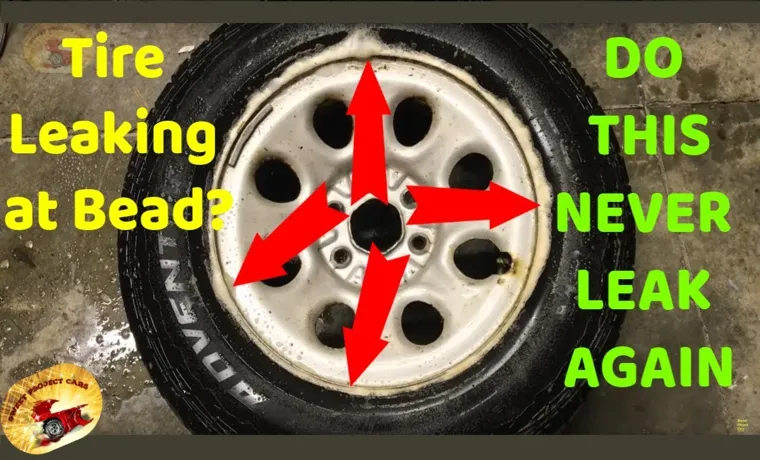
If you’re dealing with a leaking tire bead, it’s important to understand what exactly that means. The bead is what forms the seal between the tire and the wheel rim, so if there’s a leak in this area, air can escape from your tire. To fix a leaking tire bead, you’ll need to remove your tire from the wheel and inspect both the bead and rim for any damage or debris.
Often, leaks occur due to small amounts of dirt or corrosion buildup. Once you’ve cleaned the bead and rim, you may need to use sealant to create a proper seal. It’s important to ensure that the tire bead is seated correctly on the rim before inflating the tire to the recommended pressure.
If you’re unsure about fixing a leaking tire bead, take your car to a professional mechanic to prevent any further damage or safety issues. Remember, proper tire maintenance is key to keeping your vehicle safe on the road.
What is a Tire Bead and Why They Leak?
When it comes to tires, the bead is a crucial component that often gets overlooked. The tire bead is basically the rubber-coated steel edge that fits snugly against the wheel rim, creating an airtight seal. Unfortunately, beads can be prone to leaks if they are damaged or have deteriorated over time.
This can happen if the tire is improperly installed, the wheel rim is damaged, or if the tire has been sitting inactive for a long time. When a bead leaks, you may notice a slow loss of air pressure, or you may hear a hissing noise coming from the tire. In some cases, the tire may even completely deflate.
To avoid bead leaks, it’s important to make sure that your tires are correctly installed and that your wheels are in good condition. If you suspect that you have a bead leak, it’s best to take your vehicle to a trusted mechanic or tire specialist who can diagnose and repair the issue.

Symptoms of a Leaking Tire Bead
When it comes to tire maintenance, it’s crucial to understand the tire beads and the potential dangers of a leaking bead. The tire bead is a reinforced rubber edge that creates a seal between the tire and the wheel, ensuring that it stays attached under pressure. A leaking bead can result from damage or corrosion to the bead area or the rim, causing a slow leak or a sudden loss of air pressure.
Signs of a leaking tire bead include a hissing sound, a visible gap between the rim and the tire, and difficulty maintaining proper tire pressure. It’s essential to address a leaking bead promptly to prevent a tire blowout or other hazards on the roads. Regular inspections by a professional can help identify damage before it becomes a more significant problem.
Tools and Materials You Need
If you’ve ever experienced a leaking tire bead, you know how frustrating it can be. But don’t worry, it’s a problem that can be easily fixed. To get started, you’ll need a few tools and materials.
First, you’ll need a tire iron or a lug wrench to remove the tire from the rim. Next, you’ll need a bead sealant, which is a liquid or aerosol that helps seal any gaps between the tire and the rim. You can find bead sealant at most auto parts stores.
You’ll also need a bead breaker tool, which is used to separate the tire from the rim. Finally, you’ll need a tire pressure gauge to check the tire pressure once the repair is complete. With these tools and materials on hand, you’ll be able to fix your leaking tire bead and get back on the road in no time.
Required Tools
A set of essential tools and materials can make the difference between success and frustration in any project. When it comes to woodworking, there are a few items you need to have before you even consider starting your project. First, you need a sturdy workbench that can hold both your project and your tools.
You’ll also need several hand tools, such as chisels, hammers, screwdrivers, and saws. Power tools, such as a drill, a sander, or a jigsaw, can speed up your work and provide more precise results. Don’t forget to pick up some measuring tools, such as a tape measure and a square, to ensure your project’s accuracy.
Getting the correct materials is also critical. Lumber, screws, nails, glue, and sandpaper are common materials that most projects require. Whether you choose to invest in high-quality or budget options, make sure you have the proper tools and materials for the job before getting to work.
By doing so, you’ll be able to focus on the woodworking itself without worrying about any setbacks or obstacles.
Required Materials
As a DIY enthusiast, having the right tools and materials is crucial to achieving success in any project. When it comes to woodworking, there are several tools and materials that you need to have to make the process smooth and seamless. First and foremost, you need a table saw, as it’s one of the most important tools in any woodworking project.
Additionally, you need a cordless drill and driver set, a jigsaw, a miter saw, a palm sander, and a router. These tools will help you make precise cuts and create intricate designs. As for materials, you need high-quality wood, glue, screws, sandpaper, wood stain, and protective finish.
With these materials, you can build beautiful and functional pieces that will last for years to come. So, before you embark on your next woodworking project, make sure you have all the tools and materials you need to create something truly remarkable.
Fixing a Leaking Tire Bead Step-by-Step
Has your car been showing signs of a leaking tire bead lately? Not to worry, fixing it is easier than you might think. Follow these simple steps to get your tire back to its normal self. Start by removing the tire from the rim completely.
Clean the area around the tire bead and inspect it for any cracks or damage that could be causing the leak. Next, apply a layer of rubber cement to the tire bead and let it dry for a few minutes. Once dry, reinstall the tire onto the rim, making sure that the tire bead is properly seated.
Inflate the tire to the recommended pressure and check for any leaks or abnormalities. Repeat the process for any other tires that may also have leaking beads. By fixing the issue promptly, you’ll ensure better fuel efficiency and keep yourself and your passengers safe on the road.
So, don’t wait any longer – get those leaking tire beads fixed today!
Step 1: Locate the Leaking Bead
If you’ve encountered a flat tire, the source of the leak could be the bead of the tire, or the area where the tire meets the rim of the wheel. In order to fix the issue, the first step is to locate the specific area that’s leaking by visually inspecting the tire. Look for any visible damage or protruding objects that could cause a puncture.
If nothing is apparent, try spraying a solution of soapy water around the edge of the tire. If there are any leaks, bubbles will appear and indicate where the bead is allowing air to escape. Once you’ve identified the specific area of the leak, you can begin to properly address the issue and get your tire back on the road.
Step 2: Remove the Tire from the Rim
When dealing with a leaking tire bead, the second step in fixing the problem is to remove the tire from the rim. This may seem like a daunting task, but with the proper tools and techniques, it’s actually quite simple. To begin, use a tire iron to remove the valve cap and deflate the tire completely.
Next, loosen the lug nuts with a lug wrench and jack up the vehicle so that the wheel is off the ground. It’s important to use a jack stand to ensure safety before proceeding any further. With the vehicle securely lifted, remove the lug nuts and carefully slide the wheel off the hub.
You may need to use a rubber mallet to gently tap the rim towards the outside to loosen it from the bead. Once the wheel is off, use a tire iron to pry the tire away from the rim on one side, being careful not to damage the tire or the rim. Repeat the process on the other side of the tire until it is completely removed from the rim.
With the tire off, you will be able to access the bead and properly remedy the leak. The main keyword used organically: leaking tire bead
Step 3: Clean the Bead Area
When fixing a leaking tire bead, the next step is to clean the bead area. This is a crucial step before proceeding to the actual repair because dirt, grime, and other debris can interfere with the adhesive bonding process. To do this, use a clean rag and a bead cleaner solution.
Start by wiping down the tire bead area to remove any loose debris. Then, apply the bead cleaner solution to the rag and rub it onto the bead area thoroughly. This will help remove any grime or rust buildup that could prevent the tire from sealing properly.
Once you’ve cleaned the bead area, take a clean rag and wipe away any excess solution that may still be present. Remember to wear gloves when handling the bead cleaner solution to avoid skin irritation. By properly cleaning the bead area, you’re ensuring that the repair process will be more effective and that your tire will seal properly to prevent any future leaks.
Step 4: Seal the Bead Area
“seal the bead area” After cleaning and drying the bead area, it’s time to seal it properly to prevent any more air leakage. This step is crucial as it ensures that the tire stays inflated and doesn’t lose pressure while driving. To begin, grab a bead sealer and apply it generously around the inner circumference of the rim.
Ensure that the sealer covers every inch of the bead area before mounting the tire back on the rim. You can then use a bead sealer roller to distribute the sealer evenly around the bead. The roller also ensures that the bead sits tightly on the rim and is properly sealed.
At this point, you can inflate the tire to the recommended pressure and check for any leaks by applying a soap solution around the bead area. If there are no more leaks detected, you can safely drive your car, knowing that your tire is properly sealed and secure. Remember that sealing the bead area properly is essential when fixing a leaking tire, and it’s always best to consult a professional if you’re unsure or uncomfortable completing this step.
Step 5: Reinflate the Tire and Check for Leaks
After making sure the tire bead is clean, it’s time to inflate the tire and check for leaks. Before putting air back in the tire, double-check the recommended pressure for your vehicle and adjust the pressure accordingly. Slowly inflate the tire using a tire gauge to prevent over-inflation, which can cause the tire to burst.
Once inflated, spray a mixture of water and dish soap around the entire bead area while checking for any bubbling, which indicates air leaks. Keep in mind that you may need to repeat the cleaning and inflating process a few times until it’s completely sealed. Once you’re confident the tire bead is fixed, you can put the tire back in place and hit the road.
Remember, it’s important to check your tires for any visible damage or leaks on a regular basis to prevent accidents and ensure your tires are in optimal condition.
Preventing Future Leaks
If you want to prevent future leaks in your tire bead, the best thing you can do is properly maintain your tires. This means regularly checking your tire pressure and ensuring it’s within the manufacturer’s recommended range. Additionally, you should inspect your tires for damage or wear, including checking the tread depth and looking for any punctures or cracks.
If you do have a leaking tire bead, you can try reseating the bead by deflating the tire and spraying a solution of soap and water around the rim to create a seal. Then, use a tire iron to push on the bead until it pops into place. Make sure to reinflate the tire to the correct pressure afterwards.
If this method doesn’t work, it’s best to take your tire to a professional who can diagnose and fix the issue for you. Remember, proper tire maintenance is key to preventing future leaks and keeping you safe on the road.
Regular Tire Maintenance
Regular tire maintenance is crucial for preventing future leaks and ensuring a safe driving experience. Keeping your tires properly inflated is the first step in preventing leaks and ensuring longer tire life. It’s important to check your tire pressure regularly, especially before long road trips, to ensure it’s at the recommended PSI level.
Another way to prevent leaks is by avoiding driving over potholes and other rough surfaces as they can cause damage to your tires. Additionally, maintaining a good alignment and rotating your tires every 5,000 miles can help distribute wear and tear more evenly. Remember, regular tire maintenance can save you from costly repairs and unsafe driving conditions in the future.
So, take the time to inspect your tires regularly and address any potential issues immediately. It’s better to be safe than sorry when it comes to your safety on the road!
Proper Tire Installation
Proper Tire Installation: Preventing Future Leaks Nothing is more frustrating than discovering your tires are leaking air because of inadequate installation procedures. But fear not, as there are various approaches to prevent any future tire leaks from occurring. Firstly, it’s critical to ensure that your tire rims are free of any residual debris, such as rust or mud, which can cause damage and poor fitting of the tire valves and wheels.
Secondly, be alert to the correct valve stem’s placement: a misaligned valve stem can cause air leakage and, in extreme situations, even a flat tire. Thirdly, make sure the technician installs the tire assembly in the proper sequence to avoid accidental pinching of the tube. The last thing to keep in mind is seasonal variation: tyres tend to expand with heat and contract with cold temperature, so verifying the ideal amount of air pressure required for your tyres and following it regularly can not only prevent leaks but also improve their lifespan.
Be confident in your tire installation by adhering to these simple steps.
Choosing the Right Tire and Rim Combination
When it comes to choosing the right tire and rim combination for your vehicle, it’s not just about finding something that looks good. It’s important to consider the durability and functionality of the combination as well. One common issue with tires and rims is the potential for future leaks.
To prevent this from happening, it’s important to ensure that the tire and rim are properly matched, and that the tire is inflated to the correct pressure. It’s also worth investing in high-quality tires and rims that are designed to withstand the wear and tear of daily use. A combination of a sturdy tire and a durable rim will not only prevent leaks, but also provide better handling and safety on the road.
So, the next time you’re in the market for a new tire and rim combination, consider these factors to ensure you get the best value for your money.
Conclusion: Keep Your Tires Rolling Smoothly with Proper Maintenance
In conclusion, fixing a leaking tire bead may seem like a daunting task, but fear not! All you need is some elbow grease, a bit of patience, and the knowledge to tackle the problem head-on. By following the simple steps outlined above, you can quickly and easily fix your tire bead and get back on the road in no time. So, don’t let a pesky leak bring you down – take charge, fix it up, and enjoy the smooth ride ahead!”
FAQs
What causes a tire bead to leak?
A tire bead can leak due to corrosion, damage, or improper installation.
Can I fix a leaking tire bead myself?
It is possible to fix a leaking tire bead yourself, but it is recommended to have a professional inspect and repair it for safety reasons.
How much does it cost to fix a leaking tire bead?
The cost to fix a leaking tire bead varies depending on the severity of the issue, but it can range from $20 to $100.
How long does it take to fix a leaking tire bead?
The time it takes to fix a leaking tire bead depends on the severity of the issue and whether or not replacement parts are needed. It can take anywhere from 30 minutes to a few hours.
What are the signs of a leaking tire bead?
Some signs of a leaking tire bead include a hissing sound coming from the tire, low tire pressure, and visible damage or corrosion.
Is it safe to drive with a leaking tire bead?
No, it is not safe to drive with a leaking tire bead as it can cause a blowout or loss of control while driving.
Can a leaking tire bead be prevented?
Regular tire maintenance, proper installation, and avoiding hitting curbs or other objects with your tires can help prevent a leaking tire bead.


