
A sudden tear on your RV awning can be frustrating, especially when you’re enjoying your outdoor adventure. It can leave you with a perplexed feeling, not knowing what to do next. Don’t worry; we’ve got you covered.
In this blog post, we’ll guide you through the simple steps on how to fix a ripped RV awning. Burstiness may not be a good thing when it comes to your awning, but with our help, you can quickly patch it up and continue with your trip without any worry. Think of it as a small metaphor for overcoming obstacles during your travels.
Are you ready to learn how to fix your RV awning and get back to enjoying nature? Let’s dive in.
Table of Contents
Assess the Damage
If you’ve discovered a rip in your RV awning, don’t panic! The first step to getting it fixed is assessing the damage. Take a close look at the rip to determine its size and location. Is it a small tear near the edge of the awning, or a larger rip in the middle? This information will help you decide whether the awning can be repaired or if you need to replace it entirely.
Next, check to see if the rip has caused any damage to the awning hardware or frame. If so, you’ll need to address those issues as well. Once you’ve evaluated the damage, you can decide whether you’re up for a DIY repair or if it’s time to call in the professionals.
In any case, fixing a ripped RV awning is a manageable task, and with a little bit of effort, your awning will be as good as new in no time!
Inspect the rip to determine its severity
When inspecting a rip in your clothing, it’s important to assess the damage. The severity of the rip will determine the best course of action to take. First, take a closer look at the size and location of the rip.
Is it a small tear or a larger hole? Is the rip located in a visible area that will be noticeable if left unrepaired? Next, check the surrounding fabric to see if it’s frayed or stretched. This will give you an idea of whether the rip will continue to worsen if it’s not repaired. Finally, consider the type of fabric your clothing is made from.
Different fabrics will require different repair methods. Once you’ve fully assessed the damage, you can determine the best approach to take. Whether you choose to sew the rip yourself, or have a professional make the repair, assessing the damage is the first step towards ensuring your clothing looks as good as new.
Remember, a small rip is much easier to fix than a larger one, so dealing with it promptly is key.
Identify the type of awning material
When assessing the damage on your awning, it’s critical to identify the type of material used. Some awnings are made of canvas, while others use synthetic fabrics or vinyl. Canvas is a durable and long-lasting material for awnings, but it can be susceptible to mold and mildew growth.
Synthetic fabrics, like polyester or acrylic, have higher resistance to mildew and fading. Vinyl is an excellent material for awnings because it’s waterproof, easy to clean, and resistant to rot. Identifying the awning material is crucial because it will determine the type of repair or replacement needed.
If you’re unsure of the material, consult with an awning professional who can provide you with the best course of action. Remember to always handle your awning with care to avoid damage and prolong its lifespan.
Purchase a Patching Kit
If you have a ripped RV awning, don’t worry; you don’t need to replace the entire thing just yet. Instead, you can purchase a patching kit to fix it up. The first step is to find the right kit for your type of awning material, whether it’s vinyl or fabric.
Once you have the correct kit, you’ll need to clean the area around the rip with some alcohol and let it dry completely. Then, take the patching material and cut it to the appropriate size for your rip. Apply the adhesive from the patching kit to the back of the patch and lay it over the rip.
Press down firmly to ensure the patch sticks, and let it dry for at least 24 hours. Once it’s dry, test it out by extending and retracting the awning a few times to make sure the patch holds up. With a little effort, you can avoid the expense of replacing the entire awning with a simple patching kit and a little elbow grease.
Visit a dealer or an online retailer to buy a patch kit
If you’re in need of a reliable patch kit, you have two options: visit a dealer or an online retailer. Regardless of where you choose to shop, patching kits are widely available and come in various shapes and sizes, so it’s best to do some research beforehand to ensure you’re buying the right one for your needs. A patch kit is a handy tool to have on hand, especially if you’re someone who enjoys outdoor activities or if you own a vehicle.
Punctures and leaks can happen at any time, and having a patch kit nearby can save you from a lot of stress and headaches. Whether you’re buying in-store or online, make sure to read reviews and compare prices to get the best deal. Don’t wait until an emergency arises – purchase your patching kit now, so you’re prepared for any situation that comes your way.
Make sure the kit includes the appropriate adhesive
When purchasing a patching kit, it’s crucial to make sure it includes the appropriate adhesive. Without the correct adhesive, any patching job can be ineffective and ultimately a waste of time and money. Don’t make the mistake of assuming that all adhesive is the same, as different materials require different types of adhesive to properly stick.
Make sure to read the label carefully before purchasing a patching kit and confirm that it includes the correct adhesive for your particular needs. By doing so, you can ensure that your patching job is a success and that your repaired item will function properly for the long term.
Clean and Dry the Affected Area
If you’re wondering how to fix a ripped RV awning, the first thing you need to do is clean and dry the affected area. This step is crucial because any dirt or moisture can cause further damage to the awning as well as interfere with the repair process. To clean the area, use a mild detergent and warm water to gently remove any dirt or debris.
Allow the area to thoroughly dry before moving on to the next step. Once the area is clean and dry, you’ll be able to assess the damage and determine how to proceed with the repair. So, take your time and make sure the area is properly cleaned and dried before moving on to the next step.
Remember, a little extra effort here can save you a lot of headache down the road!
Remove any dirt, debris, or mildew from the awning
When it comes to maintaining your awning, the first step is to clean and dry the affected area thoroughly. Start by removing any dirt, debris, or mildew that may have accumulated on the surface of the awning. This can be done with the help of a soft-bristled brush or a broom.
Once all the loose debris has been removed, use a mild cleaning solution to scrub the affected area gently. Be sure to follow the manufacturer’s instructions when choosing a cleaning solution, and avoid using any harsh chemicals that could damage the fabric. After scrubbing, rinse the area with water, and allow it to dry completely before proceeding.
By keeping your awning clean and dry, you can prevent the growth of mold and mildew, and extend its lifespan significantly. So, schedule a regular cleaning routine, and keep your awning looking as good as new for years to come.
Ensure the area is completely dry
When dealing with a spill or a stain, it’s essential to clean and dry the affected area thoroughly. Whether you’re dealing with a carpet, upholstery, or clothing, the first step is always to remove any excess liquid or solids. You can do this by blotting the area with a clean cloth or paper towel.
Next, use a suitable cleaner for the type of stain you’re dealing with, and follow the directions carefully. Once the area is cleaned, it’s crucial to let it dry completely before using it again. To ensure that the area is entirely dry, you can use a fan, open windows, or even a hairdryer, depending on the material you’re dealing with.
Remember that moisture can lead to mold and mildew growth, which can damage your carpet or furniture and also affect your health. So, make sure you take the time to dry the area properly and avoid any potential problems in the future.
Apply the Patching Kit
When you notice that your RV awning has a rip or tear, it’s important to act fast and fix it as soon as possible. You don’t want to let more damage occur, and you certainly don’t want the rip to get bigger. One way to fix a ripped RV awning is to use a patching kit.
First, you need to clean the area around the rip to make sure it’s free of dirt and debris. Then, cut the patching material to size and apply it to the rip. Make sure it’s stuck on firmly and that there are no air pockets.
The patching material will usually be made of durable, waterproof material that can withstand outdoor elements. Applying the patching kit is a quick and easy way to fix a ripped RV awning. Just make sure to follow the instructions carefully and take your time to make sure the patch is secure.
By doing this, you can extend the life of your awning and enjoy your RV trips without any worries.
Follow the instructions on the patch kit
When it comes to repairing a punctured bicycle tire, using a patching kit is one of the most effective solutions. However, it’s essential to follow the instructions on the patch kit carefully to make sure you fix the tire correctly. Start by removing the wheel and deflating it entirely.
Afterward, locate the puncture and clean the area with alcohol or any cleaning solution recommended in the patch kit. Allow it to dry completely before applying the patch on the puncture firmly. Ensure that the patch has no air bubbles, which might affect its adhesion to the tire.
It’s also crucial to follow the recommended time for applying the patch and to hold it in place. Once the patch has adhered correctly, reinflate the tire, and check its pressure level to ensure that it’s holding up well. With these simple steps and following the instructions on the patch kit, you can successfully repair your punctured bicycle tire and keep on rolling.
Apply an appropriate amount of adhesive
When applying a patching kit to a surface, one of the most important steps is to ensure that you are using the appropriate amount of adhesive. This will help to ensure that the patch stays in place over the long term and does not come loose. The key is to use enough adhesive to create a strong bond between the patch and the surface, without using so much that it becomes messy or difficult to work with.
Before applying the adhesive, it is important to make sure that the surface is clean and dry, as any dirt or moisture can affect the adhesive’s ability to bond. Then, follow the instructions provided with the patching kit to determine the appropriate amount of adhesive to use. In general, this will involve spreading a thin layer of adhesive over the surface, using a putty knife or other tool to smooth it out, and then applying the patch on top of the adhesive.
With a little patience and attention to detail, you can ensure that your patching project is a success and that the surface remains strong and durable over time.
Spread the patch over the rip
When dealing with a rip or tear in clothing or fabric, the best solution is often to patch it up. One easy way to do this is with a patching kit. To start, clean the area around the rip to ensure that the patch will adhere properly.
Then, place the patch over the tear with the adhesive side down. Smooth out any bubbles or wrinkles to ensure a secure hold. Spread the patch over the rip, making sure to cover it completely.
Once in place, apply heat using an iron or dryer to activate the adhesive. Be sure to follow the instructions on the patching kit, as each brand may have slightly different guidelines. With a little care and attention, a patch can make your damaged clothing look good as new.
So, don’t let a rip in your clothes get you down – apply a patch and get back to looking your best in no time.
Reinforce the Patch
When it comes to fixing a ripped RV awning, reinforcing the patch is an essential step in ensuring that the repair lasts. To do this, apply a second layer of adhesive material over the first patch, making sure to extend beyond the edges to provide extra strength. You can use the same type of material as the initial patch, such as vinyl or tarp tape.
Alternatively, consider using a larger or more durable material, such as canvas or nylon, to reinforce the weakened area. Also, be sure to smooth out any bubbles or wrinkles in both layers of the patch to create a secure and smooth surface. By taking the time to reinforce the patch, you’ll increase the longevity of your RV awning and enjoy your outdoor adventures with peace of mind.
Apply additional adhesive around the edges of the patch
When it comes to patching up holes and tears, applying the patch itself is just the first step. To reinforce the patch and ensure it stays put for the long haul, it’s important to apply additional adhesive around the edges of the patch. This will help create a stronger bond between the patch and the material it’s adhered to, preventing any water or air from seeping through.
One great option for reinforcing a patch is using a waterproof glue, such as silicone or polyurethane. These types of adhesives are not only strong but also have the added benefit of being water-resistant. By using additional adhesive to reinforce a patch, you can rest assured that your repair job will be both durable and long-lasting.
Allow sufficient drying time before using the awning
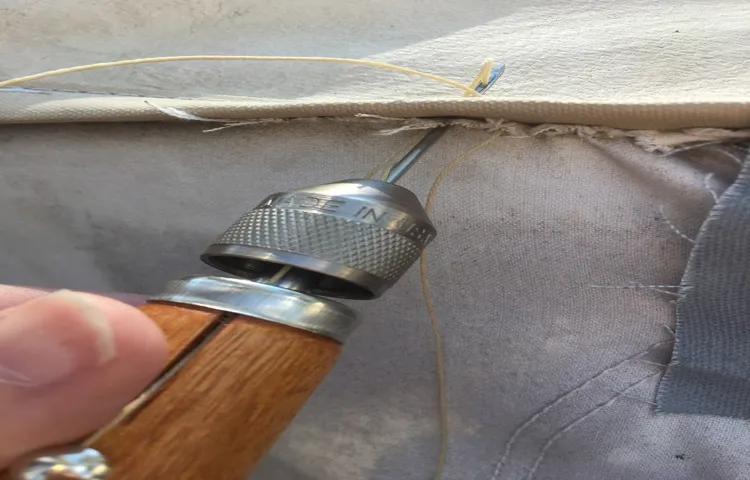
When using an awning patch, it’s essential to reinforce it correctly for it to work correctly. The best way to do this is to stitch around the perimeter of the patch with a heavy-duty thread. This stitching should be at least 1/4 inch from the edge of the patch and in a square pattern.
You’ll want to make sure that the thread is tight but not so tight that it tears the fabric. Additionally, you should sew an “X” pattern in the middle of the patch for added stability. This will help prevent the patch from coming loose or leaking during heavy rain.
Remember to allow sufficient drying time before using the awning to give the patch and stitches plenty of time to set and dry. With these steps, your awning patch will be reinforced and ready to protect you from the elements.
Conclusion
When it comes to fixing a ripped RV awning, there’s no need to get all wound up. With a little bit of patience and the right tools, anyone can patch up their own awning and get back to enjoying the great outdoors. Whether you opt for a DIY repair or seek out professional help, the most important thing is to address the issue before it gets worse.
Don’t let a small tear turn into a big headache – fix that rip and get back to living life on the open road!”
Regularly inspect your awning to prevent future rips
Ensuring your awning remains in good shape can be a daunting task, but it’s important to inspect it regularly to prevent future rips. One way to reinforce a patch is by using a seam sealer. This is especially useful when working on seams that are constantly exposed to the elements.
Seam sealer is a liquid adhesive that forms a strong bond and helps to protect a patch. It’s important to apply the seam sealer to the edges of the patch and the surrounding area. This will help to seal the patch and prevent moisture from seeping in.
Additionally, make sure that the patch is clean and dry before applying the seam sealer. With the right patch and reinforcement techniques, you can extend the lifespan of your awning and prevent future rips.
Promptly fix any damage to prolong your awning’s lifespan
When it comes to owning an awning, taking care of any damage as soon as possible can significantly prolong its lifespan. One way to reinforce a patch on your awning is by using a high-quality patch kit specifically designed for awning repairs. These kits usually come with a reinforced patch and adhesive that can effectively and quickly seal any tears or punctures.
Another thing to consider is reinforcing the edges of the patch with additional adhesive or sewing to prevent further fraying or damage. By promptly fixing any damage and reinforcing the patch, you can ensure that your awning lasts for many years and provides you with ample shade and protection. So, if you notice any damage, don’t wait to fix it – your awning will thank you!
FAQs
What causes an RV awning to rip?
An RV awning can be ripped due to various reasons such as high winds, heavy rain, hail, or improper storage.
Can a ripped RV awning be repaired?
Yes, a ripped RV awning can be repaired. The extent of the damage will determine the repair method and cost.
What are some temporary repair options for a ripped RV awning?
Duct tape or vinyl patch kits can be used as a temporary fix for a ripped RV awning.
How much does it cost to replace an RV awning?
The cost to replace an RV awning can vary depending on the type, size, and brand. On average, it can cost anywhere between $300 to $1000.
Can I install a new RV awning myself?
It is possible to install a new RV awning yourself, but it can be a complicated task that may require professional assistance.
What is the average lifespan of an RV awning?
The lifespan of an RV awning can vary depending on the quality and usage. On average, an RV awning can last anywhere between 5 to 10 years.
How can I prevent my RV awning from ripping?
To prevent your RV awning from ripping, make sure to properly secure it during windy conditions, avoid leaving it out during storms, and regularly inspect and maintain it for any wear and tear.