
Fixing a tire valve stem leak can be a daunting task, but with some simple steps, you can complete the job in no time. A leak in the tire valve stem can cause significant damage to your car, reducing its fuel efficiency and overall performance. Understanding how to fix it yourself can save you time and money and keep you from getting stranded on the side of the road.
The valve stem serves as the seal between the tire and rim, keeping air from leaking out. Over time, it can become damaged, corroded or can even break off entirely. This can cause air to leak from the tire and cause it to go flat.
A slow leak can be difficult to notice, but if you’re having to add air to your tires more frequently, it’s time to investigate. This step-by-step guide will take you through the process of fixing a tire valve stem leak, from identifying the issue to removing and replacing the valve stem. We’ll also share tips for preventing future leaks and keeping your tires in top condition.
With just a few simple tools and some know-how, you’ll be back on the road in no time. So, let’s get started!
Table of Contents
- 1 Symptoms of a Tire Valve Stem Leak
- 2 Materials Needed
- 3 Step-by-Step Guide to Fixing a Tire Valve Stem Leak
- 3.1 Step 1: Locate the leak
- 3.2 Step 2: Remove the valve cap and valve core
- 3.3 Step 3: Use pliers or a wrench to remove the valve stem
- 3.4 Step 4: Insert the new valve stem into the valve hole
- 3.5 Step 5: Tighten the nut on the new valve stem until snug
- 3.6 Step 6: Replace the valve core and valve cap
- 3.7 Step 7: Inflate the tire and check for leaks
- 4 Preventing Tire Valve Stem Leaks
- 5 Conclusion
- 6 FAQs
Symptoms of a Tire Valve Stem Leak
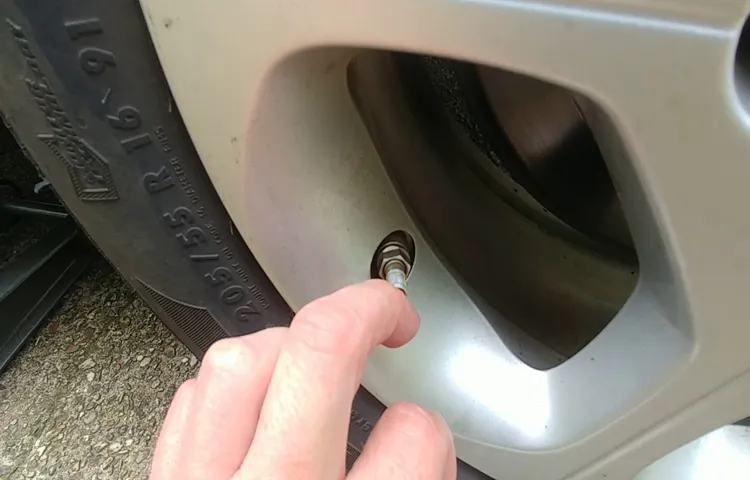
If you’re noticing that your tires are losing pressure more quickly than usual, you may have a tire valve stem leak. The valve stem is the small, metal tube that protrudes from your tire and allows you to add or remove air. When the valve stem is damaged, air can leak out, causing a loss of pressure.
Symptoms of a tire valve stem leak can include a low tire pressure warning light on your dashboard, a visible bulge in the sidewall of the tire, or a hissing sound coming from the tire. To fix a tire valve stem leak, you’ll likely need to replace the valve stem. This can be done at a tire shop or by a skilled mechanic.
It’s important to address the problem as soon as possible to avoid further damage to your tire and to ensure your vehicle is safe to drive. If you suspect a tire valve stem leak, be sure to get it checked out right away.
Low tire pressure
Low tire pressure is a common issue that can cause trouble for drivers on the road. One of the potential culprits of low tire pressure is a tire valve stem leak. Symptoms of a tire valve stem leak include a gradual loss of pressure in one or more tires, uneven tire wear, and difficulty maintaining proper tire pressure even after filling the tires with air.
It’s important to address this issue promptly, as low tire pressure can lead to decreased fuel efficiency, poor handling, and potentially dangerous blowouts. If you suspect that you may have a tire valve stem leak, it’s best to have it checked out by a mechanic as soon as possible. They can replace the faulty valve stem and ensure that your tires are properly inflated, keeping you safe on the road.
Hissing sound from the tire
If you’ve ever noticed a hissing sound coming from your tire, it could be a sign of a tire valve stem leak. This is a common issue that can happen over time due to wear and tear or a faulty valve stem. Other symptoms of a tire valve stem leak include a gradual loss of tire pressure, uneven tire wear, and difficulty keeping the car on the road.
If you suspect that you have a tire valve stem leak, it’s important to take immediate action and have the issue addressed by a professional. Ignoring this problem can lead to further damage and even dangerous driving conditions. Fortunately, a tire valve stem leak can be easily fixed with the right tools and expertise.
So if you’re experiencing hissing sounds or other symptoms of this issue, make sure to take your car to a reputable mechanic. They’ll be able to diagnose the problem and take the appropriate measures to get you back on the road safely.
Tire losing air pressure quickly
If you’ve noticed that your tire is losing air pressure quickly, it could be due to a tire valve stem leak. This is a common problem that can occur when the valve stem is damaged or worn out. One of the most obvious symptoms of a valve stem leak is a flat tire, or a tire that is constantly losing air pressure even after being filled up.
You might also notice that the tire is making a hissing sound or that the valve stem is visibly damaged. In some cases, the tire pressure monitoring system (TPMS) may also alert you to low tire pressure. It’s important to address this issue as soon as possible, as driving on a tire with low pressure can be dangerous and can cause further damage to the tire.
A trained technician can inspect the valve stem and provide the necessary repairs or replacements to get you back on the road safely.
Materials Needed
If you’re experiencing a tire valve stem leak, it’s important to have the right materials on hand so you can fix the problem quickly. First and foremost, you’ll need a valve stem tool to remove the valve core, and a valve stem replacement kit, which usually includes the valve stem, core, and cap. You may also need a tire pressure gauge to ensure correct tire pressure after the repair is complete.
In addition to these tools, it’s recommended to have a lubricant, such as dish soap or tire lubricant, to help with the installation of the new valve stem. Lastly, a good quality air compressor will come in handy to inflate the tire to the proper pressure. By having these tools ready, you can effectively address a tire valve stem leak and ensure that your tires are ready to serve you well.
Valve stem replacement kit
If you’re looking to replace the valve stem on your vehicle, you’ll need to have a few materials on hand to get the job done. The valve stem replacement kit is a great place to start, as it typically includes everything you’ll need. In addition to the kit, you’ll need a few other materials.
First, you’ll need a valve stem removal tool, which will help you remove the old valve stem from the tire. You’ll also need a valve core remover, which will help you remove the core from the old valve stem. Once the old valve stem is removed, you’ll need a new valve stem to replace it with.
Finally, you’ll need a valve core tool, which will help you install the new valve core before installing the new valve stem. With these materials on hand, you’ll be able to replace the valve stem on your vehicle quickly and easily.
Pliers or adjustable wrench
When it comes to fixing things around the house, having the right tools is essential. Two tools that you may find yourself reaching for are pliers and adjustable wrenches. Pliers are a versatile tool that can be used for gripping, cutting, and bending various materials.
Adjustable wrenches, on the other hand, are designed to loosen or tighten nuts and bolts. So, which one should you use? Well, it depends on the job you need to do. If you need to grip something tightly or make precise cuts, pliers are your best bet.
However, if you need to loosen or tighten nuts and bolts, an adjustable wrench will be your go-to tool. Just keep in mind that using the wrong tool can damage or break the item you are trying to fix. So, before you get started, take a close look at what needs to be done and choose the right tool for the job.
With the right tool and a little know-how, you can tackle any DIY project that comes your way.
Tire pressure gauge
When it comes to checking the tire pressure of your car, having the right tool is essential. That’s why investing in a tire pressure gauge is a smart choice for any car owner. To use this tool properly, you’ll need a few things.
First and foremost, you’ll need a good quality tire pressure gauge. There are many types available in the market, from digital to manual gauges. Choose one that meets your needs, fits comfortably in your hand, and is easy to read.
You will also need a tire pressure chart to find the correct tire pressure for your car. It’s important to remember that the recommended tire pressure can vary depending on the make and model of your car, as well as the size of your wheels. Once you have your gauge and chart ready, make sure that you are checking the tire pressure when the tires are cold.
This means that your car hasn’t been driven for at least three hours. By keeping these things in mind, you can be sure that you’re using your tire pressure gauge correctly and keeping your car’s tires in top condition.
Step-by-Step Guide to Fixing a Tire Valve Stem Leak
If you’re noticing a tire valve stem leak, there’s no need to panic! Fixing this issue is relatively simple, and you can save yourself a trip to the auto shop by doing it yourself. First, locate the leak by applying soapy water to the valve stem area and looking for bubbles. Once you have found the source of the leak, remove the valve cap and use pliers to tighten the valve core to stop the leak.
Alternatively, you may need to replace the valve stem altogether by using a valve stem tool to remove the faulty stem and replacing it with a new one. Make sure the new stem matches the specifications for your tire and is compatible with your valve core. Lastly, inflate the tire to the recommended PSI and reattach the valve cap.
By following these simple steps, you can fix a tire valve stem leak and get back on the road quickly and safely.
Step 1: Locate the leak
If you’re experiencing a tire valve stem leak, don’t panic – it’s a common problem that can be easily fixed. The first step is to locate where the leak is coming from. A quick way to do this is to visually inspect the tire and valve stem for any signs of damage or wear.
If you can’t find any obvious issues, try using a soapy water solution to spray around the valve stem. If you see bubbles forming, that’s a clear indication of a leak. Another method is to listen for a hissing sound, which could also pinpoint the location of the leak.
By pinpointing the source of the leak, you’ll have a better idea of what needs to be done to fix it.
Step 2: Remove the valve cap and valve core
Removing the valve cap and valve core is an essential step in fixing a tire valve stem leak. The valve cap functions as a protective layer for the valve core. Thus, removing it using a valve cap removal tool is a crucial initial step.
During removal, caution must be exercised as the valve core can get easily lost. The valve core, on the other hand, is the essential component of the valve that regulates the airflow to the tire. Using a valve core removal tool, it can be extracted from the valve housing.
Once you have removed the valve core, inspect it for any damage or debris and clean it using a valve core cleaning tool. Replacing a faulty valve core can be done with the same tool. With these two steps completed, you are one step closer to fixing your tire valve stem leak problem.
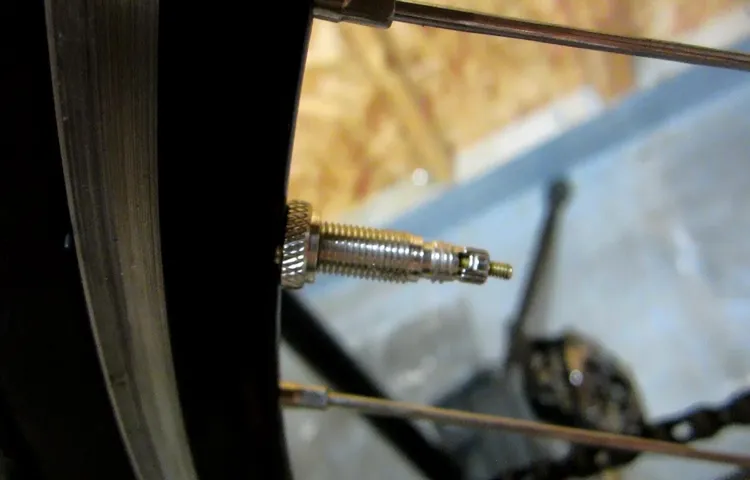
Step 3: Use pliers or a wrench to remove the valve stem
If you’re experiencing a tire valve stem leak, fixing it can be a simple and straightforward process with the right tools and approach. One of the key steps in fixing such a leak involves removing the valve stem with pliers or a wrench. This may sound daunting, but with a little patience and care, you can easily remove the stem without damaging your rim or tire.
It’s important to make sure that the valve stem is completely removed before proceeding with any other actions, as this will allow you to inspect and replace it if necessary. With the valve stem removed, you can proceed with repairing or replacing it, and then re-install it carefully and securely. By following this step-by-step guide, you can fix your tire valve stem leak and get your vehicle back on the road in no time.
So, don’t hesitate to give it a try and see for yourself just how easy it can be!
Step 4: Insert the new valve stem into the valve hole
Once you have removed the damaged valve stem from your tire, it’s time to insert the new one. But before doing so, it’s important to make sure the valve hole is clean and free from debris that could cause another leak. You can use a clean cloth or a small brush to clean the hole.
Once the hole is clean, you can insert the new valve stem, making sure it’s straight and flush with the rim. Use your fingers to tighten the nut on the base of the valve stem as much as possible, then use pliers to turn it an additional quarter turn. This will ensure a tight seal and prevent any air from escaping.
Finally, inflate the tire to the recommended pressure and give it a quick once-over to ensure there is no hissing sound indicating another leak. With a new valve stem securely in place, you can hit the road with confidence that your tire is properly inflated and ready for the miles ahead. Remember to check your tire pressure regularly to prevent future leaks.
Step 5: Tighten the nut on the new valve stem until snug
After removing the old valve stem and inserting the new one, it’s time to tighten the nut. But be careful not to over-tighten and damage the valve stem. The nut should be snug, but not too tight.
Use a wrench if needed, but ensure it’s not applied with too much force. Over-tightening could cause the valve stem to tear or even damage the tire itself. It’s crucial to follow the manufacturer’s guidelines and not exceed the recommended torque.
Putting a little bit of lubricant on the threads can also help with the tightening process. This ensures the nut won’t seize up and becomes difficult to remove next time. A properly tightened nut on the new valve stem will ensure that the tire holds air perfectly and won’t cause any further issues in the future.
Remember to check the tire pressure again after tightening the nut to ensure the tire is properly inflated.
Step 6: Replace the valve core and valve cap
Once you have successfully removed the old valve stem and cleaned the area, it’s time to replace the valve core and valve cap. The valve core is the small and important piece that is responsible for letting air in and out of the tire. It’s essential that you replace the old valve core with a new one to ensure optimal performance.
First, take the new valve core and insert it into the valve stem using pliers or a valve core tool. Once the new valve core is securely in place, it’s time to screw on the valve cap. The valve cap not only helps keep dirt and debris out of the valve stem, but it also helps to prevent air from leaking out of the tire.
It’s important to ensure that the valve cap is tightly screwed onto the valve stem to prevent any air loss. With the valve core and valve cap in place, you can now inflate the tire to the recommended pressure and check for any leaks. Don’t forget to regularly check the valve stem and valve cap for any signs of wear and tear or damage.
By following these simple steps, you can easily fix a tire valve stem leak and ensure safe and smooth driving.
Step 7: Inflate the tire and check for leaks
After completing the valve stem installation process, now it’s time to inflate the tire and double-check for any potential leaks. Before starting to inflate the tire, make sure to remove the valve cap and attach the air compressor to the valve stem securely. Then, gradually inflate the tire, observing the pressure level using a pressure gauge.
Be cautious not to over-inflate the tire, as it can cause damage to the tire, wheel, and suspension components. Once the tire is properly inflated, spray a soapy water solution around the base of the valve stem. If there is any air escaping, it will cause bubbles to appear on the surface.
If you notice any bubbles, adjust the valve stem and tighten it to ensure a secure fit. Repeat the soapy water test until you observe no more bubbles. In conclusion, fixing a tire valve stem leak is a fairly simple process and can be easily accomplished by following a few simple steps.
By correctly installing the new valve stem, checking for leaks, and properly inflating the tire, you’ll be back on the road safely in no time. Remember to always take your time and be cautious when working with tires to avoid any potential injuries or accidents.
Preventing Tire Valve Stem Leaks
If you’re experiencing a tire valve stem leak, there are several precautions you can take to prevent it. First, make sure your valve stem caps are tight and secure. Loose caps can lead to air loss, even if the valve stem itself is functioning correctly.
Additionally, avoid over-inflating your tires, as this can cause the valve stem to weaken and eventually fail. Regularly checking your tire pressure and maintaining the proper levels can also help prevent valve stem leaks. If you do find yourself with a leaky valve stem, the best solution is to replace the valve stem altogether.
A professional tire technician can quickly and easily replace the valve stem, ensuring proper inflation and safe driving conditions on the road. So if you’re encountering a tire valve stem leak, take these preventative measures to avoid further issues, and remember that replacement may be the best solution in the long run.
Check tire pressure regularly
Checking your tire pressure regularly is important to prevent tire valve stem leaks. These leaks can be caused by a variety of factors, including aging, corrosion, and damage to the valve stem itself. If you notice your tires losing pressure more quickly than usual, it’s important to check the valve stems for any signs of damage or wear.
One way to do this is to use a soapy water solution and apply it around the valve stem. If you see bubbles forming, it’s a sign that air is escaping through a leak. Another way to prevent valve stem leaks is to make sure the valve caps are securely in place, as they help to keep out dirt and debris that can cause damage.
By taking the time to check your tire pressure and valve stems regularly, you can ensure a safe and smooth ride and avoid any unexpected flat tires on the road. Remember, prevention is always better than a cure!
Use valve caps to protect valve stems
Valve caps are a simple yet effective way to prevent tire valve stem leaks. These small caps, often made of plastic or metal, are designed to fit snugly over the valve stem and protect it from damage caused by dirt, debris, and the elements. Valve stem leaks can occur when the valve stem becomes clogged or damaged, leading to air loss and potentially even a blowout.
By using valve caps, you can keep your valve stems clean and safe from harm, prolonging the life of your tires and ensuring safe and smooth driving. So the next time you’re at the gas station or getting your tires serviced, don’t forget to ask for valve caps to be installed on your vehicle. It’s a small investment that can make a big difference in the long run.
Replace valve stems every time you replace your tires
Tire valve stem leaks can be a frustrating and potentially dangerous problem. That’s why it’s important to replace your valve stems every time you get new tires. Over time, valve stems can wear down and develop cracks or leaks.
This can cause the tire to lose air, leading to poor handling and an increased risk of blowouts. By replacing the valve stems, you can ensure that your tires have a tight seal and will not leak air. It’s a simple step that can save you a lot of hassle and keep you safer on the road.
Think of your valve stems like the seals on your windows. Over time, those seals can wear down and let in drafts. It’s the same with valve stems – they can become worn and allow air to leak out.
By replacing them with each new set of tires, you can ensure that your vehicle has a tight seal all the way around. This will help prevent leaks and keep your tires properly inflated. Plus, it’s a quick and easy step that can make a big difference in the long run.
So next time you replace your tires, don’t forget to replace your valve stems too!
Conclusion
Well folks, I hope this guide has given you some insight on how to resolve the pesky issue of a tire valve stem leak. Don’t let a seemingly small problem deflate your driving experience. With a little determination, some basic tools, and a bit of elbow grease, you’ll be back on the road in no time.
Remember, a properly inflated tire not only improves your vehicle’s performance, but it also keeps you safe on the road. And let’s be honest, who doesn’t love a smooth and steady ride? So, don’t let a leaky tire valve stem get you down. Take charge, pump it up, and show that flat tire who’s boss!”
FAQs
What are the signs of a tire valve stem leak?
Signs of a tire valve stem leak can include low tire pressure, difficulty maintaining tire pressure, and hissing sounds coming from the valve stem area.
Can a tire valve stem leak be fixed without replacing the stem?
In some cases, a tire valve stem leak can be fixed by tightening the valve core or replacing the valve core. However, if the valve stem is damaged or corroded, it may need to be replaced.
How do you identify if the tire valve stem is the source of a leak?
To identify if the tire valve stem is the source of a leak, apply a mixture of soap and water to the valve stem area and look for bubbles. If bubbles appear, it indicates a leak around the valve stem.
Can a tire valve stem leak cause a flat tire?
Yes, a tire valve stem leak can cause a flat tire if left unrepaired. When the tire loses air pressure due to a leak, it can eventually go flat.
Can tire valve stem leaks be prevented?
Regularly checking tire pressure and ensuring the valve stem cap is securely in place can help prevent tire valve stem leaks. Additionally, avoiding damage to the valve stem during tire repairs or changes can also prevent leaks.
Should I attempt to fix a tire valve stem leak myself?
If you have experience with tire repairs and feel confident in your abilities, you can attempt to fix a tire valve stem leak yourself. However, if you are unsure or uncomfortable with the process, it is recommended to take your vehicle to a professional for repairs.
How much does it cost to repair a tire valve stem leak?
The cost of repairing a tire valve stem leak can vary depending on the severity of the damage and the type of vehicle. On average, the cost can range from $20 to $200.