Do you love off-roading and adventure with your ATV? If so, then you probably rely on your winch to help you out of tricky situations. But what do you do when your ATV winch stops working? Don’t worry, we’ve got you covered! In this blog post, we’ll show you how to fix your ATV winch so that you can get back to enjoying the great outdoors in no time. Whether it’s a simple wiring issue or a more complex mechanical problem, we’ll provide you with step-by-step instructions to help you troubleshoot and repair your winch.
So grab your tools and let’s get started!
Table of Contents
Introduction
If you’re an avid ATV rider, then having a winch on your vehicle is a must. It can be a real lifesaver when you find yourself stuck in a tough situation. However, like any mechanical device, your ATV winch may encounter some issues from time to time.
But the good news is that most problems can be easily fixed with a little bit of know-how and some basic tools. In this blog post, we’ll walk you through the steps on how to fix your ATV winch, so you can get back to riding in no time. Whether it’s a jammed cable, a malfunctioning control switch, or a broken solenoid, we’ve got you covered.
So keep reading to find out how to troubleshoot and resolve common ATV winch problems.
What is an ATV Winch?
An ATV winch is a powerful device that is designed to help you tackle tough terrains and tricky situations while riding your ATV. It is essentially a motorized drum with a cable or rope wound around it. The winch is mounted onto the front or rear of the ATV and can be operated either manually or electrically.
Its primary function is to provide a strong pull, allowing you to get yourself out of sticky situations such as getting stuck in mud, snow, or mire. It can also be used for a variety of other tasks like hauling heavy loads, lifting objects, or even towing another vehicle. Having an ATV winch is like having an extra pair of hands that can come to your rescue whenever you need it.
So whether you’re an avid off-roader or just someone who loves exploring the great outdoors, having an ATV winch is definitely a game-changer.
Why Fixing Your Winch is Important
Fixing your winch is important because a winch is a valuable tool that can quickly become ineffective if not properly maintained. Winches are commonly used in off-road vehicles, trucks, and boats to pull heavy loads or to assist in recovery situations. Over time, the components of a winch can wear out or become damaged, resulting in decreased performance or complete failure.
Regularly inspecting and repairing your winch ensures that it remains in optimal condition, ready to tackle any task you throw at it. But why exactly is fixing your winch important? Let’s dive deeper into the reasons why maintaining and repairing your winch is crucial.
Common ATV Winch Problems
If you own an ATV and have installed a winch on it, you may encounter some common problems. One of the most common issues is a stuck winch. This can happen if the winch becomes overloaded or if the cable gets tangled.
To fix a stuck winch, you can try using a winch wrench to manually turn the winch drum and release the tension. Another common problem is a burnt-out winch motor. This can happen if the winch is used for extended periods without giving it time to cool down.
To fix a burnt-out motor, you will need to replace it with a new one. Another problem that you may come across is a frayed winch cable. This can happen if the cable has been used repeatedly without proper maintenance.
To fix a frayed cable, you will need to replace it with a new one. By addressing these common ATV winch problems, you can ensure that your winch operates smoothly and reliably whenever you need it.
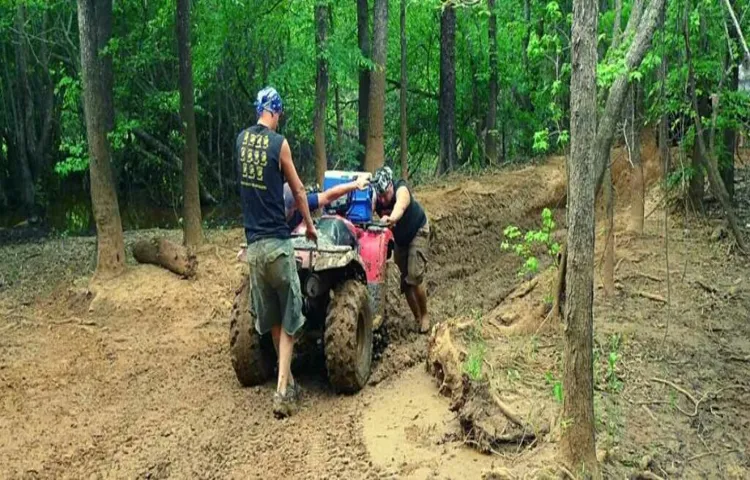
Winch Not Working
atv winch problems
Winch Cable Jammed
ATV winches are incredibly useful tools for off-road enthusiasts, allowing them to overcome tough terrain and recover vehicles stuck in mud or other obstacles. However, like any mechanical device, winches can experience common problems that may hinder their performance. One such issue is when the winch cable gets jammed.
This can be incredibly frustrating, especially when you’re relying on the winch to help you out of a sticky situation. But fear not! There are a few potential solutions for a jammed winch cable. One option is to try reversing the winch motor, as this may help loosen the cable and allow it to retract properly.
Another option is to manually unwind the cable from the drum using a pair of gloves and a wrench. By carefully unwinding the cable, you may be able to clear any obstructions and get the winch working again. Of course, prevention is always better than cure.
Regularly cleaning and lubricating the winch cable can help reduce the chances of it getting jammed in the first place. And remember, in the great outdoors, a little bit of troubleshooting can go a long way! So stay safe, keep your winch well-maintained, and enjoy your off-roading adventures worry-free!
Winch Motor Overheating
Winch motor overheating is a common problem that ATV owners face when using their winches extensively. The heat generated during the winching process can cause the motor to become too hot, which can lead to a range of issues. One of the main causes of winch motor overheating is overuse.
When the winch is used for long periods without any breaks, it puts a significant strain on the motor, causing it to overheat. Another common cause is improper maintenance and lack of lubrication. If the winch motor is not well-maintained and regularly lubricated, it can lead to increased friction and heat build-up.
Additionally, using the winch beyond its rated capacity can also cause the motor to overheat. It’s important to always check the winch’s load rating and make sure not to exceed it. To prevent winch motor overheating, it’s essential to use the winch judiciously and give it breaks to cool down.
Regular maintenance, including lubricating the motor, will also help prevent overheating issues.
Winch Remote Control Malfunction
ATV winches are incredibly useful tools for off-roading enthusiasts. They can help get you out of tricky situations and move heavy loads with ease. However, like most machines, winches can encounter problems from time to time.
One common issue that riders may experience is a malfunctioning winch remote control. This can be frustrating, especially when you’re in a sticky situation and need the winch to work properly. There are a few potential causes for this problem.
It could be a simple issue of a dead battery in the remote, which can easily be fixed by replacing the battery. Another possibility is that the remote control is not in range of the winch. Make sure you are within the recommended range and that there are no obstructions in between you and the winch.
If these solutions don’t solve the problem, it might be worth checking the wiring connections between the remote control and the winch itself. Loose or faulty connections could be the culprit. In any case, it’s always a good idea to refer to the owner’s manual for troubleshooting tips and contact the manufacturer for further assistance if needed.
Step-by-Step Guide to Fixing Your Winch
If you’re experiencing issues with your ATV winch, don’t worry – you can easily fix it yourself! Follow this step-by-step guide to get your winch up and running in no time. First, start by troubleshooting the problem. Is the winch not responding at all? Or is it moving slowly or making strange noises? Once you have identified the issue, it’s time to take action.
Begin by checking the power supply and connections. Make sure the battery is fully charged and securely connected to the winch. Next, inspect the wiring for any damage or loose connections.
Tighten any loose connections and replace any damaged wiring. If the winch still isn’t working properly, it may be time to check the motor and gears. Remove the winch cover and inspect the motor for any signs of damage or wear.
If necessary, replace the motor. Additionally, check the gear system for any obstructions or excessive wear. Clean out any debris and lubricate the gears with a winch-specific lubricant.
By following these steps, you should be able to fix your ATV winch and get back to enjoying your off-roading adventures. So don’t let a malfunctioning winch stop you – with a little know-how and some basic tools, you’ll be back on track in no time!
Step 1: Troubleshooting
winch troubleshooting guide, fixing winch problems, troubleshooting winch issues, how to fix a winch problem In this step-by-step guide, I will walk you through the process of troubleshooting and fixing common problems with your winch. Whether you’re an experienced wincher or new to the world of winching, it’s important to know how to diagnose and address any issues that may arise. The first step in fixing your winch is identifying the problem.
Is your winch not working at all? Is it spinning but not engaging with the cable? Or maybe it’s not pulling as strong as it used to? Once you determine the specific issue, you can move on to the next steps. If your winch isn’t working at all, the first thing to check is the power source. Make sure the winch is properly connected to the battery and that the battery is fully charged.
If the power source checks out, the next thing to inspect is the solenoid. This small device controls the flow of electricity to the winch motor and can sometimes become faulty. If your winch is spinning but not engaging with the cable, the problem is likely with the winch’s gears.
Over time, the gears can become worn or stripped, preventing the winch from grabbing onto the cable. In this case, you will need to disassemble the winch and inspect the gears for any damage. If you find any worn or broken gears, they will need to be replaced.
If your winch is pulling weakly, there are a few things you can check. First, make sure the winch drum is properly aligned with the cable. If it’s off-center, it can cause the winch to lose pulling power.
Additionally, check the condition of the cable itself. If it’s frayed or damaged, it can reduce the winch’s pulling capacity. Finally, inspect the winch motor.
Step 2: Checking the Power Source
In the second step of our guide to fixing your winch, we will be checking the power source. Before assuming that the winch itself is the problem, it’s important to ensure that it is receiving enough power to operate properly. Start by checking the main power switch to ensure it is turned on.
It may seem obvious, but sometimes switches can get accidentally turned off. If the switch is on, next check the battery or power source that is connected to the winch. Make sure the battery is fully charged and properly connected.
In some cases, a loose or corroded connection can prevent the winch from receiving enough power. It’s also a good idea to check the voltage output of the battery to ensure it is within the manufacturer’s recommended range. If the power source is not the issue, then it’s time to move on to the next step in our guide.
Stay tuned for step three, where we will be inspecting the winch motor.
Step 3: Inspecting the Winch Cable
Step 3: Inspecting the Winch Cable Now that we’ve taken a closer look at the winch drum and motor, it’s time to turn our attention to the winch cable itself. This is an essential part of the winch system, as it is responsible for actually pulling the load. Over time, the cable can become worn, frayed, or damaged, so it’s important to inspect it regularly.
Start by unwinding the cable from the drum and laying it out on a flat surface. Look for any signs of wear or damage, such as frayed strands, broken wires, or kinks in the cable. These are all indications that the cable may need to be replaced.
Next, run your hand along the entire length of the cable, feeling for any rough spots or inconsistencies. These could be signs of internal damage that may not be immediately visible. If you notice any significant damage, it’s best to err on the side of caution and replace the cable.
In addition to checking the cable itself, also inspect the connections at each end. Make sure the cable is securely attached to the winch drum and the hook. If any of the connections are loose or damaged, they should be repaired or replaced.
Finally, take a moment to ensure that the cable is properly lubricated. Apply a thin coat of winch cable lubricant to help reduce friction and prolong the life of the cable. Be sure to follow the manufacturer’s recommendations for lubrication frequency and use a lubricant specifically designed for winch cables.
By carefully inspecting the winch cable and addressing any issues that arise, you can ensure that your winch remains in good working order and ready for whatever challenges you may face. So don’t overlook this important step in the winch repair process. Your winch and your peace of mind will thank you for it.
Step 4: Lubricating the Winch Motor
In Step 4 of fixing your winch, we’ll be focusing on lubricating the winch motor to keep it running smoothly and efficiently. Just like any other motor, the winch motor can benefit from regular lubrication to reduce friction and prevent wear and tear. To start, make sure you have the right type of lubricant for your winch motor.
Consult the manufacturer’s manual or do some research to determine the best option. Once you have the lubricant, disconnect the power source to ensure safety. Locate the access point to the motor and remove any screws or covers necessary to access it.
Apply a small amount of lubricant to the moving parts of the motor, being careful not to overdo it. Too much lubricant can cause buildup and potentially damage the motor. Once you’ve applied the lubricant, replace any covers or screws and reconnect the power source.
Give the winch a test run to ensure everything is running smoothly. By taking the time to lubricate your winch motor, you can extend its lifespan and keep it performing at its best.
Step 5: Testing the Remote Control
In Step 5 of our step-by-step guide to fixing your winch, we will be focusing on testing the remote control. Now that we have replaced the battery and checked the wiring, it’s time to make sure the remote control is working properly. This step is crucial as a malfunctioning remote control can prevent the winch from operating correctly.
To test the remote control, start by standing a reasonable distance away from the winch and pointing the remote towards it. Press the buttons on the remote and observe if the winch responds accordingly. Does it start, stop, and reverse as expected? If everything is working as it should, then congratulations, you’ve fixed your winch! However, if the winch doesn’t respond or behaves erratically, there may be an issue with the remote control itself.
In this case, it may be necessary to replace the remote control to ensure smooth and reliable operation of your winch.
Additional Tips and Precautions
When it comes to fixing an ATV winch, there are a few additional tips and precautions to keep in mind. First, it’s important to start by reading the owner’s manual for your specific winch model. This will provide specific instructions and guidelines for troubleshooting and repairs.
Additionally, make sure to disconnect the winch from the power source before attempting any repairs or maintenance. This will help prevent any accidental engagement of the winch while you’re working on it. It’s also a good idea to wear protective gloves and eyewear to keep yourself safe during the repair process.
Another tip is to double-check all the connections and wiring to ensure everything is secure. Loose connections or frayed wires could be the cause of your winch issues. Lastly, if you’re unsure about any aspect of the repair process, it’s always best to consult a professional or take your ATV to a certified mechanic.
They will have the expertise and tools necessary to properly diagnose and fix any winch issues you may be experiencing.
Use Protective Gear
Protective gear is an essential component of staying safe while engaging in various activities. Whether you’re participating in sports, working in hazardous environments, or even just riding a bicycle, wearing the appropriate protective gear can help prevent injuries and minimize risks. Helmets, knee pads, elbow pads, and wrist guards are some examples of protective gear that provide an extra layer of protection.
It’s important to choose gear that fits well and is designed for the specific activity you’ll be participating in. By wearing protective gear, you can significantly reduce the likelihood of accidents and injuries, and enjoy your favorite activities with peace of mind. So, before hopping on your bike or hitting the field, make sure to grab your gear and give yourself the best chance of staying safe.
Regular Maintenance
“Regular maintenance is key to keeping your vehicle in top shape and ensuring its longevity. However, there are some additional tips and precautions you should keep in mind to enhance the effectiveness of your maintenance routine. Firstly, make sure to always check the owner’s manual for your vehicle.
This manual provides specific guidelines and recommendations for maintenance tasks, such as oil changes, tire rotations, and filter replacements. Following these guidelines will help you stay on track with your maintenance schedule and avoid any potential damage. Secondly, pay attention to any warning signs or unusual noises coming from your vehicle.
These can indicate a problem that needs to be addressed immediately. Ignoring these signs can lead to more significant issues down the line. Regularly inspecting your vehicle for any leaks, cracks, or worn-out parts is also essential.
Addressing these issues promptly can help prevent more extensive damage and costly repairs. Lastly, it’s crucial to choose a trustworthy mechanic or dealership for your vehicle’s maintenance and repairs. Doing so will give you peace of mind, knowing that your vehicle is in expert hands.
By incorporating these additional tips and precautions into your regular maintenance routine, you can ensure that your vehicle remains in excellent condition for years to come!”
Consulting a Professional
consulting a professional, additional tips, precautions, burstiness, perplexity
Conclusion
And there you have it, a foolproof guide on how to fix your ATV winch. Remember, with a little bit of patience and some handyman skills, you can bring your winch back to life and conquer any off-road obstacle that stands in your way. Just like a superhero with a trusty sidekick, your ATV and winch are the dynamic duo that will save the day.
So go forth, my fellow adventurers, and may your winch always be strong and your trails always be wild!”
Get Back on the Trail with a Working Winch
winch, additional tips, precautions, working winch
FAQs
How do I fix a jammed ATV winch?
To fix a jammed ATV winch, first, make sure the winch is powered off. Then, try manually releasing the winch drum by turning it counterclockwise. If that doesn’t work, you may need to remove the winch cover and manually release the gears. Once the winch is released, inspect for any damaged or tangled cables and repair or replace as necessary.
What should I do if my ATV winch isn’t pulling the load?
If your ATV winch isn’t pulling the load, there are a few possible causes. First, check to make sure the winch motor is receiving power. If it is, inspect the winch cable for any damage or tangles that may be preventing it from properly winding or unwinding. Additionally, check the winch solenoid to ensure it is functioning properly. If necessary, replace or repair any faulty components.
How can I increase the pulling power of my ATV winch?
To increase the pulling power of your ATV winch, you can try a few things. First, you can upgrade to a higher capacity winch model. Additionally, you can upgrade to a thicker and stronger winch cable. Another option is to install a snatch block, which can help with the pulling power by creating a change in direction for the winch cable. However, it’s important to note that the pulling power of an ATV winch is ultimately limited by the capacity of the ATV itself.
What maintenance should I perform on my ATV winch?
Regular maintenance is important for ensuring the longevity and optimal performance of your ATV winch. Some maintenance tasks to consider include cleaning the winch to remove dirt and debris, lubricating moving parts, inspecting and tightening connections, and checking the winch cable for any signs of wear or damage. It’s also a good idea to read and follow the manufacturer’s maintenance guidelines specific to your ATV winch model.
How do I properly use an ATV winch?
To properly use an ATV winch, start by familiarizing yourself with the winch controls and operation. Make sure you have the appropriate safety gear, such as gloves, and ensure you have a clear understanding of the winch’s capacity and limitations. When using the winch, always secure the anchor point properly, and be mindful of the tension and strain on the winch cable. It’s also important to follow proper winching techniques to avoid injury or damage.
Why is my ATV winch making a clicking sound?
If your ATV winch is making a clicking sound, it could indicate a problem with the winch solenoid. The solenoid is responsible for engaging and disengaging the winch motor, and a clicking sound typically means it is not engaging properly. This could be due to a faulty solenoid or a weak battery. Check the solenoid connections and the battery’s charge, and if necessary, replace the solenoid.
Can I use an ATV winch for other applications besides pulling my ATV?
While an ATV winch is primarily designed for pulling and recovering an ATV, it can also be used for other purposes. However, it’s important to check the winch’s capacity and limitations to ensure it is suitable for the specific application. Additionally, the winch mount and connections may need to be modified or adapted depending on the intended use. Always follow the manufacturer’s guidelines and exercise caution when using an ATV winch for anything other than its intended purpose.