
Hey there, car enthusiasts! Have you ever wondered why flushing out coolant is such an important part of regular vehicle maintenance? Well, buckle up because today we’re diving into the nitty-gritty of this crucial task. Picture this: your car’s engine is like the heart of your vehicle, pumping coolant through its veins to keep it running smoothly and prevent it from overheating. Just like how our bodies need fresh blood to stay healthy, our cars need clean coolant for optimal performance.
But why is it necessary to flush out the old coolant and replace it with new? Let’s find out!
Table of Contents
How Coolant Works
Are you wondering how to flush out coolant from your vehicle’s cooling system? Well, let me break it down for you. Coolant is a vital component in keeping your engine from overheating. It works by absorbing heat from the engine and then dissipating it through the radiator.
Over time, however, coolant can become contaminated with dirt, rust, and other debris, which can reduce its effectiveness. That’s where flushing comes in. Flushing out coolant involves removing the old, contaminated coolant and replacing it with fresh coolant.
This process helps to maintain the optimal functioning of your engine and prevents any potential damage caused by overheating. Regularly flushing out coolant is essential for the longevity and performance of your vehicle’s cooling system. So, if you’re experiencing overheating issues or noticing that your coolant is dirty or rusty, it’s time to learn how to flush out coolant and give your engine the care it deserves.
Understanding the Purpose of Coolant
coolant, purpose of coolant, how coolant works
Components of Coolant
coolant components
Signs that Your Coolant Needs to be Flushed
Have you noticed any signs that your coolant might need to be flushed out? Flushing out your coolant is an important maintenance task for your vehicle, as it helps to remove any contaminants and ensure that your engine stays cool. One sign that your coolant might need to be flushed is if you notice that your engine is running hotter than usual. This could be a sign that the coolant is not circulating properly and needs to be flushed out.
Another sign to look out for is if you notice a sweet smell coming from your engine. This could indicate a coolant leak, which might also mean that it’s time to flush out your coolant. Additionally, if your coolant is discolored or has a rusty appearance, this is another indication that it needs to be flushed.
Flushing out your coolant is a relatively simple task that can be done at home or by a professional. By keeping an eye out for these signs and regularly maintaining your coolant, you can help to extend the life of your engine and keep your vehicle running smoothly.
Overheating Engine
overheating engine, coolant needs to be flushed. Hey there car enthusiasts! One of the most common problems with vehicles is an overheating engine, which can leave you stranded on the side of the road. But did you know that one of the main causes of an overheating engine is a coolant system that needs to be flushed? That’s right, your coolant plays a vital role in regulating the temperature of your engine and preventing it from overheating.
So, how can you tell if your coolant needs to be flushed? Well, there are a few tell-tale signs to watch out for. Firstly, if you notice that your engine is running hotter than usual, it’s a clear indicator that something is amiss with your coolant system. As your coolant circulates through the engine, it absorbs heat and carries it away, keeping the engine at a safe operating temperature.
However, over time, coolant can become contaminated with debris, dirt, and rust, which hinder its effectiveness. This can lead to poor heat transfer and ultimately, an overheating engine. Another sign that your coolant needs to be flushed is if you notice a sweet smell coming from your engine.
This could be an indication of a coolant leak, which not only causes your engine to overheat but can also damage other components. The sweet smell is due to the presence of ethylene glycol, a key ingredient in most coolants. If you detect this smell, it’s important to get your coolant system checked as soon as possible.
Furthermore, a coolant that needs to be flushed may also appear discolored or have a milky appearance. This is a result of the coolant becoming contaminated with oil or other fluids, which signifies a more serious problem. If your coolant has lost its original color and seems murky, it’s a clear sign that a flush is needed to remove any contaminants and restore optimal performance.
So, there you have it. If you’re experiencing an overheating engine, it’s likely that your coolant needs to be flushed. Don’t ignore the signs – get your coolant system checked by a professional mechanic and prevent any further damage to your engine.
Rusty or Dirty Coolant
signs that your coolant needs to be flushed
Visible Coolant Leaks
visible coolant leaks, coolant needs to be flushed
Tools and Supplies Needed
Flushing out the coolant in your car’s engine is an important maintenance task that can help prolong its lifespan and prevent engine damage. To do this, you will need a few tools and supplies. First, you’ll need a pair of safety gloves and goggles to protect yourself from any potential spills or splashes.
You will also need a drain pan to catch the old coolant as it is flushed out, as well as a funnel to pour new coolant back in. Additionally, you’ll need a socket wrench or pliers to remove the drain plug and a hose or radiator flush kit to help remove any built-up sediment or debris in the coolant system. It’s also a good idea to have some rags or paper towels on hand to clean up any spills or drips.
With these tools and supplies, you’ll be all set to successfully flush out your car’s coolant system and keep your engine running smoothly.
Coolant Flush Kit
coolant flush kit. When it comes to maintaining your vehicle, a coolant flush is a task that should not be overlooked. Over time, the coolant in your car can become contaminated with dirt, debris, and sediment, affecting its ability to regulate engine temperature effectively.
That’s where a coolant flush kit comes in handy. A coolant flush kit includes all the tools and supplies you need to safely and efficiently flush out your old coolant and replace it with fresh coolant. So, what tools and supplies do you need for a coolant flush? First and foremost, you’ll need a coolant flush kit, which typically includes a flushing agent, a hose, and adapters.
The flushing agent is a chemical solution that helps break down and remove any built-up deposits and contaminants in your cooling system. The hose is used to connect the flush kit to your vehicle’s radiator, allowing the flushing agent to circulate through the system. The adapters are essential for ensuring a proper fit and preventing any leaks during the flushing process.
In addition to the coolant flush kit, you’ll also need a few other tools and supplies. These include a bucket or drain pan to catch the old coolant as it drains from your vehicle, a wrench or pliers to remove the drain plug or hose clamp, and a funnel to pour the new coolant into the radiator. It’s also a good idea to have some rags or paper towels on hand to clean up any spills or drips that may occur during the flushing process.
Now that you know what tools and supplies you need for a coolant flush, you can confidently tackle this maintenance task on your own. Just remember to follow the instructions included with your coolant flush kit, take your time, and stay safe. With a properly flushed cooling system, you can help prolong the life of your engine and avoid costly repairs down the road.
So, what are you waiting for? Get your coolant flush kit and start maintaining your vehicle today!
Gloves and Safety Glasses
Gloves and safety glasses are an essential part of any DIY or construction project. When working with tools and materials, it’s important to protect your hands and eyes from potential hazards. Whether you’re using power tools, handling sharp objects, or dealing with chemicals, wearing gloves and safety glasses can prevent injuries and accidents.
So, what tools and supplies do you need to ensure your safety? First and foremost, you’ll need a pair of gloves that are suitable for the task at hand. There are many different types of gloves available, each designed for specific purposes. For general DIY projects, a pair of heavy-duty work gloves made from materials like leather or synthetic leather can provide ample protection.
These gloves are designed to withstand rough use and provide padding to protect against impacts and cuts. If you’re working with chemicals or hazardous substances, make sure to wear chemical-resistant gloves that are specifically designed for that purpose. In addition to gloves, safety glasses are another must-have item for your toolkit.
Safety glasses are designed to protect your eyes from flying debris, dust, and other potential hazards. They should have impact-resistant lenses and fit snugly on your face to ensure proper protection. Consider getting a pair with anti-fog coating to prevent your glasses from fogging up, especially if you’re working in a humid environment or doing activities that generate heat.
Remember, wearing gloves and safety glasses is not only about following rules and regulations, but also about taking care of yourself and your well-being. By investing in the right tools and supplies and incorporating them into your DIY routine, you can ensure a safer and more enjoyable experience. So, don’t forget to put on your gloves and safety glasses before you start your next project!
Drain Pan
drain pan, tools and supplies needed
Funnel
funnel, tools and supplies needed
Step-by-Step Guide to Flushing Out Coolant
So, you’ve decided it’s time to flush out your coolant. Maybe you’re experiencing engine overheating or notice the coolant has turned murky. Either way, flushing out your coolant is an essential maintenance task that can help keep your engine running smoothly.
Here’s a step-by-step guide to help you through the process. Step 1: Gather the necessary tools and materials. You’ll need a coolant flush solution, distilled water, a funnel, a coolant catch basin, a pair of safety gloves, and safety goggles.
Step 2: Park your vehicle on a flat surface and let the engine cool down completely. It’s crucial to work on a cool engine to avoid the risk of burns. Step 3: Locate the radiator drain valve.
It’s usually positioned at the bottom of the radiator. Place the coolant catch basin underneath the valve to catch the draining coolant. Step 4: Carefully open the drain valve, allowing the coolant to flow into the catch basin.
Be cautious, as the coolant might still be hot. Once all the coolant has drained out, close the drain valve securely. Step 5: Now it’s time to mix the coolant flush solution with distilled water according to the manufacturer’s instructions.
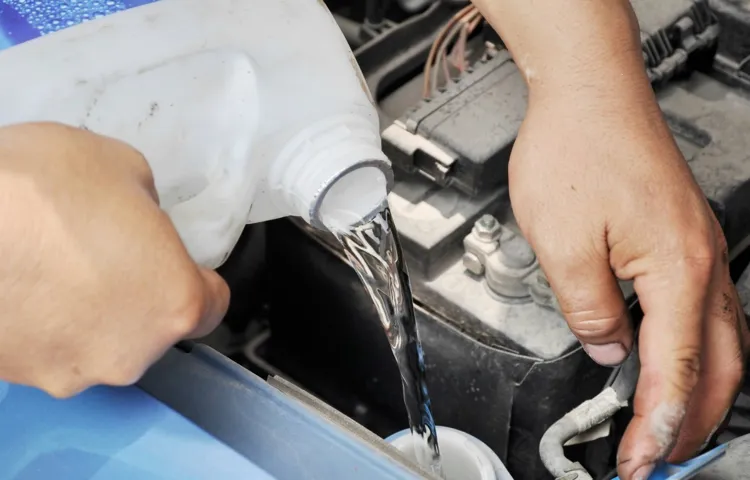
Typically, the ratio is one part flush solution to one part distilled water. Step 6: Using the funnel, pour the coolant flush solution into the radiator. Fill it up to the recommended level.
Park and Cool the Vehicle
coolant flush, step-by-step guide, park and cool the vehicle Alright, folks, it’s time to give our vehicles some tender loving care! Today, we’re going to tackle a coolant flush. Now, before we jump in, let’s make sure we’re parked in a safe and cool spot. Can you picture it? The sun shining down, a gentle breeze blowing through the trees, and our trusty vehicle resting peacefully.
It’s important to park and cool the vehicle before we start the flush because we don’t want to burn ourselves or damage any components. So, find a shady spot or wait for a cooler part of the day to begin this adventure. Safety first, right? Now that our vehicle is happily parked and cooled, let’s move on to the first step in our coolant flush.
Stay tuned because there’s a lot more to come in this step-by-step guide!
Locate the Radiator Drain Valve
When it comes to taking care of your vehicle, one important maintenance task you should not overlook is flushing out the coolant. Over time, coolant can become contaminated with debris and particles that can hinder its ability to properly cool your engine. Flushing out the old coolant and replacing it with fresh, clean coolant is a simple process that can help prolong the life of your engine.
But before you can begin the flushing process, you need to locate the radiator drain valve. This valve is typically located at the bottom of the radiator and is used to drain the old coolant. Once you have located the drain valve, you can proceed with the rest of the flushing process.
Remember to always consult your vehicle’s owner manual for specific instructions and safety precautions. With a little time and effort, you can ensure that your engine stays cool and running smoothly.
Place the Drain Pan Underneath the Radiator
coolant flush, radiator coolant, drain pan, flush the coolant, radiator maintenance, radiator system. Are you experiencing a decrease in your vehicle’s performance or noticing your engine overheating more frequently? It may be time for a coolant flush. Flushing out the old radiator coolant is an important maintenance task that ensures your radiator system is running efficiently and keeps your engine cool.
Here’s a step-by-step guide to help you through the process. First, gather all the necessary tools and equipment. You’ll need a drain pan to catch the old coolant, a socket wrench to remove the drain plug, and new coolant to refill the system.
Place the drain pan underneath the radiator, ensuring it’s large enough to hold all the coolant. Next, locate the drain plug on the bottom of the radiator. It’s usually a small bolt or valve.
Use a socket wrench to loosen and remove the drain plug, allowing the old coolant to drain into the pan. Be cautious as the coolant may be hot, so wear gloves and eye protection. Once all the coolant has drained out, replace the drain plug and tighten it securely.
Now it’s time to flush the coolant system. Fill the radiator with water until it’s full, then start the engine and let it run for a few minutes. This will circulate the water and flush out any remaining coolant or debris.
After running the engine, turn it off and let it cool down completely. Once cooled, repeat the process of draining the water from the radiator by removing the drain plug. This will ensure that all the old coolant has been flushed out of the system.
Loosen the Radiator Drain Valve
Coolant flushes are an essential part of maintaining your vehicle’s engine health and performance. One crucial step in the flushing process is to loosen the radiator drain valve. This valve is where the coolant will be drained from the radiator, making room for fresh coolant to be added later.
To start, locate the drain valve, usually located on the bottom of the radiator. It may be covered by a plastic shield or cap, so remove these if necessary. Once you’ve located the valve, use a wrench or pliers to loosen it.
Be careful not to unscrew it completely, as you don’t want the valve to fall off and cause a mess. Loosening the drain valve allows the coolant to flow out smoothly without any obstructions. This step is vital because it ensures that all old coolant and debris are completely flushed out of the system.
So, remember, take your time and carefully loosen the radiator drain valve before moving on to the next step in the coolant flushing process.
Drain the Old Coolant
Draining the old coolant is an important step in maintaining your vehicle’s cooling system. Over time, coolant can become contaminated with dirt, debris, and rust, which can hinder its effectiveness in keeping your engine cool. To flush out the old coolant, you’ll need a few tools and a bit of time, but it’s a relatively straightforward process.
First, make sure your engine is cool before you begin. Opening the radiator cap while the engine is still hot can be dangerous, as the coolant can be under pressure and cause burns. Once the engine is cool, locate the radiator drain valve.
This valve is usually located at the bottom of the radiator and can be opened using a wrench or pliers. Place a drain pan underneath the radiator drain valve to catch the old coolant. Slowly open the valve and allow the coolant to drain out completely.
Be careful, as the coolant may be hot. Once all the coolant has drained out, close the drain valve. Next, locate the radiator filler cap and remove it.
This will help the coolant drain more easily. You may also want to remove the pressure cap on the coolant reservoir to help release any pressure. Double-check that all the coolant has drained out completely.
To ensure a thorough flush, you can also flush the cooling system with water. Fill the radiator with water and run the engine for a few minutes to circulate the water through the system. Then, open the drain valve again and allow the water to drain out.
Flush the System with Water
coolant flush, flush out coolant, step-by-step guide Is your car’s engine running a little hot? Is the temperature gauge creeping past the halfway mark? It may be time to flush out your coolant and give your cooling system a fresh start. Flushing out the coolant in your car’s engine is a simple process that can help prevent overheating and extend the life of your engine. In this step-by-step guide, we’ll walk you through the process of flushing out your coolant and keeping your engine running cool.
Step 1: Gather Your Tools and Supplies Before you begin, make sure you have all the necessary tools and supplies. You’ll need a drain pan, a socket wrench or pliers to remove the drain plug, a funnel, distilled water, and new coolant. It’s important to use distilled water instead of tap water, as tap water can contain minerals that can cause corrosion in your cooling system.
Step 2: Locate the Drain Plug Next, locate the drain plug on your radiator. This plug is usually located on the bottom of the radiator and can be easily accessed from underneath your car. Place the drain pan underneath the drain plug to catch the old coolant.
Step 3: Remove the Drain Plug Using a socket wrench or pliers, carefully loosen and remove the drain plug. Be sure to wear gloves and eye protection, as the old coolant can be hot and may splatter when it drains out. Step 4: Drain the Old Coolant Allow the old coolant to completely drain out of the radiator.
This may take a few minutes, so be patient. Once the coolant has stopped flowing, replace the drain plug and tighten it securely. Step 5: Flush the System with Water Now it’s time to flush out the cooling system with water.
Using your funnel, slowly pour distilled water into the radiator. Continue pouring water until it starts coming out clear from the drain plug. This will help remove any remaining traces of old coolant and debris from the system.
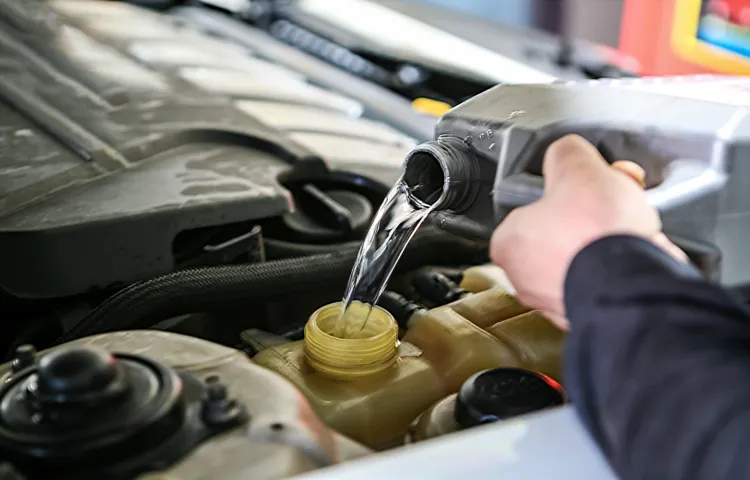
Refill with New Coolant
coolant, flush, step-by-step guide
Bleed the Cooling System
coolant system, flushing out coolant, bleed the cooling system, step-by-step guide
Check for Leaks
coolant, flush, leaks, step-by-step guide, check for leaks, bursting pipes. Have you noticed any coolants leaks in your car lately? It’s crucial to address this issue as soon as possible to prevent any further damage to your engine. Flushing out the coolant is a great way to identify and fix any leaks in your cooling system.
So, let’s get started with a step-by-step guide on how to flush out coolant and check for leaks.
Conclusion: Importance of Regular Coolant Flushes
So there you have it, my lovely readers, the ultimate guide on how to flush out coolant! With these easy steps, you can confidently tackle this task and keep your vehicle’s engine running smoothly. Just remember, don’t be afraid to get your hands dirty (or let your mechanic do it), because flushing out coolant is an essential part of vehicle maintenance. And who knows, maybe one day you’ll be able to impress your friends with your coolant-flushing expertise at a dinner party.
So go ahead and take the plunge, and bid farewell to those pesky coolant impurities. Happy flushing!”
FAQs
How often should I flush out the coolant in my vehicle?
It is recommended to flush out the coolant every two years or every 30,000 miles, whichever comes first. This helps to keep the cooling system in good working condition and prevent any buildup of contaminants.
What are the signs that indicate a need to flush out the coolant?
Some signs that can indicate the need to flush out the coolant include overheating of the engine, a coolant warning light on the dashboard, or a coolant leak. It is important to address these issues promptly to prevent any damage to the engine.
Can I flush out the coolant myself, or do I need to take it to a professional?
While it is possible to flush out the coolant yourself, it is recommended to consult the vehicle’s manual or seek professional assistance. Coolant flushing involves draining the old coolant, flushing the system with water, and refilling it with the appropriate coolant mixture, which requires certain steps and precautions.
What are the steps involved in flushing out the coolant?
The steps involved in flushing out the coolant include locating the coolant drain valve, draining the old coolant, flushing the system with clean water, ensuring all water is drained out, and refilling the system with the appropriate coolant mixture. It is important to follow the specific instructions outlined in the vehicle’s manual.
Can I use tap water for flushing the coolant system?
It is not recommended to use tap water for flushing the coolant system. Tap water often contains minerals and impurities that can cause deposits and corrosion in the cooling system. It is best to use distilled or deionized water for flushing out the coolant.
What type of coolant should I use to refill the system after flushing?
The type of coolant to use for refilling the system depends on the specifications of the vehicle. It is important to consult the vehicle’s manual or check with a professional to determine the correct coolant type and mixture ratio.
Is it necessary to bleed the cooling system after flushing out the coolant?
Yes, it is necessary to bleed the cooling system after flushing out the coolant. This helps to remove any air pockets or bubbles that may have formed during the flushing process. Failure to properly bleed the system can result in poor heat transfer and engine overheating.