
Hey there! Ever wondered what keeps your car’s engine cool and prevents it from overheating? Well, let me introduce you to the coolant system, a vital component of any vehicle. The coolant system, also known as the cooling system, plays a crucial role in regulating the temperature of your engine, ensuring its optimal performance and preventing damage. Think of the coolant system as the engine’s very own air conditioning system.
Just like how air conditioning keeps you cool on a hot summer day, the coolant system helps keep your engine cool, even when it’s running at high speeds or in extreme conditions. So how does this system work? Picture this: the engine works tirelessly, generating a tremendous amount of heat. Without proper cooling, this heat can build up and damage various engine components, leading to breakdowns and costly repairs.
That’s where the coolant system comes to the rescue. The coolant system circulates a mixture of water and coolant, also known as antifreeze, throughout the engine. The water absorbs the excess heat and carries it away, while the coolant acts as a heat transfer agent, preventing the water from freezing in cold weather or boiling in hot weather.
But that’s not all this system does. The coolant system also includes various components, such as the radiator, water pump, thermostat, and hoses, which work together to keep the engine at an optimal temperature. These components ensure that the coolant flows smoothly through the engine, dissipating the heat and maintaining a steady temperature.
Now that you know what the coolant system does, you can appreciate its importance in keeping your engine running smoothly. So next time you start up your car, take a moment to appreciate this vital system working silently in the background, keeping your engine cool and your ride enjoyable.
Table of Contents
- 1 Understanding the purpose of a coolant system
- 2 The importance of maintaining a clean coolant system
- 3 Signs that your coolant system needs flushing
- 4 Gathering the necessary tools and materials
- 5 Step 1: Preparing the vehicle
- 6 Step 2: Flushing the system
- 7 Step 3: Refilling the coolant
- 8 Step 4: Checking for leaks
- 9 Step 5: Final checks and maintenance
- 10 Conclusion
- 11 FAQs
Understanding the purpose of a coolant system
Flushing the coolant system is an essential maintenance task for any vehicle owner. The coolant system is responsible for regulating the temperature of the engine and preventing it from overheating. Over time, the coolant can become contaminated with dirt, debris, and other particles.
This can affect the performance of the coolant system, leading to potential engine damage. Flushing the coolant system involves draining the old coolant and replacing it with fresh coolant. This process helps to remove any accumulated contaminants and rejuvenate the performance of the coolant system.
By regularly flushing the coolant system, you can ensure that your engine stays cool and prevent costly repairs down the line. So, the next time you notice your engine running hotter than normal or if it has been a while since you last flushed the coolant system, it’s time to roll up your sleeves and give your vehicle the maintenance it deserves.
The importance of maintaining a clean coolant system
Maintaining a clean coolant system is crucial for the overall health and performance of your vehicle. Over time, the coolant in your car can become contaminated with rust, sediment, and other debris, which can clog up the system and lead to overheating. To prevent this, it is important to flush the coolant system regularly.
But how exactly do you flush the coolant system? First, make sure your vehicle is parked on level ground and the engine is cool. Locate the radiator drain plug, which is usually at the bottom of the radiator. Place a drain pan underneath the plug and open it to let the coolant drain out.
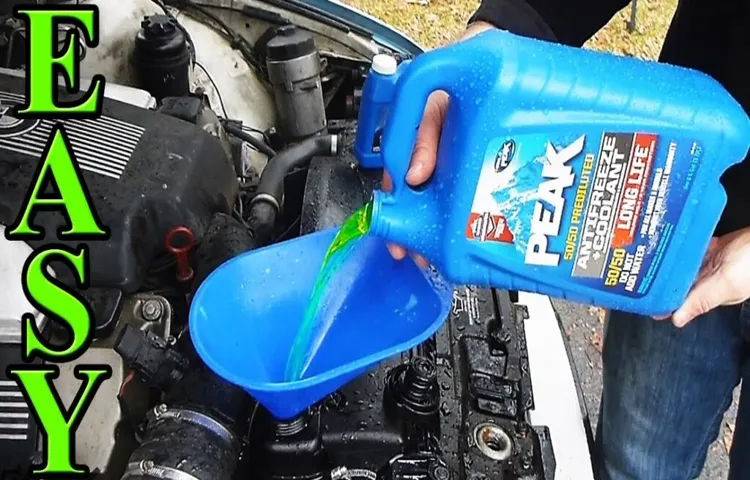
Once all the coolant has drained, close the drain plug and proceed to fill the system with a mixture of coolant and water as recommended by your vehicle’s manufacturer. Be sure to burp the system by squeezing the upper radiator hose to remove any air bubbles. Finally, start the engine and let it run for a few minutes to circulate the coolant.
Check for any leaks and top off the coolant level if necessary. By regularly flushing your coolant system, you can ensure that your vehicle stays cool and efficient on the road.
Signs that your coolant system needs flushing
Is your car’s coolant system due for a flushing? If you’re not sure, there are a few signs to watch out for. First, if you notice that your engine temperature gauge is consistently on the high side, it could be a sign that your coolant system is not functioning properly. Additionally, if you start to notice a sweet smell coming from your engine or if you see a green or orange stain under your car after it has been parked for a while, it could indicate a coolant leak.
Another sign that your coolant system needs flushing is if you see a rust-colored or cloudy appearance in your coolant reservoir. If any of these signs sound familiar, it’s time to take action. Flushing your coolant system is a necessary maintenance task that helps to remove built-up contaminants and keep your engine running smoothly.
A coolant flush involves draining the old coolant, flushing the system with a cleaning solution, and then refilling it with fresh coolant. It’s important to follow the manufacturer’s recommendations for how often you should flush your coolant system, as it can vary depending on the make and model of your vehicle. Proper maintenance of your coolant system will help to prevent overheating, minimize the risk of engine damage, and prolong the life of your vehicle.
So, if you’re experiencing any of the signs mentioned, don’t put off flushing your coolant system any longer. Your car will thank you for it!
Gathering the necessary tools and materials
Before you start flushing the coolant system in your vehicle, it’s important to gather all the necessary tools and materials. Having everything you need on hand will make the job go much smoother. First, you’ll need a set of wrenches or socket tools to remove the radiator drain plug and any other components that need to be taken off.
It’s also a good idea to have a catch pan or bucket to collect the old coolant as it drains out. Next, you’ll need a coolant flush kit, which usually includes a cleaner and flush adapter that connects to the radiator hoses. This will help remove any built-up debris and sediment from the system.
Lastly, you’ll need new coolant to put back into the system after the flush is complete. Make sure to check your vehicle’s specifications to ensure you use the correct type of coolant. Once you have all these tools and materials ready, you’ll be prepared to tackle flushing your coolant system.
Is your vehicle’s cooling system not performing as efficiently as it used to? Maybe it’s time for a coolant system flush. Flushing the coolant system is an essential part of vehicle maintenance, as it helps remove dirt, rust, and other contaminants that can affect the engine’s performance. In this step-by-step guide, we will walk you through the process of flushing your coolant system, so you can keep your engine running smoothly and avoid any costly repairs down the road.
So, grab your gloves and wrench, and let’s get started on this cooling system adventure!
Step 1: Preparing the vehicle
Before you tackle the task of flushing your coolant system, it’s important to prepare your vehicle. Start by parking your car on a level surface and allowing the engine to cool down completely. It’s crucial to work with a cool engine to avoid any burns or injuries from hot coolant.
Next, gather all the necessary tools and materials such as a drain pan, a funnel, a socket or wrench set, a new coolant, and safety gloves. You also want to refer to your vehicle’s owner’s manual for specific instructions on the type of coolant to use and any special steps required for your particular make and model. Once you have everything ready, you’re all set to move on to the next step of flushing the coolant system and ensuring your car runs smoothly.
Draining the coolant
draining the coolant, preparing the vehicle. Alright, folks, today we’re going to delve into the fascinating world of car maintenance. Specifically, we’re going to talk about step one in draining the coolant – preparing the vehicle.
Now, I know what you’re probably thinking – why on earth would I want to drain my coolant? Well, dear reader, the answer is simple. Over time, coolant can become contaminated with dirt, rust, and other particles, which can seriously affect your engine’s performance. So, to keep your car running smoothly, it’s important to drain and replace the coolant regularly.
But before you can do that, you must first prepare your vehicle for the task at hand.
Removing the radiator cap
In order to remove the radiator cap from your vehicle, it’s important to first prepare the vehicle and ensure it is safe to work on. Start by turning off the engine and allowing it to cool down completely. The radiator cap is located on the top of the radiator, and it can get very hot when the engine is running.
Trying to remove the cap while the engine is still hot can result in burns and other injuries. Once the engine has cooled down, you can proceed to the next step of removing the radiator cap.
Step 2: Flushing the system
Now, let’s move on to step 2: flushing the coolant system. This is an important step in maintaining your vehicle’s overall performance and preventing any potential problems down the line. Flushing the coolant system helps to remove any debris or buildup that may have accumulated over time, ensuring that your engine stays cool and runs smoothly.
So, how do you go about flushing the coolant system? First, you’ll need to locate the coolant drain valve, which is typically located at the bottom of the radiator. Once you’ve located it, place a drain pan underneath to catch the coolant. Then, open the valve and allow the coolant to drain out completely.
Once the coolant has drained, close the valve and dispose of the old coolant properly. Now it’s time to flush the system. You can use a flush solution that is specifically designed for cooling systems.
Follow the instructions on the bottle, but typically you’ll need to add the solution to the radiator, fill it with water, and run the engine for a certain period of time. This will help remove any remaining debris or buildup. After the recommended flush time, turn off the engine and allow it to cool down.
Once it’s cool, drain the flush solution by opening the drain valve again. Make sure to flush the system with clean water afterwards to remove any traces of the flush solution. Once the system has been flushed, you can proceed to the next step of filling the coolant.
Using a coolant flush solution
coolant flush solution, flushing the system
Running the engine
engine flushing, coolant, contaminants, radiator, car maintenance, automotive service, cooling system, engine efficiency, vehicle performance.
Draining the flush solution
The second step in ensuring a properly functioning flush system is to drain the flush solution. By doing this, we are able to remove any built-up residue or debris that may be causing blockages or inefficiencies in the system. It’s important to note that different systems may require different methods of drainage, so it’s always a good idea to consult the manufacturer’s instructions or seek professional guidance.
Once the flush solution has been drained, it’s time to move on to the next step in the process.
Step 3: Refilling the coolant
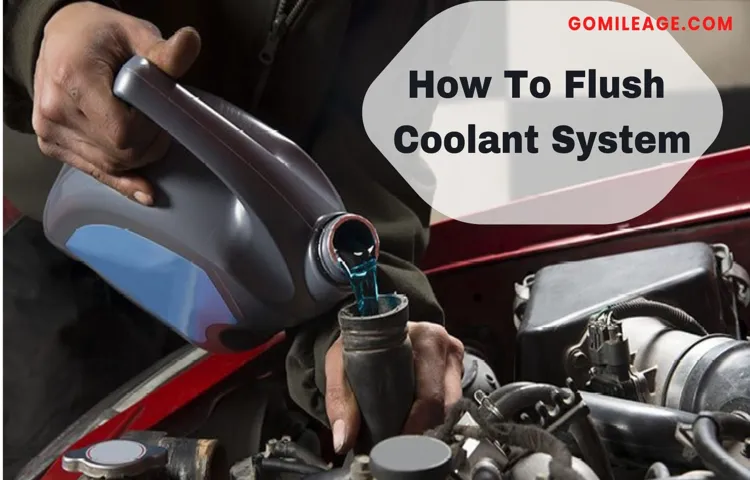
One crucial step in the process of flushing the coolant system is refilling the coolant. After draining the old coolant from the radiator and engine block, it’s important to replace it with fresh coolant to ensure optimal engine performance and prevent overheating. To refill the coolant, first, locate the coolant reservoir and remove the cap.
Slowly pour the new coolant into the reservoir until it reaches the “full” line. It’s essential to use the correct coolant type and mix it according to the manufacturer’s recommendations. Once the reservoir is filled, replace the cap tightly.
Next, start the engine and let it run for a few minutes to circulate the coolant throughout the system. Check the coolant level again and top it off if necessary. Remember to dispose of the old coolant properly.
Regularly checking and refilling the coolant will help maintain the engine’s temperature and keep it running smoothly.
Choosing the right coolant
coolant, refilling coolant, choosing the right coolant Now that you have chosen the right coolant for your vehicle, it’s time to refill it. Refilling the coolant is an important step in maintaining your car’s engine and preventing it from overheating. Before you begin, make sure the engine is cool and that the vehicle is parked on a flat surface.
Start by locating the coolant reservoir. It is usually a transparent plastic container near the radiator. Open the cap and check the coolant level.
If it is low, it’s time to refill. Next, mix the coolant with distilled water according to the manufacturer’s instructions. This is important as the coolant needs to be diluted to the correct ratio.
Using tap water is not recommended as it can contain minerals that can harm your engine. Once you have mixed the coolant, slowly pour it into the reservoir until the level reaches the “full” or “max” mark. Take care not to overfill as this can lead to leaks or other issues.
After you have refilled the coolant, securely fasten the cap on the reservoir. It is essential to ensure it is tightly sealed to prevent any leaks. Finally, start the engine and let it run for a few minutes.
This will allow the coolant to circulate and remove any air bubbles. Check the coolant level again and top up if necessary. Refilling the coolant is a simple task that can be done by any car owner.
Refilling the system
refilling coolant, car maintenance, cooling system, engine temperature, overheating. The cooling system is a critical component of your car’s engine, helping to regulate its temperature and prevent overheating. Over time, the coolant in the system can become contaminated or depleted, leading to decreased performance and potential engine damage.
That’s why it’s important to regularly refill the coolant to ensure optimal function. Refilling the coolant is a relatively simple process that can be done at home with a few basic tools. First, you’ll need to locate the coolant reservoir, which is typically a translucent plastic tank located near the radiator.
Once you’ve found it, carefully remove the cap and check the coolant level. If it’s low, it’s time to refill. Make sure to use the recommended type of coolant for your specific vehicle, as using the wrong coolant can cause damage.
Slowly pour the coolant into the reservoir, being careful not to spill any on the engine or other components. Once the coolant reaches the “Full” mark on the reservoir, replace the cap and you’re done. It’s important to note that refilling the coolant is just one part of a comprehensive car maintenance routine.
Regularly checking and replacing coolant, along with other fluids and filters, can help keep your car running smoothly and prevent costly repairs down the line. So don’t neglect your cooling system – take the time to refill the coolant and keep your engine running cool.
Step 4: Checking for leaks
Once you have completed flushing the coolant system, the next step is to check for any leaks. This is an important step as leaks can cause the coolant to escape and result in overheating of your engine. To check for leaks, start by visually inspecting the entire system.
Look for any signs of coolant dripping or pooling underneath the vehicle. Additionally, check all the connections and hoses for any signs of wear or damage. If you don’t see any visible leaks, you can perform a pressure test on the system.
This involves using a pressure tester to apply pressure to the system and checking for any drops in pressure over time. If you notice a drop in pressure, it is likely that there is a leak somewhere in the system. In this case, you will need to locate and repair the leak before refilling the coolant.
Remember, a properly functioning coolant system is essential for keeping your engine cool and preventing any damage, so it’s important to thoroughly check for any leaks before completing the flushing process.
Inspecting hoses and connections
When it comes to inspecting hoses and connections in your car, it’s important to check for leaks. Leaks can lead to a loss of fluids, which can cause damage to your vehicle’s engine and other components. To begin, visually inspect the hoses and connections for any visible signs of leaks, such as wet spots, drips, or puddles of fluid.
Pay close attention to areas where hoses connect to the engine or other parts, as these are common areas for leaks to occur. Additionally, feel the hoses and connections to check for any soft or bulging spots, which could indicate a leak. If you notice any leaks or abnormalities, it’s crucial to address them promptly to prevent further damage to your car.
Regularly inspecting hoses and connections for leaks can help ensure the longevity and performance of your vehicle.
Pressurizing the system
When it comes to pressurizing the system in a plumbing project, it’s important to check for any leaks before moving forward. This step is crucial for ensuring that the system is working properly and that there are no potential issues that could arise later on. To check for leaks, you can utilize a few different methods.
One option is to use a pressure gauge to monitor the pressure in the system and observe if it drops over time. Another method is to visually inspect all of the connections and joints in the system for any signs of leakage, such as drips or water puddles. Additionally, you can use a soapy water solution to spray on the connections and look for any bubbles that would indicate a leak.
By taking the time to thoroughly check for leaks at this stage, you can prevent more significant issues in the future and ensure that your plumbing system functions properly.
Step 5: Final checks and maintenance
Now that you’ve completed the steps of flushing the coolant system, there are a few final checks and maintenance tasks to complete. First, double-check all the connections and make sure they are tight and secure. It’s also important to inspect the coolant hoses for any signs of leaks or damage.
If you notice any issues, replace the hoses as needed. Next, refill the coolant system with the appropriate type and amount of coolant. Be sure to follow the manufacturer’s recommendations for the specific coolant for your vehicle.
Once the system is refilled, start the engine and let it run for a few minutes to check for any leaks or overheating. While the engine is running, turn on the heater to ensure that hot coolant is circulating through the entire system. Check the temperature gauge and make sure it is at the normal operating level.
If the engine starts to overheat or the temperature gauge goes above the normal range, turn off the engine immediately and check for any cooling system issues. Lastly, it’s a good idea to keep an eye on the coolant level in the following days and weeks. If you notice the level dropping significantly, it could indicate a leak in the system that needs to be addressed.
Regular maintenance of the coolant system, including flushes and inspections, will help keep your engine running smoothly and prevent any costly repairs down the line. So don’t forget to schedule regular checks and follow the manufacturer’s recommended maintenance schedule for your vehicle.
Checking the coolant level
checking the coolant level. Now that you’ve done all the main checks and maintenance for your car, it’s time to focus on the final details. One important aspect to consider is the coolant level.
Coolant, also known as antifreeze, is responsible for regulating the temperature of your engine, preventing it from overheating and causing serious damage. To check the coolant level, locate the coolant reservoir, which is usually a plastic tank near the radiator. The reservoir will have markings indicating the minimum and maximum levels.
Make sure the engine is cool before attempting to open the reservoir, as the hot coolant can cause burns. Once you’re ready, remove the cap and check the coolant level. It should be between the minimum and maximum marks.
If the coolant level is low, you’ll need to top it up. Using the appropriate coolant for your car (check the owner’s manual or ask a professional if you’re unsure), slowly pour coolant into the reservoir until it reaches the maximum mark. Be careful not to overfill, as this can lead to leaks and other issues.
After topping up the coolant, replace the cap securely. Then, start the engine and let it run for a few minutes to allow the coolant to circulate. Check again for any leaks or fluctuations in the coolant level.
If everything looks good, you’re all set! Checking the coolant level is an important part of car maintenance that shouldn’t be overlooked. By ensuring that your engine has enough coolant, you can prevent overheating and potential damage. Take the time to check and top up the coolant regularly, and you’ll have peace of mind knowing that your car is running smoothly.
Monitoring the temperature
In order to ensure accurate temperature control in your greenhouse, it is important to regularly monitor the temperature. This includes regularly checking the thermostat and making any necessary adjustments. It’s also important to monitor the temperature throughout the day, as fluctuations can occur.
One way to do this is to use a digital thermometer that displays the current temperature and records highs and lows. This can help you identify any patterns or trends in temperature changes. Additionally, it’s important to check the greenhouse for any drafts or leaks that may be affecting temperature control.
These can be fixed by sealing any gaps or cracks with weatherstripping or caulking. By consistently monitoring the temperature and making any necessary adjustments, you can ensure that your plants are growing in the optimal climate for their needs.
Are you aware of the important role your coolant system plays in keeping your vehicle running smoothly? Your coolant system is responsible for regulating the temperature of your engine, preventing it from overheating and potentially causing serious damage. Just like any other system in your vehicle, it requires regular maintenance to ensure optimal performance. Imagine your coolant system as the equivalent of a body’s circulatory system.
It circulates coolant throughout the engine, absorbing heat and carrying it to the radiator where it is cooled down. Without proper maintenance, this system can become clogged with debris, leading to reduced efficiency and potential breakdowns. So how can you keep your coolant system in top shape? Regularly flushing and replacing your coolant is essential.
Over time, coolant can become contaminated with rust, sediment, and other debris, which can hinder its ability to effectively regulate engine temperatures. By flushing out the old coolant and replacing it with fresh, clean coolant, you can help prevent damage to your engine and maintain optimal performance. Additionally, it is important to check for any leaks in your coolant system.
Even minor leaks can lead to a loss of coolant, causing your engine to overheat. Keeping an eye out for signs of a leak, such as puddles or drops of coolant underneath your vehicle, can help you catch and repair any issues before they become major problems. Regularly inspecting your hoses and belts is also crucial in maintaining your coolant system.
Over time, hoses and belts can become cracked or worn, leading to leaks or inadequate circulation of coolant. By checking for signs of wear and replacing these components as needed, you can ensure that your coolant system is functioning properly. In conclusion, by taking the time to properly maintain your coolant system, you can avoid costly repairs and keep your vehicle running smoothly.
Flushing and replacing coolant, checking for leaks, and inspecting hoses and belts are all important steps in keeping your coolant system in top shape. By treating your coolant system with care, you’ll be rewarded with a reliable and efficient vehicle.
Conclusion
So there you have it, the perfectly refreshing and revitalizing guide to flushing your coolant system! Just like a spa treatment for your car, this process ensures that your engine stays cool, calm, and collected. Remember, it’s not just about keeping things from boiling over – it’s about giving your vehicle the TLC it deserves. So next time your coolant starts feeling a little hot under the hood, don’t sweat it! Just follow these easy steps and you’ll be back on the road, feeling cooler than a cucumber wearing shades.
Happy flushing!”
FAQs
What is the purpose of flushing the coolant system?
Flushing the coolant system helps remove old and contaminated coolant, as well as any debris or sediment that may have accumulated over time. This helps maintain the optimal performance and longevity of the cooling system.
How often should the coolant system be flushed?
It is generally recommended to flush the coolant system every 2-5 years, depending on the manufacturer’s recommendations and the type of coolant used. However, it is important to consult your vehicle’s owner manual for specific guidelines.
How can I tell if my coolant system needs to be flushed?
Signs that your coolant system may need to be flushed include rusty or discolored coolant, engine overheating, coolant leaks, or a strong odor of coolant inside the vehicle. Additionally, if you haven’t flushed the system in a long time, it may be a good idea to do so preventatively.
Can I flush the coolant system myself, or should I take it to a professional?
While it is possible to flush the coolant system yourself, it is recommended to take it to a professional, especially if you’re not familiar with the process. Cooling systems can be complex, and mistakes during flushing could lead to further damage or improper coolant levels.
What is the general process for flushing a coolant system?
The process for flushing a coolant system typically involves draining the old coolant, removing any debris or sediment, cleaning the radiator and other components, and then refilling the system with fresh coolant.
Do I need any special tools to flush a coolant system?
While specialized tools are not usually required, you may need basic tools such as a wrench or pliers to remove certain components. Additionally, a coolant flush kit, which includes a flush solution, can make the process easier.
Is there a specific type of coolant I should use after flushing the system?
It is important to use the coolant recommended by your vehicle manufacturer. This ensures that the coolant is compatible with your vehicle’s cooling system and provides the necessary protection against freezing, overheating, and corrosion.