
Are you experiencing engine overheating or poor performance in your vehicle? One of the possible culprits could be a faulty or contaminated engine coolant. Over time, coolant can become contaminated with dirt, rust, and other impurities, reducing its effectiveness in maintaining proper engine temperature. That’s where flushing your engine coolant comes in.
Flushing your engine coolant is like giving your engine a refreshing shower. Just as you would clean yourself to remove dirt and sweat, your engine needs a clean coolant to function optimally. By flushing the coolant, you are essentially removing the old, contaminated coolant and replacing it with fresh, clean coolant.
But why is coolant so important? The engine coolant, also known as antifreeze, plays a crucial role in regulating the temperature of your engine. It helps prevent overheating by dissipating the excess heat generated during combustion. Additionally, it also protects your engine from freezing in cold temperatures.
Over time, the coolant can lose its effectiveness due to the accumulation of debris and contaminants. This can lead to a decrease in cooling efficiency, resulting in engine problems such as overheating, loss of power, and even engine damage. To flush your engine coolant, you will need a few tools and supplies, including a drain pan, new coolant, a flushing agent, and a funnel.
The process involves draining the old coolant from the radiator, flushing the system with a cleaning agent, refilling the radiator with new coolant, and bleeding any air pockets from the system. Flushing your engine coolant is a relatively simple procedure that can be done at home with a little bit of time and effort. By regularly maintaining your coolant system, you can ensure that your engine stays cool and performs at its best.
So, if you’re experiencing issues with your engine’s temperature or performance, it may be time to give your engine coolant a much-needed refresh.
Table of Contents
Introduction
Are you noticing that your engine is overheating more frequently? It might be time to flush your engine coolant. Flushing your engine coolant is an important part of regular car maintenance, and it’s not as complicated as it might sound. Over time, engine coolant can become contaminated with dirt, debris, and rust, which can lead to overheating and engine damage.
Flushing the coolant is a way of cleaning out the old coolant and replacing it with fresh, clean coolant. It’s like giving your car’s engine a refreshing drink of water. So, grab your tools and let’s get started on how to flush your engine coolant!
What is engine coolant and why is it important?
engine coolant, important, overheating, vehicle, system, excess heat, temperature, efficiency, preventing, freezing, corrosion, maintenance, cooling system, radiator, water pump, radiator hoses, engine block, lubrication, seals and gaskets, engine parts, antifreeze, water, mixture, boiling point, freezing point, protection, seasons, winter, summer. Introduction: Engine coolant, also known as antifreeze, is a vital component of a vehicle’s cooling system. Its main purpose is to regulate the temperature of the engine and prevent overheating.
Without coolant, the engine would reach extremely high temperatures, causing damage and potential failure. This is why it is crucial to understand the importance of engine coolant and to regularly maintain and monitor its levels in your vehicle. In this article, we will explore why engine coolant is so important and how it contributes to the overall efficiency and longevity of your vehicle.
So, let’s dive in and learn more about this essential fluid.
Reasons to flush your engine coolant
flush engine coolant, reasons to flush engine coolant
Tools and Materials
If you’re looking to keep your engine running smoothly, one crucial maintenance task you should consider is flushing your engine coolant. Over time, coolant can become contaminated with rust, debris, and other impurities that can hinder its ability to effectively regulate your engine’s temperature. Flushing the coolant involves draining the old coolant, flushing the system with clean water, and then refilling it with fresh coolant.
To complete this task, you’ll need a few tools and materials. Firstly, you’ll need a socket wrench or a set of pliers to remove the drain plug from the radiator. You’ll also need a drain pan or bucket to catch the old coolant.
Additionally, you’ll need a hose and access to clean water to flush the system. To refill the coolant, you’ll need a funnel and the appropriate type of coolant specified by your vehicle’s manufacturer. By following the proper procedure and using the right tools and materials, you can ensure that your engine coolant is clean and functioning optimally, helping to prolong the life of your engine.
List of tools needed
When it comes to tackling any DIY project, having the right tools and materials at hand can make all the difference. Before you begin your project, it’s crucial to have a list of tools needed so that you can gather everything together beforehand. Whether you’re undertaking a small repair job or a larger construction project, having the right tools will save you time and frustration in the long run.
Some essential tools that you may need include a hammer, screwdriver set, pliers, level, measuring tape, utility knife, power drill, and various wrenches. It’s also important to have safety equipment such as gloves, goggles, and a dust mask to protect yourself. Additionally, consider any specialized tools that may be required for your specific project, such as a saw, paintbrushes, or a ladder.
By having a comprehensive list of tools needed, you can ensure that you have everything you need to tackle your DIY project with confidence.
List of materials needed
In order to successfully complete a DIY project, it is essential to have the right tools and materials at hand. Here is a list of essential items that you will need for most common DIY projects: Screwdriver set: A set of screwdrivers with different sizes and types of heads is a must-have for any DIY enthusiast.
Whether you need to tighten screws or assemble furniture, a screwdriver set will always come in handy. Hammer: A good quality hammer is a versatile tool that can be used for a variety of tasks such as driving nails, removing nails, or even light demolition work.
Make sure to choose a hammer with a comfortable grip and a sturdy head. Measuring tape: Accurate measurements are crucial for any DIY project.
A measuring tape will help you ensure that your cuts and alignments are precise. Power drill: A power drill is a versatile tool that can be used for drilling holes, driving screws, or even sanding.
Invest in a good quality drill with a range of drill bits and screwdriver attachments. Level: A level is an essential tool for ensuring that your project is straight and level.
It can be used for hanging pictures, installing shelves, or even assembling furniture. Safety gear: Safety should always be a top priority when embarking on a DIY project.
Step-by-Step Guide
Are you noticing that your engine is running hot and your coolant levels are low? It may be time to flush your engine coolant. Flushing your engine coolant is an important maintenance task that should be done regularly to keep your engine running smoothly. In this step-by-step guide, we will walk you through the process of flushing your engine coolant so you can do it yourself and save money on expensive repairs.
So, grab your tools and let’s get started on this DIY project!
Step 1: Prepare your car
“Step 1: Prepare your car” Before embarking on any road trip, it is essential to prepare your car to ensure a smooth and safe journey. Start by checking the tires for proper inflation and tread depth. This will not only improve handling and fuel efficiency but also reduce the risk of a tire blowout.
Don’t forget to check your spare tire as well. Next, inspect the fluids in your car. This includes engine oil, coolant, transmission fluid, and brake fluid.
Make sure they are topped up to the recommended levels and that there are no leaks. Healthy fluids are crucial for the optimal functioning of your vehicle. It’s also a good idea to check your car’s battery.
Ensure the connections are clean and tight, and the battery is charged. The last thing you want is a dead battery in the middle of nowhere. Don’t forget to check your lights, including headlights, brake lights, and turn signals.
These are not only important for your safety but also for the safety of other drivers on the road. Replace any faulty bulbs before your trip. Lastly, make sure you have all the necessary emergency supplies in your car.
This includes a first aid kit, flashlight, blankets, and a roadside emergency kit. You never know what unforeseen circumstances you may encounter on your journey, so it’s better to be prepared. By following these steps and ensuring your car is in top shape, you’ll reduce the risk of breakdowns and increase your peace of mind on your road trip.
Step 2: Locate the radiator and drain plug
In order to flush your radiator correctly, you first need to locate the radiator and its drain plug. This might seem a bit daunting, but I’ll walk you through it step by step. The radiator is usually located at the front of your car, behind the grille.
It’s designed to help cool down the engine by dispersing heat generated during the combustion process. Once you’ve identified the radiator, look for the drain plug. This is a small valve located on the bottom of the radiator.
Its purpose is to allow you to drain the coolant from the radiator when needed. Make sure you have a container ready to catch the coolant as it drains out. Now that you know where the radiator and drain plug are, you’re ready to move on to the next step in flushing your radiator.
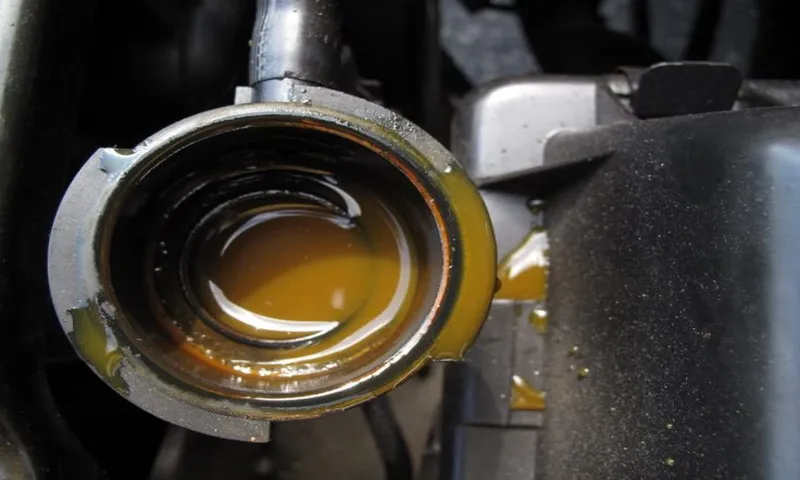
Step 3: Draining the coolant
Draining the coolant is an essential step when it comes to maintaining your vehicle’s cooling system. Over time, the coolant can become contaminated with dirt, debris, and rust, which can affect its ability to absorb and dissipate heat. Additionally, old coolant can lose its effectiveness in preventing corrosion and freezing.
Draining the coolant allows you to remove any impurities and replace it with fresh coolant, ensuring optimal performance and longevity for your engine. To begin draining the coolant, it’s important to ensure that the engine is cool. Working with hot coolant can be dangerous, and you could risk burning yourself.
Once the engine is cool, locate the drain plug on the radiator. This plug is usually located at the bottom or side of the radiator and may require a wrench to loosen it. Have a container ready to catch the coolant as it drains from the radiator.
The coolant will flow out steadily, so make sure the container is placed in a position where it can collect all the fluid. Once the coolant has drained completely, replace the drain plug and tighten it securely. Next, locate the drain plug on the engine block.
This plug allows any remaining coolant in the engine to be drained. Again, have a container ready to catch the coolant that comes out. Loosen the drain plug and allow the coolant to drain completely.
Now that the old coolant has been drained, it’s time to flush the cooling system. This involves using a flush solution to remove any remaining impurities and debris. Follow the manufacturer’s instructions on the flush solution and ensure that you flush out all the old coolant from the radiator and engine.
Step 4: Flushing the system
flushing the system, car maintenance, cooling system, radiator, coolant, engine, overheating, debris, contaminants Step 4 in properly maintaining your car’s cooling system is flushing the system. Flushing your car’s cooling system is crucial for keeping your engine from overheating and preventing any potential damage. Over time, debris and contaminants can build up in the radiator and coolant, which can hinder the system’s ability to cool the engine.
By flushing the system, you remove these impurities and ensure that the coolant can flow freely throughout the engine, keeping it at the optimal temperature. It’s like giving your car’s cooling system a refreshing cleanse, allowing it to function efficiently and effectively. So don’t neglect this important step in car maintenance and keep your engine running smoothly.
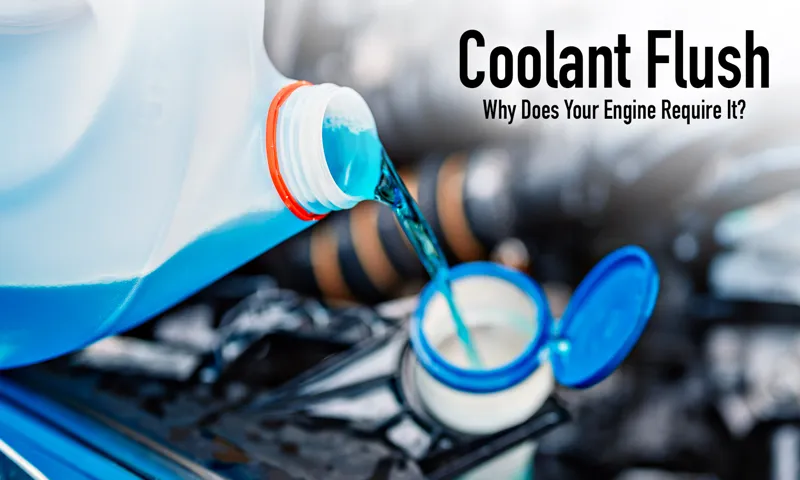
Step 5: Refilling with new coolant
“Step 5: Refilling with new coolant” Now that you’ve successfully drained the old coolant from your vehicle, it’s time to refill it with fresh coolant. This step is crucial for maintaining the proper temperature of your engine and preventing it from overheating. Here’s a step-by-step guide to help you through the process.
First, make sure you have the right coolant for your specific vehicle. Different cars require different types of coolant, so consult your owner’s manual or ask a professional if you’re unsure. Once you have the right coolant, locate the coolant reservoir under the hood of your car.
It’s usually a plastic tank marked with high and low levels. Next, take off the cap of the coolant reservoir and pour the fresh coolant into it. Be sure to pour slowly and steadily to avoid spills.
As you pour, keep an eye on the level inside the reservoir. You want to fill it up to the recommended level, but be careful not to overfill it. If you do accidentally add too much coolant, simply remove some with a siphon or a turkey baster.
After you’ve filled the coolant reservoir to the correct level, replace the cap tightly. Double-check that it’s secure to prevent any leaks. It’s critical to have a properly sealed coolant reservoir to maintain the engine’s temperature and prevent any coolant loss.
Once you’ve refilled the coolant, start your engine and let it run for a few minutes while monitoring the temperature gauge. Keep an eye out for any signs of overheating, such as smoke or steam coming from the engine. If everything appears normal, you’ve successfully refilled your coolant.
Step 6: Bleeding the system
bleeding the system, hydraulic system, release air bubbles, remove any trapped air, ensure optimal performance. In the final step of the process, it’s important to bleed the hydraulic system to ensure optimal performance. Bleeding the system means releasing any air bubbles that may be trapped within the system.
This step is crucial because air bubbles can cause a loss of pressure and affect the overall performance of the system. To bleed the system, you will need to locate the highest point in the hydraulic system, which is typically the reservoir or the highest point in the system. Once you’ve identified the highest point, you’ll need to open the bleed valve or release any air screws that may be present.
By opening these valves, you will allow any air bubbles to escape from the system. It’s important to have a container or a rag handy to catch any fluid that may come out during this process. To bleed the system effectively, you will need to pump the hydraulic system multiple times to ensure that all the air bubbles are released.
This can be done by operating the system or using a manual pump to pressurize the system. As you pump the system, you should notice any air bubbles escaping from the bleed valve or air screws. Once you no longer see any air bubbles, you can close the bleed valve or tighten the air screws to prevent any air from entering the system.
At this point, the hydraulic system should be free of any air bubbles and ready for use. Bleeding the hydraulic system is a crucial step in ensuring its optimal performance. By releasing any air bubbles, you can prevent a loss of pressure and ensure that the system operates smoothly.
So, don’t skip this important step when maintaining or repairing your hydraulic system.
Step 7: Checking for leaks
“leak detection methods” Checking for leaks is a crucial step in any plumbing project. After you have installed new pipes or repaired existing ones, it’s important to make sure that everything is watertight. One of the most common ways to check for leaks is by conducting a visual inspection.
Look for any signs of water or moisture around the joints and connections. Pay close attention to areas that might be prone to leaks, such as bends or corners. Another method is to use a leak detection device, such as a water meter or pressure gauge.
These tools can help you identify any irregularities in water flow or pressure, which could indicate a leak. Additionally, you can perform a dye test by adding a colored dye into the system. If the dye appears in areas where it shouldn’t, it’s a clear sign of a leak.
Remember, even a small leak can cause significant damage over time, so it’s essential to thoroughly check for any potential leaks and address them promptly.
Tips and Precautions
If you’re looking to flush your engine coolant, there are a few tips and precautions you should keep in mind. First and foremost, it’s important to make sure that your engine is cool before starting the flushing process. Hot coolant can cause severe burns, so it’s best to wait until the engine has cooled down completely.
Additionally, you should always wear protective gloves and eyewear to avoid any potential accidents or injuries. One important tip is to locate the radiator drain plug before you begin. This plug is usually located at the bottom of the radiator and is used to drain the old coolant.
It’s essential to have a proper container to catch the draining coolant, as it can be toxic to the environment. Once you have located the drain plug, it’s time to open it and let the old coolant drain out completely. It’s important to note that some vehicles may have multiple drain plugs, so make sure to double-check your vehicle’s manual for the exact locations.
After the coolant has drained out, it’s time to flush the system. This can be done by using a specialized coolant flush kit that is available at most automotive stores. The kit usually includes a cleaning chemical and instructions on how to use it.
It’s important to follow the instructions carefully to ensure a thorough flush. Once the system has been flushed, it’s time to refill it with fresh coolant. Make sure to use the recommended type and mixture of coolant for your vehicle.
It’s also important to properly dispose of the old coolant in an environmentally friendly manner. In conclusion, flushing your engine coolant is an important maintenance task that should be done regularly to keep your engine running smoothly. By following these tips and precautions, you can ensure a safe and effective coolant flush.
Protective measures
protective measures, tips and precautions, COVID-19 In order to protect ourselves and others from the spread of COVID-19, it is important to take certain protective measures. One of the most important tips is to regularly wash our hands with soap and water for at least 20 seconds. This simple act can help remove any potential germs or viruses that may be clinging to our hands.
Additionally, we should avoid touching our faces, particularly our eyes, nose, and mouth, as these are entry points for the virus. Maintaining proper hygiene extends beyond hand washing – we should also regularly clean and disinfect commonly touched surfaces, such as doorknobs and light switches. Another important precaution is to practice social distancing, which means keeping a safe distance of at least six feet from others.
This helps to minimize the risk of coming into contact with someone who may be carrying the virus. Wearing a mask in public places is also highly recommended, as it can help prevent the spread of droplets that may contain the virus. Lastly, it is crucial to stay informed and follow the guidelines and recommendations from health authorities.
By taking these protective measures, we can do our part to help reduce the transmission of COVID-19 and keep ourselves and our communities safe.
Choosing the right coolant
coolant, choosing the right coolant, tips and precautions Choosing the right coolant for your vehicle is crucial to ensure optimal performance and to prevent any potential damage. Here are some tips and precautions to consider when selecting a coolant. First and foremost, it’s important to check your vehicle’s owner’s manual for the recommended coolant type.
Different vehicles may require different types of coolant, such as ethylene glycol-based coolants or propylene glycol-based coolants. Using the wrong coolant can lead to reduced cooling efficiency and potential damage to your engine. Another factor to consider is the coolant’s performance characteristics.
You’ll want to choose a coolant that has excellent heat transfer properties to keep your engine running at the right temperature. Additionally, look for a coolant that has good anti-corrosion properties to protect against rust and scale buildup in your cooling system. It’s also worth considering the coolant’s compatibility with other materials in your cooling system.
Some coolants may not be suitable for use with certain gaskets, seals, or hoses. Check the coolant manufacturer’s recommendations to ensure compatibility and avoid any potential damage. When using coolant, be sure to mix it with the appropriate amount of distilled water as instructed by the manufacturer.
Using straight coolant or tap water can lead to issues such as freezing or boiling coolant, reduced cooling efficiency, and potential damage to your engine. Lastly, remember to flush and replace your coolant at the recommended intervals. Over time, coolant can become contaminated with debris, rust, and other contaminants, which can negatively affect its performance.
Regular maintenance and replacement of coolant will help keep your cooling system in top shape and prevent any potential issues down the line. In conclusion, choosing the right coolant for your vehicle is essential for optimal performance and longevity. By considering factors such as coolant type, performance characteristics, compatibility, proper mixing, and regular maintenance, you can ensure that your cooling system functions properly and keeps your engine cool.
Seeking professional help
seeking professional help, therapy, mental health treatment, counseling services, psychotherapy. Blog: When it comes to seeking professional help for mental health issues, it’s important to know that you are not alone. Many people go through challenging times and find it helpful to seek therapy or counseling services.
But how do you know when it’s time to seek professional help and what should you consider before making that decision? One important factor to consider is the persistence and intensity of your symptoms. If you have been experiencing distressing thoughts or feelings that are affecting your daily life, relationships, or overall well-being for a significant period of time, it may be time to seek help. It’s also crucial to seek professional help if your symptoms are preventing you from functioning at your best or if they are causing you significant distress.
Another consideration is whether your current coping mechanisms are effective. If you have tried various self-help strategies, such as talking to friends or practicing self-care, but still find yourself struggling, it may be beneficial to seek professional assistance. A therapist or counselor can offer you a fresh perspective and provide you with evidence-based techniques to help you navigate your challenges.
It’s important to remember that therapy is not a magic cure, but rather a safe and supportive space where you can explore your thoughts, emotions, and behaviors. A qualified therapist can help you develop healthier coping mechanisms, gain insights into underlying issues, and make positive changes in your life. When seeking professional help, it’s important to do your research and find a therapist or counselor who specializes in your specific concerns.
Look for someone who has experience in treating individuals with similar issues and who uses evidence-based approaches. It’s also important to feel comfortable and connected with your therapist, as the therapeutic relationship is a crucial factor in the effectiveness of treatment. Taking the step to seek professional help is a brave and empowering decision.
Remember, you don’t have to face your challenges alone. Therapy or counseling can provide you with the support and tools you need to navigate through difficult times and improve your overall mental health and well-being.
Conclusion
So there you have it, folks! Flushing your engine coolant is like giving your car’s circulatory system a fresh, invigorating spa treatment. It’s like taking your engine on a luxurious vacation, where all the old, tired coolant gets replaced with a rejuvenating elixir that keeps everything running smoothly. Just think of it as a hot date for your car, where the old coolant is shown the door and a new one takes its place.
So go ahead, show your engine some love and give it the coolant flush it deserves. Trust me, your car will be eternally grateful and your mechanic might just give you a standing ovation. Cheers to a well-cooled and perfectly maintained ride!”
FAQs
What does it mean to flush your engine coolant?
Flushing your engine coolant refers to the process of removing the old coolant from your vehicle’s cooling system and replacing it with fresh coolant.
How often should you flush your engine coolant?
It is recommended to flush your engine coolant every 30,000 to 60,000 miles or every 2 to 5 years, depending on your vehicle’s make and model.
What are the signs that your engine coolant needs to be flushed?
Signs that your engine coolant needs to be flushed include overheating, coolant leaks, a strong odor, discolored coolant, or a coolant warning light on your dashboard.
Can I flush my engine coolant myself or should I take it to a mechanic?
You can flush your engine coolant yourself if you have the necessary tools and experience. However, if you’re unsure or uncomfortable, it’s best to take it to a mechanic.
What are the steps to flush your engine coolant?
The steps to flush your engine coolant typically include draining the old coolant, flushing the system with water, refilling with new coolant, and bleeding the air from the system.
Do I need any special tools to flush my engine coolant?
Depending on your vehicle, you may need a socket set, pliers, a drain pan, a funnel, and a coolant flush kit.
What type of coolant should I use when flushing my engine coolant?
It is important to use the recommended type of coolant for your specific vehicle, which is usually specified in the owner’s manual or on the coolant reservoir cap.