
Are you wondering how to remove coolant from your car’s reservoir? Well, look no further because we’ve got you covered! Whether you’re experiencing an overheating issue or simply need to replace the coolant, it’s essential to know how to remove the old coolant from the reservoir properly. Think of the coolant reservoir as a mini fridge for your car’s engine. It keeps the engine cool and prevents it from overheating, just like a fridge keeps your food cool.
Over time, the coolant can become dirty or contaminated, which can reduce its effectiveness in cooling the engine. That’s why it’s crucial to remove the old coolant and replace it with fresh coolant regularly. Removing coolant from the reservoir may seem like a daunting task, but it’s actually relatively simple.
Before you begin, make sure the engine is cool to avoid any burns or injuries. First, locate the coolant reservoir, which is typically a translucent plastic tank with a cap labeled “coolant.” Open the cap and inspect the coolant level.
If it’s near the maximum mark, you may not need to remove the coolant entirely. However, if it’s below the minimum mark or looks dirty, it’s time for a change. To remove the coolant, you’ll need a few tools and materials, such as a pair of pliers or a wrench to loosen clamps, a drain pan or bucket to catch the old coolant, and new coolant for replacement.
Start by placing the drain pan or bucket underneath the radiator drain plug. Open the plug using the pliers or wrench and allow the old coolant to drain fully. Be sure to dispose of the coolant properly, as it’s toxic and harmful to the environment.
Next, move on to the coolant reservoir. Depending on your vehicle’s make and model, you may need to disconnect hoses or remove clamps to access the reservoir. Refer to your car’s manual or consult a professional if necessary.
Table of Contents
- 1 Introduction
- 2 Step 1: Park the vehicle on a flat surface
- 3 Step 2: Allow the engine to cool down
- 4 Step 3: Locate the coolant reservoir
- 5 Step 4: Remove the reservoir cap
- 6 Step 5: Drain the coolant from the reservoir
- 7 Step 6: Clean the reservoir
- 8 Step 7: Refill the reservoir with fresh coolant
- 9 Step 8: Check for leaks
- 10 Conclusion
- 11 FAQs
Introduction
Today, I’m going to show you how to get coolant out of your reservoir. If you’re experiencing issues with your vehicle overheating or if you need to replace the coolant, removing the old coolant from the reservoir is an important step. First, let’s start by finding the coolant reservoir.
It’s usually a translucent plastic reservoir located near the radiator. Once you’ve located it, you’ll need to ensure that your engine is cool before proceeding. It’s crucial to never open the coolant reservoir cap when the engine is hot, as it can lead to serious burns.
Next, you’ll want to place a container or a drain pan underneath the reservoir to catch the coolant as it drains. Then, carefully open the cap of the reservoir and slowly pour the coolant into the drain pan. It’s essential to dispose of coolant properly, as it is toxic and harmful to the environment.
You can bring it to a local waste disposal facility or check if there are any organizations near you that accept used coolant. After you’ve emptied the reservoir, double-check for any remaining coolant and clean the reservoir using a mixture of water and mild detergent. Rinse it thoroughly and let it dry completely before adding new coolant.
And that’s it! By following these steps, you’ll be able to safely remove the coolant from your reservoir and replace it with fresh coolant.
Why it is important to remove coolant from the reservoir
coolant, remove, reservoir
Safety precautions
Safety precautions Introduction: When it comes to ensuring our own safety and the safety of those around us, taking the necessary precautions is of utmost importance. Whether it is in our daily activities or in specific situations such as emergencies or hazardous environments, being prepared and aware can make a world of difference. By following safety protocols and guidelines, we can minimize the risks and protect ourselves and others from harm.
In this blog section, we will explore various safety precautions that we can implement in different scenarios, from home safety to workplace safety and more. So let’s dive in and learn how to stay safe and secure in our everyday lives.
Step 1: Park the vehicle on a flat surface
When it comes to getting coolant out of the reservoir, there are a few steps you’ll want to follow to ensure it’s done correctly and safely. Step one is to park your vehicle on a flat surface. This is important because it will help prevent any accidental spills or leaks while you’re working with the coolant.
By parking on a flat surface, you’ll also have better access to the reservoir and can more easily remove the coolant. Once you’ve parked your vehicle, you can move on to the next steps in the process.
Why parking on a flat surface is important
When it comes to parking your vehicle, finding a flat surface might not seem like a big deal. However, it is actually incredibly important for a few reasons. Firstly, parking on a flat surface ensures stability.
When a vehicle is parked on an incline or decline, it can put unnecessary stress on the tires and suspension system. This can lead to premature wear and tear, as well as potential damage to the vehicle. Secondly, parking on a flat surface allows for easier loading and unloading of passengers and cargo.
Imagine trying to open a car door when you’re parked on a steep hill – it’s not exactly the most convenient scenario. Finally, parking on a flat surface is also essential for safety. When a vehicle is parked on an uneven surface, there is a greater risk of it rolling or tipping over.
This is not only dangerous for the vehicle itself, but also for nearby pedestrians and other vehicles. So, before you choose a parking spot, take a moment to find a flat surface. It will save you from potential headaches down the road.
Step 2: Allow the engine to cool down
So, you’ve noticed that your coolant level is too high in the reservoir and you’re wondering how to get it out. Well, don’t worry, it’s actually quite simple. The first step is to allow the engine to cool down.
This is important because working with a hot engine can be dangerous. So, pop open the hood and give it some time to cool down. You can even check the temperature gauge on the dashboard to see when it’s safe to proceed.
Once the engine is cool, you can move on to the next step of removing the excess coolant from the reservoir.
Why it is necessary to allow the engine to cool down
In order to keep your engine in peak condition, it is necessary to allow it to cool down after use. This step is often overlooked, but it plays a crucial role in preventing potential damage to your engine. When your engine is running, it generates a significant amount of heat.
By allowing it to cool down, you are giving it the chance to dissipate this excess heat and return to a safe operating temperature. Just like how you need to cool down after a strenuous workout, your engine needs time to cool down after being pushed to its limits. If you neglect to give your engine this cooling period, the heat can build up and cause various problems, such as warping of engine components or even engine failure.
So, be sure to give your engine the time it needs to cool down properly, and you’ll be rewarded with a longer-lasting, more reliable engine.
Step 3: Locate the coolant reservoir
Okay, so now that you’ve located the radiator, it’s time to find the coolant reservoir. This is where the extra coolant is stored and it is usually a translucent plastic tank that is connected to the radiator. It is very important to locate this reservoir correctly in order to remove the coolant properly.
Sometimes, the reservoir is located on the side of the engine bay, while in other vehicles, it may be located near the radiator. If you are unsure about where the reservoir is, you can refer to the owner’s manual for your specific vehicle or do a quick search online. Once you have located the reservoir, you are ready to move on to the next step in getting the coolant out.
Where to find the coolant reservoir in different vehicle models
coolant reservoir, vehicle models
Step 4: Remove the reservoir cap
So, you’ve realized that it’s time to get the coolant out of your reservoir. Well, the first step in this process is to remove the reservoir cap. Now, this might seem like a simple task, but it’s important to do it correctly to avoid any mishaps.
First, make sure that your engine has cooled down completely before attempting to remove the cap. Coolant can reach high temperatures, and you definitely don’t want to risk getting burned. Once you’re sure that everything is cool, locate the reservoir in your vehicle’s engine compartment.
It’s usually a translucent plastic container with a cap on top. Take a look at the cap and see if there are any markings indicating how to remove it. Some caps might have arrows or instructions printed on them, while others might simply twist off.
Follow the directions on the cap, if there are any, or twist the cap counterclockwise to remove it. Be gentle when removing the cap, as there might be pressure built up inside the reservoir. Stay safe and take your time with this step.
How to safely remove the reservoir cap
reservoir cap, safely remove Step 4 in the process of inspecting and maintaining your vehicle’s reservoir is removing the reservoir cap. It may seem like a simple step, but it’s important to do it correctly to avoid any mishaps or injuries. The reservoir cap is usually located on top of the reservoir, and it’s designed to keep the fluid inside and prevent any leakage.
Before removing the cap, it’s crucial to make sure the engine has cooled down completely. Hot engine parts can cause burns, so it’s best to wait for at least 30 minutes after turning off your vehicle. Once the engine is cool, you can carefully remove the cap by twisting it counterclockwise.
It may require some force, but be gentle not to damage the cap or the reservoir. If you encounter any resistance, stop and reassess the situation. Safety should always come first.
Once the cap is removed, don’t forget to check the condition of the seal and clean any debris that may have accumulated around the cap. This will ensure a proper seal when you put the cap back on. Safety is paramount when performing any maintenance tasks on your vehicle, so always take your time and be cautious.
Step 5: Drain the coolant from the reservoir
So, you’ve reached the point where you need to drain the coolant from your reservoir. No worries, it’s actually a pretty simple process. The first step is to locate the coolant reservoir in your vehicle.
It’s typically a translucent plastic container located near the radiator. Once you’ve found it, take a look at the bottom of the reservoir. You should see a drain plug or valve.
This is what you’ll use to drain the coolant. All you need to do is place a container or bucket underneath the drain plug, and then loosen it with a wrench or pliers. Be careful not to completely remove the plug just yet.
Slowly turn it counterclockwise until you start to see coolant flowing out. Once it’s drained, you can remove the plug completely and let the remaining coolant flow out. Remember to dispose of the coolant properly, as it is toxic and harmful to the environment if not handled correctly.
And just like that, you’ve successfully drained the coolant from your reservoir. Pretty easy, right?
Different methods to drain the coolant
coolant drain, coolant reservoir, draining coolant
Step 6: Clean the reservoir
So, you’ve drained the coolant from your car’s radiator and now you’re wondering how to get it out of the reservoir? Well, the reservoir is where the excess coolant goes when your engine heats up and the pressure increases. It’s important to clean the reservoir regularly to keep your cooling system functioning properly. To do this, you’ll need to locate the reservoir, which is typically a translucent plastic tank connected to the radiator.
Once you’ve found it, remove the cap and use a turkey baster or a siphon pump to suck out the coolant. Be careful not to spill any on the engine or yourself. Once the reservoir is empty, rinse it out with clean water and use a soft brush or cloth to wipe away any residue or buildup.
Then, simply refill the reservoir with the proper coolant mixture, and you’re good to go! By keeping your reservoir clean, you’ll help maintain the efficiency and longevity of your cooling system, saving you time and money in the long run.
Why cleaning the reservoir is important
Cleaning the reservoir of your appliance is a crucial step in maintaining its functionality and ensuring quality results. When using your appliance, like a coffee maker or a humidifier, the water that goes into the machine is stored in the reservoir. Over time, the reservoir can accumulate mineral deposits, bacteria, mold, and other contaminants that can affect the taste of your coffee or the air quality in your home.
By regularly cleaning the reservoir, you can remove these impurities and prevent any buildup from occurring. This will not only improve the taste and quality of your beverages but also prolong the lifespan of your appliance. Neglecting to clean the reservoir can lead to clogged filters, inefficient performance, and even potential health risks.
So, make sure to include cleaning the reservoir as part of your regular maintenance routine to keep your appliance in top-notch condition.
Step 7: Refill the reservoir with fresh coolant
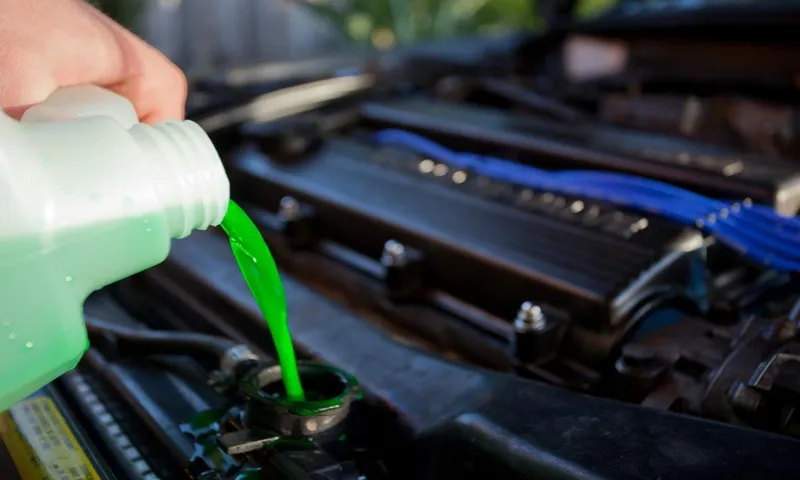
So, you’ve drained the coolant from your vehicle’s reservoir and now it’s time to refill it with fresh coolant. This step is crucial for maintaining the proper operating temperature of your engine and preventing it from overheating. To get started, make sure you have the correct type of coolant for your vehicle.
You can find this information in your owner’s manual or by checking with a knowledgeable mechanic. Once you have the right coolant, locate the reservoir, which is usually a translucent plastic tank near the radiator. Remove the cap and carefully pour in the coolant until it reaches the recommended level marked on the reservoir.
Avoid overfilling as this can result in overflow and a loss of coolant. After you’ve refilled the reservoir, secure the cap back in place and make sure it is tight. Finally, start your vehicle and let it run for a few minutes to allow the coolant to circulate throughout the system.
Keep an eye on the temperature gauge to ensure it remains within the normal range. And that’s it! You’ve successfully refilled the coolant reservoir and taken an important step in maintaining the health of your vehicle’s engine.
How to properly refill the reservoir
refill the reservoir, fresh coolant
Step 8: Check for leaks
So, you’ve noticed that your car’s coolant reservoir is full and you want to know how to get the coolant out. Well, the first thing you’ll want to do is let your engine cool down completely. It’s important to never open the coolant reservoir while the engine is hot, as the pressure could cause hot coolant to spray out and burn you.
Once the engine is cool, locate the coolant reservoir, which is usually a translucent plastic tank near the radiator. Look for any cracks or leaks in the reservoir, as this could be the cause of the coolant level being too high. If you do find any cracks or leaks, it’s important to have them repaired before proceeding.
Next, you’ll want to carefully remove the cap from the coolant reservoir. There may be a small arrow or line on the side of the reservoir indicating the maximum fill line. If the coolant level is above this line, it’s a good idea to remove some of the excess coolant.
You can do this by using a siphon or turkey baster to carefully remove the coolant and transfer it to a suitable container. Be sure to dispose of the coolant properly, as it is toxic and harmful to the environment. After you’ve removed the excess coolant, take a close look at the coolant reservoir and surrounding area for any signs of leaks.
If you notice any leaks, it’s important to have them repaired as soon as possible. Checking for leaks is an important step in ensuring the proper functioning of your vehicle’s cooling system. By regularly inspecting your coolant reservoir and addressing any issues, you can help maintain the performance and longevity of your car.
How to inspect for coolant leaks
coolant leaks, inspect, step 8, check, leaks
Conclusion
So, there you have it – the foolproof guide to getting coolant out of your reservoir. I hope you found this information as refreshing as a cold glass of lemonade on a hot summer day. Remember, dealing with coolant can be a bit like navigating a maze, but with the right knowledge and a little bit of charm, you’ll be able to conquer any coolant conundrum that comes your way.
So, go forth my fellow DIYers and cool off those engines like the smooth, efficient operators that you are. Happy coolant extracting!”
Summary of the coolant removal process
coolant removal process, check for leaks Once you have successfully drained the coolant from your vehicle, it is important to check for any leaks before moving on to the next step. Leaks can occur due to a variety of reasons, such as loose or damaged fittings, cracked hoses, or a faulty radiator. To check for leaks, start by visually inspecting all the coolant hoses, connections, and the radiator itself.
Look for any signs of coolant dripping or pooling, as well as any visible cracks or damage. Next, you can use a pressure tester to check for leaks. The pressure tester will pressurize the cooling system, allowing you to see if there is any decrease in pressure indicating a leak.
Simply attach the pressure tester to the radiator cap opening and pump it up to the recommended pressure. If you notice a drop in pressure, it is a clear indication that there is a leak somewhere in the system. In this case, you will need to locate and repair the leak before continuing with the coolant removal process.
Checking for leaks is a crucial step to ensure the successful completion of the coolant removal process and prevent any potential damage to your vehicle’s cooling system.
FAQs
Why is it important to remove coolant from the reservoir?
It is important to remove coolant from the reservoir to prevent contamination and maintain the proper level of coolant in the cooling system.
How often should the coolant be drained from the reservoir?
The coolant should be drained from the reservoir at regular intervals as recommended by the vehicle manufacturer or during routine maintenance.
What tools are needed to remove coolant from the reservoir?
To remove coolant from the reservoir, you may need a pair of pliers or a wrench to loosen and remove the reservoir cap, a drain pan to collect the coolant, and possibly a siphoning tool or a vacuum pump.
Can I remove coolant from the reservoir while the engine is hot?
It is generally not recommended to remove coolant from the reservoir while the engine is hot as the coolant can be under pressure and cause burns. It is best to let the engine cool down before removing the coolant.
How do I safely remove coolant from the reservoir?
To safely remove coolant from the reservoir, start by ensuring the engine is cool. Then, open the hood, locate the coolant reservoir, and carefully remove the cap. Use a drain pan to collect the coolant as you slowly pour it out of the reservoir.
What should I do with the coolant after draining it from the reservoir?
It is important to dispose of coolant properly as it is toxic and harmful to the environment. Check local regulations for proper disposal methods, which may include taking it to a recycling facility or a designated hazardous waste collection site.
What should I do after removing the coolant from the reservoir?
After removing the coolant from the reservoir, it is recommended to inspect the reservoir for any signs of damage or contamination. If necessary, clean the reservoir before refilling it with fresh coolant. Make sure to follow the vehicle manufacturer’s guidelines for coolant type and proper refill procedures.