
Maintaining your trailer’s wheel bearings is crucial to ensuring a safe and smooth ride. As a trailer owner, you need to know the right way to grease a trailer wheel bearing. Learning how to do this procedure can save you money and time.
Plus, it will help you avoid accidents caused by ungreased or poorly greased bearings. Greasing a trailer wheel bearing might seem overwhelming for first-timers. But don’t worry, it’s a simple process that you can accomplish in minutes with the right tools and knowledge.
So, let’s dive in and learn how to grease your trailer’s wheel bearings like a pro!
Table of Contents
Supplies Needed
If you’re planning on servicing your trailer’s wheel bearings, there are a few essential supplies you’ll need to ensure the job goes smoothly. First and foremost, you’ll need grease – plenty of it! You’ll also require a bearing packer, which is a handy tool that simplifies the process of loading fresh grease into your bearings. Other necessary supplies include a pair of nitrile gloves (to protect your hands), a few clean rags (for wiping away excess grease), and a jack stand (to lift the trailer and remove the wheel).
Remember, safety should always be your top priority when working on your trailer, so make sure you have all the appropriate tools and equipment before beginning. With the right approach and the right supplies, you’ll be able to grease your trailer’s wheel bearings like a seasoned pro!
Grease gun
When it comes to using a grease gun, there are a few supplies that you will need to ensure that you can use it effectively. First and foremost, you will need grease. It’s important to choose a grease that is appropriate for the job at hand, as different types of grease will have different properties and viscosities.
You may also need to consider the temperature range that the grease can withstand, as well as its compatibility with the materials that you will be working with. Secondly, you will need a grease gun. There are different types of grease guns available, so it’s important to choose one that is suitable for the task at hand.
For example, you might need a pistol-grip grease gun if you are working in a tight space, or a lever-action grease gun if you need to apply grease quickly and easily. Finally, you will need a clean cloth or rag to wipe away any excess grease that may have accumulated during the application process. With these supplies on hand, you’ll be able to use your grease gun to keep your machinery and equipment running smoothly and efficiently.
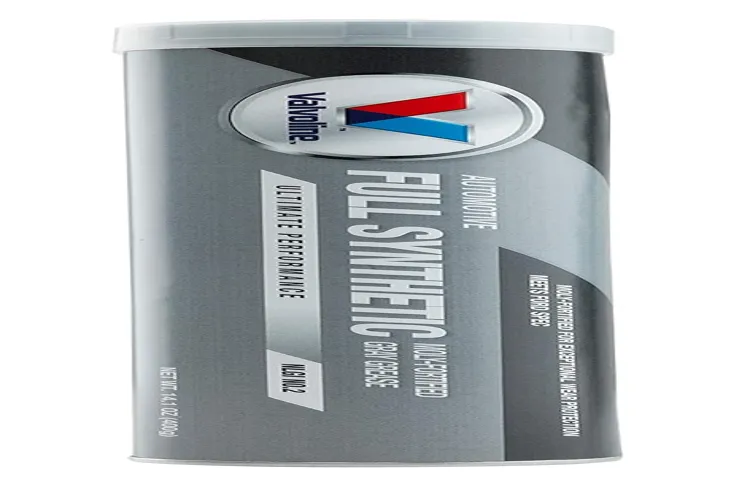
Grease
When it comes to making your own grease, there are a few basic supplies that you’ll need. The first thing to consider is the type of grease you want to make. Different applications require different types of grease, so it’s important to choose the right formulation for your needs.
Once you’ve decided on the type of grease you want to make, you’ll need to gather a few basic ingredients. One of the most important supplies is the base oil, which will provide the lubricating properties of the grease. Common base oils include mineral oil, vegetable oil, and animal fat.
You’ll also need a thickening agent, such as clay or calcium carbonate, to give the grease its characteristic texture. Finally, you’ll need to add some type of additive, such as rust inhibitors or friction reducers, to enhance the performance of the grease. By gathering these basic supplies, you’ll be well on your way to making your own high-quality grease that will meet the demands of your specific application.
Rags
When it comes to making rags, there are a few essential supplies you’ll need to get started. The first thing you’ll need is a good pair of scissors that can easily cut through fabric. Next, you’ll need to gather some old clothing or linens that you no longer need or want.
These will be your raw materials for making the rags. Be sure to sort through your fabric and select pieces that are in good condition and free from holes or stains. Once you have your materials, you’ll need a place to cut and sort them.
A large, flat surface is best, such as a cutting table or kitchen island. Finally, you’ll need a container or bin to store your newly-made rags. Some people use plastic tubs, while others prefer woven baskets or fabric bags.
Whatever you choose, make sure it’s large enough to hold all of your rags and can be easily accessed when you need them. With these supplies in hand, you’ll be well on your way to making your own rags for cleaning, crafting, or any other purpose you can imagine.
New cotter pin
When it comes to replacing a cotter pin, there are a few supplies you’ll need to have on hand before you can get started. First and foremost, you’ll need the replacement cotter pin itself. Make sure you have the correct size and type for your particular application.
You’ll also need a pair of pliers to help you remove the old pin and install the new one. Some people find it helpful to have a small hammer on hand as well, in case the pin is particularly stubborn. Finally, you may want to have a small amount of lubricant or grease to apply to the pin and help it slide into place more easily.
By having all of these supplies on hand, you’ll be ready to replace your cotter pin quickly and easily, ensuring that your equipment stays safe and secure. So whether you’re working on a piece of machinery or fixing up your bicycle, make sure you have these supplies ready to go whenever you need them.
Preparing the Trailer
If you want your trailer to perform at its best, you need to take care of your wheel bearings. Wheel bearings are essential to your trailer’s function, and you need to grease them regularly. First, you should determine what type of bearings your trailer has, as there are different ways to grease them.
You will also need a few tools, including a grease gun and grease. Once you have everything you need, you can start by removing the wheels and cleaning the bearings with a solvent. Next, apply a small amount of grease to the bearings using a grease gun, taking care not to over-grease.
Lastly, replace the bearings, seal them, and put the wheels back on. By regularly greasing your trailer’s wheel bearings, you can extend the life of your trailer and prevent expensive repairs down the line. Keeping up with this maintenance task isn’t difficult, but it can make a significant difference in the long run.
Jack up the trailer
When it comes to preparing your trailer for its next adventure, one of the first things you’ll need to do is jack it up. Jacking up your trailer serves two purposes: it allows you to safely inspect and maintain the underside of the trailer, and it enables you to hook the trailer up to your towing vehicle. But before you start jacking, there are a few things you should keep in mind to ensure a safe and successful process.
First, make sure you have a high-quality jack that can support the weight of your trailer. If your jack is flimsy, you run the risk of it collapsing under the weight of your trailer, causing damage or injury. Once you have a sturdy jack, position it beneath the trailer’s frame, near the wheel you want to lift.
Next, make sure the trailer is level and the wheel you intend to lift is firmly secured in place with a wheel chock. Then, slowly crank the jack handle until the trailer is lifted high enough off the ground to accomplish your task. Remember to double-check that the trailer is stable and secure before starting any work.
Jacking up your trailer may seem like a simple task, but taking these precautions can go a long way towards ensuring a safe and successful outcome. Remember to always use a high-quality jack, make sure the trailer is level and secure, and take your time throughout the process. With these tips in mind, you’ll be well on your way to a successful trailer preparation.
Remove the hub cap and wheel
When preparing your trailer for a long haul journey, it’s essential to ensure that your vehicle is in tip-top condition before hitting the road. One of the crucial steps in preparing a trailer for a journey is removing the hubcap and wheel. This usually involves using a lug wrench to unscrew the nuts that hold the wheel in place and then carefully sliding the wheel off the hub.
It’s essential to check the wheel and the tire for any signs of damage or wear and tear and replace them if necessary. This process will ensure your trailer is safe to drive and prevent any unexpected problems on the road. So, the next time you’re preparing your trailer for a journey, remember to remove the hubcap and wheel, give them a thorough check, and replace them if needed, ensuring a smooth and safe trip.
Remove the cotter pin and castle nut
When preparing a trailer for towing, it is important to remove the cotter pin and castle nut from the wheel hub. These parts are crucial for keeping the wheel in place, so it’s important to take care when removing them. Start by lifting the trailer onto a stable surface and securing it with chocks or wedges.
Then, using a wrench or pliers, gently remove the cotter pin by pulling it straight out. Next, use the appropriate size socket wrench to remove the castle nut. This may take some effort, as it is often quite tight.
Once the nut is removed, carefully pull the hub assembly off the axle spindle. It’s always a good idea to inspect the hub and bearings for any damage or wear while you have it off. With the cotter pin and castle nut removed, you can easily service the bearings or replace worn parts as needed.
Overall, taking the time to properly prepare your trailer for towing by removing the cotter pin and castle nut will ensure a safe and trouble-free journey.
Remove the hub and bearing
To prepare your trailer for maintenance or repair, you may need to remove the hub and bearing. This process involves several steps, but it’s essential for accessing inner components for inspection and replacement. First, you need to jack up the trailer and secure it on jack stands.
Then, remove the lug nuts and wheel to expose the hub and bearing assembly. Next, loosen and remove the castle nut and washer and carefully slide the hub and bearing assembly off the spindle. Finally, inspect the components for damage and wear, and replace any damaged parts before reassembling everything in the reverse order.
By removing the hub and bearing, you can maintain your trailer’s safety and performance, reducing the likelihood of accidents and breakdowns. So, make sure to take the time to prepare your trailer properly before tackling any maintenance tasks.
Cleaning the Bearing
If you want to properly grease a trailer wheel bearing, one of the first steps is cleaning the bearing. This ensures that the new grease can fully penetrate the bearings and provide the necessary lubrication. To clean the bearing, first remove it from the hub and wipe away any visible grime or debris with a rag.
Then, you can use a solvent or brake cleaner to remove any remaining particles. Be sure to completely dry the bearing before applying the new grease. By taking the time to properly clean the bearing, you can prolong its lifespan and ensure a smooth ride on your trailer.
Clean bearing with solvent
When it comes to maintaining your bearings, a good clean every now and then can go a long way in keeping them in top condition. To start the cleaning process, you’ll want to use a solvent to remove any dirt and debris that may have accumulated over time. The type of solvent you use will depend on the specific type of bearing you are working with, as well as the environment it is exposed to.
It’s important to follow the manufacturer’s instructions when choosing a solvent, as using the wrong one could potentially damage your bearing. Once you have your solvent, soak the bearing in it for a few minutes to allow it to break down any buildup. Then, use a clean cloth or brush to carefully remove any remaining dirt or debris.
Be sure to handle the bearing gently to avoid causing any damage. With a bit of patience and care, you can easily clean your bearings and keep them running smoothly for longer.
Inspect bearing for damage
When inspecting a bearing for damage, it’s important to start with a clean slate. Dirt and debris can make it difficult to properly assess the condition of the bearing, and can even cause further damage. Begin by wiping down the bearing with a soft, clean cloth, avoiding any harsh chemicals or solvents that could leave behind residue.
Once the bearing is clean, use a magnifying glass to look for any signs of wear and tear, such as pitting or cracks. If you notice any damage, it’s important to replace the bearing rather than attempting to repair it. By taking the time to clean the bearing before inspection, you can ensure that you’re making an accurate assessment of its condition and taking the necessary steps to keep your equipment running smoothly.
Dry bearing with compressed air
If you’re looking to clean a dry bearing, using compressed air is a great technique to consider. Compressed air is highly effective in removing dirt, debris, and other contaminants that can build up inside a bearing over time. To clean your bearing in this way, you’ll need to first remove it from whatever machinery it’s a part of and make sure it’s completely dry.
Next, hold the bearing with one hand and use the compressed air to blow out any debris or dust that may have accumulated inside. Be sure to angle the compressed air carefully so that you don’t accidentally damage any parts of the bearing. Keep going until you’re satisfied that the bearing is completely clean and free of any contaminants.
Once you’ve finished, you can reattach the bearing and reinsert it back into your machine. With this simple technique, you should be able to extend the life of your bearings and avoid any potential issues down the line.
Greasing the Bearing
If you’re planning on going on a road trip soon, it’s essential to know how to grease a trailer wheel bearing. This is a crucial part of maintaining your trailer and ensuring a smooth journey. First, remove the wheel and hub assembly and clean all the old grease with a clean cloth.
Next, inspect the assembly for any signs of damage or wear and tear, like corrosion or cracks in the bearing race. Then, apply a high-quality wheel bearing grease using a bearing packer or your hand until you see the grease oozing out of both sides of the bearing. Don’t forget to reassemble and tighten everything properly.
By continuing to lubricate your bearings regularly, you can enhance their lifespan and prevent costly repairs down the road.
Apply grease to palm and insert into bearing
When it comes to greasing bearings, it’s important to make sure you do it right. One of the key steps in this process is applying grease to your palm and then inserting your hand into the bearing. While this might sound a bit intimidating at first, it’s actually a pretty simple process that can make all the difference when it comes to keeping your machinery running smoothly.
The first thing you’ll want to do is make sure you’re using the right type of grease for your particular application. Once you’ve got the right grease picked out, you can apply it to your palm and then carefully insert your hand into the bearing. As you do this, make sure you’re moving your hand around to ensure that the grease is being evenly distributed throughout the bearing.
When you’re finished, you’ll want to make sure you wipe off any excess grease and dispose of it properly. With the right approach, greasing your bearings can be a breeze. So why not give it a try and see for yourself?
Fill all gaps with grease
Greasing the bearing is an essential step in maintaining machinery and ensuring its longevity. It involves filling all the gaps with grease to prevent friction and reduce heat, which can damage and wear out the bearing. Grease acts as a lubricant, coating the surfaces and allowing them to slide against each other smoothly.
It also keeps out moisture and contaminants that can corrode the bearing and cause it to fail. To grease the bearing, you’ll need to first remove the old grease and clean the surfaces with a solvent. Then, apply the new grease using a grease gun or other lubrication tool.
Make sure to choose the appropriate type of grease for your bearing, as there are different grades and formulations designed for specific applications. It’s also important to grease the bearing regularly, as recommended by the manufacturer, to maintain its efficiency and performance. By greasing the bearing properly, you can extend the lifespan of your equipment and save money on repairs and replacements in the long run.
Reinstall the hub and bearing
When it comes to reinstalling the hub and bearing, greasing the bearing is an essential step that should not be overlooked. Without proper lubrication, the bearing will be prone to wear and tear, as well as generate heat, which could cause it to fail prematurely. The first step is to ensure that the bearing surfaces are clean and free of any debris or old grease.
Once clean, apply a quality grease to the bearing surfaces, moving it around to ensure that it is distributed evenly. A good option for this is a high-temperature, synthetic lubricant, which offers superior protection against heat and wear. Once the bearing is greased, carefully install it back into the hub, being mindful of any seals or retainers that may need to be installed.
Tighten any bolts or nuts to the manufacturer-specified torque values and proceed with the rest of the installation process. By taking the time to properly grease the bearing, you can be sure that your hub assembly will function smoothly and reliably for miles to come.
Final Steps
Now that you’ve greased your trailer wheel bearings, there are a few final steps to ensure that everything is secure and working properly. Firstly, make sure to reinsert the cotter pin through the spindle nut, making sure it is properly seated. Then, bend the ends of the cotter pin down around the nut to keep it from coming loose.
Next, you’ll want to put the dust cap back on the hub by tapping it into place with a rubber mallet or hammer and a block of wood. Finally, give everything a quick check to make sure the wheel spins properly and there is no excess grease coming out of the hub. By following these final steps, you can ensure the safety of your trailer and have peace of mind on the road.
So go out, hit the road, and enjoy your trip knowing that you’ve properly maintained your trailer’s wheel bearings!
Torque the castle nut to manufacturer’s specification
After replacing or performing maintenance on your car’s wheel hub assembly, there are a few final steps you must take to ensure proper safety and functionality. One of the most important steps is to torque the castle nut to the manufacturer’s specification. The castle nut secures the wheel hub assembly to the axle, and if it’s loose, it can cause the wheel to wobble or even fall off while driving.
Torquing the castle nut involves applying the right amount of force to tighten it without over-tightening it. Over-tightening can cause damage to the bearings, while under-tightening can result in a loose assembly. It’s important to consult your car’s manual for the proper torque specifications since it varies between vehicles.
Once the castle nut is at the correct torque, you can install the wheel and tighten the lug nuts by hand using a torque wrench to prevent over-tightening. Remember, proper installation of a wheel hub assembly is crucial to ensure your safety while driving, so take your time and do it right.
Install new cotter pin
After adjusting your bike chain tension, it’s time to install a new cotter pin. This final step is easy and should only take a minute. First, locate the hole on the rear axle that lines up with the hole on the chain tensioner.
Then, slide the cotter pin through both holes and bend the ends over to secure it in place. This will prevent the rear axle from slipping and keep your chain tension consistent while riding. Remember to double-check that the cotter pin is secure before riding again.
Taking these small steps to maintain your bike can extend its lifespan and prevent future issues.
Reinstall the hub cap and wheel
After successfully fixing the flat tire, the final step is to reinstall the hub cap and wheel. This may seem like a simple task, but it is crucial to do it properly to ensure the safety of your vehicle. Start by lining up the holes on the hub cap with the studs on the wheel.
Once they are aligned, slide the hub cap back onto the wheel and press it firmly into place. Next, carefully line up the wheel with the lugs on the car and tighten them in a star pattern to evenly distribute the pressure. Use a torque wrench to make sure the lugs are tightened to the proper specification.
Finally, give the wheel a gentle wiggle to make sure it is secure. Congratulations, you have successfully changed your tire and can now confidently continue on your journey. Stay safe on the road!
Complete the other wheel
Now that you’ve successfully completed one wheel, it’s time to tackle the other and bring your project to fruition. The final steps in this process are crucial to ensuring the smooth operation and longevity of your creation. First and foremost, it’s essential to ensure that both wheels are identical in size, shape, and weight.
This balance guarantees that your vehicle will move smoothly and without unnecessary strain on any one wheel, extending the life of your invention. Then, it’s time to attach the second wheel, following the same steps as before carefully. Here, attention to detail and symmetry are key.
Ensure that the second wheel is affixed with the same amount of force and pressure as the first, ensuring balance. Finally, check the wheels’ alignment, ensuring they rotate smoothly and are straight with the axle. Any misalignment can lead to increased friction and decreased performance.
Take your time, double-check your work, and when you’re confident, it’s time to take your creation for a spin. With careful consideration and attention to detail, you’ll have a functioning vehicle in no time!
Conclusion
Congratulations! You now know how to grease a trailer wheel bearing like a pro, ensuring smooth and safe travels on the road. And always remember, just like relationships, regular maintenance and attention to detail can prevent major breakdowns and keep things running smoothly. So grab your grease gun, channel your inner mechanic, and get ready to ride off into the sunset with confidence!”
FAQs
Why is it important to grease a trailer wheel bearing?
Greasing a trailer wheel bearing is important to ensure proper lubrication, prevent excessive wear, and extend the lifespan of the bearings. Without proper grease, the bearings can overheat and fail, causing potentially dangerous situations on the road.
How often should you grease your trailer wheel bearings?
You should grease your trailer wheel bearings every 12 months or 12,000 miles, whichever comes first. It’s important to follow the manufacturer’s recommendations for your specific trailer, as some may require more or less frequent greasing.
What type of grease should I use for my trailer wheel bearings?
You should use a high-quality wheel bearing grease that is specifically designed for use in trailer bearings. Look for grease that is rated for high temperatures and has good water resistance.
Can I over-grease my trailer wheel bearings?
Yes, over-greasing your trailer wheel bearings can actually be detrimental to their performance. Too much grease can cause excess heat and pressure buildup, leading to premature wear and damage.
How do I know if my trailer wheel bearings need to be greased?
Signs that your trailer wheel bearings need to be greased include unusual noises from the wheel area, increased rolling resistance, and excessive heat buildup. It’s important to inspect your bearings regularly to catch any issues before they become serious.
Can I grease my trailer wheel bearings myself, or should I take it to a professional?
Depending on your level of experience and comfort with mechanical tasks, you may be able to grease your trailer wheel bearings yourself. However, if you are unsure or inexperienced, it may be best to take it to a professional for proper servicing.
What are the consequences of neglecting to grease my trailer wheel bearings?
Neglecting to grease your trailer wheel bearings can lead to a variety of issues, including premature wear and damage to the bearings, an increased risk of accidents due to bearing failure, and potentially costly repairs or replacements. It’s important to stay on top of your trailer’s maintenance to avoid these consequences.