
As a truck owner, you know that proper maintenance is essential for preserving your vehicle’s longevity and performance. One component you don’t want to overlook is the throwout bearing, which is responsible for disengaging the clutch when you shift gears. If your Peterbilt’s throwout bearing is not lubricated correctly, it could cause significant damage, leading to costly repairs and downtime.
But don’t worry, in this blog post, we’ll be sharing a step-by-step guide on how to grease your Peterbilt throwout bearing safely and efficiently. So, grab your tools and let’s dive in!
Table of Contents
Gathering Supplies
If you’re wondering how to grease your Peterbilt throwout bearing, the first step is gathering all the necessary supplies. You’ll want to make sure you have a good quality grease, a grease gun, rags, and a jack or lift to safely raise your truck. It’s important to select a high-quality grease that’s specifically designed for throwout bearings, as using the wrong type could cause undue wear and tear on the bearing and lead to expensive repairs down the line.
Once you have your supplies ready to go, you’re one step closer to properly maintaining your Peterbilt’s throwout bearing.
What you’ll need:
If you’re planning on starting a new project or hobby, one of the first things you’ll need to do is gather your supplies. This may sound like a simple task, but depending on the project, there could be a long list of items you’ll need. First, assess what you already have on hand.
Can you repurpose any items or use them in a different way? The next step is to research what materials you’ll need that you don’t already have. This may require a trip to the store or ordering online. It’s important to make a list and double-check it before making any purchases to ensure you don’t forget anything.
Don’t forget to consider any tools or equipment you’ll need as well, such as scissors or a sewing machine. Once you have everything gathered, you’ll be ready to dive into your project with confidence!
– Grease gun
Gathering the necessary supplies before carrying out any auto repair job is crucial, as it prevents frequent trips to the store and unnecessary delays. Among the essential items that should be included in your toolkit is a grease gun. This simple but useful tool is a must-have for any DIY mechanic looking to keep their vehicle’s moving parts well lubricated.
It’s designed to dispense grease, ensuring that components such as ball joints, tie rods, and driveshafts work smoothly. The grease gun works by pumping the grease into specific areas with high pressure, allowing for better performance and longevity of the vehicle. By ensuring that your toolkit includes a grease gun, you are already on track to a successful repair job.
It’s a small but essential tool that every DIY mechanic should have in their toolbox for a smooth and hassle-free auto maintenance experience.
– High-temperature grease
When it comes to maintaining high-temperature machinery, a key supply to have in your toolbox is high-temperature grease. This specialized lubricant is designed to withstand extreme heat, making it essential for use in ovens, kilns, and other hot equipment. But where do you start when gathering supplies? Firstly, it’s important to consider the type of equipment you’ll be working with and the level of heat it produces.
This will help you determine the best type of high-temperature grease to use. Next, look for reputable brands and suppliers to ensure you’re getting a quality product. It’s also important to read the label carefully to make sure the grease is compatible with your equipment and won’t cause any damage.
By taking these steps, you can gather all the supplies you need to keep your high-temperature machinery running smoothly.
Preparing Your Vehicle
If you’re wondering how to grease your Peterbilt throwout bearing, you’re in the right place. Preparing your vehicle for this task is crucial, and the first step is to ensure your truck is on a level surface. Next, secure your vehicle so that it can’t move around.
Once you’re sure your truck is in good order, it’s time to locate the zerk fitting on the throwout bearing. The zerk fitting is where the grease gun will attach, and this needs to be wiped clean with a rag. Then, attach the grease gun to the zerk fitting and pump the grease in.
You’ll know when the bearing is properly greased because you’ll see grease seep out of the bearing. Greasing your Peterbilt throwout bearing is an important maintenance task that will help to ensure your truck runs smoothly, and will save you money on costly repairs in the long run.
Step 1: Park on level ground
Before starting any maintenance on your vehicle, it’s important to ensure that it’s properly parked on level ground. This not only ensures your safety but also allows for more accurate measurements and adjustments when working under the car. Find a level area to park your vehicle, such as a driveway or a flat area on the side of the road.
Avoid parking on an incline or decline as it can lead to an unstable working environment, making it difficult to properly secure your vehicle with jack stands or ramps. Additionally, when your car is parked on uneven ground, it can be challenging to access certain areas that need to be inspected or worked on. By taking a few minutes to secure a level parking spot, you can save yourself time and frustration later on.
Remember, safety should always come first when working on your vehicle.
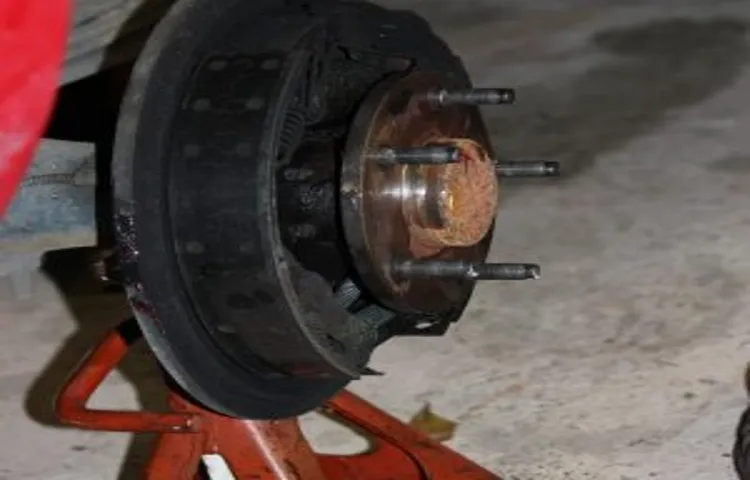
Step 2: Locate the throwout bearing
When preparing to replace the throwout bearing on your vehicle, the second step is to locate the bearing itself. This is an important step, as the throwout bearing is a key component of your vehicle’s clutch system, and replacing it requires careful attention to detail. Typically, the throwout bearing can be found near the transmission input shaft or the clutch fork, both of which are located on the underside of your vehicle.
You may need to consult your vehicle’s manual for specific instructions on locating the throwout bearing, as it can sometimes be hidden or difficult to access. Once you have located the bearing, you can move on to the next step in the process of replacing it. With some patience and persistence, you can have your vehicle’s clutch system running smoothly once again in no time.
Greasing the Bearings
If you’re looking for a way to grease your peterbilt throwout bearing, then you’ve come to the right place. First off, it’s important to note that the throwout bearing is a crucial component of your vehicle’s clutch system. Without it, you wouldn’t be able to engage or disengage the clutch, which means you wouldn’t be able to switch gears.
As for greasing the bearings, the process is relatively simple but requires a bit of know-how. Start by locating the throwout bearing and removing any debris or dirt from around it. Then, using a high-quality grease gun, apply a small amount of grease to the bearing’s bearing surface.
It’s best to do this in small increments, as you don’t want to over-grease the bearing, which can cause it to spin incorrectly. With a properly greased throwout bearing, your clutch system will run smoothly and last longer. So, take the time to properly grease your peterbilt throwout bearing – your vehicle will thank you for it!
Step 1: Clean the grease fitting
Greasing the bearings of your machinery is an essential task that helps prolong its lifespan. One of the essential steps in this process is cleaning the grease fitting. This fitting connects to the bearing surface and is responsible for delivering grease to lubricate the components.
A clogged grease fitting can lead to inadequate lubrication, resulting in increased friction and wear. Therefore, it is vital to clean the fitting regularly. To get started, wipe off any dirt or debris around the grease fitting before removing the dirt cap.
Then, use a wire brush or a rag to scrub the exterior to remove any grease or grime buildup. Once the fitting is cleaned, insert the grease gun nozzle and lubricate the bearings by injecting grease into the fitting. By following these steps, you will ensure that your machine’s bearings are adequately lubricated and reduce the risk of component failure.
Step 2: Insert grease gun nozzle
When it comes to greasing the bearings, there are several steps to follow to ensure proper maintenance and longevity of your equipment. Step two involves inserting the grease gun nozzle into the designated lubrication point. This step allows for the grease to be effectively delivered to the bearings, providing much-needed lubrication.
It is important to ensure that the nozzle is secure and properly inserted before continuing with the greasing process. Without a secure fit, the grease may not reach the bearings, and maintenance efforts will be in vain. By taking the time to properly insert the grease gun nozzle, you can rest assured that your equipment will perform at optimal levels and last longer.
Overall, greasing your bearings is an essential step in equipment maintenance and should not be overlooked.
Step 3: Pump grease into fitting
When it comes to maintaining your bearings, one of the most important things you can do is regularly grease them. To do this, you’ll need to use a grease gun and a zerk fitting. With the fitting in place, it’s time to pump grease into it.
This can sometimes be tricky, as you’ll need to make sure that you’re applying enough grease, but not too much. You want the grease to be able to flow through the bearing and provide adequate lubrication, but you don’t want it to overflow and cause damage or create a mess. To ensure that you’re applying the correct amount of grease, start by slowly pumping the trigger on the grease gun.
Keep a close eye on the bearing to make sure that it’s taking in the grease, and stop pumping once you see a small amount of grease coming out from the other side. This will help to ensure that your bearings are properly lubricated and can function at their best.
Step 4: Stop once grease is visible at bearing
Greasing the bearings of your vehicle is an important maintenance task that should never be neglected. Step 4 of this process involves knowing when to stop greasing. You need to stop greasing as soon as you notice any grease coming out of the bearings.
This can easily be seen through the grease fitting or the area around the bearing. Over-greasing the bearings can cause the excess grease to be pushed out the sides and onto other parts of your vehicle, making a mess. Additionally, too much grease can cause the seals to rupture, leading to damage and costly repairs.
By following this simple step, you’ll help to ensure your bearings are properly lubricated and functioning smoothly, while also reducing the risk of expensive repairs down the line. So, remember to look out for that visible grease and stop the greasing process once you see it!
Finishing Up
If you’re looking to grease your Peterbilt throwout bearing, there are a few steps to follow to ensure it’s done properly. First, locate the throwout bearing on your truck, which should be near the transmission. Then, remove the grease fitting on the bearing and clean it thoroughly to ensure no dirt or debris gets into the bearing.
Next, use a grease gun to apply a small amount of grease to the bearing, being careful not to over-grease it. Finally, replace the grease fitting and wipe away any excess grease. It’s important to regularly grease your throwout bearing to ensure it stays lubricated and functions properly, as a poorly lubricated bearing can cause significant damage to your truck’s transmission.
By following these steps, you can keep your Peterbilt running smoothly and proactively prevent any potential issues.
Step 1: Remove grease gun nozzle
When it comes to finishing up with your grease gun, the first step is to remove the nozzle. This may sound like a simple task, but it’s important to do it correctly to avoid any mess or waste. Start by properly cleaning the nozzle before you remove it from the grease gun.
This will not only make the process easier, but it will also prevent any leftover grease from getting onto your hands or surroundings. Then, loosen the nozzle by turning it counterclockwise until it’s loose enough to pull off. Be sure to hold onto the nozzle securely so it doesn’t fall and create a mess.
By taking the time to properly remove your grease gun nozzle, you can ensure that the next time you use your tool, it’s clean and efficient.
Step 2: Clean up any excess grease
After scraping off any visible debris from your kitchen range hood, the next step is to clean up any excess grease. This step is crucial as the grease can accumulate over time and become a fire hazard. Using a degreaser or a mixture of warm water and dish soap, wipe down the interior and exterior of the range hood with a clean cloth.
Pay special attention to the areas where grease tends to accumulate, such as the filters and the ventilation ducts. You can also use a toothbrush or a smaller brush to reach those hard-to-clean areas. Once you’ve cleaned up all the grease, rinse off the range hood with warm water and dry it thoroughly with a clean towel.
This final step will leave your range hood looking and smelling fresh, while also ensuring that it’s safe to use for your next cooking session. So, don’t forget to clean up any excess grease for a spotless and hazard-free kitchen!
Step 3: Test clutch operation
After completing the first two steps of replacing your clutch, it’s time to move on to the final section: testing the clutch operation. This part is essential to ensure that everything has been set up correctly and that your clutch is in good working condition. One way to do this is to start the engine and engage the gears.
If your car moves forward without any problems and the clutch doesn’t slip, then you’re good to go. Another way to check is to listen for any unusual noises during the clutch operation. If you hear any squealing or grinding, it could be a sign of a misaligned or damaged clutch.
In this case, you may need to take it apart again and fix the problem. Remember, testing the clutch operation is crucial to ensure your safety on the road and the longevity of your car. So, take your time and make sure everything is working smoothly before hitting the road again.
Conclusion
In conclusion, greasing your Peterbilt throwout bearing should be a breeze with these simple steps! Remember, just like any healthy relationship, a little bit of maintenance goes a long way. So don’t be afraid to get down and dirty with your trusty Peterbilt. Happy driving!”
FAQs
1. What is a throwout bearing in a Peterbilt truck and why does it need greasing? A: A throwout bearing is a component in the clutch assembly of a Peterbilt truck that helps in disengaging the clutch. It needs greasing to ensure smooth operation and prevent wear and tear. 2. How often should I grease my Peterbilt throwout bearing? A: It is recommended to grease the throwout bearing every 50,000 miles or as per the manufacturer’s recommendation. 3. What type of grease should I use for my Peterbilt throwout bearing? A: You should use a high-temperature, heavy-duty grease that is recommended by the manufacturer for your Peterbilt throwout bearing. 4. Can I grease my Peterbilt throwout bearing myself or should I take it to a professional mechanic? A: If you have experience in greasing and maintaining truck components, you can do it yourself. However, if you are unsure, it is better to take it to a professional mechanic. 5. What are the signs that my Peterbilt throwout bearing needs greasing? A: If you hear a grinding or squealing noise when operating the clutch pedal, or if the clutch feels stiff or unresponsive, it may be an indication that the throwout bearing needs greasing. 6. What happens if I don’t grease my Peterbilt throwout bearing? A: Over time, the throwout bearing may wear out faster and cause damage to other clutch components. It may also lead to difficult or jerky gear shifts and affect the overall performance of your truck. 7. Is it necessary to replace the throwout bearing along with the clutch assembly? A: It is recommended to replace the throwout bearing along with the clutch assembly to ensure optimal performance and prevent premature wear and tear.