
Have you noticed a squeaky noise coming from your clutch, or the pedal sticking to the floor? These are common symptoms of a worn-out throw out bearing, also known as a clutch release bearing. The throw out bearing is a small but essential component of your car’s transmission system, responsible for applying pressure to the clutch plates to disengage the clutch. Over time, it can wear out due to constant use and high internal temperatures, leading to a malfunction of the entire system.
But fear not, greasing your throw out bearing can help extend its life and keep your transmission running smoothly. In this step-by-step guide, we’ll show you how to grease your throw out bearing so you can get back on the road in no time.
Table of Contents
Introduction
Greasing a throw out bearing can be a daunting task, but it is essential to keep your vehicle running smoothly. The first step is to locate the throw out bearing, which is situated between the clutch and the engine. You’ll need to remove the transmission to access the bearing properly.
Once you have exposed the bearing, clean it with a rag and remove any old grease residue. It’s crucial to make sure the bearing is free from any debris or dirt as this can cause damage to the bearing. Next, apply a generous amount of grease to the bearing using a grease gun and make sure it’s evenly distributed.
It’s important not to overdo it with the grease as this could cause the bearing to become clogged or cause damage to the clutch. Once you have applied the grease, carefully replace the transmission and test the clutch to ensure it’s working correctly. By following these simple steps, you can effectively grease your throw out bearing and keep your vehicle running smoothly and efficiently.
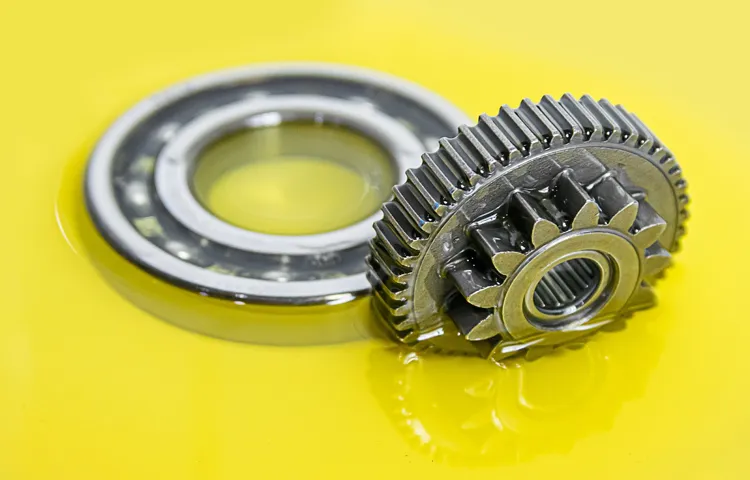
What is a Throw Out Bearing?
A throw out bearing, also known as a clutch release bearing, is a crucial component in the clutch system of a manual transmission vehicle. When the clutch pedal is pressed down, the throw out bearing presses against the clutch pressure plate, which disengages the clutch disc from the flywheel, allowing for a smooth gearshift. The throw out bearing works continuously whenever the clutch is used, meaning it is subject to wear and tear over time.
It is essential to ensure that the throw out bearing is in good condition, as a faulty bearing can result in difficult gear shifts or even transmission damage. Regular maintenance checks and prompt replacements can help prevent expensive repairs down the line.

Why Grease a Throw Out Bearing?
If you’ve ever had to replace a clutch, you may have come across the term “throw out bearing.” A throw out bearing, also known as a clutch release bearing, is an important component of a manual transmission system. It is responsible for disengaging the clutch from the engine when you depress the clutch pedal.
But why do you need to grease your throw out bearing? The answer is simple. Greasing your throw out bearing ensures that it moves smoothly, which reduces wear and tear and extends its lifespan. It also reduces the chances of overheating and damage to your transmission system, which can be costly to repair.
So, if you’re replacing your clutch, make sure to grease your throw out bearing properly to keep your vehicle running smoothly and efficiently.
Tools Needed
One of the essential parts of maintaining your vehicle is ensuring that the throw-out bearing is well-greased. The throw-out bearing, also known as a clutch release bearing, is responsible for engaging and disengaging the clutch. Without proper lubrication, this crucial component can wear out quickly, leading to increased friction, degraded performance, and even damage to other transmission parts.
To grease the throw-out bearing, you will need a few tools, namely a grease gun, a tub of high-quality grease, and a jack stand. To begin, locate the release lever and remove the bolts securing it in place. Next, remove the throw-out bearing, being careful not to damage it.
With the bearing removed, apply a small amount of grease to the inner and outer surfaces before reinstalling it. Use your grease gun to apply a liberal amount of grease to the bearing’s inner bore. Finally, reattach the clutch lever and test the clutch’s operation.
With these simple steps, your throw-out bearing will be well-greased and ready to perform reliably for miles to come.
Lithium Grease
When it comes to working with your tools, having the right lubricant can make all the difference. That’s where lithium grease comes in. But what kinds of tools need lithium grease? The answer is simple: any tools that move or rotate.
This includes things like car parts, bearings, hinges, and even bicycles. Lithium grease is a highly versatile lubricant that won’t break down under high pressure or extreme temperatures. It’s also waterproof, which means you don’t need to worry about it washing away in wet conditions.
Now, when it comes to using lithium grease, you don’t need a whole lot of special tools. In fact, all you really need is a clean rag or cloth to wipe away any existing lubricant or debris. You’ll also want to have some kind of applicator, whether that’s a small brush or a grease gun.
This will make it easy to apply the lithium grease precisely where you need it. Some people also like to wear gloves or use a disposable tool for this job, since lithium grease can be quite sticky and messy. Overall, using lithium grease is a simple but effective way to keep your tools running smoothly and protect them from wear and tear.
Just make sure you’re using the right kind of grease for the job, and follow the manufacturer’s recommendations for how much and how often to apply it. With a little bit of care and maintenance, your tools can last for years to come. So why wait? Grab your lithium grease and get to work!
Throw Out Bearing Tool
If you’re looking to replace the throw out bearing in your car, you’ll likely need a specialized tool to make the process easier and smoother. This tool, aptly named the throw out bearing tool, is a must-have for anyone looking to tackle this job. Don’t worry if you’ve never used one before – it’s fairly easy to use and can save you a lot of time and frustration.
To use the tool, you’ll need to insert it into the back of the crankshaft and slide it over the throw out bearing. From there, you can apply pressure to the tool, which will in turn push the bearing out. While it might seem like an unnecessary expense, investing in a throw out bearing tool can make the process of replacing your bearing much smoother and less stressful.
So if you’re in the market for one, be sure to look for a high-quality option to ensure the best possible results.
Mechanic Gloves
Mechanic Gloves/Tools Needed Thinking about using mechanic gloves for your upcoming project? One of the most important considerations when working with mechanic gloves is having the right tools to get the job done. A good starting point for any mechanic glove project is to have a solid understanding of the type of gloves you’re going to need. Depending on the nature of the project, you might require gloves that are heat-resistant or insulated.
Similarly, you might need special gloves that offer additional durability and grip. In addition to choosing the right gloves, you should also ensure that you’re well equipped with the other tools that you’ll need for your project. These might include pliers, screwdrivers, wrenches, or other equipment depending on the specific task at hand.
Lastly, take the time to practice using your mechanic gloves and any associated tools before you start your project in order to ensure that you’re comfortable and confident in their use. With the right tools and a little bit of practice, mechanic gloves can help protect your hands while you tackle your next big project.
Jack Stands
Jack stands are an essential tool in any automotive mechanic’s arsenal. They provide a stable and secure base for supporting a vehicle while working underneath it. To use jack stands, you will need a few tools to ensure that they are set up correctly and safely.
This includes a hydraulic jack, a wheel chock, and a torque wrench. The hydraulic jack is used to lift the vehicle off the ground, the wheel chock is used to prevent the vehicle from rolling while on the jack stands, and the torque wrench is used to tighten the bolts on the jack stands to secure the vehicle in place. It’s crucial to follow the manufacturer’s instructions when setting up jack stands and make sure that they are placed on a level, solid surface.
By using these tools and taking the necessary precautions, you can ensure that you are working on your car safely and securely, without risking injury or damage to the vehicle itself. Remember, safety first!
Step-by-Step Guide
Are you looking for a step-by-step guide on how to grease throw out bearing? Then you’ve come to the right place! First, you need to locate the throw out bearing in your vehicle’s transmission system. It’s usually mounted on the transmission’s input shaft, connected to the clutch fork via a bearing retainer or sleeve. Once you’ve located it, remove the retainer clips or snap ring to take the clutch fork off the throw out bearing.
Then, use a grease gun and an appropriate grease (check the owner’s manual) to inject the grease into the bearing until it oozes out from the opposite end. Finally, reattach the clutch fork, and snap the retainer clips back into place. It’s important to grease the throw out bearing regularly to avoid wear and tear, reduce noise and vibrations, and promote smoother gear shifting.
So, don’t hesitate to follow these simple steps and maintain your car’s performance and longevity.
Step 1: Locate the Throw Out Bearing
When it comes to replacing your throw out bearing, the first step is locating it. The throw out bearing can be found in your vehicle’s clutch assembly, typically connected to the clutch fork. It’s an essential component of your vehicle’s transmission system, responsible for disengaging the clutch as you shift gears.
Finding the throw out bearing may require some disassembly of your car’s transmission, depending on your vehicle’s make and model. You’ll need to consult your owner’s manual to determine the exact location of the throw out bearing. Once you’ve located it, you can begin the process of replacing it.
Remember, it’s essential to take your time and follow the correct procedures to ensure a successful throw out bearing replacement. With proper care and attention to detail, your vehicle’s transmission system will be running smoothly in no time!
Step 2: Remove the Throw Out Bearing
Now that we’ve removed the transmission, the next step in replacing the clutch is removing the throw out bearing. The throw out bearing, also known as a clutch release bearing, is responsible for disengaging the clutch by pressing against the pressure plate. Before removing it, we need to locate it, which is relatively easy in most vehicles.
It’s usually situated near the center of the clutch assembly, and if you’re unsure of its location, consult your vehicle’s manual to find the exact position. Once you’ve located it, carefully detach it from the clutch fork by removing the clips or bolts holding it in place. Be sure to take note of the position of the different components and how they fit together, as this will make re-assembly much easier later on.
With the throw out bearing removed, we’re one step closer to replacing the clutch and getting our vehicle running like new again.
Step 3: Clean the Throw Out Bearing
When it comes to replacing the throw-out bearing in your vehicle, it is essential to clean it thoroughly. This step is crucial in ensuring that the new throw-out bearing operates smoothly and doesn’t cause any issues in the future. To clean the throw-out bearing, start by using a rag or towel to wipe away any excess grease or debris.
Then, soak the bearing in a carburetor cleaner or brake cleaner solution for a few minutes to dissolve any remaining gunk. Finally, use compressed air to blow out any remaining grime and ensure that the bearing is entirely clean and ready for use. By taking the time to clean the throw-out bearing properly, you’ll avoid any potential issues down the road and ensure that your vehicle operates smoothly.
Step 4: Apply Lithium Grease
Now that you’ve cleaned and dried your bike chain, it’s time to apply some lithium grease. Lithium grease is a type of lubricant that is highly resistant to water and heat, making it perfect for bike chains. It will protect your chain from rusting and reduce friction between the chain and the gears.
To apply it, first, hold the can of lithium grease about six inches away from the chain. Then, gently squeeze the nozzle and move the can along the length of the chain. Make sure to cover the entire chain with the grease, but don’t apply too much, or it’ll attract dirt and debris.
Once you’ve finished applying the grease, turn the pedals to distribute it evenly. And that’s it! Your bike chain is now ready to hit the road again. Remember to apply the lithium grease regularly to keep your chain in tip-top shape.
Step 5: Reinstall the Throw Out Bearing
When it comes to reinstalling the throw out bearing, there are a few key things to keep in mind to ensure that everything goes smoothly. First, you’ll want to make sure that the bearing is properly lubricated so that it can move smoothly against the clutch fork. Additionally, you’ll want to take care to position the bearing correctly so that it sits flush against the fork and is properly aligned with the transmission input shaft.
Lastly, don’t forget to reinstall any retaining clips or snap rings that were removed during the disassembly process. With these tips in mind, you should be able to reinstall your throw out bearing with ease and get your vehicle back up and running smoothly.
Safety Precautions
If you’re looking to grease your throw out bearing, it’s important to take safety precautions before getting started. Make sure your vehicle is completely turned off and has had sufficient time to cool down before getting underneath it. Ensure that your car is securely lifted with jack stands and not solely supported by a hydraulic jack.
It’s also important to wear appropriate protective gear such as gloves and goggles to prevent injury. Once you’ve taken these precautions, it’s time to grease your throw out bearing. First, remove the old grease from the bearing using a solvent.
Then, apply a thin layer of high-temperature grease to the bearing by using your finger or a brush. Finally, carefully reinstall the bearing and double-check that it’s properly secured before lowering your car. By following these safety measures and greasing your throw out bearing properly, you can ensure that your car runs smoothly and safely.
Use Personal Protective Equipment (PPE)
Personal Protective Equipment (PPE) When it comes to staying safe at work, using personal protective equipment (PPE) should be at the top of your list. Whether you’re working in construction, healthcare, or any other field where hazardous materials or dangerous equipment are present, PPE is essential in protecting you from injury and illness. PPE can include items such as hard hats, safety goggles or glasses, gloves, respirators, and protective clothing.
By wearing the appropriate gear, you are not only protecting yourself but also those around you. It is important to ensure that the PPE you’re using is properly fitted and in good condition. PPE is not a substitute for safe work practices, but it is an important piece of the puzzle when it comes to preventing accidents and injuries.
Remember, wearing PPE is always better than the alternative – risking injury or illness. So make sure you use it every time you’re on the job.
Use Jack Stands to Secure the Vehicle
When it comes to working under a vehicle, safety should always be your top priority. Using jack stands to secure the vehicle is one of the most crucial safety precautions you should take. Jack stands provide a stable base for the car and prevent it from falling on you while you work.
To use jack stands properly, the first step is to raise the car with a jack. Then, place the stands under the manufacturer-recommended lift points on the vehicle’s frame and lock them in place. Once the stands are securely in place, lower the car onto them and give the vehicle a gentle shake to ensure it is stable.
Remember to never work under a vehicle that is only supported by a jack, as it can easily fail and cause serious injury. By using jack stands to secure the vehicle, you can work under it with confidence, knowing that you are taking the necessary safety precautions to protect yourself.
Follow Manufacturer’s Instructions
When it comes to using any product, it’s crucial to follow the manufacturer’s instructions to ensure everyone’s safety. The same goes for our appliances, tools, and other household items. Reading and understanding the instructions manual can prevent accidents and mishaps from happening.
It might seem like common sense, but many people tend to ignore or overlook the manual, assuming that they know how to operate the item. However, overlooking crucial details could lead to serious injuries, damage to the item, or worse, cause a fire or explosion. Therefore, it’s essential to take the time to study the manual carefully, understand how the product works, and follow all the safety precautions.
By doing so, you can avoid any potential hazards and enjoy the product’s full benefits without risking anyone’s life or property. Remember, safety always comes first, so don’t neglect the importance of following manufacturer’s instructions.
Conclusion
And there you have it folks, the secret to greasing your throw out bearing! It’s not rocket science, but it takes some finesse. Whether you’re a seasoned grease monkey or a newbie under the hood, this quick and easy step-by-step guide will have your throw out bearing running smoothly in no time. So go ahead and give it a try – and take pride in knowing that you’ve just learned something new and useful.
Who knows, you may even impress some of your gearhead friends with your newfound knowledge. Happy greasing!”
FAQs
What is a throw out bearing and what does it do?
A throw out bearing, also known as a clutch release bearing, is a component of the clutch system that presses against the clutch pressure plate to disengage the clutch. It spins on an axle and is responsible for allowing the clutch to engage and disengage smoothly.
How do I know if my throw out bearing needs to be greased?
Signs that your throw out bearing may need to be greased include a squeaking or grinding noise when the clutch pedal is pressed, difficulty shifting gears, or a “slipping” feeling when accelerating. If you suspect the throw out bearing is causing issues, it should be inspected and possibly greased or replaced.
Can I grease the throw out bearing myself, or do I need a professional?
It is possible to grease the throw out bearing yourself, but it can be a difficult and time-consuming process. In some cases, the clutch may need to be disassembled to access the throw out bearing. If you are not comfortable working on your own vehicle, it is best to have a professional mechanic handle the task.
What type of grease should I use on my throw out bearing?
It is important to use a high-quality, high-temperature grease specifically designed for use on clutch release bearings. Examples of appropriate greases include Red Line CV-2 grease or Valvoline SynPower Synthetic Grease.
How often should I grease my throw out bearing?
The frequency with which you should grease your throw out bearing depends on a number of factors, including driving style, mileage, and the condition of the bearing. It is generally recommended to have the bearing inspected and greased or replaced as part of standard clutch maintenance, which typically occurs every 50,000 to 100,000 miles.
What happens if I don’t grease my throw out bearing?
Without proper lubrication, the throw out bearing can wear out more quickly, leading to premature failure of the clutch system. This can result in difficulty shifting gears, a slipping clutch, and ultimately, a complete clutch failure.
Can I use WD-40 or other general-purpose lubricants on my throw out bearing?
No, it is important to use a high-quality, high-temperature grease specifically designed for use on clutch release bearings. General-purpose lubricants like WD-40 are not suitable for this application and can actually cause damage to the bearing.