
Welcome to our blog on “Introduction”! In today’s fast-paced digital world, making a great first impression is more important than ever. Whether you’re meeting someone for the first time, starting a new job, or writing an essay, the introduction sets the tone for what’s to come. It’s like the opening scene of a movie – it hooks the audience and leaves them wanting more.
So, how can you craft an introduction that captures attention and keeps your readers engaged? In this blog, we’ll explore various strategies and techniques to help you master the art of introductions. Whether you’re a student, a writer, or simply someone looking to improve your communication skills, this blog is for you! Ready to dive in and learn the secrets of a captivating introduction? Let’s get started!
Table of Contents
What is an RV awning?
Installing a new RV awning may seem like a daunting task, but with the right tools and a little bit of know-how, it can actually be quite simple. An RV awning is a retractable shade that attaches to the side of your motorhome or travel trailer. It provides a comfortable outdoor space to relax in the shade and protection from the elements.
There are several different types of RV awnings, including manual and automatic, and they come in various sizes to fit your specific needs. To install a new RV awning, start by measuring the space where you want to install it and purchasing an awning that will fit. Then, gather your tools and follow the manufacturer’s instructions for installation.
Typically, the process involves attaching the awning to the side of your RV using brackets or rails, and then extending it out and securing it in place. Once installed, you can enjoy the benefits of your new RV awning, whether it’s providing shade on a hot summer day or keeping you dry during a sudden rainstorm. So why wait? Upgrade your RV with a new awning and start enjoying the great outdoors in style and comfort.
Benefits of installing a new RV awning
If you’re an RV owner, you probably already know the importance of having a good awning on your vehicle. But did you know that installing a new RV awning can come with a range of benefits? One of the most obvious benefits is the added shade and protection it provides. Whether you’re enjoying a picnic or simply relaxing outside, having an awning can shield you from the sun’s rays and keep you cool on hot summer days.
Additionally, a new awning can help protect your RV from the elements, such as rain, wind, and even hail. By providing an extra layer of protection, it can help prolong the life of your vehicle and save you money in potential repairs. Furthermore, installing a new awning can enhance the overall appearance of your RV.
With a variety of colors, patterns, and styles available, you can choose one that complements your vehicle and adds a touch of personal style. So whether you’re looking for added shade, protection, or aesthetic appeal, installing a new RV awning is a smart decision that can enhance your outdoor experience.
Are you ready to tackle your next DIY project? Whether you’re a seasoned DIY enthusiast or just starting out, having the right tools and materials is essential to getting the job done right. From simple home repairs to complex woodworking projects, having the right tools and materials on hand can make all the difference in the final outcome. But with so many options available, it can be overwhelming to know exactly what you need.
In this blog post, we’ll explore the tools and materials that are essential for any DIY project. So grab your tool belt and let’s get started!
List of tools
If you’re looking to install a new RV awning, you’ll need a few tools to get the job done right. First, you’ll need a ladder or step stool to safely reach the top of your RV. Next, you’ll need a power drill with the appropriate attachments to remove any existing hardware and secure the new awning in place.
A measuring tape is essential for taking accurate measurements and ensuring the new awning fits properly. You may also need a socket wrench to loosen or tighten nuts and bolts. Additionally, a level will come in handy to make sure your awning is installed straight and level.
Finally, don’t forget to have some sealant on hand to keep out any rain or moisture. With these tools in your arsenal, you’ll be well-equipped to install a new RV awning and enjoy the shade and comfort it provides during your travels.
List of materials
If you’re looking to install a new RV awning, there are a few materials you’ll need to get started. First, you’ll need the awning fabric itself. This comes in a variety of colors and patterns, so you can choose one that matches your RV’s style.
You’ll also need the awning arms, which attach to the side of your RV and hold the fabric in place. These can usually be adjusted to provide different levels of shade and protection. Additionally, you’ll need the awning rails, which are attached to the side of your RV and serve as a track for the fabric to slide in and out of.
Lastly, you’ll need a hardware kit, which includes the screws, bolts, and other fasteners necessary to install the awning securely. With these materials on hand, you’ll be able to enjoy the comfort and convenience of a new RV awning in no time.
Are you ready to upgrade your RV with a new awning? Adding an awning can provide shade and protection from the elements, making outdoor activities more enjoyable during your camping trips. While the thought of installing a new awning may seem daunting, it doesn’t have to be. In this step-by-step guide, we’ll walk you through the process of installing a new RV awning, making it a breeze for even the most novice DIYers.
So grab your tools and let’s get started on transforming your outdoor space!
Remove the old awning
When it comes to installing a new RV awning, the first step is to remove the old one. This process may seem daunting, but with a little patience and the right tools, it can be done easily. Start by extending the awning fully and securing it in place.
Then, locate the awning rail, which is usually attached to the side of the RV. Use a screwdriver or wrench to loosen the screws holding the awning rail in place. Once the screws are loose, carefully slide the awning fabric out of the rail.
If the awning has a spring-loaded roller, make sure to secure it with a clamp or vice grip to prevent it from retracting unexpectedly. Once the fabric is removed, you can then begin removing the awning arms. These arms are typically held in place by brackets or bolts.
Using a wrench or socket set, loosen the bolts and carefully remove the arms from the RV. With the old awning fully removed, you are now ready to install your new RV awning and enjoy the benefits of a fresh and functional outdoor space. As always, be sure to consult the manufacturer’s instructions for specific guidelines and safety precautions.
Disconnect the power
When it comes to replacing an old awning, the first step is to disconnect the power. This is crucial for safety reasons as well as to avoid any damage to the electrical system. You don’t want to risk getting electrocuted or causing a short circuit by not disconnecting the power before starting the removal process.
Once you have turned off the power, you can proceed to remove the old awning. This involves carefully undoing any attachments, such as screws or bolts, and gently pulling the awning away from the wall or support structure. It’s important to be cautious and take your time to avoid damaging the awning or causing any injury.
By following these steps, you can ensure a smooth and safe removal process for your old awning.
Detach the fabric
In order to remove the old awning, the first step is to detach the fabric. This may seem like a daunting task, but with the right tools and a little bit of patience, it can be done. Start by locating the screws or brackets that are holding the fabric in place.
Use a screwdriver or wrench to remove these screws and carefully take out any brackets that are securing the fabric. Once all the screws and brackets are removed, gently pull the fabric away from the frame. Be sure to take your time and avoid any excessive force that could damage the fabric or the frame.
Detaching the fabric is an important step in the process of removing the old awning, as it allows you to access the frame and any other parts that may need to be removed or replaced.
Unscrew and remove the hardware
When it comes to replacing an old awning, the first step is to unscrew and remove the hardware. This may seem like a simple task, but it can actually be a bit more complicated than it appears. You’ll need a few tools, such as a screwdriver or drill, to help you in this process.
Start by carefully examining the awning and identifying all of the screws or bolts holding it in place. Once you’ve located these, begin to remove them one by one. It’s important to be gentle with this process, as you don’t want to strip any screws or damage the surrounding area.
Once all of the hardware has been removed, you can then proceed to removing the old awning itself. By taking the time to properly unscrew and remove the hardware, you’ll ensure that your new awning installation goes smoothly and without any hiccups.
Prepare the RV for the new awning
If you’re looking to install a new awning on your RV, you’re in luck! Adding a new awning can greatly enhance your RV experience by providing shade and protection from the elements. Before you begin the installation process, it’s important to properly prepare your RV. Start by thoroughly cleaning the area where the awning will be installed.
This will ensure that the awning adheres properly and is not damaged by dirt or debris. Next, measure the length of your RV and choose an awning that is the appropriate size. It’s always better to go slightly larger than smaller, as you can always trim the awning if needed.
Once you have the proper size awning, gather all the necessary tools and materials for the installation. This may include a drill, screws, and a tape measure. Finally, make sure you have a clear and level area to work in.
Installing a new awning on your RV can be a challenging but rewarding project. With proper preparation, you will be well on your way to enjoying the benefits of your new awning in no time.
Clean the area where the old awning was
Preparing your RV for a new awning involves several steps, one of which is cleaning the area where the old awning was. This step is crucial to ensure proper installation and seamless integration of the new awning. Start by removing any debris or dirt from the surface using a soft brush or a broom.
Then, use a mild detergent mixed with water to gently scrub the area and remove any stubborn stains. Rinse thoroughly with clean water and allow the surface to dry completely before proceeding with the installation. By cleaning the area where the old awning was, you are not only creating a clean canvas for the new awning, but you are also ensuring its longevity and performance.
So, grab your cleaning supplies and get ready to make way for a fresh and beautiful awning for your RV.
Inspect the support arms and brackets
awning, RV, support arms, brackets
Install the new awning
If you’re looking to upgrade your RV and give it a fresh new look, installing a new awning is a great place to start. Not only will it provide shade and protection from the elements, but it will also enhance the overall appearance of your vehicle. So, how do you go about installing a new RV awning? The first step is to determine the type and size of awning that will best suit your needs.
Once you have chosen the right awning, you can proceed with the installation process. Start by removing the old awning, if you have one, by loosening the screws or bolts that hold it in place. Next, carefully measure and mark the area where the new awning will be installed.
Make sure to double-check your measurements to ensure a precise fit. Finally, attach the new awning to the RV using the provided hardware, making sure it is securely fastened. Voila! You now have a brand new awning that will not only provide shade and protection but also give your RV a fresh, updated look.
Attach the support arms and brackets
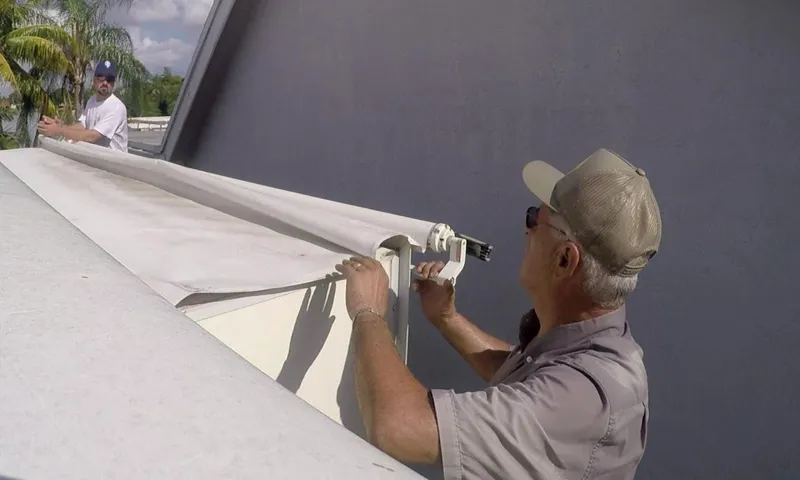
When it comes to installing a new awning, one of the key steps is attaching the support arms and brackets. These components are crucial for holding up the awning and providing stability. To start, you’ll want to identify the correct placement for the support arms on your wall or structure.
Make sure to measure and mark the appropriate spacing to ensure an even and balanced installation. Once you have your marks in place, it’s time to secure the support brackets. Using a drill and the appropriate screws or bolts, attach the brackets firmly to the wall.
You’ll want to make sure they are level and secure, as they will be holding the weight of the awning. Once the brackets are in place, it’s time to attach the support arms. These arms will slide into the brackets and may require some adjusting to ensure a snug fit.
Once everything is in place, give it a test run to ensure that the support arms are securely holding the awning. With this step complete, you’re well on your way to enjoying your new awning and the shade it provides.
Secure the fabric onto the roller tube
Installing a new awning can be a daunting task, but with the right tools and a little patience, you can have your outdoor space looking stylish and functional in no time. One essential step in this process is securing the fabric onto the roller tube. The roller tube is the part of the awning that allows you to retract and extend it as needed.
To secure the fabric, start by unrolling it completely and aligning it with the tube. Once aligned, use a tape measure to ensure equal distribution of the fabric on both sides. Next, grab a fabric screw and insert it through the fabric and into the tube.
Repeat this process every few inches along the length of the tube until the fabric is securely attached. It’s important to make sure the fabric is taut but not overly stretched to prevent any damage. Once all the fabric screws are in place, give the fabric a gentle tug to ensure it is secured properly.
And just like that, you have successfully installed the fabric onto the roller tube of your new awning. Now you’re one step closer to enjoying shade and protection from the elements in your outdoor space!
Connect the power
install a new awning, connect the power, awning installation, power connection for awning
Test the new awning
Installing a new RV awning can seem like a daunting task, but with a little bit of patience and some helpful tips, you’ll have it up in no time! First, gather your materials – you’ll need the new awning, a ladder, a tape measure, a drill, and some screws. Start by measuring the length of your RV to determine the size of the awning you’ll need. Once you have the correct size, carefully remove the old awning by unscrewing any screws or bolts holding it in place.
Now it’s time to install the new awning. Position it carefully, making sure it is straight and centered. Use a drill to screw the awning into place, making sure to secure it firmly.
Finally, give it a test by opening and closing the awning a few times to ensure it operates smoothly. Now you can sit back and enjoy your new and improved outdoor space!
Extend and retract the awning
extend and retract the awning, testing the new awning. In our latest home improvement project, we decided to add an awning to our patio. Not only does it provide much-needed shade during the hot summer months, but it also adds a touch of elegance to our outdoor space.
Now that the awning has been installed, it’s time to put it to the test and see how well it performs. One of the key features of our new awning is the ability to extend and retract it with ease. This feature allows us to customize the amount of shade we want and adjust it based on the position of the sun.
With just a few simple steps, we can easily extend the awning to cover the entire patio or retract it to allow more sunlight in. The mechanism is smooth and effortless, making it easy for anyone to operate. But of course, we wanted to make sure that it works as advertised, so we decided to put it to the test.
We extended the awning to its full length and marveled at how it instantly transformed our patio into an oasis of shade. We then retracted it halfway to create a balance between shade and sunlight. It was truly amazing how such a simple feature could have such a big impact on our outdoor experience.
Whether we’re hosting a barbecue or simply relaxing on a sunny day, we now have the flexibility to adjust the awning to our liking. It’s safe to say that our new awning has exceeded our expectations, and we couldn’t be happier with the results.
Check for proper alignment
awning, alignment, test Are you excited about your new awning? Installing an awning is a great way to add some shade and style to your outdoor space. But before you start enjoying the benefits of your new awning, it’s important to make sure it is properly aligned. Improper alignment can lead to a variety of issues, such as water pooling and premature wear and tear.
So, how do you test the alignment of your new awning? First, take a step back and visually inspect the awning. Stand at a distance and make sure it appears straight and even. If it looks crooked or lopsided, it may be a sign that the alignment is off.
You can also use a level to check if the awning is level. Next, open and close the awning a few times. Pay attention to how it moves and if it slides smoothly.
Any jerky or uneven movement could indicate alignment issues. You should also check if the awning locks in place securely when fully extended. Another test you can perform is the “water test.
” Grab a water hose and spray water onto the awning. Observe how the water flows off the fabric. If it pools or collects in certain areas, it may be a sign that the awning is not properly aligned.
Proper alignment will ensure that water drains off the fabric evenly. If you notice any alignment issues during these tests, it’s best to contact a professional awning installer or repair service. They will have the expertise to properly align your awning and make any necessary adjustments.
So you’ve reached the end of your blog post, and it’s time to wrap things up with a bang. The conclusion is your chance to leave a lasting impression on your readers, to make them think about what they’ve just read and to inspire them to take action. But how do you write a conclusion that really packs a punch? Well, the key is to sum up your main points, reiterate your key message, and leave your readers with a strong call to action.
In this blog post, we’ll discuss some tips and tricks for writing a compelling conclusion that will leave your readers wanting more. Firstly, it’s important to summarize your main points concisely. Think of your conclusion as a condensed version of your entire blog post.
You want to remind your readers of the key takeaways without repeating everything you’ve already said. One way to do this is by using bullet points or numbered lists to highlight the main ideas you’ve discussed throughout your post. Next, reiterate your key message.
What is the main point you want your readers to remember? Make sure to state it clearly in your conclusion. This is your chance to drive home your main argument and ensure that your readers understand and remember your key message. Now, it’s time to inspire your readers to take action.
What do you want them to do after they finish reading your blog post? Whether it’s signing up for your newsletter, leaving a comment, or sharing your post on social media, make sure to include a strong call to action in your conclusion. This will encourage your readers to engage with your content and take the next step. Finally, end with a bang.
Your conclusion is your last chance to make an impression, so make it count. Consider using a rhetorical question or an analogy to make your conclusion more memorable. For example, you could ask your readers to imagine a world where everyone followed the advice you’ve given in your post, or you could compare your main message to a light bulb moment that will change their lives.
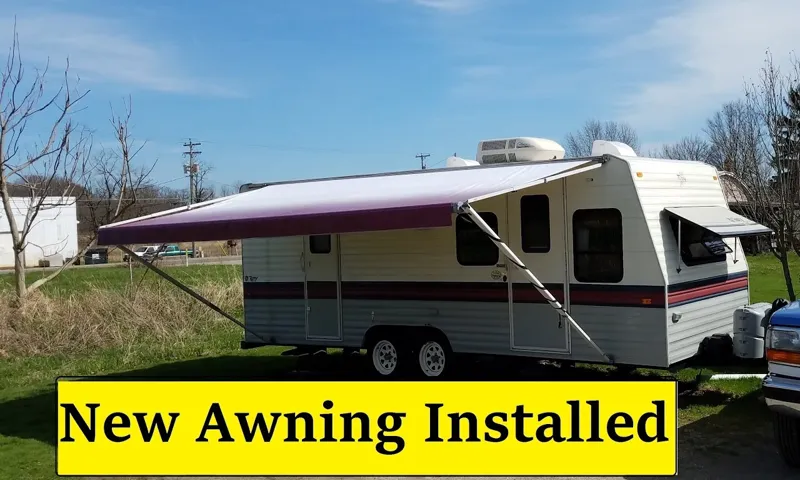
Enjoy your new RV awning!
Installing a new RV awning may seem like a daunting task, but with the right steps, it can be a breeze. Start by identifying the type and size of the awning you need, as well as any necessary accessories. Next, remove the old awning if you have one, making sure to disconnect any electrical connections or support arms.
Begin by attaching the awning brackets to the RV, ensuring they are level and secure. Next, install the roller tube and fabric onto the brackets, making sure to align them properly. Secure the fabric in place using the awning’s provided fasteners or clips.
Finally, test the awning to ensure it opens and closes smoothly. With just a few simple steps, you can enjoy your new RV awning and enhance your outdoor experience.
Conclusion
And there you have it, the step-by-step guide on how to install a new RV awning. It may have seemed like a daunting task at first, but hopefully this witty and clever explanation has made the process a little less overwhelming. Just remember to take your time, use caution, and maybe even recruit a helper (or a group of friends if you’re feeling really ambitious) to make the installation process a breeze.
Now go forth and enjoy the shade and style of your new RV awning. Happy camping!”
FAQs
How long does it take to install a new RV awning?
The installation time for a new RV awning can vary depending on factors such as the type of awning and the experience of the person installing it. On average, it may take anywhere from 1 to 4 hours to complete the installation process.
What tools are needed to install a new RV awning?
The tools required to install a new RV awning typically include a drill, screwdriver, measuring tape, level, ladder or step stool (depending on the height of the RV), and possibly a caulking gun. It is also important to have the necessary hardware and mounting brackets provided with the awning.
Can I install a new RV awning by myself, or do I need professional help?
Installing a new RV awning can be a DIY project, especially if you have some experience with basic tools and handy work. However, if you are not confident in your abilities or have any concerns, it is always recommended to seek professional help. They can ensure a proper and secure installation.
Are there any specific instructions for installing a new RV awning?
Yes, each awning may come with specific instructions provided by the manufacturer. It is important to carefully read and follow these instructions to ensure a successful installation. These instructions will typically include steps for measuring, positioning, securing, and adjusting the awning.
Can I install a new RV awning on any type of RV?
In most cases, RV awnings are designed to be compatible with various types of RVs, including travel trailers, motorhomes, and fifth wheels. However, it is important to check the specifications and compatibility of the awning with your specific RV model before making a purchase.
Are there any safety precautions to consider when installing a new RV awning?
Yes, safety should always be a priority when installing a new RV awning. It is important to use a sturdy ladder or step stool, wear appropriate protective gear such as gloves and safety goggles, and ensure the area around the installation site is clear of any hazards. It is also important to follow proper lifting and handling techniques to prevent injuries.
Can I replace an old RV awning with a new one without removing the mounting brackets?
In some cases, it may be possible to replace an old RV awning with a new one without removing the existing mounting brackets. However, it is important to carefully assess the condition and compatibility of the brackets to ensure a secure installation. It is recommended to consult the manufacturer or a professional for guidance in such cases.