

Are you an avid traveler, constantly hitting the road in your RV for thrilling adventures and unforgettable experiences? If so, then you understand the importance of having a well-maintained and functional RV. And when it comes to ensuring the longevity and functionality of your RV, one component that should not be overlooked is the awning. Think of the awning on your RV as its protective shield, guarding you against the elements of nature while providing a comfortable outdoor living space.
Whether it’s shielding you from the scorching sun or providing a cozy shelter during a sudden rainstorm, the awning is an indispensable part of any RV. However, over time and with regular use, awnings can deteriorate and become worn out. This can lead to a host of problems, from tears and leaks to difficulty in retracting or extending the awning.
So, what’s the solution? A replacement awning. A replacement awning can breathe new life into your RV, giving you a fresh start and peace of mind. With a brand-new awning, you can wave goodbye to the worries of leaks and tears, and enjoy the great outdoors without any interruptions.
Plus, a replacement awning can enhance the aesthetic appeal of your RV, making it stand out from the rest. But why go through the trouble of replacing your awning when you can simply patch it up or live with its imperfections? Well, think of it this way: would you continue using a tattered umbrella that barely provided any protection from the rain, or would you invest in a new umbrella that kept you dry and comfortable? The same principle applies to your RV awning. By investing in a replacement, you are ensuring the longevity and functionality of your beloved RV, allowing you to truly enjoy your travels without any worries.
So, if you’re ready to give your RV a much-needed upgrade and take your adventures to the next level, it’s time to consider a replacement awning. Your RV deserves the best, and a new awning can provide just that. Say goodbye to the hassles of a worn-out awning and hello to a world of outdoor enjoyment and endless possibilities.
Table of Contents
Choosing the Right Replacement Awning
Are you looking to install a replacement awning for your RV? Well, you’ve come to the right place! Installing a new awning can be a great way to refresh the appearance of your RV while also providing much-needed shade and protection from the elements. But with so many options out there, how do you choose the right one? Here are a few things to consider. First, you’ll want to measure the size of your RV’s awning rail to ensure you select the correct size replacement.
Next, take into account the material of the awning and consider factors such as durability and weather resistance. Lastly, think about the style and design of the awning to ensure it complements the overall aesthetic of your RV. By taking these factors into consideration, you’ll be well on your way to installing the perfect replacement awning for your RV!
Measurements and Compatibility
When it comes to choosing the right replacement awning, measurements and compatibility are essential factors to consider. You want to make sure that the new awning fits perfectly in the same space as the old one. Measure the dimensions of your existing awning, including the width and projection, to ensure that the replacement is the correct size.
Additionally, it’s important to consider the compatibility of the replacement awning with your existing hardware and mounting system. Check if the new awning is compatible with your current brackets, arms, and roller tube. Taking accurate measurements and ensuring compatibility will ensure a seamless and hassle-free installation process.
Material and Design Options
replacement awning
Preparing for Installation
Installing a replacement awning for your RV may seem like a daunting task, but with a little preparation, it can be a straightforward process. First, gather all the necessary tools and materials that you’ll need, such as a ladder, a drill, and the replacement awning itself. Next, carefully remove the old awning by following the manufacturer’s instructions.
Take note of how the old awning was secured, as this will help you when installing the new one. Once the old awning is removed, inspect the area for any damage or wear that may need repair before installing the new awning. Finally, follow the manufacturer’s instructions for installing the replacement awning, ensuring that it is secure and properly aligned.
Taking the time to properly prepare for the installation will help ensure a smooth and successful process.
Removing the Old Awning
“Removing the Old Awning” So, you’ve decided to give your outdoor space a fresh new look by replacing your old awning. Good for you! But before you can install that shiny new awning, you’ll need to remove the old one first. Don’t worry, it’s not as daunting as it may seem.
With a few simple steps, you’ll have that old awning off in no time. Start by gathering the necessary tools for the job. You’ll need a ladder, a screwdriver, and a helper if your awning is particularly large or heavy.
Safety should always come first, so make sure your ladder is stable and securely positioned before climbing up. Begin by removing any fabric or covering on the awning. You may need to cut through any stitches or fasteners holding the fabric in place.
Once the fabric is removed, you’ll have a clear view of the frame and hardware. Next, use your screwdriver to remove any screws or bolts connecting the awning to the exterior of your home. Be sure to keep track of these screws, as you’ll need them later when installing your new awning.
Once the screws and bolts are removed, carefully detach the awning from the frame. This may require some force, especially if the awning has been in place for a long time. Again, having a helper can be beneficial in this step to provide extra strength and support.
Once the awning is detached from the frame, carefully lower it to the ground. Be mindful of any electrical wires or other hazards that may be present. With the old awning removed, you’re now ready to prepare for the installation of your new one.
Gathering Tools and Supplies
“Tools and Supplies for Installing Your New Flooring: Prep Like a Pro” When it comes to installing new flooring, having the right tools and supplies handy is crucial. Just like a chef needs their trusty knife and cutting board, you’ll need a few essentials to ensure a smooth installation process. First and foremost, you’ll need a measuring tape.
This will help you accurately measure the dimensions of your space and determine the amount of flooring material you’ll need. Remember, it’s better to have a little extra than not enough! Next, you’ll need a utility knife for cutting the flooring material to size. A power saw may also come in handy for more precise cuts.
Don’t forget about safety goggles and a dust mask to protect your eyes and lungs from any dust or debris. And of course, you’ll need some good ol’ measuring and marking tools, such as a pencil and a chalk line, to ensure straight and accurate cuts. Lastly, you’ll need adhesive or nails to secure the flooring in place, so don’t forget to grab those as well.
With the right tools and supplies at your disposal, you’ll be well-prepared to tackle your flooring installation project like a pro!
Preparing the Installation Area
“preparing the installation area” The first step in any successful installation project is to properly prepare the area where the installation will take place. This is an important step because it ensures that the installation will go smoothly and that the finished result will be both safe and aesthetically pleasing. So, how exactly do you prepare for an installation? Well, it starts with making sure the area is clean and free of any debris or obstacles that could potentially get in the way.
This could involve sweeping or vacuuming the area, removing any furniture or other objects, and ensuring that there is enough space for the installation to take place. Additionally, it’s important to consider any specific requirements or recommendations that may be provided by the manufacturer or installer. This could include things like ensuring the area is properly ventilated or that the temperature is within a certain range.
By taking the time to properly prepare the installation area, you can help ensure that the installation goes smoothly and that you are left with a finished result that you can be proud of.
Installing the Replacement Awning
Installing a replacement awning for an RV can be a relatively simple process if you have the right tools and follow the necessary steps. Start by removing the old awning fabric, carefully noting how it was attached so you can replicate the process later. Next, measure the length of your RV’s awning roller and cut the new fabric to the correct size.
Attach the new fabric to the roller using the same method as before, making sure it is evenly aligned. Once the new fabric is attached, extend the awning fully and secure it in place using the provided hardware. Finally, test the awning to ensure it operates smoothly and make any necessary adjustments.
By following these steps, you can easily install a replacement awning for your RV and enjoy the shade and protection it provides on your outdoor adventures.
Attaching the Awning Fabric to the RV
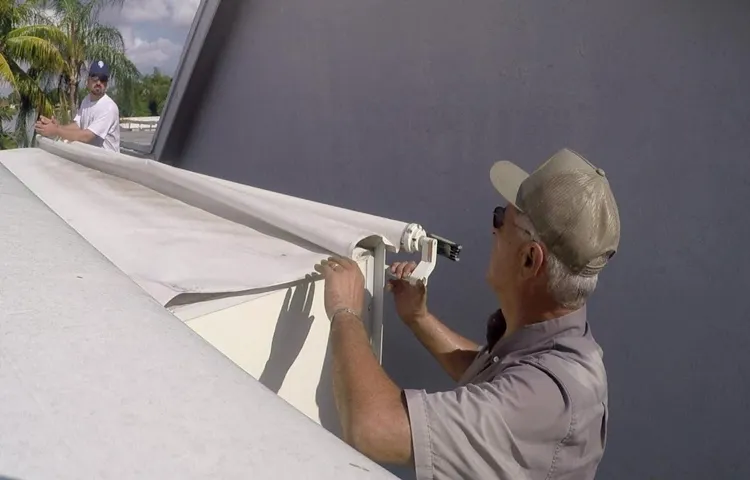
“Installing the Replacement Awning: Attaching the Awning Fabric to the RV” So, you’ve finally gotten your hands on a replacement awning for your RV and are ready to give your outdoor space a much-needed makeover. But before you can start enjoying the shade and protection it offers, you need to know how to attach the awning fabric to your RV. Don’t worry, though, it’s easier than you might think.
First, you’ll want to make sure you have all the necessary tools handy. This will typically include a drill with the appropriate attachments, screws, and a ladder to help you reach the desired height. Safety should always come first, so be sure to take the necessary precautions when working at heights.
Next, you’ll need to locate the mounting brackets on your RV. These are the metal brackets that are already secured to the exterior of your vehicle, designed specifically for attaching an awning. The exact location and number of brackets may vary depending on the size and model of your RV.
Once you’ve located the brackets, you’ll want to measure and mark the placement of the awning fabric. This will ensure that it is evenly distributed and properly aligned. You can use a measuring tape, a chalk line, or any other method that helps you achieve accurate measurements.
Now comes the fun part – actually attaching the awning fabric to your RV. Start by sandwiching the awning fabric between the mounting brackets and the RV’s exterior. This will help provide a secure and sturdy attachment.
Using your drill, carefully screw the brackets into place, making sure to tighten them securely. It’s important to use the appropriate screws and attachments for this step, as using the wrong ones can result in an unstable or imperfect installation. If you’re unsure about the correct screws to use, consult the manufacturer’s instructions or seek professional assistance.
Mounting the Awning Arms and Supports
awning arms, supports, replacement awning
Securing the Awning in Place
When it comes to securing your awning in place, it’s important to properly install the replacement awning. One of the key steps in this process is ensuring that the awning is securely fastened to the structure it is attached to. This can be done by using anchors or brackets that are specifically designed for awning installations.
These anchors or brackets should be securely attached to the structure using screws or bolts. Additionally, it’s important to make sure that the tensioning system of the awning is properly adjusted to ensure that the fabric is taut and the awning is securely held in place. This will help to prevent any sagging or flapping of the awning in windy conditions.
By taking the time to properly secure your awning in place, you can ensure that it will be able to withstand the elements and provide you with years of enjoyment and protection.
Testing and Adjusting the Awning
So you just got a new replacement awning for your RV and now you’re wondering how to install it. Well, don’t worry, I’ve got you covered. Installing a replacement awning may seem like a daunting task, but with a little bit of patience and some basic tools, you’ll have it up in no time.
First, you’ll want to gather your tools. You’ll need a ladder, a drill with a screwdriver bit, a tape measure, a level, and some silicone caulk. Once you have everything ready, it’s time to get started.
Start by removing the old awning. Carefully roll it up and remove any screws or brackets that are holding it in place. Once the old awning is removed, take a moment to clean up any debris or old caulk that may be left behind.
Next, measure the length of the new awning and mark the placement of the brackets. Use the level to ensure that the brackets are straight and then drill pilot holes for the screws. Attach the brackets to the RV using the screws provided with the awning.
Now, it’s time to attach the awning fabric to the brackets. Start by unrolling the fabric and sliding it into the groove on the roller tube. Make sure that the fabric is centered and then secure it to the roller tube using the provided screws or clips.
Once the fabric is securely attached, extend the awning to its full length and make any necessary adjustments. Use the tape measure to ensure that the fabric is even on both sides and adjust as needed. Once you’re satisfied with the placement, tighten the screws on the roller tube to secure the fabric in place.
Extending and Retracting the Awning
extending and retracting the awning, testing and adjusting the awning When it comes to enjoying your outdoor space, having an awning can really make a difference. Not only does it provide shade and protection from the sun, but it also adds a touch of style to your patio or deck. However, before you can start enjoying your awning, you need to know how to properly extend and retract it.
To begin, let’s talk about extending the awning. Most awnings have a simple mechanism that allows you to easily extend and retract them. Typically, there will be a crank or handle that you can turn to open the awning.
Simply grab hold of the crank and start turning it in the appropriate direction. As you do so, you’ll notice the awning slowly starting to extend. Keep turning the crank until the awning is fully extended to the desired length.
Retracting the awning is just as easy. You’ll want to start by making sure the awning is securely fastened and locked in place. This will prevent any unnecessary movement during the retracting process.
Once the awning is secure, locate the crank or handle and turn it in the opposite direction as before. As you do so, the awning will gradually start to retract. Keep turning the crank until the awning is fully closed and securely in place.
Now that you know how to extend and retract your awning, it’s important to test and adjust it to ensure it’s working properly. Start by extending the awning fully and checking for any signs of resistance or unevenness. The awning should extend smoothly and evenly without any hiccups or jerky movements.
Checking for Proper Alignment and Tension
“awning testing and adjustment” When it comes to your awning, proper alignment and tension are key to ensuring it functions correctly and looks its best. To test and adjust your awning, there are a few things you can do. First, start by checking the alignment of the awning.
Stand back and take a look to see if it is centered and level. If it looks off, you may need to make some adjustments. Next, you’ll want to check the tension of the fabric.
Gently pull down on the front edge of the awning and see how it feels. It should be taut without being too tight or too loose. If it needs adjusting, you can tighten or loosen the tension using the adjustment knobs or bolts located on the arms of the awning.
By regularly testing and adjusting your awning, you can ensure that it operates smoothly and stays in great condition for years to come.
Maintaining Your Replacement Awning
Installing a replacement awning for your RV can be a simple and straightforward process. The first step is to carefully measure the width of your current awning and purchase a replacement that matches those measurements. Once you have your new awning, start by removing the bolts or screws that hold the old awning in place.
As you remove the old awning, be sure to keep track of any hardware or accessories that may need to be transferred to the new awning. Once the old awning is removed, you can then attach the new awning using the same bolts or screws. Make sure to tighten them securely to ensure that the awning is stable and secure.
Once everything is in place, take a step back and admire your newly installed replacement awning. It’s important to regularly inspect and maintain your replacement awning to ensure its longevity and functionality. This can include cleaning the fabric, tightening any loose screws or bolts, and checking for any signs of wear or damage.
By taking proper care of your replacement awning, you can enjoy its benefits for many years to come.
Cleaning and Inspecting Regularly
When it comes to maintaining your replacement awning, one of the most important tasks is cleaning and inspecting regularly. Over time, dirt, leaves, and other debris can accumulate on your awning, causing it to look worn and dirty. By taking the time to clean it on a regular basis, you can extend its lifespan and keep it looking its best.
Start by removing any loose debris with a broom or brush, being careful not to damage the fabric. Then, mix a solution of mild soap and water and use a soft cloth or sponge to clean the awning. Pay attention to any stains or spots, and gently scrub them away.
Once you’re done cleaning, rinse the awning thoroughly with water and allow it to air dry. While you’re cleaning, take the opportunity to inspect the awning for any signs of damage or wear. Check the seams, zippers, and hardware to ensure everything is in good working order.
If you notice any issues, address them as soon as possible to prevent further damage. By regularly cleaning and inspecting your replacement awning, you can ensure it stays in great condition for years to come.
Repairing and Replacing Parts as Needed
Maintaining your replacement awning is essential to ensure its longevity and functionality. One crucial aspect of maintenance is regular inspection and repair of the awning parts as needed. Over time, various components of the awning, such as the frame, fabric, and hardware, may wear out or get damaged.
By inspecting these parts regularly, you can identify any issues early on and address them promptly. For instance, if you notice any rust or corrosion on the frame, it’s important to clean it and apply a protective coating to prevent further damage. Similarly, if the fabric starts to show signs of wear or tear, it’s wise to repair or replace it to maintain the awning’s aesthetic appeal and weather resistance.
Additionally, check the hardware, such as the bolts and screws, and tighten or replace them if necessary. By taking these proactive measures, you can ensure your replacement awning stays in excellent condition for years to come.
Conclusion: Enjoying Your New Replacement Awning
And there you have it, the guide to installing a replacement awning for your RV. Now you can enjoy the shade and protection it provides, while also impressing your fellow campers with your handyman skills. So go ahead, grab your tools and get to work – just remember to read the instructions (and maybe have a few extra hands on deck) to ensure a smooth and successful installation.
And who knows, maybe one day you’ll be known as the RV awning guru, offering your services to fellow campers in need. Just be prepared for the influx of grateful campers, a line of RVs waiting for your expertise, and of course, a potential sponsorship from your favorite camping gear company. Happy installing! “
FAQs
Can I install a replacement awning for my RV myself?
Yes, you can install a replacement awning for your RV yourself. However, it is important to have some basic DIY skills and knowledge of the process to ensure proper installation.
What tools do I need to install a replacement awning for my RV?
To install a replacement awning for your RV, you will typically need a drill, screwdriver, tape measure, level, ladder, and possibly some additional tools depending on the specific awning model.
How long does it take to install a replacement awning for an RV?
The time it takes to install a replacement awning for an RV can vary depending on your experience and the complexity of the awning system. On average, it might take a few hours to half a day to complete the installation.
Can I install a different brand of awning as a replacement for my RV?
In most cases, you can install a different brand of awning as a replacement for your RV. However, it is important to ensure that the new awning is compatible with your RV’s mounting brackets and measurements.
Do I need any special permits or permissions to install a replacement awning for my RV?
In general, you do not need any special permits or permission to install a replacement awning for your RV. However, it is always a good idea to check with your local jurisdiction or RV park regulations to ensure compliance.
Can I reuse my RV’s existing fabric for the replacement awning?
In some cases, you may be able to reuse your RV’s existing fabric for the replacement awning. However, it is recommended to assess the condition of the fabric and determine if it is still in good shape before making a decision.
Are there any specific maintenance requirements for a replacement RV awning? A7.Yes, there are specific maintenance requirements for a replacement RV awning. Regularly cleaning the awning fabric, lubricating moving parts, and inspecting for any damage or wear are important tasks to ensure its longevity and proper functioning.