
Are you looking to add some pizzazz to your RV’s exterior and enhance your outdoor living experience? LED awning lights are a great way to do just that! Not only do they add a festive and inviting atmosphere to your campsite, but they also provide practical lighting for evening activities. But how do you go about installing LED awning lights on your RV? In this blog, we will guide you through the installation process, step-by-step, so you can enjoy the benefits of these vibrant lights in no time. So grab your toolbox and let’s get started!
Table of Contents
What You Will Need
So you’re looking to add a little extra sparkle to your RV? Well, installing LED awning lights is a great way to do just that! Before you get started, there are a few things you’ll need to gather. First and foremost, you’ll need the lights themselves. There are many options to choose from, so take some time to find the style and color that suits your aesthetic.
You’ll also need a power source for your lights. Most RVs have a 12-volt power supply, so you’ll want to make sure your lights are compatible with that. Additionally, you’ll need some tools to help with the installation process.
Depending on your specific RV, you may need a drill, a screwdriver, or some adhesive strips to secure the lights to your awning. Finally, it’s always helpful to have a friend or family member to lend a hand. Installing LED awning lights can be a bit tricky, so having an extra set of hands can make the job much easier.
With all of these things in place, you’ll be well on your way to brightening up your RV in no time!
LED Awning Lights
led awning lights. To set up LED awning lights, there are a few essentials that you will need. First and foremost, you will need the LED lights themselves.
LED lights come in a variety of styles and colors, so you can choose the ones that best fit your aesthetic. You will also need a power source for the lights. Depending on the length and number of lights you plan to use, you may need a transformer or a power supply.
Additionally, you will need some mounting clips or brackets to secure the lights to your awning. These can usually be found at your local hardware store. Lastly, you will need some tools to complete the installation, such as a drill and screws.
With these simple supplies, you will be well on your way to creating a stunning illuminated awning.

Screwdriver
screwdriver, tools, DIY projects, home improvement, repair, versatile, essential, flathead, Phillips head, torque, tight spaces, fasteners, screws, bolts, handle, blade, grip, magnetic tip. The humble screwdriver is a versatile and essential tool for any DIY enthusiast or homeowner. Whether you’re tackling a home improvement project or a simple repair job, you’ll likely find yourself in need of this trusty device.
The screwdriver comes in various types, but the two most common are the flathead and the Phillips head. The flathead screwdriver has a single, flat blade, while the Phillips head has a cross-shaped blade. Each type is designed to work with different types of screws or bolts, allowing you to tackle a wide range of tasks.
One of the great advantages of a screwdriver is its ability to provide torque, or turning force. The handle of a screwdriver offers a sturdy grip, allowing you to exert the necessary force to tighten or loosen screws. Additionally, some screwdrivers come with a magnetic tip, making it easier to handle and place screws in tight spaces without dropping them.
No matter the type of fastener you’re working with, a screwdriver should have a blade that fits snugly into the screw or bolt head. The right size and shape will ensure a proper grip and minimize the risk of damaging the fastener or the surrounding materials. In conclusion, the screwdriver is a must-have tool for any DIYer.
Its versatility, ability to provide torque, and the ease of use make it a reliable companion for various projects. So, the next time you embark on a home improvement task or need to repair something around the house, don’t forget about this handy tool that can save you time and frustration.
Electric tape
electrical tape, electrician tool, electrical insulation
Adhesive clips
adhesive clips
Step 1: Planning
Looking to add some flair to your RV? Installing LED awning lights can be a fun and easy way to add a touch of ambiance to your outdoor living space. Before getting started, it’s important to have a plan in place. First, determine where you want to install the lights.
Are you looking to line the awning itself or do you want to illuminate the ground below? Next, decide whether you want to go with a permanent installation or if you prefer a more temporary option. Once you have these details figured out, it’s time to gather the necessary supplies. You’ll need LED light strips, a power source, and any connectors or mounting hardware required for your specific setup.
With a well thought out plan and the right supplies in hand, you’ll be well on your way to enjoying the cozy glow of LED awning lights on your RV.
Select the location for the lights
When planning for outdoor lights, one of the essential steps is selecting the location for the lights. This decision will greatly impact the overall effect and functionality of the lighting. Think about the areas you want to highlight or illuminate, whether it’s a pathway, patio, or garden.
Consider the positioning of the lights to create the desired ambiance and ensure that they serve a practical purpose, such as providing adequate visibility and safety. It’s also important to consider the power source for your lights and whether they need to be within reach of an electrical outlet or if solar-powered options are available. By taking the time to carefully think through the location of your lights, you can create a well-lit outdoor space that is both aesthetically pleasing and functional.
Measure the length of your awning
awning length measurement, measuring your awning, planning for your awning. So you’ve decided to install an awning to provide some shade and protection for your outdoor space. That’s a great choice! But before you dive into the installation process, there are a few things you’ll need to consider.
One of the most important steps in planning for your awning is measuring the length of the space where you want to install it. This will help ensure that you choose the right size awning for your needs. To measure the length of your awning, start by finding the outer edges of the space where you want to install it.
Use a tape measure or a long piece of string to measure the distance between these two points. Make sure to account for any obstacles, such as windows or doors, that might affect the length of the awning. It’s also a good idea to measure the height of the space to determine how far the awning will extend from the ground.
Once you have your measurements, you can start to consider the different options available for awning sizes. Depending on your needs and preferences, you may choose a retractable awning that can be adjusted to different lengths, or a fixed awning that is permanently extended. Keep in mind that the length of your awning will affect how much shade it provides, so it’s important to choose a size that is appropriate for your space.
In addition to measuring the length of your awning, you’ll also need to consider other factors such as the material and color of the awning, as well as any additional features you might want, like motorized operation or built-in lighting. By taking the time to properly plan and measure for your awning, you can ensure that you choose the right size and features to enhance your outdoor space and provide the shade and protection you need. So grab that tape measure and get ready to start planning for your new awning!
Decide on the spacing of the lights
spacing of the lights
Step 2: Preparing the Lights
Now that you have gathered all the necessary tools and materials, it’s time to move on to step 2: preparing the lights for installation. Start by carefully unpacking the LED awning lights from their packaging and untangling any cords or wires. Lay them out flat on a clean surface so that you can easily work with them.
Next, check the length of the lights and make sure they are long enough to cover the entire length of your RV awning. If they are too short, you may need to purchase additional lights or consider a different installation method. Once you have confirmed the length, inspect the lights for any damages or defects.
If you notice any issues, contact the manufacturer for a replacement. Finally, familiarize yourself with the different parts of the lights, such as the power connector, clips, and control box. This will make the installation process much easier and smoother.
With the lights prepared and ready to go, you’re one step closer to transforming your RV into a dazzling oasis of light.
Test the lights before installation
One important step to take before installing your lights is to test them beforehand. This may seem like common sense, but it’s an often overlooked step that can save you a lot of hassle in the long run. Testing the lights before installation allows you to ensure that they are in working order and will provide the desired amount of light once installed.
It also gives you the opportunity to identify any faulty lights or issues with the wiring, allowing you to make any necessary repairs or replacements before the installation process begins. By taking the time to test your lights beforehand, you can avoid any potential headaches or delays that may arise from discovering problems after the lights have already been installed.
Apply adhesive clips to the back of each light strip
To begin preparing your LED lights, you’ll need to apply adhesive clips to the back of each light strip. This step is crucial because it allows you to easily attach the lights to different surfaces, such as walls or furniture. The adhesive clips provide a secure hold without causing any damage to the surfaces you’re attaching them to.
Think of these clips as the support system for your LED lights, ensuring they stay in place and create the desired ambiance for your space. Just like a sturdy foundation keeps a building upright, these adhesive clips keep your lights securely attached so you can enjoy their beautiful glow.
Cut the light strips to the desired length
When it comes to setting up LED light strips, one of the first steps is to cut the strips to the desired length. This step is important because it allows you to customize the lights to fit your specific needs and space. To cut the light strips, you will need a pair of scissors or a sharp knife.
Before you start cutting, it is essential to measure the area where you want to install the lights and then mark the cutting points on the strip. This will ensure that you cut the strips accurately and avoid any mistakes. Once you have marked the cutting points, you can then use the scissors or knife to cut along the marked lines.
It is important to cut carefully and slowly to prevent any damage to the lights. Remember, you can always cut the strips shorter if needed, but you cannot add length once they are cut. Therefore, it’s always better to err on the side of caution and cut the strips slightly longer than you initially planned.
This way, you can always trim them down later if necessary.
Step 3: Installation
So, you’ve decided that you want to add some LED awning lights to your RV. Great choice! Not only do these lights add a fun and festive touch to your outdoor space, but they also provide added safety and convenience. Now, let’s talk about how to actually install these lights.
The first step is to determine where you want to mount the lights. Most RVs have a built-in awning rail, which is the perfect spot for attaching the lights. Measure out the length of the awning rail and then choose the appropriate length of LED lights to match.
Next, clean the surface of the awning rail where you’ll be attaching the lights. You want to ensure that the surface is free from dirt and debris, as this will help the lights adhere better. Now it’s time to attach the lights to the awning rail.
Most LED awning lights come with adhesive backing, so you can simply peel off the backing and stick them onto the clean surface of the awning rail. Start at one end and work your way along the rail, pressing firmly to ensure a secure bond. Once the lights are installed, you’ll need to connect them to a power source.
Most LED awning lights come with a plug that you can easily connect to an outlet on your RV. Make sure to route the cord in a way that is safe and secure, so it doesn’t get caught or tangled. Finally, test the lights to make sure they are working properly.
Turn on the power and admire your handiwork! You now have a beautifully lit awning that will make your RV stand out at the campground. Installing LED awning lights on your RV is a relatively simple task that can make a big difference in the ambiance of your outdoor space. So why not give it a try and enjoy the benefits of having a well-lit and inviting awning? Happy camping!
Clean the area where the lights will be installed
clean, area, lights, installed, installation
Peel off the backing of the adhesive clips and stick the lights to the awning
In this step, we will go over how to install the lights onto your awning. Once you have determined the placement of the lights and measured the length you need, it’s time to get them up. The lights come with adhesive clips on the back, making it really easy to stick them securely onto the awning.
Simply peel off the backing of the adhesive clips and attach them to the desired spots on the underside of the awning. Make sure to press down firmly to ensure a strong bond. The adhesive clips are designed to hold the lights in place, even in windy conditions.
Once you have attached all the clips, it’s time to attach the lights. Gently press the lights onto the clips, making sure they are securely attached. Now your awning is ready to light up the night!
Secure any loose wires with electric tape
“electric tape to secure loose wires during installation” When it comes to installing electrical equipment, ensuring the safety of the wiring is a crucial step. One way to do this is by using electric tape to secure any loose wires. It may seem like a small task, but it can make a big difference in preventing potential hazards.
Loose wires can not only lead to electrical malfunctions but can also be a fire hazard. By using electric tape, you can keep the wires in place and minimize the risk of them coming loose. Think of it like putting a band-aid on a cut – it may be a simple solution, but it helps protect against further damage.
So, the next time you’re installing electrical equipment, don’t forget to secure any loose wires with electric tape for added safety and peace of mind.
Repeat the process for each section of the awning
In this blog section, we will discuss the third step of installing an awning: repeating the process for each section. Once you have successfully installed the first section of the awning, it is time to move on to the next one. This step is crucial to ensure that your awning is properly and securely installed.
Each section of the awning needs to be installed in the same way, following the same steps as the previous section. This means measuring, marking, drilling, and attaching the brackets and supports before attaching the fabric or material of the awning. It is important to pay attention to detail and make sure each section is aligned and level with the others.
This will contribute to the overall stability and functionality of your awning. By carefully repeating the installation process for each section, you will have a complete and well-installed awning that will provide shade and protection for years to come.
Step 4: Wiring
So, you’ve got your LED awning lights and you’re ready to install them on your RV. The next step is wiring them up. Now, before you start, it’s important to make sure you have all the necessary tools and materials.
You’ll need wire cutters, wire strippers, electrical tape, and a voltage tester. First, locate a power source near your RV awning. This could be an existing outdoor lighting outlet or a separate power supply specifically for your awning lights.
Once you’ve found your power source, turn off the power to that circuit for safety. Next, take your wire cutters and cut the LED light strip to the desired length. It’s best to measure and do this before permanently attaching the strip to your RV.
Now, take your wire strippers and strip the insulation off the ends of the wires coming from the LED strip. Make sure to expose enough wire for a solid connection. Next, take your voltage tester and test the wires from the power source to ensure that the power is off.
Once you’ve confirmed that the power is off, connect the positive wire from the LED strip to the positive wire from the power source, and the negative wire from the LED strip to the negative wire from the power source. Secure the connections with electrical tape, making sure they are tight and secure. Finally, tape down any loose wires and turn the power back on.
Test the lights to make sure they are working properly, and you’re all set! You’ve successfully wired your LED awning lights on your RV.
Connect the lights to your RV’s power source
RV, power source, lights, wiring.
Use electric tape to secure the connections
“electric tape to secure the connections” Now that you have all your wires in place, it’s time to make sure they are securely connected. The last thing you want is for all your hard work to come undone because of a loose connection. That’s where electric tape comes in handy.
Once you have made your connections, simply wrap the exposed wires with the tape, ensuring that they are tightly sealed. Think of it as the electrical equivalent of duct tape – it keeps everything together and prevents any potential mishaps. Just like how duct tape holds things together, electric tape keeps your wires securely connected, providing a reliable and safe electrical connection.
So don’t forget to grab a roll of electric tape before you start your wiring project – it’s an essential tool in ensuring a successful and long-lasting electrical setup.
Step 5: Test and Adjust
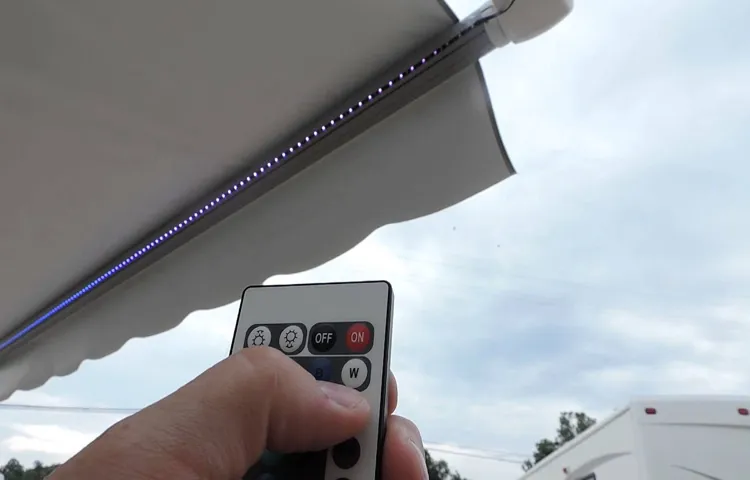
So, you’ve made it to step 5 of installing LED awning lights on your RV: the testing phase! This is where things start to get exciting because you finally get to see your hard work pay off. Before you jump into testing, make sure your lights are securely installed and all the connections are properly connected. Once you’ve double-checked everything, it’s time to flip the switch and see the magic happen.
Turn on your LED awning lights and take a step back to admire the beautiful illumination they provide. Are they evenly spaced? Is the light intensity to your liking? Take note of any adjustments you might need to make. Some things you might want to consider are adding more lights if you find any dark spots, adjusting the angle or position of the lights, or even playing around with different color options.
The testing phase is all about finding the perfect setup that suits your preferences. Don’t be afraid to experiment and make small tweaks until you’re completely satisfied with the results. Enjoy the process and remember, it’s all about creating a cozy and inviting atmosphere for your outdoor living space!
Turn on the lights to test their functionality
When it comes to testing and adjusting the lights in your home, one important step is to actually turn them on and see if they work. This may seem like a simple task, but it’s an essential part of ensuring that your lights are functioning properly. By turning on the lights, you can check for any issues such as flickering, dimness, or complete failure to turn on.
This step is also helpful for identifying any bulbs that may need to be replaced or fixtures that may need to be adjusted. By testing the lights, you can make sure that your home is well-lit and that all of your lighting fixtures are in working order. So turn on those lights and see if they shine bright!
Make any necessary adjustments to the positioning or wiring
adjustments, positioning, wiring, test, adjust
Conclusion
In conclusion, installing LED awning lights on your RV is a bright idea that will illuminate your outdoor space in style. With just a few simple steps, you can transform your RV into a dazzling and welcoming oasis that will make all your camping neighbors green with envy. First, gather all the materials you’ll need, including LED awning lights, adhesive strips, and wire connectors.
Make sure to choose lights that are weatherproof and durable, so they can withstand the elements and provide long-lasting sparkle. Next, measure the length of your awning and determine how many lights you’ll need. Remember, you want to achieve a balanced and evenly distributed glow, so don’t skimp on the number of lights.
Now it’s time for the installation fun! Start by thoroughly cleaning the area where you’ll be attaching the lights. This will ensure a strong bond and prevent any dirt or debris from interfering with the adhesive. Carefully peel off the backing of the adhesive strips and attach them to the back of the LED lights.
Then, position the lights along the desired area of your awning, making sure to apply gentle pressure to secure them in place. To ensure a seamless and professional-looking installation, use wire connectors to join the lights together and create a clean line of illumination. This will not only make your RV look like a luxurious camping paradise but also make the installation process a breeze.
Finally, step back and admire your handy work. Your RV is now a beacon of brightness, ready to welcome you and your fellow campers with its radiant glow. Whether you’re enjoying a relaxing evening under the stars or hosting a lively outdoor gathering, your LED awning lights will set the mood and add a touch of sophistication to your outdoor living space.
So go on, embrace the brilliance of LED awning lights and let them shine a light on your next RV adventure. It’s time to take your outdoor living to the next level and let the world see that your RV is not just a vehicle but a symbol of elegance, style, and outdoor party prowess. Happy camping!”
Enjoy the beautiful ambiance created by your new LED awning lights
LED awning lights
FAQs
How do I install LED awning lights on my RV?
To install LED awning lights on your RV, follow these steps:
1. Determine the location for the lights. Choose a spot where they will be easily visible and not obstructed.
2. Measure and cut the lights according to the desired length.
3. Clean the installation area to ensure proper adhesion.
4. Peel off the backing of the adhesive strip on the lights and carefully stick them in place.
5. Test the lights to make sure they are working properly.
6. Secure any loose wiring and hide it as necessary.
7. Enjoy your new LED awning lights!
What tools do I need to install LED awning lights on my RV?
To install LED awning lights on your RV, you will need the following tools:
1. Measuring tape
2. Utility knife or scissors
3. Rubbing alcohol or mild cleaner
4. Adhesive primer (optional)
5. Adhesive promoter (optional)
6. Wire connectors (if needed)
7. Wire strippers (if needed)
8. Electrical tape
9. Test light or multimeter
10. Zip ties or wire clips (optional)
11. Screwdriver or drill (if necessary for any mounting brackets)
12. Caulk or sealant (if needed)
Are LED awning lights suitable for all types of RVs?
LED awning lights can be suitable for most types of RVs, including motorhomes, travel trailers, fifth wheels, and campervans. However, it is always recommended to check the manufacturer’s guidelines and compatibility before making a purchase. Some specific RV models may have limitations or unique requirements when it comes to installing LED awning lights.
Can I install LED awning lights on my fiberglass RV?
Yes, you can install LED awning lights on a fiberglass RV. However, it is important to prepare the surface properly before installation. Clean the area where you plan to attach the lights with rubbing alcohol or a mild cleaner to remove any dirt or oils. You may also consider using an adhesive primer or promoter for better adhesion on the fiberglass surface. Follow the manufacturer’s instructions for proper installation and make sure the lights are securely attached.
Can LED awning lights be used while driving?
It is generally recommended to turn off the LED awning lights while driving. While some RVs may have an option to use them for safety purposes, it is best to refer to the specific guidelines provided by the RV manufacturer. Leaving the lights on while driving may cause distractions or potential electrical issues. Use caution and follow any applicable laws and regulations regarding exterior lights on vehicles.
Are LED awning lights waterproof?
Most LED awning lights are designed to be weatherproof or waterproof. However, it is important to check the product specifications and manufacturer’s information to ensure they are suitable for outdoor use and can withstand exposure to rain, humidity, and other weather conditions. Choosing lights specifically labeled as waterproof or IP65 rated will provide added protection against moisture.
Can I dim LED awning lights for different lighting effects?
Many LED awning light kits come with dimming options or can be connected to a separate dimmer switch. This allows you to adjust the brightness to your desired level and create different lighting effects. Look for LED awning lights with dimmable capabilities or check if a compatible dimmer switch is available. Follow the provided instructions for proper installation and adjustment of the brightness levels.