Hey there! Welcome to my blog, where I love diving into various topics and sharing my thoughts with all of you. Today, I want to talk about something that is essential in any piece of writing – the introduction. Whether it’s an article, a blog post, or even a book, the introduction sets the tone for what’s to come and grabs your attention right from the start.
Think of the introduction as a hook, a way to reel in the reader and make them want to keep reading. It’s like the opening scene of a movie that captivates you and makes you eager to see how the story unfolds. A good introduction should do the same – intrigue the reader and make them curious about what lies ahead.
But what makes a great introduction? It’s all about creating curiosity and sparking interest. You want to give the reader a glimpse of what they can expect, but not reveal too much. It’s like teasing them, leaving them wanting more.
One way to do this is by asking a rhetorical question that makes the reader think. For example, “Have you ever wondered what makes a good introduction?” This immediately engages the reader and invites them to ponder the question. It creates a connection between the reader and the writer, making them feel involved in the conversation.
Another effective technique is to use analogies or metaphors to paint a vivid picture in the reader’s mind. For example, you could compare a good introduction to a key that unlocks the door to a thrilling adventure. This not only makes the introduction more memorable but also adds a touch of creativity and imagination.
At the end of the day, a great introduction sets the stage for what’s to come. It captivates the reader, creates curiosity, and leaves them wanting more. So, the next time you sit down to write, remember the importance of a powerful introduction.
Table of Contents
What is an RV awning fabric?
If you’re looking to update the awning fabric on your RV, you’ll first need to understand what RV awning fabric is. The fabric used for RV awnings is specially designed to withstand outdoor conditions and provide shade and protection from the sun. It is typically made from a durable material such as vinyl or acrylic, which is resistant to UV rays, mildew, and fading.
RV awning fabric comes in a variety of colors and patterns, allowing you to personalize the look of your RV. Installing new awning fabric on your RV can be a simple process that can greatly enhance the appearance and functionality of your outdoor space. With a few basic tools and some handy DIY skills, you’ll be able to enjoy a fresh, new awning in no time.
Why do you need to install new awning fabric on your RV?
Installing new awning fabric on your RV is necessary for several reasons. Over time, the fabric on your RV awning can become worn out, faded, or damaged due to exposure to the elements. This not only affects the aesthetic appeal of your RV, but it also compromises the functionality of the awning.
By installing new awning fabric, you can restore the appearance of your RV and ensure that your awning provides the necessary shade and protection. Furthermore, installing new fabric allows you to choose a style and color that suits your preferences and matches the overall look of your RV. Whether you’re a seasoned RV owner or new to the world of RVing, learning how to install new awning fabric can save you money and give you the satisfaction of completing the task yourself.
Preparation before installing new awning fabric
Installing new awning fabric on your RV can give it a fresh and stylish look while also providing you with much-needed shade on those hot summer days. However, before you begin the installation process, there are a few important steps you should take to ensure a successful and smooth project. First, it’s crucial to measure the existing awning fabric accurately.
This will help you determine the size of the new fabric you need to purchase. Next, thoroughly clean and inspect the awning framework and hardware to identify any potential issues or damages that need to be addressed before installing the new fabric. Additionally, it’s essential to gather all the necessary tools and materials, such as a ladder, tape measure, screwdriver, and the new awning fabric itself.
Finally, make sure to thoroughly read and follow the instructions provided by the manufacturer for installing the new fabric. By taking these precautions and properly preparing, you can ensure a successful and hassle-free installation process for your new awning fabric.
Measure the dimensions of your existing awning fabric
awning fabric, install new awning fabric. Are you tired of the old and worn-out fabric on your awning? It’s time to give your outdoor space a fresh new look by installing new awning fabric. But before you start the process, it’s important to measure the dimensions of your existing fabric.
This will ensure that you get the right size of the new fabric and make the installation process much easier. To measure the dimensions, start by extending your awning fully and then measure the length and width of the fabric. Take accurate measurements and note them down.
These measurements will be crucial when you go shopping for the new fabric. So, make sure you have them handy and double-check them before making any purchases. With the right measurements in hand, you can now move on to the next step in your awning fabric installation project.
Choose the right fabric for your RV
awning fabric, RV fabric, RV awning fabric Choosing the right fabric for your RV awning is crucial for both functionality and aesthetics. Before installing new awning fabric, there are a few important preparations to consider. First, you need to measure your existing awning to ensure you purchase the correct size fabric.
You should also take note of any specific features or requirements you may have, such as UV protection or waterproofing. Next, consider the different fabric options available. One popular choice is vinyl fabric, which is durable and easy to clean.
Another option is acrylic fabric, which offers excellent color retention and is resistant to mold and mildew. It’s important to choose a fabric that suits your needs and preferences. Once you have selected the right fabric, you can proceed with the installation process, either on your own or with the help of a professional.
With proper preparation and the right fabric, you can enhance the look and functionality of your RV awning.
Gather the necessary tools and materials
When it comes to installing a new awning fabric, proper preparation is key. Before you begin, gather all the necessary tools and materials to ensure a smooth and efficient process. You will need a tape measure to accurately measure the dimensions of your awning, as well as a pencil or marker to mark your measurements.
You will also need a ladder or step stool to reach the top of the awning, as well as a drill or screwdriver to remove any existing hardware. Additionally, you will need a staple gun and staples to secure the new fabric to the frame, as well as a utility knife or scissors to cut the fabric to the correct size. It’s important to have all of these tools and materials on hand before you start the installation process, so you don’t have to pause midway through to go get something you forgot.
With the right tools and materials, you’ll be ready to install your new awning fabric with ease.
Remove the old awning fabric
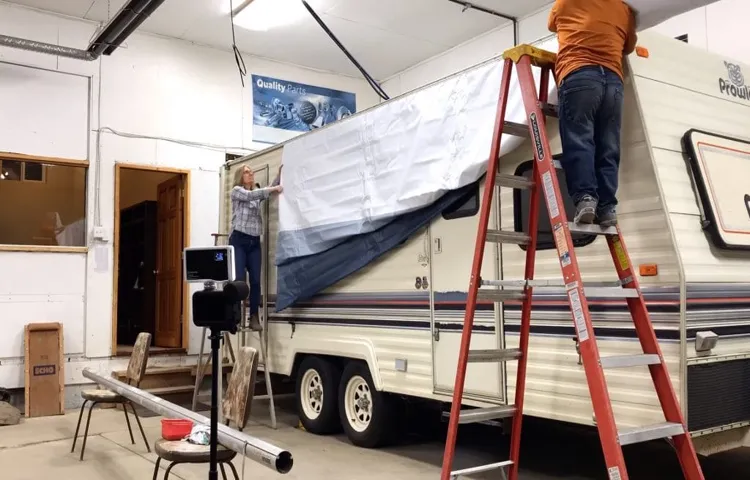
Installing new awning fabric may seem like a daunting task, but with a little preparation, it can be a straightforward project. One of the first steps is to remove the old awning fabric. Before you start, make sure you have all the necessary tools and materials on hand.
This might include a ladder, a wrench or screwdriver, and a utility knife. Additionally, it’s important to ensure that you have a safe and stable work area, as well as someone to assist you if needed. Once you have everything ready, carefully remove the old awning fabric by loosening the bolts or screws that hold it in place.
Be cautious not to damage the frame or any other components in the process. Once the old fabric is removed, dispose of it properly and assess the condition of the frame. If there are any repairs or replacements that need to be made, now is the time to do so.
By taking the time to properly prepare and remove the old fabric, you will be well on your way to installing your new awning with ease.
Steps to install new awning fabric on your RV
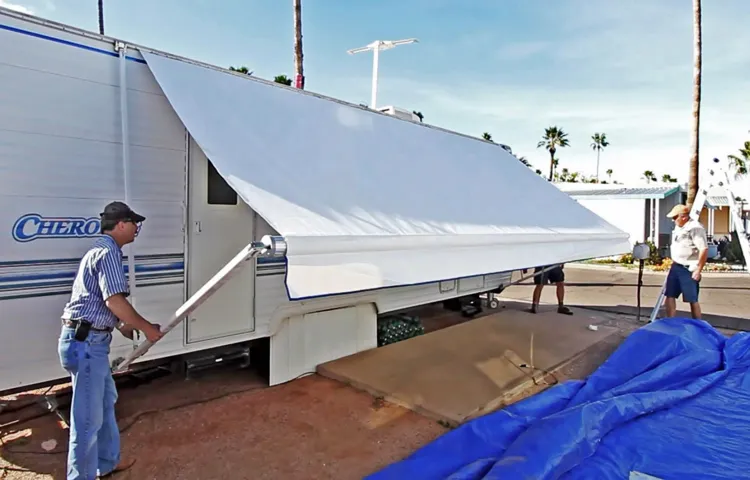
So, you’ve decided it’s time to give your RV’s awning a fresh new look? Well, installing new awning fabric on your RV is a great way to spruce up its appearance and protect yourself from the elements. The process may seem daunting, but with a little patience and some basic tools, you can complete the job easily. First, start by removing the old fabric from the awning frame.
This typically involves unscrewing or unhooking the fabric from the frame and carefully pulling it off. Once the old fabric is removed, take measurements to ensure you purchase the correct size and style of new fabric. Next, lay out the new fabric and attach it to the awning frame using the provided hardware.
Be sure to secure it tightly and evenly to prevent any sagging or wrinkles. Finally, step back and admire your newly installed awning fabric, ready to provide shade and protection during your next adventure.
Unroll and inspect the new awning fabric
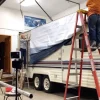
If you’re looking to freshen up the look of your RV or replace a torn or faded awning fabric, installing new fabric is a simple and rewarding DIY project. Here are the steps to get it done: Unroll and inspect the new awning fabric: Start by unrolling your new awning fabric and lay it out in a clean and open area.
Take a close look at the fabric for any defects, tears, or imperfections. It’s important to ensure that the fabric is in perfect condition before you start the installation process.
Remove the old fabric: To install the new awning fabric, you’ll first need to remove the old fabric. Start by retracting the awning fully and then remove any supporting arms or brackets that are holding the fabric in place. Carefully detach the fabric from the roller tube, making sure to note how the old fabric is attached for reference later.
Measure and cut the new fabric: Once the old fabric is removed, lay it out flat and measure its dimensions. Use these measurements as a guide to cut the new fabric to the appropriate size.
Be sure to add a few extra inches to account for any shrinkage or stretching that may occur during installation. Attach the new fabric to the roller tube: Begin by attaching the new fabric to the roller tube.
This can usually be done by sliding the fabric into a groove or track on the tube. Make sure the fabric is centered and aligned before securing it in place.
Attach the new fabric to the awning roller tube
“Steps to install new awning fabric on your RV”
Secure the new fabric to the RV’s frame
Installing new awning fabric on your RV can be a challenging task, but with the right steps, it can be done successfully. One important step in this process is securing the new fabric to the RV’s frame. This ensures that the fabric stays in place and provides the necessary shade and protection.
To do this, you will need to remove the old fabric and clean the frame thoroughly. Then, you can measure and cut the new fabric to the appropriate size. Once you have the new fabric ready, you can attach it to the frame using heavy-duty screws or staples.
Make sure to evenly distribute the tension across the fabric to prevent sagging or ripping. Additionally, consider using a fabric sealant to protect the fabric from UV rays and prevent fading. By taking these steps, you can ensure that your new awning fabric is securely installed and ready to provide shade and protection for your RV.
Adjust the tension of the awning fabric
install new awning fabric Installing new awning fabric on your RV can give it a fresh new look and improved functionality. One important step in this process is adjusting the tension of the awning fabric. Maintaining the correct tension ensures that the awning operates smoothly and doesn’t flap in the wind.
To adjust the tension, start by extending the awning fully. Then, locate the tensioning knobs or screws on the roller tube. These are usually located on the opposite end of the awning from the motor or crank handle.
Using a tool such as a wrench or pliers, turn the tensioning knobs or screws clockwise to tighten the fabric or counterclockwise to loosen it. Be sure to make small adjustments and test the tension by extending and retracting the awning a few times. Keep in mind that the fabric should be taut but not overly stretched.
A properly tensioned awning will not only enhance the appearance of your RV but also provide shade and protection from the elements.
Test the awning fabric
awning fabric, install, RV
Maintenance tips for your new awning fabric
So you’ve decided to install new awning fabric on your RV, and you’re ready to tackle the job. Installing new awning fabric can be a great way to freshen up the look of your RV and protect yourself and your family from the elements. But before you start, there are a few things you should keep in mind to ensure a successful installation.
Firstly, carefully measure your awning and order the right amount of fabric. You’ll want to have a bit of extra fabric on hand in case of any mistakes or mishaps during the installation process. It’s always better to have too much fabric than not enough.
Next, make sure you have all the necessary tools and equipment on hand. This may include a ladder, screwdriver, tape measure, and a helper to assist you with the installation. Having everything ready and easily accessible will help streamline the process and make it go more smoothly.
Before you begin, take a close look at your awning hardware and make sure it’s in good condition. If there are any worn or damaged parts, it’s a good idea to replace them before installing the new fabric. This will ensure that your awning is sturdy and secure once the new fabric is in place.
When it comes time to actually install the new fabric, take your time and follow the manufacturer’s instructions carefully. Start by removing the old fabric from the awning hardware, being careful not to damage any of the components. Then, lay out the new fabric and ensure it is properly aligned and centered before securing it in place.
Once the new fabric is installed, it’s important to properly maintain it to ensure its longevity. Regularly clean the fabric with a mild soap and water solution, being sure to remove any dirt or debris that may accumulate. Additionally, keep an eye out for any signs of wear or damage, such as fraying or tearing, and address them promptly.
Clean the fabric regularly
If you want your awning fabric to last for a long time and maintain its pristine appearance, regular cleaning is essential. Over time, dirt, debris, and even mold and mildew can accumulate on the fabric, causing it to become stained and discolored. To keep your awning looking its best, it’s important to clean it at least once a year, or more frequently if needed.
Start by removing any loose dirt or debris with a broom or brush. Then, mix a mild detergent with water and scrub the fabric gently using a soft brush or sponge. Rinse thoroughly with clean water and allow the fabric to air dry.
Avoid using harsh chemicals or bleach, as these can damage the fabric. By cleaning your awning fabric regularly, you can keep it looking fresh and new for years to come.
Check for any signs of wear and tear
When you invest in a new awning for your outdoor space, it’s important to take good care of the fabric to ensure its longevity. One crucial maintenance tip is to regularly check for any signs of wear and tear. Over time, awning fabric can be subjected to harsh weather conditions, such as heavy rain, intense sunlight, and strong winds.
These elements can cause the fabric to fade, become brittle, or develop small tears. By regularly inspecting your awning fabric, you can catch any early signs of damage and address them before they worsen. Look for any discoloration, thinning spots, or loose stitching.
Catching these issues early on can help prevent a small problem from turning into a major repair or even needing to replace the entire awning. So, make it a habit to examine your awning fabric every few months or after any severe weather events.
Keep the awning fabric properly tensioned
Keeping the awning fabric properly tensioned is an important aspect of maintaining your new awning. When the fabric is loose or sagging, it not only looks unsightly but can also reduce the effectiveness of the awning in providing shade and protection. To ensure that your awning fabric remains taut and in good condition, there are a few steps you can take.
Firstly, regularly check the tension of the fabric and make any necessary adjustments by using the manual crank or motorized controls to tighten or loosen the awning accordingly. Additionally, consider investing in a fabric tensioning device or system that helps to keep the fabric taut, especially in windy conditions. This will help to prolong the lifespan of the awning fabric and ensure that it continues to provide you with ample shade and protection for years to come.
Store the awning fabric properly when not in use
One important aspect of maintaining your new awning fabric is properly storing it when it’s not in use. Storing it correctly will help prolong its lifespan and keep it looking its best. One option is to remove the fabric from the awning and store it indoors, such as in a garage or basement.
Make sure the fabric is clean and dry before folding it up. For added protection, you can place the fabric in a storage bag or cover it with a large plastic sheet. Another option is to leave the fabric on the awning but roll it up and secure it with straps or bungee cords.
This can help protect the fabric from dust, debris, and harsh weather conditions. Whichever method you choose, it’s essential to store the awning fabric in a cool, dry place to prevent mold and mildew from forming. By taking the time to store your awning fabric properly, you can ensure it stays in excellent condition for years to come.
Conclusion
In conclusion, installing new awning fabric on your RV is like giving your home-on-wheels a fashionable makeover. It’s the equivalent of putting on a stylish new outfit that not only protects you from the elements but also turns heads as you strut your stuff down the campground runway. With a few simple tools and a bit of DIY know-how, you’ll be able to transform your drab old awning into a fabulous focal point that screams, “Look at me, I’m a trendsetter!” So grab your toolbox and get ready to unleash your inner design diva.
Follow these steps, and soon enough, you’ll be the envy of the RV park. Just remember, with great awning fabric comes great responsibility – you’ll have to deal with all the compliments and curious onlookers asking where you got your fabulous new awning, but hey, that’s the price you pay for being a fashion-forward RVer. Now, go forth and conquer the world of awning installation! May your fabric be flawless, your stitching be straight, and your adventures under the stylish shelter of your RV awning be nothing short of epic.
Happy RVing, my fabulous road warriors!”
FAQs
How long does it take to install new awning fabric on an RV?
The time it takes to install new awning fabric on an RV can vary depending on the size of the awning and the level of experience of the person doing the installation. On average, it can take anywhere from 1-3 hours.
What tools do I need to install new awning fabric on my RV?
To install new awning fabric on your RV, you will need a few basic tools such as a screwdriver, pliers, ladder, measuring tape, and a utility knife. Additionally, you may need a drill and a rivet gun if you need to remove and replace any hardware.
Can I install new awning fabric on my RV by myself, or do I need professional help?
Installing new awning fabric on an RV can be done by yourself if you have the necessary tools and some basic DIY skills. However, if you are not comfortable working at heights or have never done it before, it may be best to hire a professional to ensure the job is done correctly and safely.
Can I use any type of fabric for my RV’s awning replacement?
It is recommended to use fabric specifically designed for RV awnings when replacing the fabric. This fabric is typically made from high-quality materials that are resistant to UV rays, mildew, and moisture. Using the wrong type of fabric may result in a shorter lifespan or improper functioning of the awning.
How often should I replace the fabric on my RV awning?
The lifespan of the fabric on an RV awning can vary depending on factors such as usage, weather conditions, and maintenance. On average, it is recommended to replace the fabric every 5-10 years or as soon as signs of wear, tear, or damage become apparent.
Can I install new awning fabric on my RV’s electric awning?
Yes, you can install new awning fabric on an RV’s electric awning. However, it is important to exercise caution and follow the manufacturer’s instructions to ensure the motor and electrical components are not damaged during the installation process.
Are there any special considerations when installing new awning fabric on a slide-out awning?
When installing new awning fabric on a slide-out awning, it is important to make sure the fabric is properly aligned and centered. This will ensure smooth operation when extending and retracting the slide-out. It may also be necessary to adjust the tension of the fabric to prevent sagging or wrinkling.