Are you planning to set out on a road trip with your RV soon? One essential item that you will need for a comfortable journey is an awning that provides necessary shade and shelter. The Sun Wave RV Awning is an excellent choice to keep you cool and dry during your camping adventures. Before you pack up and hit the road, it is crucial to know how to install your new awning correctly.
In this blog post, we will guide you through the process step by step, helping you set up your Sun Wave RV Awning quickly and efficiently. Whether you are a seasoned camper or novice, our comprehensive guide will provide you with all the information you need to get started. So, get ready to learn how to install your Sun Wave RV Awning and make your next road trip a comfortable and enjoyable one!
Table of Contents
Preparing for Installation
If you’ve purchased a Sun Wave RV awning, congrats on taking the first step toward enhancing your RV experience! Before diving into the installation process, it’s important to be prepared. Start by reading the installation instructions thoroughly and gather all the necessary tools and materials. These may include a drill, screwdriver, measuring tape, sealant, and potentially a ladder or step stool.
It’s also a good idea to have a friend or family member there to assist you. Next, measure the area where you’ll be installing the awning to ensure it will fit properly. Lastly, make sure the area is clean and free of any debris or protruding screws that may interfere with the installation.
With all the necessary preparations completed, you’ll be ready to move onto the next step in the process – installing your Sun Wave RV awning!
Gather your supplies
When preparing for installation, it is essential to gather all the necessary supplies beforehand. This ensures that the installation process goes smoothly and without any hitches. So, what supplies do you need? First and foremost, you will need the product you are installing.
It could be a new light fixture, a thermostat, or any other home improvement item. Additionally, you will need tools such as a screwdriver, pliers, wire cutters, and a voltage tester. Finally, make sure you have any other hardware or screws that may be required to secure the product in place.
By having all the supplies close at hand, you can save yourself time and avoid any frustrations during the installation process.
Clear the area for installation
Preparing for installation requires you to clear the area where your equipment will be installed thoroughly. It is important to ensure that the area is free of any obstructions, debris, or dust that may affect your installation process. In addition, you need to ensure that the area is dry, well-ventilated, and away from any sources of heat or potential electrical interference.
This preparation ensures that your installation process goes smoothly without any hiccups. You can sweep or vacuum the area and use cleaning agents to wipe it down. Make sure to remove any items that may hinder access to the equipment to be installed.
Preparing an installation checklist ensures you don’t leave any stone unturned, and the installation process ends up faster and smoother than anticipated. Remember, if your site requires extra cleaning or repair, it’s best to handle it before the installation to avoid unnecessary delays and extra costs.
Mounting Your Awning
If you’ve purchased a Sun Wave RV awning, the next step is to install it properly. The first thing to do is to measure the length of your RV’s awning rail to ensure that your awning will fit. Once you’ve verified the measurements, it’s time to start the installation process.
Start by laying out your awning fabric on a clean surface and connecting the trailing edge of your aluminum roller tube with the fabric. You can use screws or bolts to attach the mounting brackets to your RV’s awning rail, making sure that they’re aligned with the awning fabric’s hem. Then, slide the fabric onto the roller and secure it with a locking mechanism.
Make sure to tighten all bolts and screws and test the awning’s functionality before taking it out on the road. With these steps, you should be able to enjoy your awning’s shade and protection during your camping trips.
Attach mounting brackets to RV
When it comes to mounting your awning onto your RV, attaching the mounting brackets is a critical step. The process can be fairly straightforward, but it’s important to make sure the brackets are securely fastened to your RV before proceeding. Begin by determining where you want to place the awning on your RV and mark the mounting holes with a pencil.
Use a drill to make the holes, then line up the mounting brackets and screw them into place. When tightening the screws, be sure not to over-tighten them in order to prevent damaging your RV. Once the brackets are securely attached, you can move on to installing the rest of your awning.
With proper mounting, you’ll soon be enjoying plenty of shade and protection from the elements on your next RV adventure.
Attach awning roller to brackets
Now comes the fun part! Once you’ve assembled the brackets on either end and extended the awning fabric, it’s time to attach the awning roller to the brackets. First, ensure that the roller is completely unrolled and that the fabric is taut. Then, slide the awning roller into one of the brackets and firmly press it in place.
Repeat the process for the other bracket, ensuring that the fabric is still straight and taut. Once both sides are secured, take a step back and admire your handiwork! Just remember to keep the awning fabric clean and dry, and to retract it in inclement weather conditions. With proper care and maintenance, your new awning will provide shade and comfort for years to come!
Unfurling and Securing Your Awning
Are you ready to install your Sun Wave RV awning and start enjoying some shade and protection from the elements? Here’s a quick guide to get you started. First, ensure that you have all the necessary tools, including a ladder, a drill, screws, and a friend to help you out. Next, locate the awning rail on your RV and mount the brackets securely on both ends with the screws and drill.
Once the brackets are in place, it’s time to unfurl and secure the awning fabric. Release the locking mechanism and slide the awning out to your desired length, making sure the arms are straight and aligned properly. Tension the awning by adjusting the knobs on the arms until it’s taut.
Finally, secure the awning by sliding the adjustable support poles into place and locking them. With your Sun Wave RV awning properly installed, you’re now ready to relax and enjoy your outdoor living space!
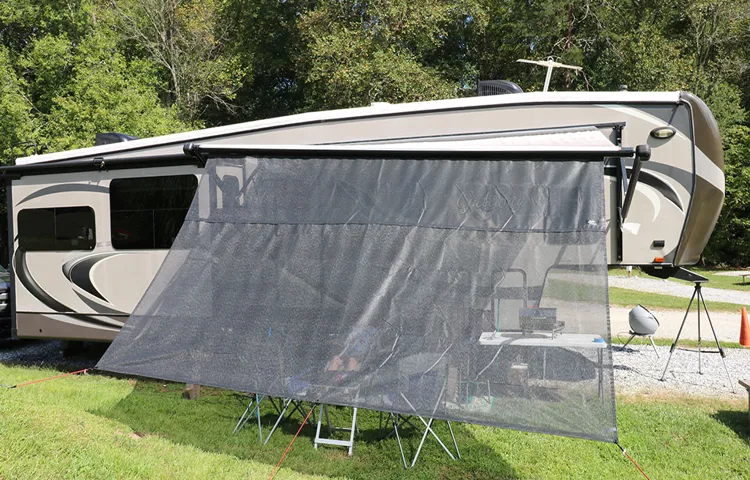
Extend awning and lock in place
When it’s time to enjoy some shade and relaxation outside, extending and securing your awning is a crucial step. Start by unlocking the levers or buttons that hold the awning in place. Slowly unfurl the fabric, checking to make sure it isn’t being caught on anything or becoming twisted.
Keep a good grip on the edge of the awning as you let it out, so it doesn’t unfurl too quickly. Once the fabric is fully extended, locate the locking mechanism and confirm that it is in good working order. This may involve sliding a locking pin into a channel or adjusting a pressure knob.
Test the awning’s stability by giving it a gentle tug from different angles. If everything looks good, it’s time to relax and enjoy the shade.
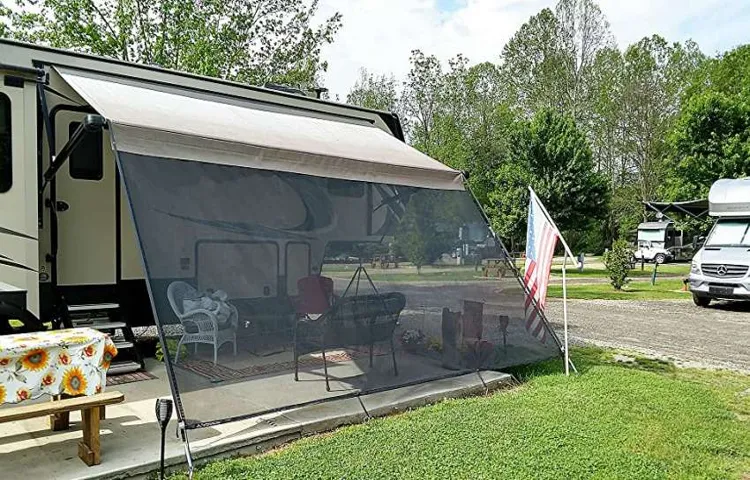
Secure legs of awning
When it comes to setting up your awning, it’s important to not only unfurl the canopy but also secure the legs of the awning. This will ensure that your awning is stable and won’t come crashing down in a gust of wind. One way to do this is to use stakes or pegs to firmly plant the legs into the ground.
This is particularly important if you’re camping on uneven terrain. You don’t want your awning to wobble or tilt, as it can be dangerous and cause damage to your property. Another option is to use sandbags or weights to anchor the legs down.
This is a great solution if you’re camping on concrete or other hard surfaces. Remember, the key to a successful awning setup is to unfurl it properly and secure the legs diligently. With a little bit of effort, you can enjoy the shade and comfort of your awning without any worries.
Maintaining Your Awning
If you’re looking to install a Sun Wave RV awning, the good news is that it’s a relatively easy process. You’ll need to start by choosing the appropriate size awning for your RV, as well as the type of mounting brackets that will work best for your vehicle. Once you have your awning and brackets, it’s time to get started with the actual installation process.
Begin by determining where you want to mount the awning, being sure to choose a location that is both secure and functional. From there, you can attach the brackets and awning assembly to your RV using the appropriate hardware. Once your awning is securely in place, be sure to take good care of it so that it lasts as long as possible.
This includes regular cleanings, as well as checking for any signs of wear or damage that may need to be addressed. With proper care and maintenance, your Sun Wave RV awning can provide you with years of outdoor enjoyment.
Regular cleaning tips
If you have an awning, then regular cleaning is essential to maintain its appearance and functionality. You can start by sweeping away any debris, like leaves and twigs, that may have accumulated on the material. Next, mix a solution of mild detergent and warm water, and apply it to the awning with a soft-bristled brush.
Gently scrub the material in a circular motion, focusing on any particularly stubborn stains. Finally, rinse away the suds with a garden hose, and let the awning air-dry. Regularly cleaning your awning will help prevent dirt and grime buildup, which can lead to mildew growth and fabric discoloration.
By keeping your awning clean, you’ll not only extend its lifespan but also ensure that it looks great for years to come.
Seasonal maintenance reminders
Maintaining Your Awning As we approach the hot summer months, it’s essential to remember to maintain your awning. Regular upkeep will not only ensure your awning lasts for years to come, but it will also keep it functioning correctly. One crucial aspect of awning maintenance is cleaning.
Make sure to remove any debris, such as leaves or sticks, that may have accumulated on your awning. Then, use a mild soap and water solution to clean the awning fabric thoroughly. Avoid using harsh chemicals or abrasive materials that may damage the fabric.
Another important maintenance step is inspecting for wear and tear. Check for any holes, tears, or loose stitching in the fabric. If you spot any damage, address it promptly to prevent further deterioration.
Additionally, examine the frame for any signs of rust or corrosion and address accordingly. Remember to lubricate any movable parts of the frame regularly to make opening and closing the awning easier. In conclusion, by taking the time to maintain your awning, you can extend its lifespan and keep it in excellent condition.
It’s best to approach this maintenance gradually, performing these tasks before the season begins, and regularly thereafter. A well-maintained awning will provide you with the shade and protection you need for years to come.
Conclusion
Installing a Sun Wave RV awning may seem like a daunting task, but with a little patience and a lot of sunscreen, anyone can do it! Whether you’re a seasoned RV enthusiast or a newcomer to the world of camping, adding an awning can make all the difference in your outdoor experience. So don’t let the summer sun beat down on you – grab your tools and get ready to install the ultimate shade solution on your RV. Happy camping!”
FAQs
What tools are needed to install a Sun Wave RV awning?
The tools required for installation include a drill, drill bits, screws, a tape measure, a level, and a ladder.
Where can I find installation instructions for a Sun Wave RV awning?
The awning should come with installation instructions in the packaging. If not, you can usually find them online on the manufacturer’s website.
How long does it take to install a Sun Wave RV awning?
Installation time varies depending on experience and the specific awning model, but it generally takes between 1-3 hours to complete the installation.
Can I install a Sun Wave RV awning by myself or do I need professional help?
While it is possible to install the awning by yourself, it is recommended that you have some DIY experience and a helper. If you are not comfortable with DIY projects, it is best to hire a professional to install the awning.
What is the difference between a manual and electric Sun Wave RV awning?
Manual awnings are operated by hand cranking while electric awnings are operated with a motor. Electric awnings are generally more expensive but easier to use.
What maintenance is required for a Sun Wave RV awning?
To keep your awning in good condition, clean it regularly with water and mild soap. Be sure to let it dry completely before retracting it. Additionally, it’s essential to inspect the awning and its components regularly to identify any signs of wear or damage.
Can I use my Sun Wave RV awning in windy conditions?
It is not recommended to use the awning in windy conditions as it may cause damage to the awning or even the RV. Always retract the awning before the wind gets too strong, or there is an approaching storm.