
Have you ever noticed the tire pressure warning light in your car turn on and were unsure of how to fix it? It’s a common issue that many car owners face. Fortunately, the solution is a simple one: installing tire pressure sensors. Not only will this solve the warning light problem, but it can also improve the overall safety and performance of your vehicle.
In this blog post, we will guide you on how to install tire pressure sensors so that you don’t have to rely on a mechanic. From selecting the right sensors to installing them on your tires, we’ve got you covered. So, let’s get started and learn how to keep your tires properly inflated and your driving experience smooth and safe.
Table of Contents
Gather Required Tools
Before installing tire pressure sensors, it is important to gather all the necessary tools and materials to ensure a smooth installation process. Some of the tools you may need include a jack, lug wrench, torque wrench, valve stem tool, and tire pressure gauge. It’s important to double-check the manufacturer’s instructions to make sure you have all the tools you need before beginning the installation process.
Additionally, if you plan to install the sensors yourself, it’s important to have some knowledge of basic car mechanics. However, if you don’t feel comfortable installing the sensors yourself, it’s always best to seek professional help to ensure your safety and the functionality of your sensors. By having the right tools and expertise, you can ensure a successful tire pressure sensor installation.
Tire Pressure Sensor Kit
Before starting the installation process of a tire pressure sensor kit, it’s important to gather all the necessary tools. You’ll need a tire pressure gauge to check the pressure in your tires, a valve stem tool to remove the valve caps, a torque wrench to tighten the valve stems to the correct specifications, and a rubber mallet to help seat the sensors properly. Make sure that the tools you gather are appropriate for the type of car you have, and that they’re in good working order.
Using the correct tools will make the installation process much smoother and faster. Plus, it will help you ensure that the installation is done correctly, which will maximize the performance of your tire pressure sensor kit.
Jack and Lug Wrench
When it comes to changing a tire, having the right tools can make all the difference. One of the most important tools you’ll need is a jack. A jack lifts your car off the ground so you can remove and replace the tire.
You’ll also need a lug wrench. The lug wrench is used to remove the lug nuts that hold the tire in place. Without it, you won’t be able to take the tire off.
When gathering your tools, be sure to check that the jack and lug wrench are the right size for your car. Using a jack and lug wrench that are too small or too large can be dangerous and cause damage to your vehicle. With the right tools and a little bit of know-how, changing a tire can be a quick and easy process.
Valve Stem Tool
When it comes to changing or repairing a valve stem on your car, having the right tools can make all the difference. One important tool you will need is a valve stem tool. Gathering the necessary tools ahead of time can save you time and hassle later on.
In addition to a valve stem tool, you will need a valve stem core remover, a valve stem cap wrench, and a tire pressure gauge. These tools will help ensure that you can properly remove and replace the valve stem, as well as check the tire pressure to ensure it is at the proper level. With the right tools, you can quickly and easily repair or change a valve stem on your car, helping you get back on the road safely and smoothly.
Remove Old Valve Stems
When installing tire pressure sensors, it’s important to remove any old valve stems first. These stems can cause damage to the sensors, so it’s crucial to eliminate them before installation. To remove the old valve stems, you’ll need a valve stem removal tool or pliers.
Simply place the tool over the stem and twist it counterclockwise until it pops out. Be sure to check the condition of the valve hole and the rim while you’re removing the old stem. If there’s any damage, you’ll need to replace the valve hole or the entire rim before installing the new sensor.
By removing the old valve stems, you’ll ensure a secure and accurate tire pressure monitoring system, which is essential for safe and efficient driving.
Deflate Tires
Deflating your tires can be a necessary step when it comes to replacing old valve stems. It’s important to make sure that your tires are properly deflated before attempting to remove the old valve stems. The reason for this is that inflation puts pressure on the stems, making them harder to remove.
By deflating your tires, you’ll allow the valve stem to move more easily. To get started, find a tire pressure gauge and deflate your tires to the recommended level. If you aren’t sure what that is, consult your vehicle owner’s manual or the sticker on the inside of your driver’s side door.
Once you’ve deflated your tires, use a tool to remove the old valve stems. Be careful not to damage the rims or the tires! With the old valve stems removed, you can install the new ones and inflate your tires to the proper level. Remember, taking care of your tires is an important part of vehicle maintenance.
By properly deflating your tires, you’ll make it easier to replace old valve stems and keep your car running smoothly.
Remove Valve Cores and Stems
If you’re planning to replace your tires or fix a punctured one, you’ll need to remove the old valve stems first. Valve stems are what allow air to flow in and out of the tire. Removing the valve stems will give you access to the inside of the tire so you can make any necessary repairs.
The valve core is the small part that screws onto the end of the valve stem and is what allows air to pass through. To remove the valve core, you’ll need a valve core removal tool. Insert the tool into the stem and twist it counterclockwise to remove the core.
The valve stem can then be removed by using pliers to loosen and pull it out. Once you’ve removed the old valve stem, you can be sure that the new one will fit properly and provide optimal performance. With these simple steps, you can easily remove old valve cores and stems in no time!
Install New Sensors
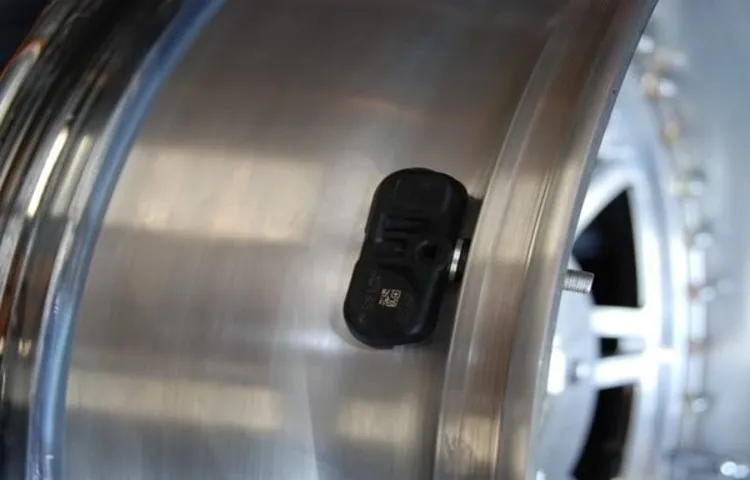
Installing new tire pressure sensors may seem like a daunting task, but with a few simple steps, you’ll be able to do it yourself in no time. First, start by locating your vehicle’s tire pressure sensors. They are typically located inside the wheel well or on the inner surface of your tire valve stem.
Next, remove the old sensor by using a special tool to unscrew it from the valve stem. Once the old sensor is removed, clean the valve stem area and install the new sensor. Tighten the new sensor to the correct torque level, and then inflate the tire to the recommended pressure.
Finally, activate the new sensor using the manufacturer’s recommended method. By following these steps, you’ll have a new tire pressure sensor installed and ready to help keep you safe on the road.
Attach Sensors to Valve Stems
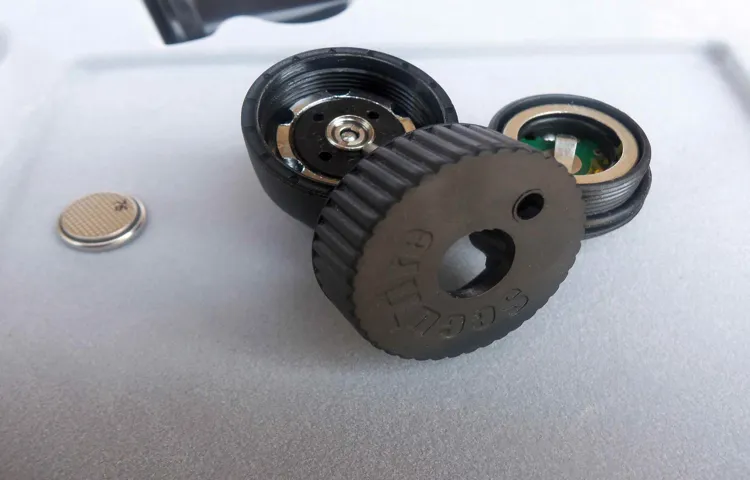
When it comes to monitoring your tire pressure, the first step is to install new sensors onto your valve stems. These small, battery-powered devices are what allow you to easily keep tabs on your tires’ pressure levels and receive notifications if they fall below a certain threshold. But don’t worry, installing them is a breeze.
All you need is a simple tool to unscrew the old valve stem caps and replace them with the new sensors. Once they are securely screwed on, you can connect the sensors to either an app on your phone or a separate monitor inside your car. It’s important to note that not all sensors are created equal, so make sure you do your research to find ones that are compatible with your car and provide accurate readings.
Overall, attaching sensors to your valve stems is a crucial step in maintaining the health and safety of your tires on the road.
Secure Sensors into Place
Installing new sensors is an essential step towards securing your property, but it’s equally important to ensure that they are firmly in place. A loose or wobbly sensor can cause false alarms or fail to detect intruders, leading to potential security breaches. To avoid this, it’s recommended to secure the sensors with sturdy brackets or adhesive strips.
Brackets offer a solid, permanent solution as they can be screwed or bolted into place, while adhesive strips are useful for temporary or non-invasive installations. It’s also important to follow the manufacturer’s instructions for proper sensor placement and calibration, which can vary depending on the type of sensor and the environment it’s in. Taking these precautions will not only improve the accuracy of your sensors but also provide peace of mind knowing that your property is well-protected.
Install Valve Stems
If you’re trying to install new sensors in your tires, then it’s important to also install valve stems that work well with them. Valve stems are the small components that attach to your tires and allow air to enter and exit. They’re also the part of the tire where tire pressure sensors are installed.
So, if you’re installing new sensors, it’s important to also ensure that the valve stems are in good condition and compatible with the sensors you’re installing. One of the quickest ways to replace valve stems is by using a valve stem puller tool to remove the old stems and then inserting the new ones. Doing this will not only help to ensure the sensors are functioning optimally, but it will also help prevent any leaks or other tire-related problems down the line.
Reinflate Tires
If your vehicle’s tire pressure sensors need to be replaced or installed, there are a few things to keep in mind. First, make sure you have the right sensors for your vehicle. You can find this information in your owner’s manual or by checking with your local dealership.
Once you have the sensors, you will need to remove the old ones. This can be done by removing the valve stem cap and unscrewing the sensor. Be careful not to damage the valve stem or sensor while doing this.
Once the old sensor is removed, insert the new sensor and screw it in place. Lastly, inflate the tires to the proper pressure using a tire gauge. This will help ensure accurate readings from the new sensors.
By following these steps, you can safely and effectively install tire pressure sensors and keep your tires properly inflated for optimal performance.
Use Air Compressor or Manual Pump
When it comes to inflating tires, there are two main options to choose from – using an air compressor or a manual pump. Both methods have their pros and cons, so it ultimately comes down to personal preference. Using an air compressor can be a faster and more convenient option, especially if you have multiple tires to inflate.
It also allows for more precise pressure control, which is important for ensuring the safety and performance of your vehicle. However, air compressors can be quite expensive and require a power source, which may not always be readily available. On the other hand, using a manual pump can be a more affordable and accessible option, as they are relatively inexpensive and can be found at most automotive stores.
They also don’t require any electricity, so you can use them anywhere. However, they do require more physical effort to use and can take longer to inflate a tire. Ultimately, whether you choose to use an air compressor or a manual pump, the most important thing is to ensure that your tires are regularly checked and inflated to the correct pressure.
This will not only help improve your vehicle’s safety and performance, but it can also save you money on fuel costs in the long run.
Check Sensor Readings
Nowadays, with tire pressure monitoring systems in our cars, it’s easy to see if a tire is underinflated. It’s important to check sensor readings regularly to avoid potential accidents. If you notice that one of your tires is a bit low, it’s best to reinflate it right away.
Not only will this keep you safe on the road, but it will also save you money on gas in the long run. Underinflated tires are not only dangerous, but they also require more effort from your engine and can cause it to work harder than necessary. This leads to a decrease in your car’s fuel efficiency and an increase in emissions.
So, regularly monitor your car’s tire pressure and ensure that they are inflated to the recommended levels to keep yourself and the environment safe.
Calibrate Sensors
If your car comes equipped with tire pressure sensors, it’s important to understand how to install them properly. Once they’re installed, you’ll need to calibrate them to ensure they’re accurately measuring your tire pressure. This involves resetting the sensors once they’ve been installed, as well as periodically checking and adjusting the pressure readings as needed.
This process can be done manually or through a tool like a TPMS scanner. It’s essential to calibrate your tire pressure sensors regularly to prevent incorrect readings, which could lead to unsafe driving conditions. By taking the time to properly install and calibrate your sensors, you’ll give yourself peace of mind knowing that your tire pressure is always accurately monitored.
Follow Manufacturer’s Instructions
When it comes to calibrating your sensors, it’s important to always follow the manufacturer’s instructions. Each sensor is different, and calibration methods can vary greatly between models. Calibration ensures your sensors are giving accurate measurements and readings, which is crucial when it comes to any type of monitoring or control system.
The manufacturer’s instructions will guide you through the calibration process step-by-step, ensuring that you are doing it correctly and effectively. Neglecting to follow these instructions can lead to inaccurate readings, system failures, and even safety hazards. So, take the time to read and understand the instructions before starting calibration.
It may seem like a tedious process, but in the long run, it will save you time and money by ensuring your sensors are accurate and reliable. Keyword: Calibrate Sensors
Final Check
After you’ve installed tire pressure sensors on each of your tires, it’s time to do a final check. The first thing you should do is to ensure that you’ve tightened the sensors securely, to make sure they don’t come loose while you’re in motion. Then, turn on your car, and wait for a few seconds for the sensors to register.
You should see a notification on your dashboard, indicating that all sensors are working correctly. If you notice that any of the sensors aren’t working, check to make sure they’re installed correctly. Lastly, inflate your tires to the recommended pressure, and verify that the sensors read the right pressure levels.
If you’re unsure about any of the steps, consult your car’s manual or a mechanic. By doing a final check, you’ll be able to ensure that your new sensors are functioning correctly, and that you’re driving with the right tire pressure levels.
Ensure Sensors are Properly Installed and Functioning
As you finalize your sensor installation, it is crucial to ensure that all sensors are properly installed and functioning. Double-check your work to prevent any errors that may hinder your sensors from working correctly. Check for any loose connections or damage, and ensure that the sensors are correctly aligned and facing the correct direction.
You can test your sensors by activating them and verifying if they are producing accurate data. A final check of your sensors will give you peace of mind that they are working correctly and will provide you with reliable data to make informed decisions. Remember, taking the time to complete a thorough check of all your sensors will save you plenty of troubleshooting time in the long run.
Conclusion
Congratulations! You now possess the knowledge necessary to become a tire pressure sensor installation expert. Remember to take all necessary safety precautions and use the proper tools as you embark on this exciting adventure. May your tires always be properly inflated and your journeys be smooth and hassle-free!”
FAQs
What are tire pressure sensors?
Tire pressure sensors are electronic devices that are mounted on each tire and are responsible for checking and monitoring the air pressure inside the tire.
Why are tire pressure sensors important?
Tire pressure sensors are important because maintaining proper tire pressure is crucial for safe and efficient driving, and also helps in prolonging the life of your tires.
How do tire pressure sensors work?
Tire pressure sensors work by using a battery-powered sensor that is mounted inside the tire valve stem. The sensor measures the air pressure inside the tire and transmits the data to the vehicle’s onboard computer.
Can tire pressure sensors be reset or recalibrated?
Yes, tire pressure sensors can be recalibrated. You can do it yourself by following the instructions in the vehicle owner’s manual or by taking your vehicle to a qualified mechanic.
How do you know if your tire pressure sensors are malfunctioning?
You will know that your tire pressure sensors are malfunctioning if the dashboard warning light for tire pressure comes on or if you notice that your tires are underinflated or overinflated.
How long do tire pressure sensors last?
Tire pressure sensors can last for several years, but their lifespan depends on various factors such as the type of sensor, the usage conditions, and the quality of the sensor.
Do all vehicles come with tire pressure sensors?
No, not all vehicles come with tire pressure sensors. However, most newer vehicles come equipped with this technology as a safety feature.